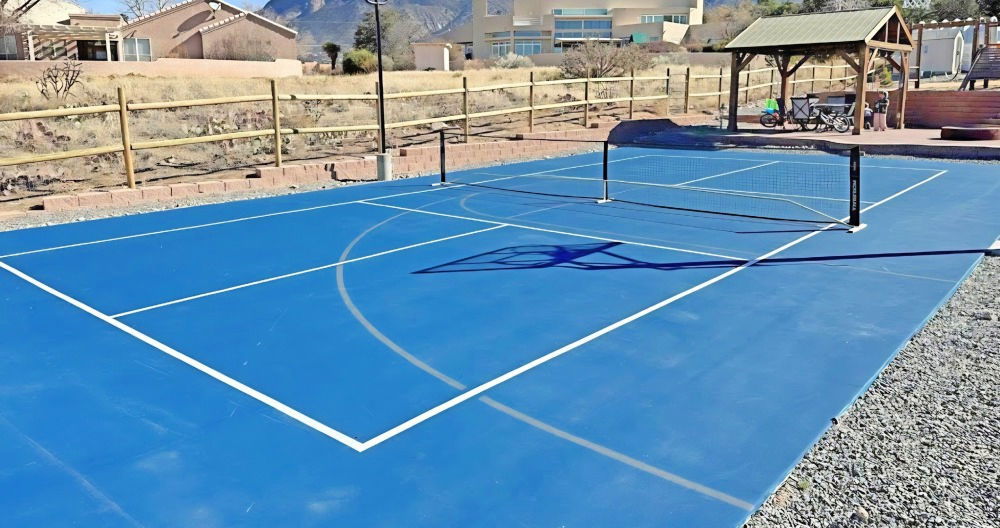
Building a DIY backyard basketball court was a project I took on to spend more quality time with my family. First, I chose a flat area in our backyard. I then measured and marked the space to make sure it was the right size. This step took a bit of patience, but it was worth it to avoid mistakes later.
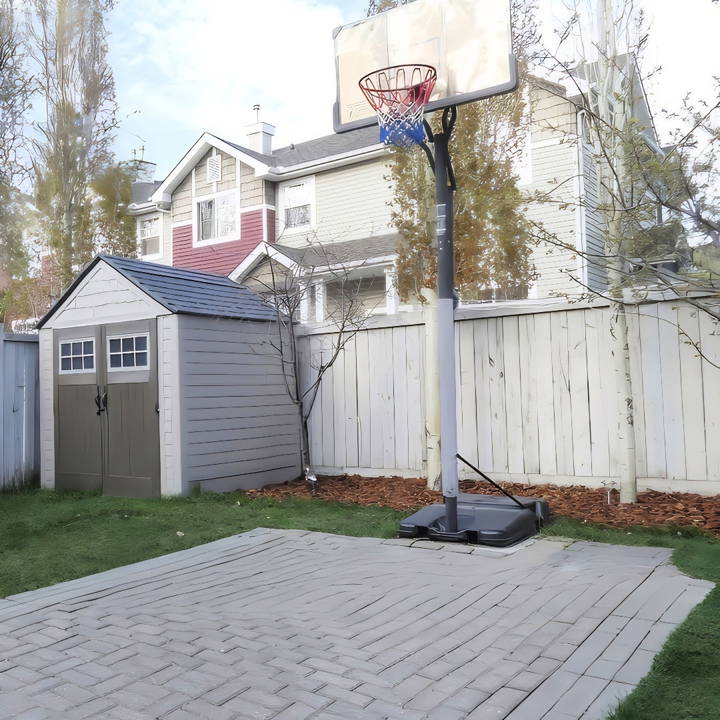
Next, I laid down a solid foundation using concrete. Once the base was ready, I added the hoop and painted the lines for the court. The kids were super excited when they saw the finished basketball court. It became our favorite spot to play and exercise together. I'm glad I took on this project, and you can do it too.
By following these steps, you can build your own DIY basketball court. It's a fun and rewarding project that your family will enjoy. Get started today; it's easier than you think!
Materials You Need and Why
- Bricks or Pavers: For the court's surface, ensuring durability and stability.
- Gravel and Sand: To level the ground underneath the bricks, providing a solid foundation.
- Limestone Screenings: This mixes rocks and sand for an additional level of evenness beneath the bricks.
- Shovels and a Small Trowel: For digging and moving earth or sand.
- Wheelbarrow: For transporting materials across your yard.
- Landscape Fabric: Optional, for weed control under your court.
- Measuring Tape and Chalk: To measure and mark your court dimensions accurately.
Each material plays a crucial role in making a stable and flat surface suitable for a basketball court. The foundation's integrity, buildd by carefully laying down gravel, sand, and limestone screenings, is vital for the longevity and playability of your court.
Step by Step Instructions
Learn how to build a DIY small backyard basketball court with our step-by-step guide. Perfect for transforming your space into a sports haven!
Step 1: Planning and Measuring Your Space
The first key step is to plan and measure the space where you want your court. Deciding on the size is crucial; remember to consider the free-throw line and three-point line if space allows. For my backyard, I went with a modest size that fits a free-throw line (15 feet from the backboard) and a three-point line (19 feet 9 inches from the basket).
Step 2: Preparing the Ground
Next, I embarked on the most physically demanding part: preparing the ground. This involved:
- Removing Grass: I cut out the grass where the court would lay, ensuring to keep the underlying soil intact.
- Leveling the Ground: Using gravel and sand, I painstakingly leveled the ground. This step cannot be overstated; a level ground makes everything that follows easier and ensures a stable court.
Step 3: Laying the Foundation
After the ground was prepped, it was time for the limestone screenings. This material is critical for ensuring a compact and even base. I spread it across the prepared ground, took my time to level it meticulously, and then compacted it down. This base not only aids in drainage but also provides a firm foundation for the bricks.
Step 4: Setting the Bricks
Laying the bricks was both exciting and nerve-wracking. I started from one corner and worked my way across, making sure each brick was level before moving on to the next. This step required patience and attention to detail; each brick needed to be perfectly aligned to ensure a smooth playing surface.
Step 5: Securing the Bricks Together
After all the bricks were laid down, I swept fine sand into the cracks between them. This not only secures the bricks together but also prevents weeds from growing through the cracks. It's important to fill every gap thoroughly to maintain the court's integrity.
Step 6: Installing the Hoop
I opted for a portable basketball hoop for its versatility and ease of installation. However, anchoring the base with sand (instead of water) is vital for stability, especially in windy conditions or during the cold months when water might freeze.
- Take Your Time: This isn't a weekend project; it requires patience and effort over several days, or even weeks, depending on your schedule and help.
- Level Twice, Lay Once: Constantly check the level of your base materials and bricks. It's easier to fix mistakes before moving on than to correct them later.
- Ask for Help: Don't shy away from recruiting family or friends. The extra hands make the process more enjoyable and much faster.
Customization Ideas for Your DIY Backyard Basketball Court
Building a backyard basketball court is not just about playing the game; it's about making the space your own. Here are some creative ideas to customize your court and make it a unique feature of your home.
- Choose Your Surface: While concrete is the traditional choice for a basketball court, it's not your only option. Consider alternative materials like sports tiles or rubberized surfaces that offer good bounce and are gentler on the knees.
- Pick Your Paint: Personalize your court with paint. Go beyond the standard white lines; use colors that match your home or your favorite team. You can even paint a logo or a mascot at center court.
- Light It Up: Add lighting around your court to play after dark. LED lights are energy-efficient and provide bright, even illumination. For a fun twist, use colored lights or install a system that you can control with your smartphone.
- Seating and Shade: Install benches or bleachers for spectators, and consider a pergola or canopy for shade. This makes your court more comfortable and inviting for players and guests alike.
- Accessorize: Add a scoreboard, a ball rack, and a water cooler to give your court a professional feel. You can also install a sound system to play music or amplify the announcer during games.
- Fencing and Landscaping: Enclose your court with fencing to keep balls in play and add landscaping for aesthetic appeal. Plants and shrubs can also act as a natural barrier for errant balls.
- Make it Multi-Use: If space allows, design your court to be multi-purpose. Markings for other sports like volleyball or badminton can increase the utility of your space.
The key to a great DIY project is personalizing it. These ideas are just a start. Let your creativity shine, and design a backyard basketball court that shows your love for the game.
Legal Considerations for Building a DIY Backyard Basketball Court
Before you start building your backyard basketball court, it's essential to understand the legal requirements to ensure your project goes smoothly and doesn't run into any issues. Here's what you need to know:
- Check Zoning Regulations: Your local government has rules about what you can build and where. Contact your local planning department to find out if you're allowed to build a basketball court in your backyard and what the specific requirements are.
- Obtain a Building Permit: Most places require you to have a permit for construction projects like a basketball court. This is to make sure your court is safe and doesn't negatively affect your neighborhood. You'll need to submit your plans and may have inspections during and after construction.
- Understand Property Boundaries: Make sure you know where your property ends. There are laws about how close you can build to the edge of your property. If you build too close or over the line, you might have to move or remove your court.
- Consider Environmental Impact: Think about how your court will affect the environment. This includes managing water runoff so it doesn't cause problems and making sure you don't harm local plants and animals.
- Review HOA Rules: If you live in a community with a homeowners' association (HOA), they may have their own rules about building things like basketball courts. It's important to follow these rules to avoid fines or being asked to take down your court.
By taking care of these legal considerations, you can enjoy your basketball court without any worries. It's always better to check and follow the rules than to have to fix problems later.
Maintenance Tips for Your Backyard Basketball Court
Keeping your backyard basketball court in top condition is crucial for safety and enjoyment. Here's a straightforward guide to maintaining your court:
- Regular Cleaning: Sweep the court regularly to prevent dirt and debris from accumulating. This not only keeps the court looking good but also prevents the surface from damage.
- Address Spills and Stains: Clean any spills immediately to avoid permanent stains. Use gentle cleaning agents that won't harm the court's surface.
- Inspect for Damage: Regularly check for cracks, chips, or other signs of wear and tear. Early detection means easier repairs.
- Paint and Seal: Protect the court's surface and lines with a specialized sealant. This will enhance durability and keep the court looking fresh.
- Proper Drainage: Ensure good drainage around the court to prevent water accumulation, which can damage the surface and lead to hazardous playing conditions.
- Use as Intended: Discourage activities that can damage the court, like riding bikes or using heavy equipment on the surface.
- Indoor Court Care: If you have an indoor court, mop it regularly with a damp mop to remove stubborn dirt and maintain a safe playing surface.
By following these simple steps, you can enjoy a safe and beautiful basketball court for years to come.
FAQs About DIY Small Backyard Basketball Court
Discover essential FAQs about DIY small backyard basketball courts. Learn materials, costs, and construction tips to build your own court.
Before you begin, it’s important to plan. Decide on the size of the court based on the space available in your backyard. A full-sized court is 94 feet by 50 feet, but you can scale down to a half-court or smaller if needed. Consider the playing surface; concrete, asphalt, and modular tiles are common choices. Check if you need a permit for construction and ensure there are no property easements that could affect your build.
The surface you choose will depend on your budget and personal preference. Concrete is durable and popular for a permanent court, while asphalt is softer and cheaper but doesn’t last as long. Modular tiles offer good drainage and can be customized for multiple sports. Acrylic coatings are another option that can be applied to concrete for a custom look.
You’ll need various tools such as shovels, levels, and possibly heavy equipment for excavation if you have to clear the area. For materials, you’ll need concrete or your chosen surface material, surface paint for the court lines, and stencils to ensure straight lines. Don’t forget to include a high-quality basketball hoop in your planning.
While it is a big project, it's certainly possible to build a basketball court yourself with the help of friends or family. However, if you're not experienced with construction or landscaping, it might be wise to consult with a professional or even hire one to ensure the court is built safely and correctly.
Maintenance will vary depending on the surface. For concrete, regular sweeping and occasional power washing should keep it in good condition. Asphalt may require sealing every few years to prevent cracks. Modular tiles can be easily removed and cleaned individually if needed.
Conclusion
In conclusion, building a DIY backyard basketball court can be a rewarding project that enhances your outdoor space and provides endless entertainment. By following our guide on how to build a backyard basketball court, you can build a functional and fun area for friends and family to enjoy.


