When you enter a room, the sound you hear is a combination of direct sound from the source and reflections off the walls, ceiling, and floor. These reflections can build reverberation (reverb), which is the persistence of sound after the source has stopped. In rooms where listening or recording quality is important, like home theaters or music studios, managing reverb is crucial for clear sound.
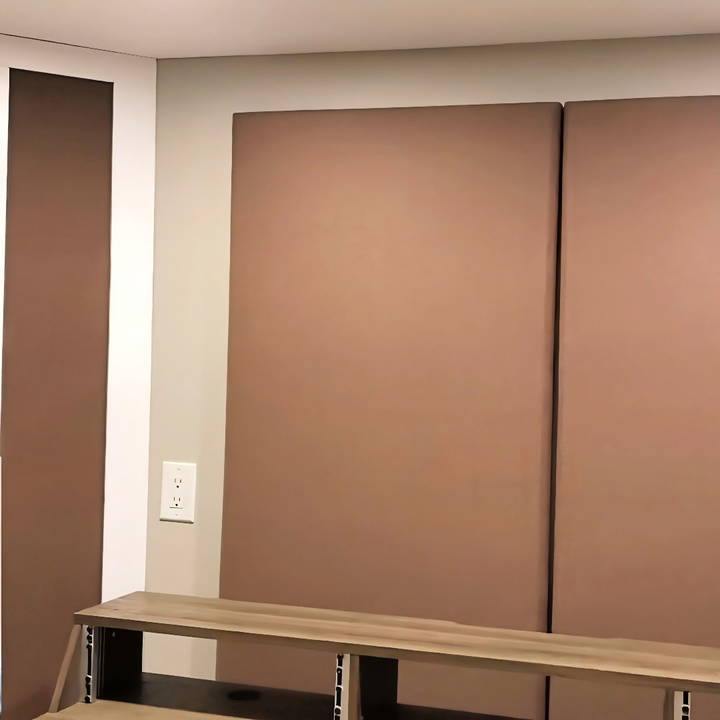
These DIY bass traps are designed to absorb low-frequency sounds, which are longer waves that tend to build up in corners and can cause muddy acoustics. By trapping these bass frequencies, the traps help to prevent the reverb that can distort what you're hearing or recording.
Here's a simple breakdown of how bass traps work and why they're important:
- Low-Frequency Management: Bass traps absorb the lower frequencies that regular acoustic panels might miss, leading to a clearer and more balanced sound.
- Placement: They are typically placed in corners where bass frequencies naturally accumulate. This strategic placement helps to manage the sound more effectively.
- Materials: Common materials for DIY bass traps include rigid fiberglass or rockwool, which have the density to absorb low frequencies.
- Impact on Sound Quality: By absorbing excess bass, these traps prevent the ‘boomy' sound quality that can occur in untreated rooms.
Using bass traps improves sound clarity and quality. For both music lovers and professionals, knowing their role in room acoustics is key to perfecting sound.
Materials Needed and Their Purpose
- Wooden frames: Acts as the skeleton for our traps.
- Rockwool insulation: The core absorbing material.
- Rockwool Comfortboard: Adds rigidity and enhances absorption.
- Fabric: To wrap our traps, not just for aesthetics but also to allow sound to pass through for absorption.
- Construction screws and staple gun: For assembling and securing components.
- Trim pieces: To give our traps a polished look.
- Wood filler, sandpaper, and paint: For finishing touches, ensuring a professional appearance.
These materials were chosen for their effectiveness and ease of handling, making this project accessible even to DIY beginners.
Step by Step Instructions
Learn how to make DIY bass traps with our step-by-step guide. From planning and prepping to finishing touches, build effective soundproofing.
Step 1: Planning and Prepping
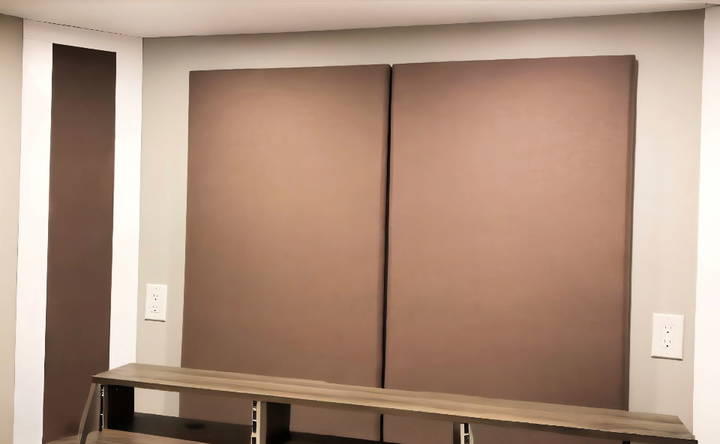
To kick things off, I measured my studio's corners where the traps would reside. In my case, electrical outlets posed a challenge, dictating the traps' width. One foot wide was the magic number, allowing enough space for the traps without interfering with the outlets.
Step 2: Building the Frames
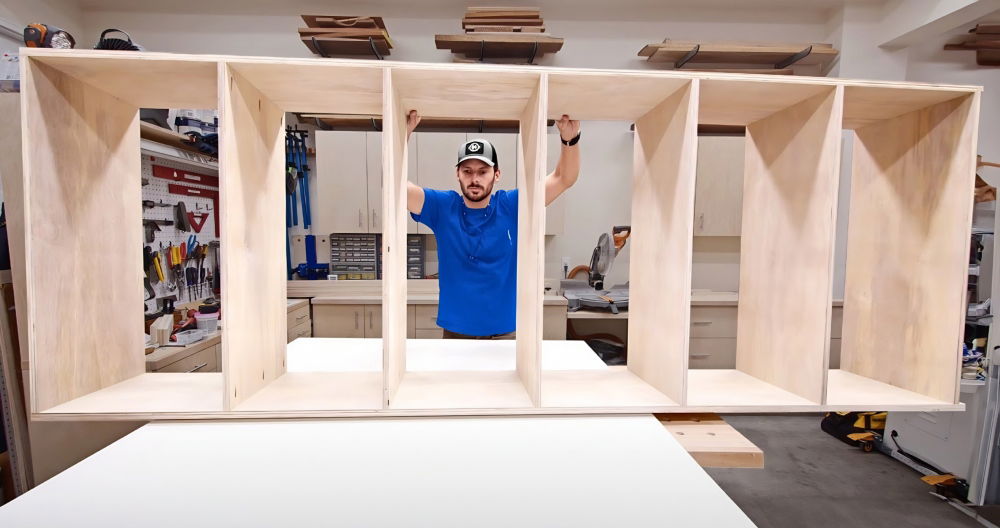
Next, cutting the wood to build rectangular frames, I built what would become the visible part of the traps, mounting them on a 45-degree angle in the corners. The first frame spanned four feet in height, aligning with the Rockwool insulation's size. This base acted as the foundation for the second, customized frame to fill the remaining height.
Step 3: Insulating
With the frames mounted, filling them with cut-to-shape Rockwool insulation was next. This material is magical, offering robust low-frequency absorption. Compacting the insulation ensures every inch works hard to tame those unruly bass notes. For added density and a smoother front surface, I inserted Rockwool Comfortboard pieces into the frames.
Step 4: Wrapping in Fabric
Choosing a desert brown poly-wool blend fabric, I cut pieces to match the traps' dimensions. This fabric not only looks great but is acoustically transparent, crucial for effective absorption. I used a staple gun to secure the fabric, a simple yet satisfying step.
Step 5: Adding the Trim
Trim pieces, cut with precision, encased our traps, covering the fabric edges and adding an elegant finish. This step greatly enhanced the traps' aesthetic appeal, ensuring they complemented the studio's vibe.
Step 6: Finishing Touches
Filling in nail holes with wood filler, sanding for smoothness, and applying a coat of paint brought everything together. This phase required a meticulous eye for detail but was well worth the effort. The traps not only performed fantastically but also looked like professional installations.
Integrating these bass traps into my studio significantly elevated my audio. The dreaded bass buildup was no longer an issue, allowing me to hear mixes with unprecedented clarity. What amazed me was not just the improvement in sound but how seamlessly the traps integrated into my studio's aesthetic.
Troubleshooting Common Issues
When making and using DIY bass traps, you might encounter some challenges. Here's a guide to troubleshoot common issues:
Ineffective Bass Absorption
- Cause: Using materials that are too light or not dense enough.
- Solution: Opt for denser materials like rockwool or rigid fiberglass. Ensure the trap is tightly packed to increase effectiveness.
Bass Traps Falling Off
- Cause: Insufficient mounting or support.
- Solution: Use appropriate mounting brackets and ensure the wall can support the weight. Consider floor-standing designs if wall-mounting isn't viable.
No Noticeable Acoustic Improvement
- Cause: Incorrect placement or insufficient number of traps.
- Solution: Place traps in room corners and at reflection points. Add more traps if necessary, focusing on the room's specific acoustic needs.
Material Safety Concerns
- Cause: Some materials can be irritants or have health risks.
- Solution: Wear protective gear during construction. Choose materials with low VOC emissions and ensure proper room ventilation.
Aesthetic Displeasure
- Cause: Bass traps may not always blend well with room decor.
- Solution: Customize the fabric covering to match your room's style. Consider using paintable acoustic panels for a more integrated look.
Structural Integrity Issues
- Cause: DIY traps may not be as structurally sound as commercial ones.
- Solution: Reinforce the frame with additional supports. Use quality construction techniques to ensure longevity.
Address these issues to ensure your DIY bass traps are effective and safe. Balance function and aesthetics for a space that sounds and looks great.
Safety Precautions
When embarking on a DIY project to build bass traps, safety is paramount. Here's a comprehensive guide to ensure you stay safe while improving your room's acoustics:
Wear Protective Gear
Always wear gloves, especially when handling materials like fiberglass or rockwool, which can irritate the skin. A mask is also crucial to prevent inhaling any particulates.
Work in a Ventilated Area
Ensure your workspace is well-ventilated. This is particularly important when using adhesives or materials that release fumes.
Handle Tools with Care
If using power tools, make sure you are familiar with their operation. Always follow the manufacturer's safety instructions.
Secure Materials Properly
When mounting bass traps, confirm that they are securely attached to prevent them from falling and causing injury.
Be Mindful of Fire Safety
Choose materials that are fire-resistant and be aware of the location of fire extinguishers in your work area.
Avoid Tripping Hazards
Keep your workspace tidy and free of loose materials or cords that could cause trips and falls.
Check Material Safety Data Sheets (MSDS)
Before using any new material, review its MSDS for any specific health risks and how to handle them safely.
Follow these safety tips to enjoy crafting bass traps safely. Proper preparation and protection make DIY projects more enjoyable and safe.
FAQs About DIY Bass Traps
Discover essential FAQs about DIY bass traps, including materials, setup, and effectiveness, to enhance your sound quality and optimize your room's acoustics.
Bass traps are acoustic energy absorbers designed to dampen low-frequency sounds. They are particularly useful in recording studios, home theaters, and any room where audio performance is a priority. By installing bass traps, you can reduce unwanted echoes and reverberations, resulting in clearer sound.
Bass traps work by trapping and absorbing low-frequency sound waves. These sound waves are longer and can build up in corners and along walls, making a boomy or muddy sound. Bass traps are typically placed in these problem areas to absorb the excess energy and improve the room's acoustics.
Absolutely! You can build effective bass traps using affordable materials like rigid fiberglass insulation and acoustically transparent fabric. The key is to ensure that the materials you choose are capable of absorbing low frequencies. With some basic tools and a bit of DIY spirit, you can build bass traps that rival commercial options.
For best results, place bass traps in the corners of your room, as this is where low frequencies tend to accumulate. You can also position them along the wall-ceiling junctions and on the back wall behind your listening position for additional control.
The size of your bass traps will depend on the specific needs of your room. Generally, larger bass traps are more effective at absorbing lower frequencies. A good starting point is to make traps that are at least 24 inches on each side for corner traps. However, if you have the space and materials, going up to 48 inches can increase their effectiveness. Remember, the depth of the trap also plays a role; a minimum of 4 inches is recommended, but more depth can improve performance. Measure your room and identify the areas with the most significant low-frequency build-up to guide the size and placement of your bass traps.
Final Thoughts
In conclusion, building your own DIY bass traps can significantly enhance your sound quality at home. With simple materials and clear steps, you can build effective solutions to manage bass in any room. Start your project today and enjoy the cleaner sound!


