Making a DIY batting cage for your backyard can be an enjoyable and rewarding project. This homemade batting cage not only provides a convenient space for practicing baseball or softball but also adds a unique feature to your home. By following simple steps and using readily available materials, you can build a safe and sturdy backyard batting cage that meets your needs and suits your space.
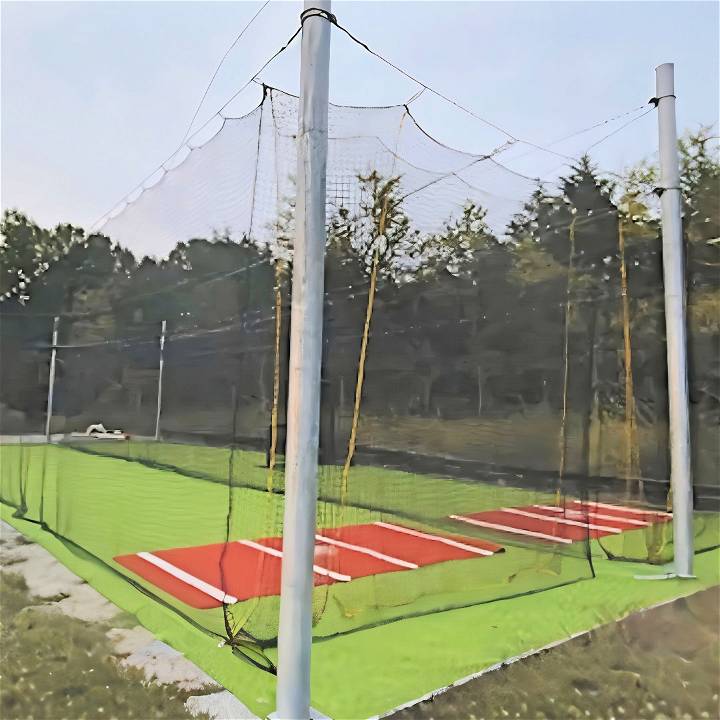
Building a backyard batting cage involves planning, gathering materials, and assembling the structure. You'll need items like netting, poles, and zip ties to create a robust and functional area for batting practice. With detailed instructions and a bit of effort, your DIY batting cage will be ready for use.
Why Build a Professional Batting Cage?
Before diving into the steps, it's important to understand the why. A batting cage is an invaluable tool for baseball players at all levels. It allows for focused hitting practice without the need for a full field, improving players' batting skills and confidence. Plus, having a professional-grade cage demonstrates commitment to the sport and can significantly benefit a team or training facility's reputation.
Materials Needed
- Posts and Poles: These form the structure of the batting cage. Their sturdy construction is crucial for stability.
- Cables and Turnbuckles: These are used to hold the net firmly in place and adjust tension.
- Net: A high-quality, durable net is essential for safety and longevity.
- Ground Anchors: These secure the batting cage to the ground, preventing movement.
- Ladders: Essential for reaching the top of the structure during assembly.
- Auger and Elevating Laser: This is used to dig holes and ensure the poles are at the correct height and alignment.
- Carabiners: These make attaching the net to the cables easier.
- Wire Ties: Attach the net to the bottom cable, ensuring it stays in place.
Step by Step Instructions
Learn how to build your own batting cage with our step-by-step DIY instructions. Follow our easy guide from planning to securing the base.
Step 1: Planning and Layout
First, it's critical to plan the layout of your batting cage. For my project, I measured a 70 ft length to ensure ample space for batting practice. Marking the spots for the poles with precision was key for a symmetric structure.
Step 2: Setting the Posts
Using an auger, I dug holes for the posts, which I then secured using concrete. An elevating laser was invaluable in making sure each pole stood at the perfect height and alignment.
Step 3: Establishing the Frame
Once the poles were set, I installed horizontal supports and the top frame. This step required careful measurement and adjustment to ensure the frame's stability and squared alignment.
Step 4: Installing Cables and Turnbuckles
Stringing the cables along the top and sides of the frame, then attaching the turnbuckles, was the next step. This system supports the net and allows for tension adjustment, which is crucial for the net's performance.
Step 5: Laying Out the Net
Laying out the net carefully to identify the top, bottom, and sides was essential. Markings, such as a yellow string for the inside perimeter, helped orient the net correctly.
Step 6: Attaching the Net
Using carabiners, I attached the top of the net to the cables, ensuring to distribute tension evenly. Climbing ladders and moving along the structure, I worked systematically to secure the net fully around the cage.
Step 7: Adjusting for Tension
After the net was in place, I went back to adjust the turnbuckles, ensuring the net was taut and evenly suspended. This step might require going back and forth to achieve perfect tension throughout the structure.
Step 8: Securing the Base
Lastly, I attached the bottom of the net to the ground anchors using wire ties, ensuring the net wouldn't lift or allow balls to escape underneath.
Customization Ideas for Your DIY Batting Cage
Creating a DIY batting cage is not just about practicing your swings; it’s about crafting a space that inspires and adapts to your needs. Here are some customization ideas to make your batting cage uniquely yours:
Multi-Sport Adaptability:
- Think beyond baseball: Design your cage to be versatile. With minor adjustments, it can be used for practicing golf swings, soccer goalkeeping, or even as an enclosed area for yoga or fitness routines.
- Adjustable partitions: Install movable nets or curtains inside the cage to create separate areas for different activities or simultaneous use by multiple people.
Design and Aesthetics:
- Personal touch: Paint the frame in your team colors or add decals and logos to show off your team spirit.
- Landscaping: Integrate the cage with your garden by planting shrubs or flowers around it, making it a natural part of your outdoor space.
Tech Upgrades:
- Smart tech: Incorporate technology like ball speed radars or video recording setups to analyze your performance.
- App connectivity: Set up apps that connect with your smart devices to track progress, provide coaching tips, or control lighting and equipment.
Comfort Features:
- Seating area: Add a bench or chairs for rest periods or for friends and family to watch and cheer.
- Weather protection: Consider a retractable roof or side covers to shield from sun or rain, ensuring all-weather use of the cage.
Lighting for Night Use:
- LED lights: Install energy-efficient LED lights for evening practice sessions. Ensure they are positioned to reduce shadows and glare.
- Solar power: Go green by using solar panels to power the lights, which is cost-effective and environmentally friendly.
Safety Enhancements:
- Padding: Add padding to poles and edges to prevent injuries.
- Emergency kit: Keep a first aid kit and fire extinguisher accessible for any unforeseen incidents.
Blend these ideas to make your batting cage both a training spot and a personal retreat. Balance function and preference for a useful, enjoyable space. Keep it simple, prioritize, and have fun!
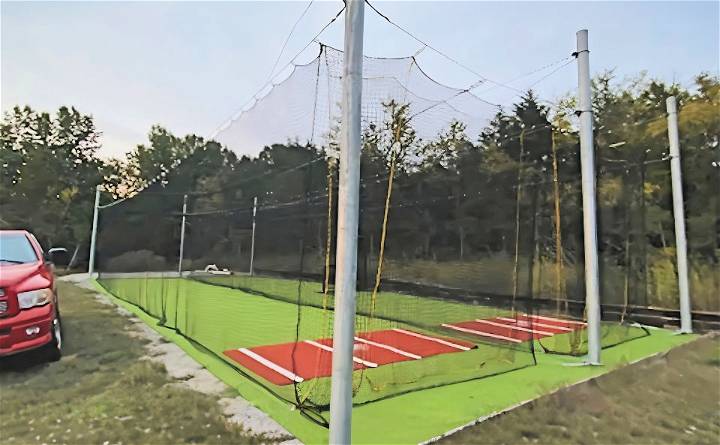
Maintenance and Upkeep
Keeping your DIY batting cage in top condition is crucial for safety and longevity. Here’s how you can maintain it effectively:
Regular Inspections:
- Check the netting: Look for any tears or weak spots. Small holes can be repaired with twine, but larger damage may require patching or replacement.
- Examine the frame: Ensure all connections are tight and there’s no rust or wear. If you find rust, sand it down and apply a rust inhibitor.
Cleaning Routine:
- Keep it clean: Remove leaves, debris, and dirt from the net and floor. A leaf blower can be handy for this task.
- Wash the net: Use a gentle soap and water solution to clean the netting occasionally. Avoid harsh chemicals that can degrade the material.
Weatherproofing:
- Protect from the elements: If you live in an area with harsh weather, consider using covers or taking down the net during off-seasons.
- Sun protection: UV-resistant netting is a good investment to prevent sun damage.
Ground Maintenance:
- Look after the turf: If you have artificial turf, brush it regularly to keep the fibers upright and even.
- Manage weeds: For natural grass, mow regularly and control weeds to prevent them from growing through the netting.
Equipment Care:
- Store balls properly: Keep baseballs and other equipment in bins or bags to protect them from the weather.
- Inspect training aids: Regularly check any pitching machines or tees for wear and tear.
Safety Measures:
- First aid kit: Always have a first aid kit nearby for any minor injuries.
- Emergency plan: Have a clear plan in case of emergencies, like severe weather or accidents.
Follow these steps to keep your batting cage safe and fun for years. Regular maintenance prevents major repairs. Keep it simple, stay alert, and enjoy batting!
Safety Precautions
When building and using a DIY batting cage, safety is paramount. Here’s how to ensure a secure environment:
During Construction:
- Wear protective gear: Always use gloves, safety glasses, and sturdy shoes when working.
- Follow instructions: Use reliable sources for construction guides and adhere to the recommended procedures.
For Users:
- Helmet use: Batters should wear helmets to protect against accidental hits.
- Supervision: Children should always be supervised by an adult when using the batting cage.
Equipment Safety:
- Regular checks: Inspect bats, balls, and pitching machines for damage before use.
- Secure netting: Ensure the net is firmly attached to the frame to prevent gaps.
Environmental Safety:
- Clear area: Keep the space around the batting cage free from obstacles that could cause trips or falls.
- Lightning policy: Establish a clear policy to suspend use during thunderstorms.
Emergency Preparedness:
- Accessible first aid: Keep a well-stocked first aid kit nearby.
- Know emergency procedures: Be familiar with basic first aid and have emergency contact numbers readily available.
Implementing these safety measures ensures a worry-free batting practice, minimizing accidents. Safety first in sports—keep it simple, stay safe, and have fun!
FAQs About DIY Batting Cage
Discover essential faqs about DIY batting cages. Learn how to build, maintain, and optimize your own batting cage at home.
A DIY batting cage is a homemade structure designed for baseball or softball batting practice. Building one in your backyard can save you money on hourly fees at commercial cages and provide convenient access to practice anytime.
The space required depends on the type of cage you plan to build. For a standard size, you’ll need a flat area that’s at least 55 feet long and 14 feet wide. Ensure you have enough clearance from trees, buildings, and other structures.
Yes! There are batting cage kits available that come with all the necessary components and detailed instructions. These kits are designed to be assembled with basic tools and a bit of DIY spirit.
The time it takes can vary widely. A simple kit can be set up in a few hours, while a custom, built-from-scratch cage might take a weekend or more to complete. Planning and preparation can help speed up the process.
Proper maintenance is crucial for the durability of your DIY batting cage. Regularly inspect the netting for wear and tear, especially after extreme weather conditions. Tighten loose bolts and anchors, and consider applying a UV protectant to the netting to prevent sun damage. If you’ve used wood for the structure, check for signs of rot or insect damage and treat accordingly. Keeping the area clean and free of debris will also help maintain the integrity of your batting cage.
Final Thoughts
Wrapping up, building your own DIY batting cage for your backyard can be a rewarding and practical project. It offers a unique space for practice and improves your baseball or softball skills. With basic tools and materials, creating a homemade batting cage is achievable and fun. By following the steps mentioned, you can enjoy the benefits of backyard batting cages and perfect your game right at home. Start on this exciting project today and watch your performance soar!


