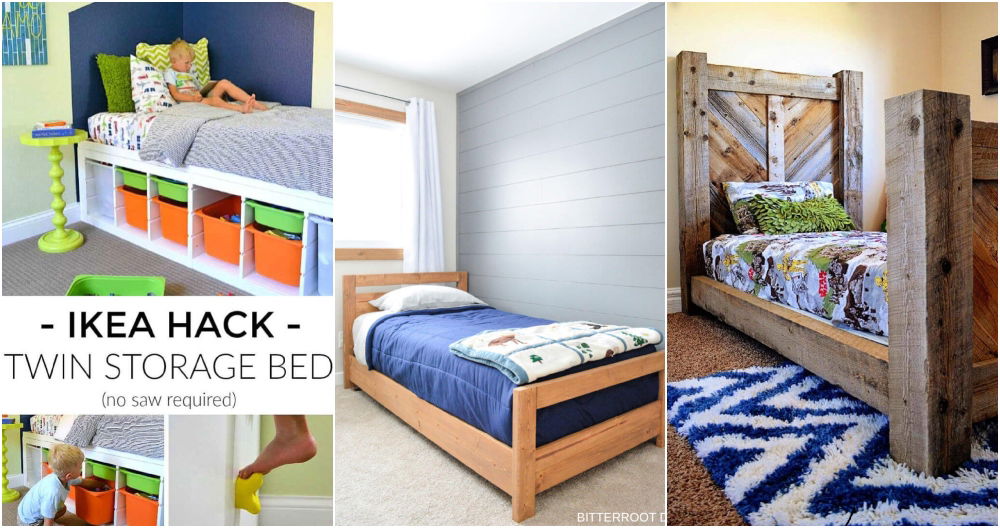
Making a DIY bed frame can be an immensely satisfying project. It merges practicality with the joy of making something with your own hands. Having recently embarked on this journey myself, I discovered the simplicity and affordability of crafting a bed frame suited to my needs and aesthetic preferences. I'm thrilled to share my experience and guide you through the process of making your own simple, budget-friendly bed frame.
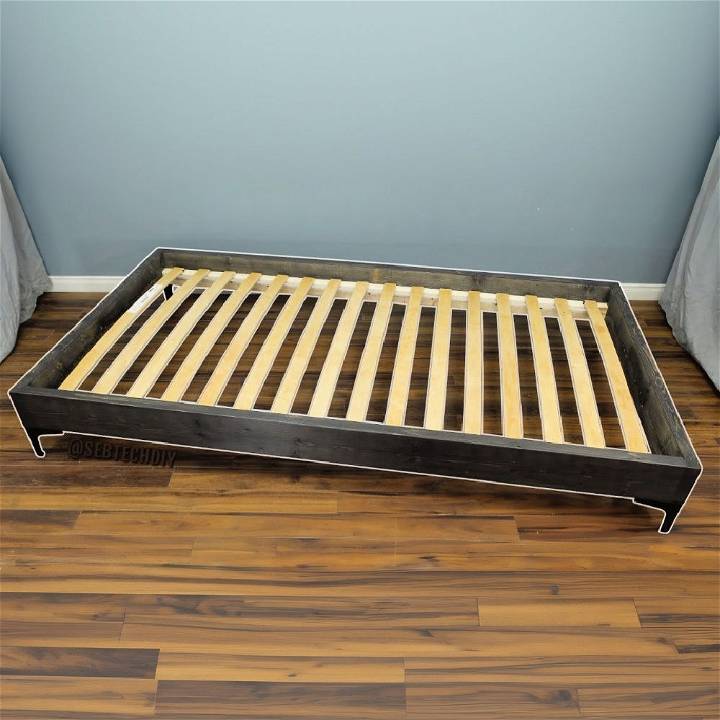
Materials You'll Need and Why
1. Wood: You'll need three 2x6 and two 2x3, all eight feet long. The 2x6s form the frame's perimeter, providing a sturdy base, while the 2x3s support the mattress.
2. Slatted Bed Base Kit: I opted for one from Ikea, a cost-effective solution that replaces the need for additional 2x3s.
3. Wood Stain: Choose a color that matches your room's decor. It beautifies and protects the wood.
4. Construction Screws: Two and a half inches for internal support and three and a half inches for structural integrity. They ensure the bed frame is securely assembled.
5. Tools: A circular saw for cutting wood to the right dimensions, a drill for making pilot holes, and sanding tools for a smooth finish.
Step by Step Instructions
Learn how to build a DIY bed frame step by step with detailed instructions for cutting, assembling, sanding, staining, and more.
Step 1: Cutting the Wood
Cutting the wood accurately is crucial for a stable frame. Despite some wood pieces being imperfect, trimming them to 75 inches (for the bed's sides) ensured only the best parts were used. A circular saw, a basic yet effective tool, made quick work of this.
Step 2: Assembling the Frame
Starting with the four 2x6 pieces, I marked and drilled pilot holes to prevent the wood from splitting. Aligning them correctly, I used clamps (optional but helpful) to hold everything in place. The structural wood screws joined the pieces securely, forming the bed frame's perimeter.
Step 3: Sanding and Staining
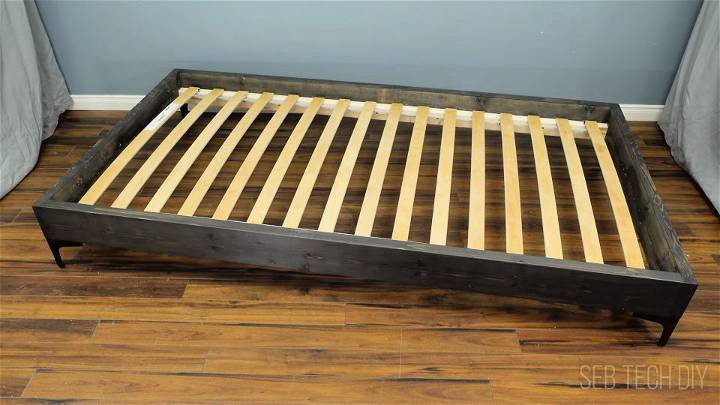
With the frame assembled, I smoothed all surfaces and rounded the corners using a palm sander and a sanding sponge. The staining process followed, enhancing the bed frame's appearance with two coats of charcoal wood stain, allowing it to dry thoroughly between applications.
Step 4: Adding Support
The 2x3s were next, drilled and screwed into the frame's interior sides to support the mattress slats. Their placement is critical for evenly distributing weight and ensuring mattress stability.
Step 5: Attaching Legs
Opting for black metal legs available on Amazon added a modern touch and lifted the frame off the ground. The self-centering drill bit ensured accurate placement, making the installation process a breeze.
Step 6: Installing the Slatted Base
The Ikea slatted bed base kit was not only economical but also convenient, offering evenly spaced slats and simplifying installation. I secured the slats with screws at both ends to prevent shifting, ensuring a firm foundation for the mattress.
Final Touches and Considerations
To personalize the bed frame further, I added an RGB LED strip beneath, making ambient lighting. The bed was then ready for its mattress and bedding, transforming it into a cozy retreat.
Transporting the completed frame to its designated room was surprisingly straightforward, a testament to the design's practicality and my careful consideration of assembly at the outset.
Customization Tips for Your DIY Bed Frame
Making a DIY bed frame gives you the freedom to tailor it to your personal style and bedroom decor. Here are some tips to help you customize your bed frame in a way that's both unique and practical:
Choose Your Style
Start by deciding on the overall style you want for your bed frame. Do you prefer a modern look, or are you more inclined towards a rustic or traditional design? Your style choice will guide the materials and design elements you'll use.
Selecting Materials
The materials you choose can greatly affect the appearance and feel of your bed frame. Consider using reclaimed wood for a vintage touch or painted metal for an industrial vibe. For a minimalist look, opt for clean lines and smooth finishes.
Color and Finish
Color can transform your bed frame from ordinary to extraordinary. Stain the wood to highlight its natural grain, or paint it in a color that complements your bedroom palette. You can also experiment with distressing techniques for a shabby chic effect.
Headboard Design
The headboard is often the focal point of a bed frame. Personalize it with upholstery, carving, or even built-in shelving. For a simple change, you can drape fabric or hang a tapestry to add texture and color.
Adding Functional Elements
Consider incorporating functional features like built-in lights for reading or USB ports for charging devices. Storage drawers or boxes under the bed can help keep your space tidy and organized.
Decorative Details
Add decorative hardware or embellishments to give your bed frame character. This could be anything from ornate metalwork to simple wooden knobs. Even the pattern of screws or nails can add an artistic touch.
Comfort Considerations
Make sure your bed frame is not just stylish but also comfortable. Ensure the height and size suit your preferences and that any added features like a padded headboard enhance your comfort.
Eco-Friendly Options
If sustainability is important to you, consider eco-friendly materials like bamboo or recycled plastics. You can also look for non-toxic finishes and adhesives.
Troubleshooting Common Issues in DIY Bed Frame Projects
When embarking on a DIY bed frame project, it's common to encounter a few hiccups along the way. Here's a helpful guide to troubleshoot some of the most common issues you might face:
Stability Concerns
Problem: The bed frame wobbles or doesn't feel stable. Solution: Check all joints and connections to ensure they are tight. Reinforce any weak points with additional brackets or screws. Make sure the frame is level by adjusting the legs or adding stabilizers.
Squeaky Noises
Problem: The bed frame makes squeaking sounds when you move. Solution: Identify the source of the noise, which is usually where two parts rub together. Tighten all screws and bolts. If the noise persists, apply wax or a lubricant to the noisy area.
Misaligned Pieces
Problem: Parts of the bed frame don't line up correctly. Solution: Take apart the misaligned sections and reassemble them, making sure to follow the instructions carefully. Use a square tool to ensure angles are correct.
Wood Splitting
Problem: The wood splits when you insert screws or nails. Solution: Pre-drill holes to prevent splitting, especially near the ends of the boards. Use the correct size drill bit and screws for the type of wood you're working with.
Inadequate Support
Problem: The mattress sags or doesn't have enough support. Solution: Add more slats or a solid platform on top of the frame. Ensure that the spacing between slats is even and adequate to support the mattress.
Finishing Flaws
Problem: The finish on the wood is uneven or blotchy. Solution: Sand the wood thoroughly before applying any stain or paint. Apply finishes in thin, even coats, allowing adequate drying time between layers.
Difficulty Assembling
Problem: The bed frame is difficult to put together. Solution: Lay out all pieces and hardware before starting. Follow the instructions step by step, and don't tighten all screws until the entire frame is assembled.
FAQs About DIY Bed Frames
Making your own bed frame can be a rewarding project, but it's natural to have questions before you start. Here are answers to some common queries to help you build with confidence.
What materials do I need for a DIY bed frame?
You'll need sturdy lumber like pine or oak for the frame, screws or bolts for assembly, and tools such as a saw, drill, and sander. For a detailed list, check the design plan you're following.
How do I choose the right size for my bed frame?
Measure your mattress and add a few inches on each side for the frame. Standard sizes are twin, full, queen, and king. Ensure your room has enough space for the bed frame you plan to build.
Can I build a bed frame without power tools?
Yes, you can use hand tools like a handsaw and screwdriver, but it will take more time and effort. Power tools make the process faster and more precise.
What's the best way to ensure my bed frame is sturdy?
Use quality materials and ensure all joints are properly aligned and securely fastened. Adding extra support beams can also help increase stability.
How can I customize my bed frame?
Choose a style that fits your taste, like modern or rustic. You can paint or stain the wood, add a headboard, or incorporate storage options to make it uniquely yours.
Conclusion
This DIY project demonstrated that building a simple, budget-friendly bed frame is entirely achievable with basic tools, materials, and a bit of creativity. Not only did this endeavor allow me to tailor the bed to my specific requirements, but it also imbued my bedroom with a sense of personal accomplishment.
For anyone looking to embark on a similar project, remember to approach it with patience and a willingness to learn. The rewards of making something both beautiful and functional, not to mention the savings realized by doing it yourself, are well worth the effort. Happy building!


