As a thrifty DIY enthusiast, I recently embarked on a project to build my own bed slats using an old wood pallet. This project not only saved me a significant amount of money but also offered me the satisfaction of upcycling and personalizing my daughter's bed frame.
Materials Needed and Their Purpose
- Old Wood Pallet: The star of the project, chosen for its affordability and the eco-friendly upcycling aspect.
- Crowbar/Hammer: Essential for prying the wooden slats from the pallet.
- Multi-tool (optional): Makes the process of cutting nails and removing slats easier, though not mandatory.
- Bleach Solution: For cleaning the slats and ensuring they are free from mold or mildew before bringing them inside.
- Stain Blocking Primer and Paint: To seal the wood, preventing any potential mold spore dispersal and adding a personalized touch with color.
- Brushes and Tools for Application: For applying the bleach solution and for painting.
Step by Step Instructions
Learn how to make DIY bed slats in a few simple steps with this easy-to-follow guide. Save money and customize your bed frame today!
Step 1: Dismantling the Pallet
First, I assessed my wood pallet, ensuring it was in good condition – sturdy, not rotted, and relatively free of chemical treatments. Dismantling it was perhaps the most challenging part. I opted for a combination of a crowbar and a multi-tool. The crowbar allowed me to pry the slats with care, aiming to keep them intact. For some stubborn nails, the multi-tool came in handy, allowing me to cut them without too much hassle.
Step 2: Prepping the Slats
Once the slats were free, I had a batch of wood that needed some TLC. I concocted a simple bleach solution (one part bleach to three parts water) and scrubbed each slat down. This step was crucial for removing dirt, potential mildew, and preparing the wood for a new lease on life. After a thorough scrub, I let them dry in the sun, enhancing the disinfectant effect of the bleach.
Step 3: Sealing the Wood
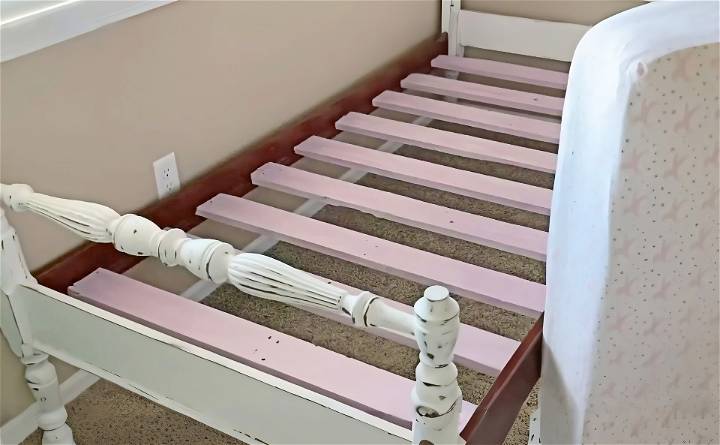
With clean, dry slats in hand, it was time to seal them. I applied a coat of stain-blocking primer first. This step is vital as it locks away any remaining impurities and builds an ideal surface for painting. Once the primer dried, I brought in a vibrant touch with purple paint - a specific request from my daughter. Letting your kids pick the color can turn this project into a fun family activity! Not only did the paint add a personal touch, but it also added an additional layer of protection to the wood.
Step 4: Testing and Installing
Before declaring the project a success, I did a ‘dry fit' of the slats in the bed frame to ensure they fit perfectly. The dimensions of the pallet slats were a fortunate match to my daughter's twin bed frame, saving me the hassle of cutting them down to size.
Safety Measures and Additional Tips
- Nail Removal: Ensure all nails are either cut flush with the wood or completely removed to avoid any injuries.
- Sealing: Don't skimp on the primer and paint. These not only aestheticize but seal the wood effectively.
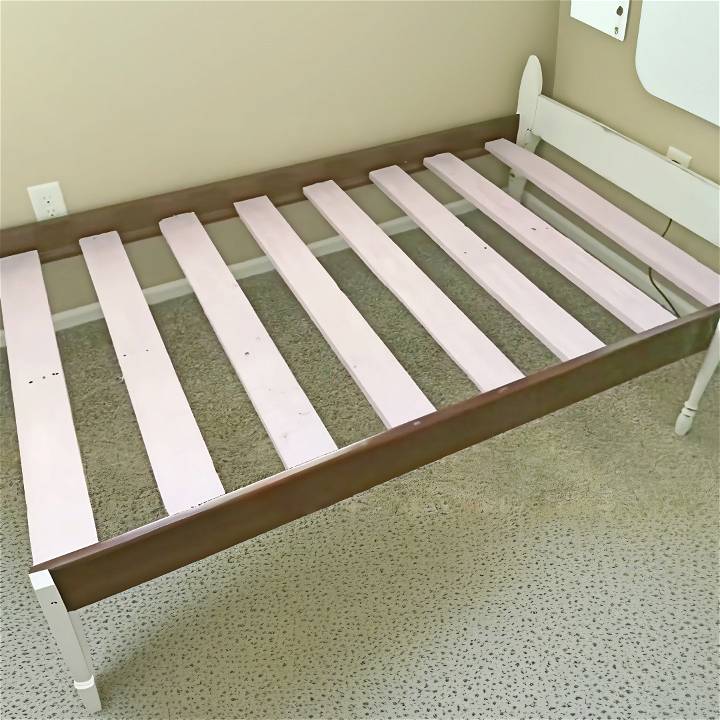
- Spacing: I spaced the slats about 4–5 inches apart. However, adjust based on your bed frame and mattress requirements.
A Project Worth Jumping Into
As I placed the mattress on the freshly installed slats, my daughter couldn't wait to test its resilience. Together, we jumped on the bed, finding the slats perfectly sturdy and squeak-free.
This project wasn't just about saving money or being environmentally conscious; it was a meaningful bonding activity with my daughter, teaching her the value of creativity, hard work, and sustainability.
For anyone considering a similar project, I say go for it. With some basic tools, a bit of elbow grease, and a splash of creativity, you can transform a discarded pallet into a functional and unique piece of your home. Remember, DIY projects like these are not only about the final product but the experiences and lessons learned along the way.
Understanding the Importance of Bed Slats
When it comes to building a comfortable and supportive bed, bed slats play a crucial role. These often-overlooked components provide the foundation for your mattress, ensuring a restful night's sleep. Let's delve into why bed slats matter and how they impact your overall sleep experience.
1. What Are Bed Slats?
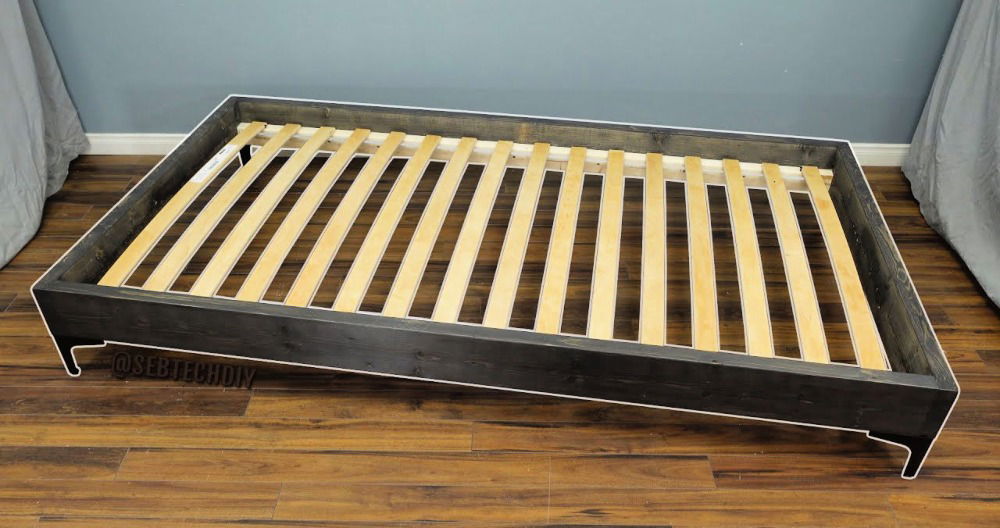
Bed slats are horizontal supports that span across the width of your bed frame. They serve as a bridge between the side rails or the headboard and footboard. Instead of relying solely on a solid platform or box spring, bed slats distribute the weight of your mattress evenly, preventing sagging and promoting stability.
2. Why Do Bed Slats Matter?
- Mattress Support: Bed slats prevent your mattress from sinking in the middle. Without proper support, your mattress may develop uncomfortable indentations over time.
- Air Circulation: Slats allow air to circulate beneath the mattress. This ventilation helps regulate temperature and keeps your bed fresh.
- Durability: Well-designed slats enhance the longevity of your mattress. They reduce stress on the mattress springs and prevent premature wear.
- Cost-Effective: Bed slats offer an economical alternative to box springs. They provide adequate support without the need for an additional bulky foundation.
3. Types of Bed Slats
Different types of bed slats are available, each with its own characteristics:
- Wooden Slats: These are the most common. They come in various thicknesses and can be solid or slatted. Wooden slats offer flexibility and durability.
- Metal Slats: Metal slats are lightweight and sturdy. They often have a mesh design, allowing for better airflow.
- Composite Slats: Made from materials like plywood or particleboard, composite slats are cost-effective and provide decent support.
4. Ideal Spacing and Placement
- Spacing: The gap between slats matters. Too wide, and your mattress may sag; too narrow, and it won't breathe properly. Aim for approximately 2 to 3 inches between slats.
- Placement: Distribute slats evenly across the bed frame. Ensure they align with the mattress's support zones (e.g., lumbar, shoulder, and hip areas).
5. Common Bed Slats Myths Debunked
- Myth: More Slats Are Always Better: While additional slats can improve support, quality matters more than quantity. Sturdy, well-spaced slats are preferable.
- Myth: Thicker Slats Are Always Better: Thicker slats aren't necessarily superior. Opt for the right thickness based on your mattress type and weight.
6. Maintenance Tips
- Inspect Regularly: Check for loose or broken slats. Tighten screws or replace damaged ones promptly.
- Rotate Slats: Occasionally rotate slats to distribute wear evenly.
- Address Squeaks: Lubricate any noisy joints to prevent disruptions during sleep.
Remember, investing time in understanding and maintaining your bed slats pays off in terms of comfort, mattress longevity, and overall sleep quality.
Strengthening Bed Slats for Heavy Mattresses
If you have a heavy mattress, ensuring your bed slats can handle the load is essential. Here are practical steps to strengthen your bed slats and provide robust support:
Choose Sturdy Materials
- Solid Wood: Opt for hardwood slats like oak, maple, or beech. These are less likely to warp or bend under pressure.
- Thicker Slats: Consider thicker slats. A minimum thickness of 1 inch (2.5 cm) provides better stability.
Increase Slats Density
- Add More Slats: The more slats you have, the better the weight distribution. Aim for slats spaced no more than 2 to 3 inches apart.
- Narrower Gaps: Reduce the gap between slats to prevent sagging. Use additional slats if needed.
Reinforce the Center
- Support Legs: Install center support legs beneath the slats. These bear the weight and prevent sagging in the middle.
- Adjustable Legs: Choose legs with adjustable height to accommodate different mattress thicknesses.
Use Metal Brackets
- L-Brackets: Attach L-shaped metal brackets to secure slats to the bed frame. These prevent slats from shifting or bowing.
- Corner Brackets: Use corner brackets at the junction of slats and side rails for added stability.
Cross-Bracing Technique
- X-Shaped Braces: Make an X-shaped brace using additional slats or metal bars. Place them diagonally across the slats to reinforce the entire structure.
- Attach Securely: Screw or bolt the braces securely to the slats and bed frame.
Plywood Platform
- Plywood Base: Lay a sheet of plywood over the slats. This acts as an additional layer of support.
- Smooth Edges: Sand the edges of the plywood to prevent splinters.
Inspect Regularly
- Check for Wear: Periodically inspect slats for signs of stress, cracks, or warping.
- Tighten Screws: If you notice any loose screws or connectors, tighten them promptly.
Remember, a well-supported mattress contributes to better sleep and overall well-being. Strengthening your bed slats ensures that your heavy mattress remains comfortable and stable night after night.
FAQs About DIY Bed Slats
All you need to know about DIY bed slats - from materials to assembly. Discover step-by-step guides to upgrade your bed frame with ease.
1. What are bed slats, and why do I need them?
Bed slats are essential support components for your mattress. While some bed frames come with built-in slats, others don't. These slats can be flat or slightly arched. They play a crucial role in distributing weight evenly and preventing sagging. If your bed lacks slats or if you want to replace existing ones, making your own is a practical solution.
2. How do I determine the size and number of slats I need?
- Using Existing Supports: If your current bed has wooden slats supporting the mattress, use one of these slats as a template. Measure its dimensions to build new ones.
- Calculating Without Current Supports: Measure the length of your bed. Most beds are around 80 inches long. Divide this by the width of the slats (usually 2 inches). For example, 80 divided by 2 equals 40, so you'll need approximately 40 slats. Remember to leave space between each slat, so divide this number in half—about 20 slats should suffice.
3. What type of wood should I use for bed slats?
Several wood options work well for bed slats:
- Yellow Southern Pine: Sturdy and commonly used.
- Other Hardwoods: Oak, maple, or birch are suitable choices.
- Plywood: While not traditional, thicker plywood can also serve as slats.
4. How do I measure and cut the slats?
- Measure the width of your bed and subtract approximately 1/2 inch. This width will be the measurement for cutting your slats.
- Use a bench saw or circular saw to make clean, 90-degree cuts across the wood.
- Use the first slat as a template to mark dimensions on the uncut wood, then cut all the slats you'll need.
5. What's the finishing process for bed slats?
- Sanding: After cutting the slats, sand them with high-grit sandpaper or a sanding machine to smooth the wood and remove splinters.
- Varnishing or Waxing: Apply a fine coat of beeswax or varnish to protect the slats. Both options work well.
6. How do I install the slats?
- Place the first slat at the bottom of the bed frame.
- Add two more slats next to the original one.
- Secure the two outer slats using wood screws or rubber stoppers.
- Maintain equal spacing between each slat as you install them.
Remember, well-constructed bed slats contribute to better mattress support and overall sleep comfort.
Conclusion:
Wrapping up this guide on DIY bed slats, constructing your own bed support system can be a cost-effective and customizable solution for improving the comfort and longevity of your mattress. With simple materials and tools, you can build sturdy bed slats to ensure a good night's rest. Experiment with different designs and measurements to cater to your specific needs and preferences. Happy crafting!


