Learn how to make DIY bell-bottom jeans with this easy guide. Bell bottoms were a signature style of the 1960s and 1970s, and they continue to be a fashionable, funky way to breathe new life into your wardrobe. If you're a fan of upcycling and want to transform an old pair of jeans into something bold and unique, then turning them into bell bottoms is a fantastic DIY project! This guide will take you step by step through the process of converting your jeans into bell bottoms with inserts, inspired by the groovy styles of the past. Ready to get started? Let's go!
Materials You'll Need
Before diving into the sewing process, gather these materials:
- Old Jeans: Narrow-legged jeans work best for this project, but any style will do.
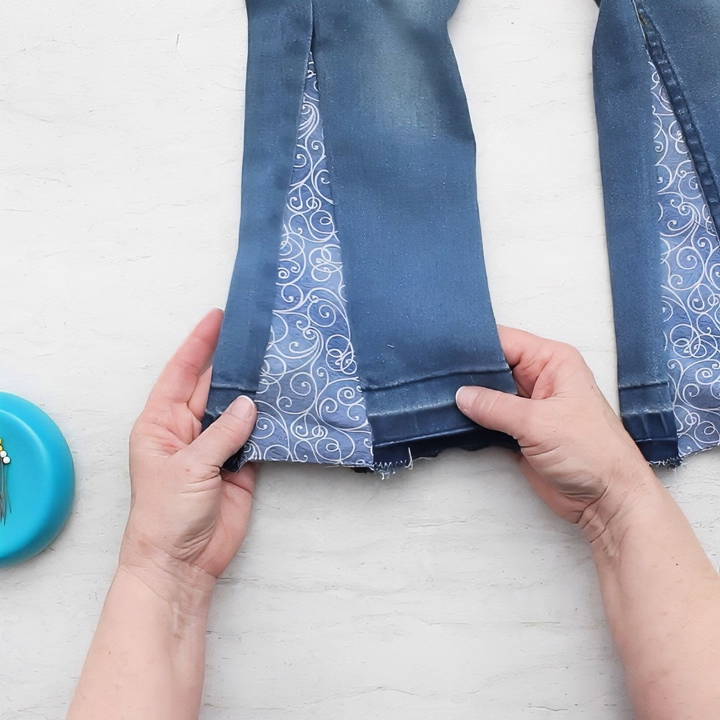
- Fabric for Inserts: You can choose any fabric you like—whether it's something vibrant and patterned or denim in a contrasting or matching shade.
- Seam Ripper: Essential for taking apart the seams of your jeans.
- Pins: For holding fabric in place while sewing.
- Ruler: To measure where to cut and sew.
- Scissors: Sharp enough for fabric.
- Sewing Machine: To sew your fabric inserts securely into place.
- Paper: For making the triangle pattern.
With these items ready, you're all set to get started on your bell-bottom journey!
Step by Step Instructions
Learn how to make DIY bell bottoms with step-by-step instructions. Customize and style your jeans with easy tips for a trendy, flared look.
Step 1: Prepare Your Jeans
Discover how to transform your jeans with ease. Learn to choose and mark the flair before ripping the seams for a unique style.
Choose Your Jeans and Mark the Flare Point
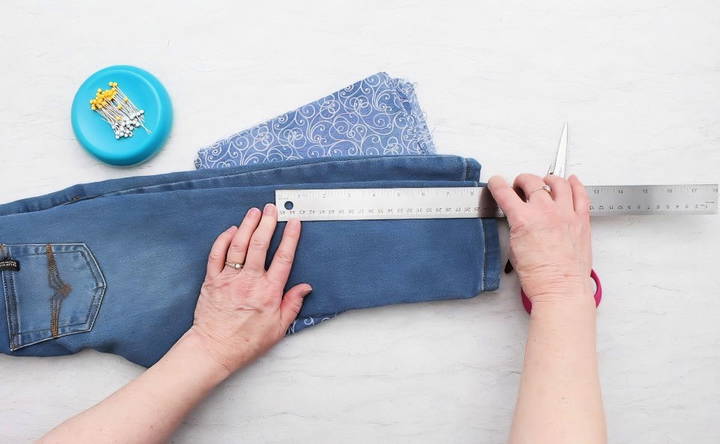
Pick a pair of jeans you want to upcycle. Jeans that are too narrow or tight-fitting will make a more dramatic bell-bottom look. The first thing you'll want to do is try them on and decide where you want the flare to start. This is typically just below the knee. For children, the measurement is around 8.5 inches above the hem, while for adults it might be closer to 18 inches. However, this can vary depending on your personal style preference. Once you've found the right point, mark the spot on both sides of each leg.
Rip the Seams
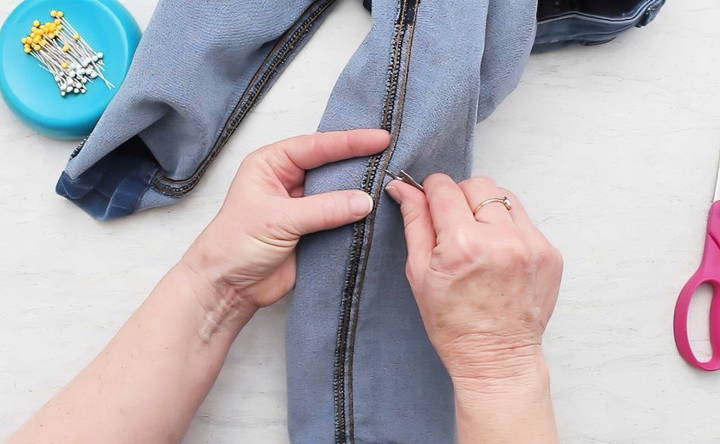
Turn the jeans inside out to work more easily. You will be ripping open the seams on both sides of each leg, from the bottom hem to your marked point. Be careful with the seam ripper as it's very sharp and can damage the fabric if you rush. A chain stitch, commonly used in jeans, might make this process easier—once you find the right thread, the seam will unravel quickly. If you don't have that luck, just take your time to rip apart the seams carefully.
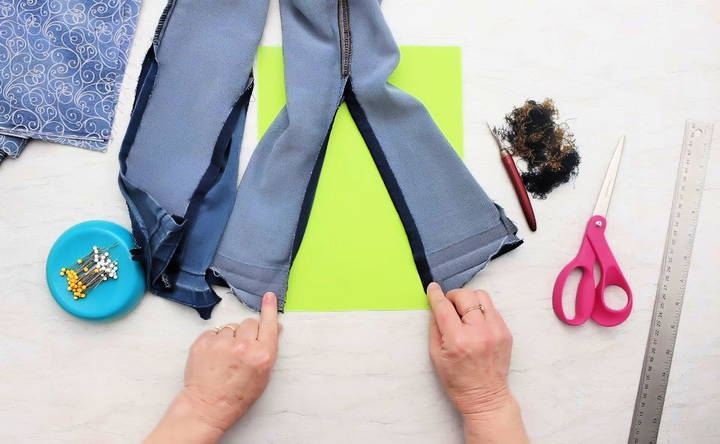
Remove the hem at the bottom of the jeans too, as this will allow the fabric insert to flow freely once sewn in. You should now have two wide openings on each leg where your fabric inserts will go.
Step 2: Make Your Fabric Insert Pattern
Learn how to make your fabric insert pattern with step-by-step guidance on measuring, drawing triangles, and cutting your fabric precisely.
Measure and Draw the Triangle
Now it's time to make the triangle insert that will form the bell of your bell bottoms. Lay a piece of paper flat and draw out a triangle. The base of the triangle will determine how wide your bell bottoms will be. For a smaller child, a base of around 3 inches is enough, while for an adult, you might go up to 7 inches. This is completely up to your taste—if you want a dramatic "elephant bell" look, go wider!
Measure from the bottom hemline (where you ripped the seam) up to the flare point and make sure your triangle is tall enough to reach this point. For example, if you measured 10 inches up from the hem, make your triangle at least 10 inches tall.
Once your triangle pattern is ready, cut it out. You will use this to cut your fabric inserts.
Cut Your Fabric
Lay your chosen fabric flat and pin the paper triangle pattern on top. You will need four triangle-shaped fabric inserts—two for each leg. You can cut all four pieces at once if your scissors are sharp and steady. After cutting the fabric, remove the pins and set your fabric inserts aside.
Step 3: Pin and Sew the Inserts
Learn how to pin and sew inserts with this easy guide. Master attaching and securing inserts seamlessly for your sewing projects.
Attach the Inserts
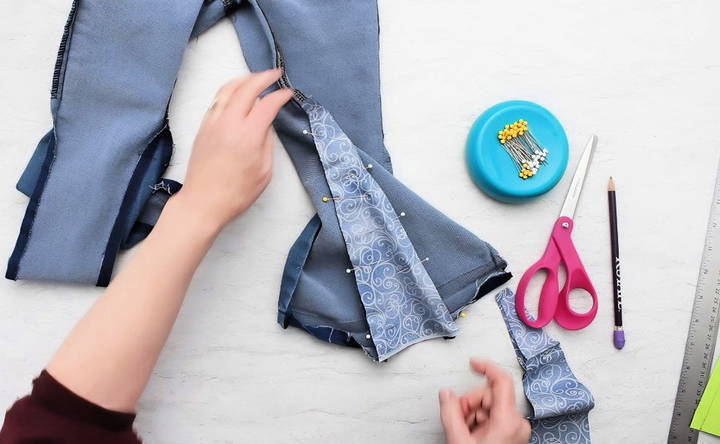
With your jeans still inside out, take one fabric triangle and pin it into the open seam of one leg. Align the base of the triangle with the bottom hem of the jeans and pin all the way up to the point where the flare begins. Do the same for the other side of the leg, pinning a triangle on both the inner and outer seams. Repeat this for the other leg.
Make sure the fabric is lying flat as you pin, so the fabric won't bunch up when you sew. Also, ensure that the right side of the fabric faces the right side of the denim to get a clean finish.
Sew the Inserts In Place
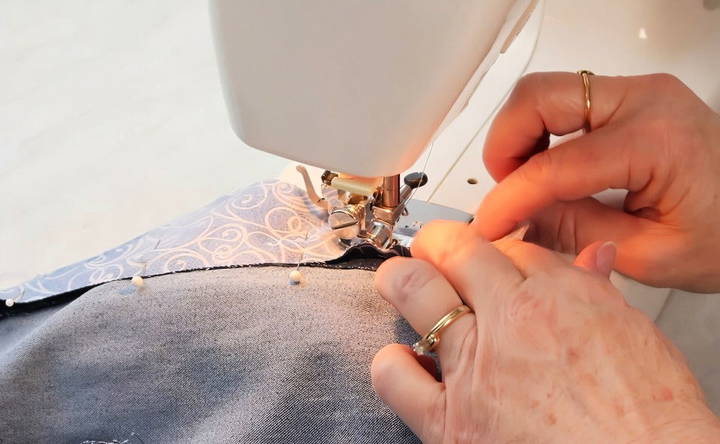
Now, get your sewing machine ready! Start by sewing one side of the triangle insert, from the bottom hem up to the flare point, using a half-inch seam allowance. Backstitch at the beginning and end of the seam to secure it. Once one side is done, sew the other side in the same way.
Repeat this process for the other leg, sewing both sides of the triangle insert in place. After sewing, use a zigzag stitch along the raw edges of the fabric to prevent fraying.
Step 4: Finishing Touches
Perfect your garment with precise fit checks and seamless finishes. Learn to zigzag or hem the bottoms for a professional touch.
Check the Fit and Finish
Once all four triangle inserts are sewn in, turn the jeans right-side out to check the fit and flare of your new bell bottoms. They should flare out at the bottom, with the added fabric making that iconic bell-bottom shape.
Zigzag or Hem the Bottoms
Now, take a look at the bottom hem of your jeans. You can choose to leave the edge raw if you're going for that 70s-inspired frayed look. To do this, just zigzag stitch along the bottom edge to prevent excessive fraying, and leave the raw edges as they are. Over time, they'll develop a vintage, worn-in look.
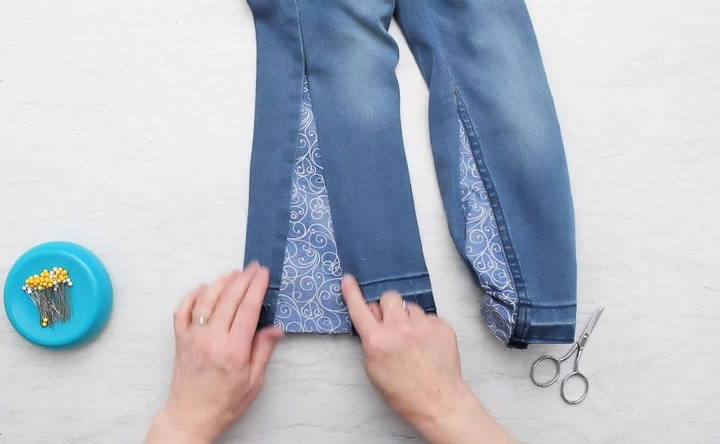
If you prefer a cleaner finish, fold the bottom hem up once or twice and sew it in place. Use a straight stitch close to the edge for a professional look.
Step 5: Style and Rock Your Bell Bottoms!
Congratulations! Your DIY bell bottoms are complete and ready to wear. Now that you've upcycled your jeans into something fresh and funky, it's time to show them off. Pair them with your favorite tops, shoes, and accessories for a modern take on retro fashion. Whether you're dressing up for a themed event or just want to add some groovy flair to your everyday wardrobe, your new bell-bottoms are sure to turn heads.
Tips and Tricks for Customizing Your Bell Bottoms
Here are a few extra tips to make your bell-bottoms even more unique:
- Choose Bold Fabrics: Add some personality to your jeans with patterned or brightly colored fabric inserts. Floral prints, tie-dye, or even sequins can make your bell-bottoms stand out even more.
- Add Embellishments: For an extra dose of 70s-inspired flair, consider sewing on patches, embroidery, or even beading to your bell-bottoms.
- Experiment with Length: Bell bottoms don't have to be full-length. Try cropping them into capris or leave them slightly longer for a bohemian vibe.
- Use Denim: If you prefer a subtler look, use denim fabric that matches or contrasts with your jeans instead of a loud pattern.
- Repurpose Old Clothes: Upcycling isn't just for jeans—if you have an old denim skirt or overalls, you can use the same technique to give them a bell-bottom twist.
Conclusion:
Upcycling old jeans into bell bottoms is a fun and rewarding project that's perfect for anyone who loves fashion, creativity, and sustainability. Whether you're revisiting a classic style from the past or trying bell bottoms for the first time, this DIY project allows you to customize your wardrobe while giving new life to an old pair of jeans. Follow these steps, and soon you'll be rocking your own groovy bell bottoms with pride!
Remember, the beauty of this project lies in its flexibility. You can go as bold or as subtle as you like with fabric choices and embellishments, making each pair of bell bottoms truly one-of-a-kind.
FAQs About DIY Bell Bottoms
Discover answers to common questions about DIY bell bottoms. Learn techniques, materials, and styling tips for your custom jeans!
To ensure the fabric insert fits well, measure the height from the hem to where the flare starts, and the width of the opening. Your triangle should match these dimensions, plus an additional ½ inch on each side for seam allowance.
You can sew the inserts by hand using a strong backstitch. It will take longer but can still give sturdy results. Be patient and use even stitches for a clean look.
Yes! You can use patterned fabric, cotton, or even stretch materials. Make sure the fabric you choose complements the denim's weight and style.
Use a seam ripper carefully, focusing on cutting individual stitches instead of pulling at the fabric. Going slowly and being patient will help prevent unwanted tears.
Yes, just be mindful of any existing alterations. You may need to adjust the pattern or fabric placement to accommodate previous changes to the jeans.
If your fabric is prone to fraying, use a zigzag stitch or serge the edges after sewing the inserts to prevent unraveling over time.
For a more dramatic bell-bottom look, widen the base of your fabric insert. A wider base makes a larger flare, so feel free to experiment based on your style preferences.
If you sew the insert incorrectly or find a mistake, carefully remove the stitches with a seam ripper and re-pin the fabric. Take your time to ensure a better fit.
Absolutely! You can upcycle skirts or overalls with the same technique by inserting fabric into the seams. This method works on any garment with a similar structure.
Yes! Once your bell bottoms are complete, you can personalize them with patches, embroidery, or beads for an extra retro touch.


