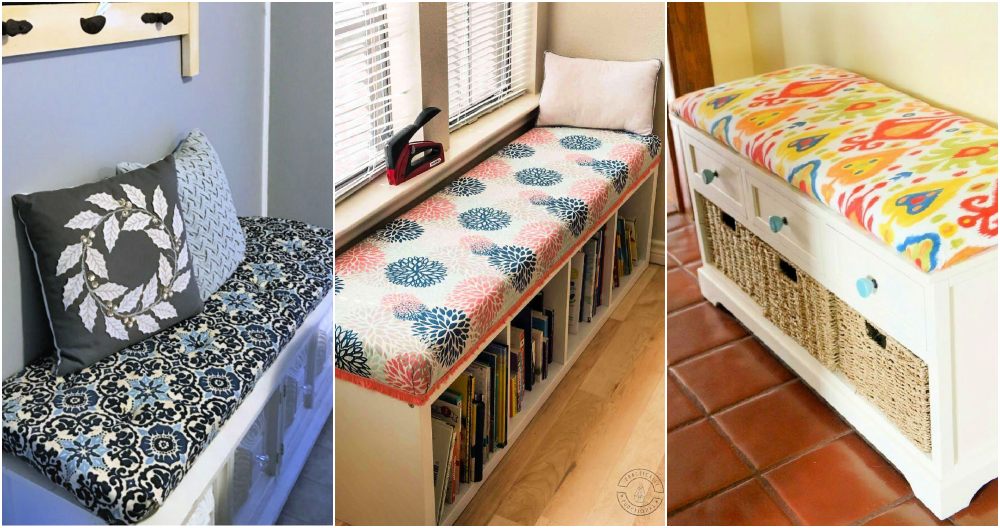
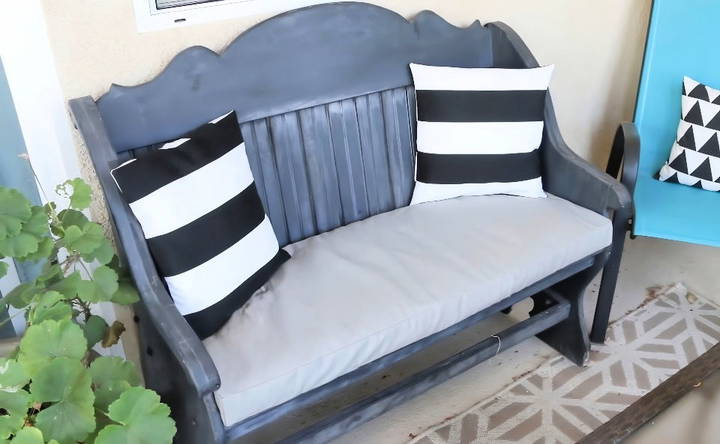
I recently gave my balcony a stunning makeover—a serene space enlivened with a touch of vintage charm. My centerpiece? A delightful vintage bench that begged for a comfortable cushion. What better way to add style and comfort than by crafting my own DIY bench cushion? Allow me to guide you through my process of making a bench cushion in just two hours, even for those of us who aren't sewing experts.
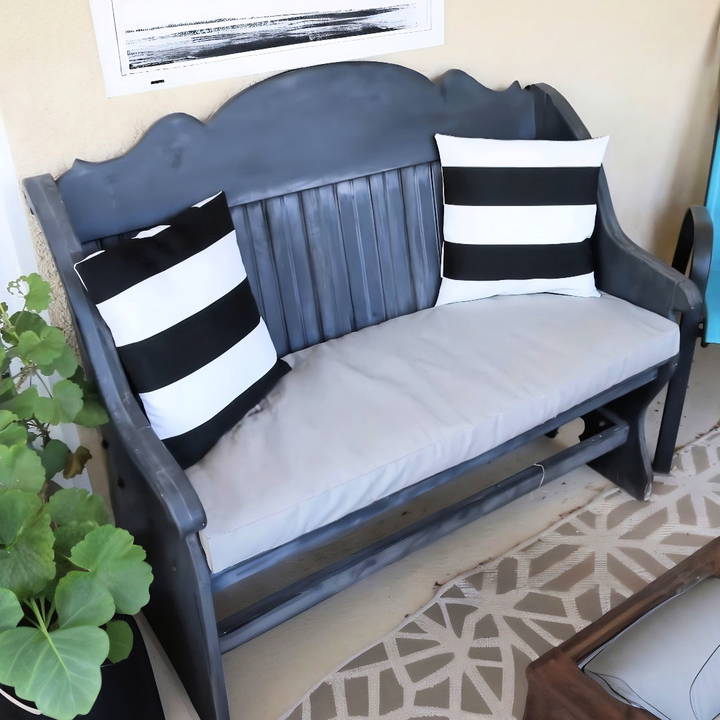
This project is perfect for beginners, and you'll end up with a custom bench cushion that fits perfectly with your bench specs.
Step by Step Instructions
Learn how to build a DIY bench cushion, from gathering materials to sewing the cover. Make the perfect cushion with ease!
Getting Started: Gathering Materials and Tools
Kickstart your project with our guide! Learn how to assemble essential supplies and tools for a flawless start.
Step 1: Assemble Your Supplies
Before diving in, it's important to gather all the materials and tools needed for this project:
- Foam: I used a pre-packaged foam, which saved time on measuring and cutting. Opt for foam that's at least two inches thick for a comfortable cushion.
- Batting: High loft batting, which you can find at most fabric stores like Joann's, will give your cushion a softer, more rounded appearance. It also helps secure the foam inside the fabric cover.
- Fabric: Choose an upholstery weight fabric that's durable and aesthetically pleasing. Ensure that you have enough fabric to cover your cushion completely, with extra for seam allowances.
- Fabri-Tac Glue: This glue is useful for adhering the batting to the foam, providing stability and making it easier to insert the cushion into the cover.
- Velcro: This will make an easy-to-remove cover for washing.
- Basic Sewing Kit: Include a sewing machine, matching polyester thread, fabric markers, measuring tape, ruler, pins, iron, and fabric scissors.
- Box Cutter: For trimming the foam if necessary.
Why These Materials are Essential
- Foam and Batting: Balance comfort and durability when selecting the thickness and quality.
- Upholstery Fabric: Provides a professional look and extended life.
- Polyester Thread: More durable against sun exposure and wear compared to cotton.
- Fabri-Tac Glue and Velcro: Ensure your cushion stays in form and is easily washable.
Customizing the Cushion: Measuring and Cutting
Learn how to measure your bench and precisely cut foam for customizing the cushion. Step-by-step guide for perfect cushion fit.
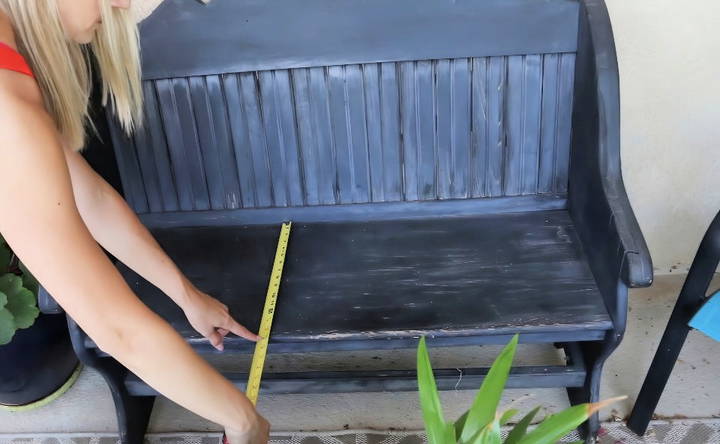
Step 2: Measure Your Bench
Accurate measurement is crucial in crafting a cushion that looks professional:
- Length and Depth: Measure the full length and depth of your bench. Mine measured 42 inches long and 15 inches deep.
- Note the Thickness: Depending on whether you want a thick or thin cushion, select foam thickness that complements your style.
Step 3: Cut the Foam to Size
If your foam isn't pre-cut:
- Mark the foam with a fabric marker using your measurements.
- Use a box cutter to trim the foam to ensure it fits perfectly on your bench.
Don't worry about precision here—any rough edges will be hidden by the batting.
Preparing the Cushion: Wrapping and Gluing
Learn how to wrap foam with batting and finalize measurements in our step-by-step guide on preparing the cushion: wrapping and gluing.
Step 4: Wrapping the Foam with Batting
High loft batting wraps around the foam, which smooths out any irregular edges:
- Drape the batting over the foam and ensure it covers all sides neatly.
- Cut the batting to size, ensuring that all corners are wrapped like a neatly packed gift.
- Use Fabri-Tac glue to secure the batting in place. It dries quickly, holding batting firmly so it doesn't bunch or shift under the fabric cover.
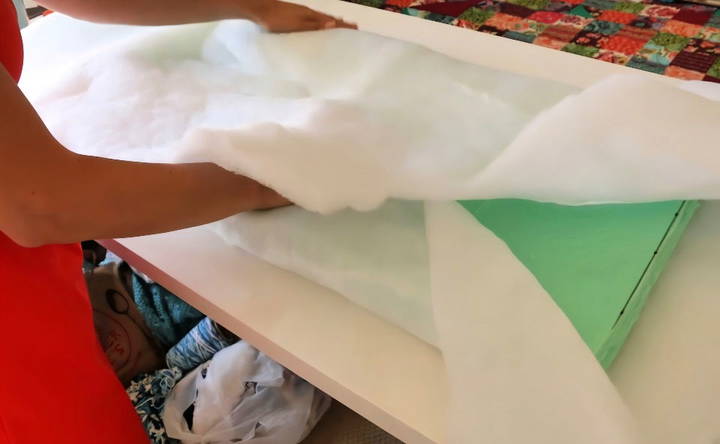
Step 5: Final Measurements
With the batting in place, recalculate dimensions. You'll find the dimensions increase slightly because of the extra padding. Mine became about 43 inches in length and approximately 15 inches plus a tiny fraction in depth.
Crafting the Cover: Cutting and Sewing the Fabric
Learn to craft the perfect cover with steps to cut fabric, make a velcro enclosure, sew panels together, and attach the top and bottom.
Step 6: Cut the Fabric
Using your final measurements, plus a little extra for seam allowances, cut the fabric pieces:
- Top and Bottom Panels: Cut two pieces using your recalculated measurements. Mine were around 44 x 16 inches.
- Side Panels: Ensure they meet the height requirement of your foam, including batting thickness. My side panels measured 44 inches long and 3.5 inches high.
- Velcro Side Panels: These short sides allow for easy removal. Use the same dimensions for depth as other side panels.
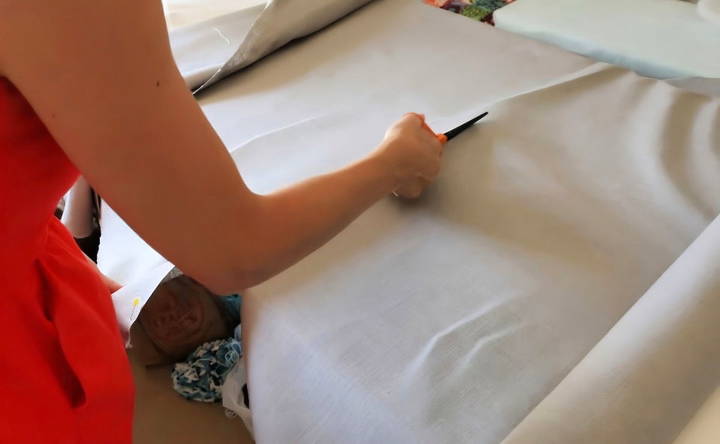
Step 7: Make the Velcro Enclosure
- Iron the Edges: Lightly iron hems on the two short sides where velcro will be placed.
- Attach Velcro: Sew into place, ensuring the pieces align properly for an effective closure.
Step 8: Sew the Panels Together
Begin by sewing the side panels first:
- Pin the panels right sides together along the edges.
- Sew using a half-inch seam allowance. Do not backstitch; it will be needed for the corners.
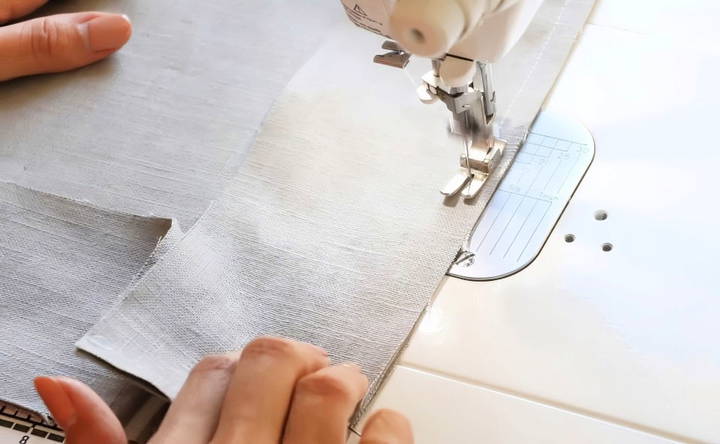
Step 9: Attach the Top and Bottom
With the frame in place:
- Unpick a half-inch at each corner seam.
- Pin the top panel, right sides together, aligning corners meticulously.
- Sew, being careful around corners—backstitch at folds and align the fabric properly.
Repeat these steps for the bottom panel, leaving velcro sides undone for cushion insertion.
Assembling the Cushion
Discover how to assemble the cushion in easy steps. Learn to insert foam and make final adjustments for the perfect finish!
Step 10: Insert Your Foam
With your fabric cover ready:
- Carefully insert the foam cushion, ensuring batting remains smooth.
- Secure the velcro enclosure, making spot checks at corners for fit.
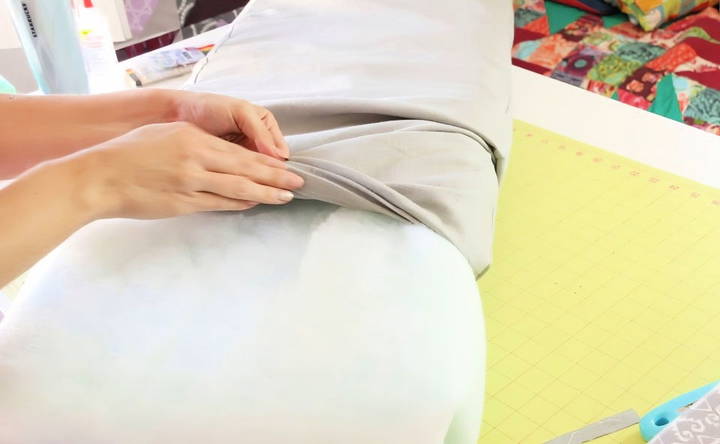
Step 11: Final Adjustments
Slide your arm inside the cover to pop out edges for a crisp look. Check everything is velcroed securely.
Reflecting on the Experience
Enhance your self-awareness with reflecting on the experience. Discover how to appreciate your achievements and enjoy your work.
Step 12: Enjoy Your Work
Take a moment to admire your handiwork! You've maked a bespoke cushion that enhances both comfort and style for your space. Plus, since it's washable, maintaining the cushion is effortless.
By following these steps, you're not just sewing fabric—you're crafting a story. Each stitch ties together elements of personalization, craftsmanship, and practicality. This project honed my patience and attention to detail, leaving me with not only a stunning lounge area but also boosted confidence in my creative ability.
Customization Tips
Customizing your DIY bench cushion can make it unique and personal. Here are some easy-to-follow tips to help you add your own touch:
Design Ideas
- Themes: Choose a theme that matches your space. For example, a nautical theme for a beach house or a floral theme for a garden bench.
- Colors: Pick colors that complement your existing decor. Bold colors can make a statement, while neutral tones offer a classic look.
- Patterns: Mix and match patterns like stripes, polka dots, or geometric designs to make an interesting visual effect.
Personalization
- Embroidery: Add embroidered initials, names, or designs to your cushion. This can be done by hand or with a sewing machine.
- Buttons: Sew decorative buttons onto the cushion for added flair. You can use buttons of different sizes and colors to make a unique look.
- Piping: Add piping around the edges of the cushion for a professional finish. Piping can be made from contrasting fabric to make it stand out.
Creative Touches
- Fabric Paint: Use fabric paint to make custom designs or patterns. This is a great way to add a personal touch without needing advanced sewing skills.
- Appliqué: Attach fabric shapes or patches to your cushion. This can be a fun way to add character and detail.
- Tassels and Fringe: Add tassels or fringe to the corners or edges of your cushion for a boho-chic look.
Practical Customizations
- Removable Covers: Make cushion covers removable for easy washing. Use zippers or buttons to secure the covers.
- Waterproofing: If your cushion will be used outdoors, consider using waterproof fabric or adding a waterproof liner.
- Extra Padding: Add extra layers of padding for more comfort. You can use batting or additional foam layers.
Inspiration Sources
- Magazines and Websites: Look through home decor magazines and websites for inspiration. Pinterest is also a great place to find creative ideas.
- Nature: Take inspiration from nature. Colors and patterns found in flowers, leaves, and landscapes can be beautiful and calming.
- Personal Interests: Incorporate elements that reflect your hobbies or interests, such as sports, music, or travel.
By following these tips, you can make a bench cushion that is not only comfortable but also a reflection of your personal style.
Troubleshooting Common Issues
Making a DIY bench cushion can be a fun project, but sometimes things don't go as planned. Here are some common issues you might encounter and how to fix them:
Uneven Seams
- Problem: Your seams are not straight, making the cushion look uneven.
- Solution: Use a ruler or measuring tape to mark straight lines on the fabric before sewing. Pin the fabric pieces together to keep them aligned while you sew. If you notice uneven seams after sewing, you can carefully unpick the stitches and try again.
Loose Fabric
- Problem: The fabric on your cushion is loose and wrinkled.
- Solution: Ensure you cut the fabric to the correct size, leaving enough allowance for seams. When sewing, pull the fabric taut but not too tight. If the fabric is still loose, you can add more stuffing or padding to fill out the cushion.
Incorrect Measurements
- Problem: The cushion doesn't fit the bench properly because of incorrect measurements.
- Solution: Double-check your measurements before cutting the fabric. Measure the length, width, and depth of the bench and add extra for seam allowances. If the cushion is too small, you can add fabric panels to the sides. If it's too large, you can trim it down and resew the seams.
Fabric Fraying
- Problem: The edges of your fabric are fraying.
- Solution: Use pinking shears to cut the fabric, which helps prevent fraying. You can also use a zigzag stitch or a serger to finish the edges. Applying a fabric sealant to the edges can also help.
Uneven Stuffing
- Problem: The stuffing inside the cushion is lumpy or uneven.
- Solution: Distribute the stuffing evenly by hand, breaking up any clumps. If using foam, make sure it's cut to the right size and shape. For a smoother finish, consider using a layer of batting between the fabric and the stuffing.
Zipper Issues
- Problem: The zipper is difficult to open or close, or it gets stuck.
- Solution: Ensure the zipper is aligned properly before sewing it in. If it gets stuck, you can rub a bar of soap or a candle along the teeth to lubricate it. If the zipper is broken, you may need to replace it.
Fabric Puckering
- Problem: The fabric puckers along the seams.
- Solution: Adjust the tension on your sewing machine. Make sure you're using the right type of needle and thread for your fabric. Sew slowly and steadily to avoid pulling the fabric.
Color Fading
- Problem: The fabric color fades after washing.
- Solution: Pre-wash the fabric before sewing to remove any excess dye. Use a gentle detergent and cold water to wash the cushion covers. Avoid direct sunlight when drying, as it can cause colors to fade.
By addressing these common issues, you can ensure your DIY bench cushion looks great and lasts a long time.
FAQs About DIY Bench Cushions
Get expert answers to the most common questions about DIY bench cushions, from materials to measurements and design tips.
First, measure the length and width of your bench. Cut the foam to match these dimensions. For the fabric, add an extra 2-3 inches on each side to allow for wrapping around the foam and securing it. Use a sharp knife or electric carving knife to cut the foam, and scissors for the fabric.
Yes, you can make a bench cushion without sewing! Use a staple gun to attach the fabric to the foam. Simply wrap the fabric around the foam and plywood (if using), then staple it securely on the underside. This method is quick and easy, perfect for beginners.
Choose a fabric that is durable and easy to clean. Upholstery fabric, outdoor fabric, or heavy-duty cotton are great options. If the cushion will be used outdoors, ensure the fabric is weather-resistant and UV-protected to prevent fading.
To keep your bench cushion looking fresh:
Regular Cleaning: Vacuum the cushion regularly to remove dust and debris.
Spot Cleaning: Use a mild detergent and water to clean any spills or stains. Test the cleaner on a small, hidden area first.
Fabric Protection: Consider using a fabric protector spray to repel stains and water.
To enhance the comfort of your bench cushion, consider the following tips:
Add Extra Layers: Use multiple layers of foam or add a layer of memory foam on top of the regular foam for added softness.
Use High-Density Foam: High-density foam provides better support and durability, making the cushion more comfortable for longer periods.
Include Batting: Adding a layer of batting between the foam and fabric can make the cushion feel more plush and smooth out any rough edges.
Choose Soft Fabric: Opt for a fabric that feels soft to the touch, such as cotton or a cotton blend, to enhance the overall comfort.
Consider a Pillow Top: Adding a pillow top layer can give your cushion a luxurious feel, similar to high-end furniture.
Helpful Tips
- Always Pre-wash Fabric: Prevent unexpected shrinkage by washing fabric prior to sewing.
- Consult Friends or Guides: If uncertain during steps, online tutorials and forums can provide visual guidance or reassurance.
I hope sharing my journey with you inspires you to take on your own sewing projects. Remember, patience and attention to detail are key in ensuring a finished product you'll be proud of.
Conclusion:
In conclusion, making your own DIY bench cushion is a rewarding project that adds both comfort and style to your space. With just a few materials and simple steps, you can make a custom cushion that perfectly fits your bench. Whether for indoor or outdoor use, this project is a great way to enhance your home with a personal touch.


