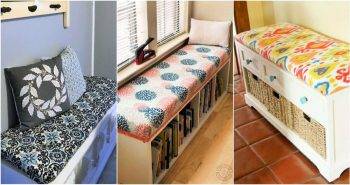
Making a DIY bench seat was a great way for me to maximize space and add style to my home. It was a straightforward project that didn't take too long and offered practical benefits. The process involved basic tools, and the steps were simple to follow. I believe my experience can guide you in making your own bench seat with storage without any hassle.
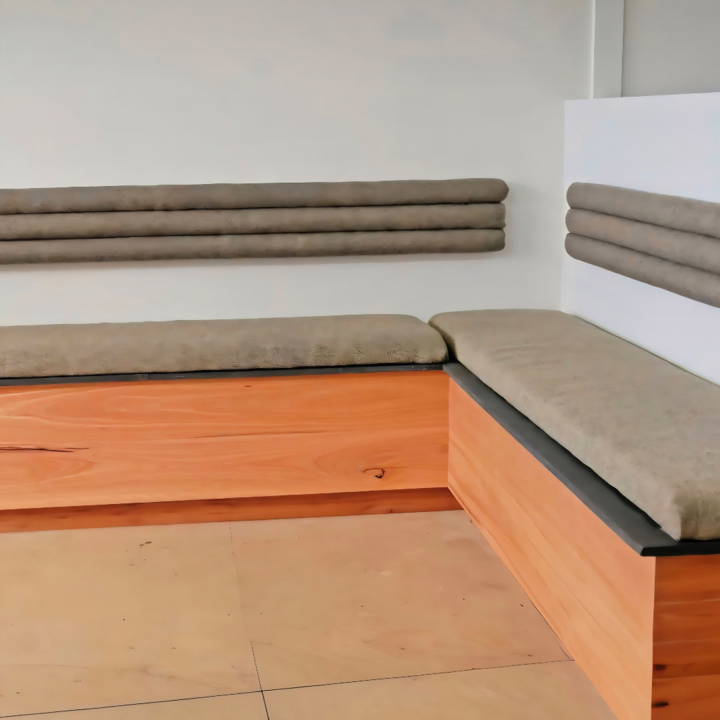
Building your own bench seat is not just about looks but also about making the most of your home's space. With clear instructions and a bit of effort, you can build a piece that fits your needs perfectly. The storage underneath provides a practical solution for keeping things organized. I'm sharing my experience to help you get started.
Getting Started
The journey began with meticulous planning. Deciding on the location was crucial. For me, it was the living room window that offered the perfect spot. Anchoring the bench there meant it would serve double duty as a cozy nook and storage unit. The materials list was my next focus. Here's a handy checklist of what you'll need:
- Kickboards: They form the base structure. Their sturdy build is essential for a durable seat.
- Timber and MDF: For the seat and lid. Choose timbers that are both robust and aesthetically pleasing.
- Hinges: These are vital for a storage seat. Opt for durable ones to handle frequent opening and closing.
- Paint: To give your bench seat a personal touch and integrate it into your room's decor.
- Cladding (optional): If you're keen on adding texture and depth to the appearance.
Why These Materials?
Every material was picked with purpose. The kickboards guarantee a strong foundation; essential for furniture that's going to be both sat on and stored in. Timber and MDF are my go-to for DIY furniture, offering a nice balance between ease of working and durability. Hinges make the storage component accessible, and paint? That's the soul of your project – it brings your bench seat to life, making it a seamless part of your room.
Step by Step Instructions
Build a DIY bench seat with our step-by-step guide. Perfect for home improvement enthusiasts seeking clear, simple instructions.
Step 1: Measure and Mark
First, I measured the intended area, keeping in mind that I would leave about 100mm back from the front of the seat for the kickboards, ensuring enough room for seat depth and overhang.
Step 2: Building the Foundation
Following the measurements, I constructed two sturdy boxes from the kickboards and secured them to the wall, locating the studs for a solid attachment. This foundation is critical for stability and support.
Step 3: Assembling the Seat
Then, it was time to cut the timber and MDF to size for the seat. I allowed a 60mm overhang for added flair and ease of lifting the seat. After cutting, I glued and assembled these pieces, forming the base of the bench.
Step 4: Crafting the Lid
The lid required precise measurements to ensure a snug fit, with a 40mm overhang for aesthetic and functional purposes. After cutting the MDF to size, the hinges were attached next. This step was a tad tricky; I needed to make sure the screws were not too tight initially, allowing smooth closing before securing firmly.
Step 5: Personalizing with Paint
Choosing a paint color that complemented the living room's palette brought me a step closer to seeing my vision come to life. Painting both the lid and inside, I opted to leave the outside natural for a contrasting, modern look.
Step 6: Final Touches
After the paint dried, it was time to attach the lids to the kickboard boxes, ensuring everything was level and secure. For some added texture, I measured and cut cladding for the exterior, though this is optional and based on personal preference.
As I stepped back to admire my work, I couldn't help but feel a rush of pride. Not only did the bench look phenomenal, but it also offered ample storage, solving my clutter issue while adding seating. The project, although challenging, was incredibly rewarding.
Design Customization Ideas
When it comes to making a DIY bench seat, the design possibilities are endless. Here are some ideas to help you personalize your project and make it truly your own:
- Choose Your Style: Think about the overall look you're aiming for. Do you prefer a modern, minimalist design or a rustic farmhouse feel? Your style choice will guide the rest of your decisions, from materials to finishing touches.
- Selecting Materials: The materials you choose can greatly affect the appearance of your bench. For a natural look, opt for woods like cedar or pine. Consider incorporating metal or concrete elements if you're going for a more industrial vibe.
- Paint and Stain: Color can transform your bench. Paint it a bold color to make a statement, or use a stain to enhance the natural beauty of the wood. Remember to use outdoor-friendly products if the bench will be exposed to the elements.
- Cushions and Upholstery: Adding cushions is comfortable and an opportunity to introduce patterns and textures. Use outdoor fabrics for durability, and have fun mixing and matching designs.
- Accessorize: Pillows, throws, and even outdoor rugs can complement your bench seat. These accessories can be changed seasonally to refresh the look without much effort.
- Functional Add-ons: To increase the functionality of your bench, consider building in storage under the seat or adding side tables.
- Personal Touches: Finally, add elements that reflect your personality. This could be anything from hand-painted designs to engraved initials.
Incorporate these design tips to craft a functional bench seat that reflects your style. Keep it simple, prioritize quality, and enjoy the process!
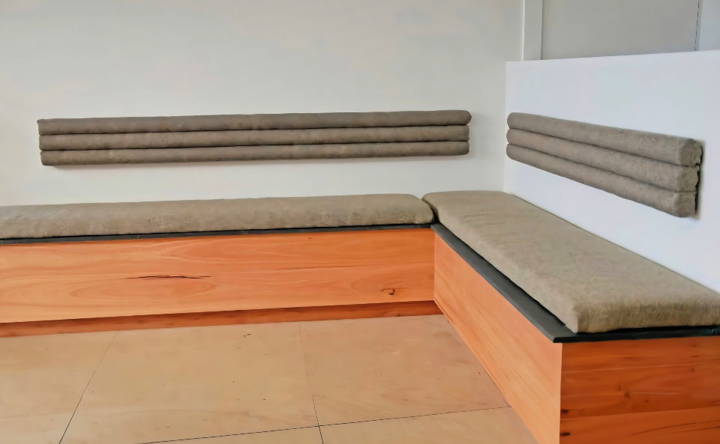
Upcycling and Repurposing Tips
Building a bench seat from upcycled materials is not only eco-friendly but also adds character and history to your furniture. Here are some tips to help you repurpose materials effectively:
- Start with What You Have: Look around your home for items that you no longer use. Old bed frames, bookshelves, and even doors can be transformed into the base of your bench.
- Scout for Materials: Visit local thrift stores, garage sales, or online marketplaces for materials that can be repurposed. Look for solid wood furniture that can be taken apart and reused.
- Keep It Safe: Ensure that the materials you choose are safe and free from hazards like rusted metal or splintered wood. Clean and prepare them properly before starting your project.
- Preserve the Story: If the materials have a unique history, consider preserving some of the original features. This could be a carved detail or a distinctive paint job.
- Simple Tools: You don't need fancy equipment to upcycle. Basic tools like a saw, drill, and sandpaper can go a long way.
- Combine Old and New: It's okay to mix repurposed materials with new ones. This can often strengthen the structure and extend the life of your bench.
- Finish Thoughtfully: Choose finishes that will protect the repurposed materials and enhance their look. For outdoor benches, make sure the finish is suitable for exterior use.
By using these tips, you'll build a functional, beautiful bench seat that tells a story through reused materials. The key to upcycling is seeing old items' potential and using your creativity and effort.
Troubleshooting Common Issues
When embarking on a DIY bench seat project, you might encounter a few hiccups along the way. Here's how to tackle some common issues with practical solutions:
- Wobbly Bench: If your bench wobbles, check to ensure all legs are even. You can add felt pads or adjust the length of the legs for stability.
- Screws Not Holding: If screws aren't holding, it could be due to stripped holes. Use larger screws or plug the hole with a wooden dowel and re-screw.
- Wood Splitting: Prevent wood from splitting by pre-drilling holes, especially near the ends of boards. Choose the correct screw size and type for your material.
- Uneven Stain: For an even stain, sand the wood thoroughly and apply a pre-stain wood conditioner. Test the stain on a scrap piece to ensure the desired color.
- Paint Peeling: Make sure the wood is clean and dry before painting. Use a primer suited for the wood type and environment, and apply paint in thin, even layers.
- Cushion Slipping: To keep cushions from slipping, attach hook-and-loop tape to the cushion and bench or add a non-slip mat underneath.
- Weather Damage: Protect outdoor benches with a waterproof sealant and store cushions inside during bad weather to extend their life.
By addressing these common issues, you'll ensure your DIY bench seat is both durable and comfortable.
FAQs About DIY Bench Seat
Discover answers to FAQs about building a DIY bench seat: tips, materials, and step-by-step guidance to build your perfect bench seat at home.
First, measure and mark the length of your seat on the 1" x 12" wood. Draw a line across with a ruler, then cut with a circular saw. For the legs, measure and cut two 17" pieces from the same wood. If desired, add a decorative V-shape at the bottom of the legs.
Absolutely! The size of your bench can be tailored to fit your space. Just adjust the length of the top board and support accordingly. Remember to calculate the amount of material needed based on your desired bench length.
To ensure sturdiness, use quality pine wood and make sure all cuts are straight and precise. When assembling, use finishing nails or a nail gun for a secure hold. Sand any rough edges and apply paint or sealant to protect the wood and enhance its appearance.
To match the bench to your home's style, consider the following:
Choose the right wood: Different woods can complement different styles. For a rustic look, opt for reclaimed wood. For a modern touch, go with a clean, smooth hardwood.
Select the right finish: A stain can add warmth and depth, while paint can be used to match the color scheme of your room.
Add custom details: Consider adding trim, decorative cuts, or even upholstery to personalize your bench seat.
Safety is paramount when working on any DIY project. Here are some tips:
Wear protective gear: Always use safety glasses and gloves when cutting wood or sanding.
Work in a well-ventilated area: Especially when painting or staining, ensure good airflow to avoid inhaling fumes.
Secure your materials: Use clamps to hold the wood in place while cutting to prevent slipping.
Keep your workspace tidy: A clean space will help prevent accidents and make your project more enjoyable.
Words of Wisdom
By making your own DIY bench seat, you can enhance your home's decor and boost functionality. This project can be a fun and rewarding activity. The storage space will keep your things tidy, while the seat adds a stylish touch. I hope my story inspires you to get started and enjoy the process.


