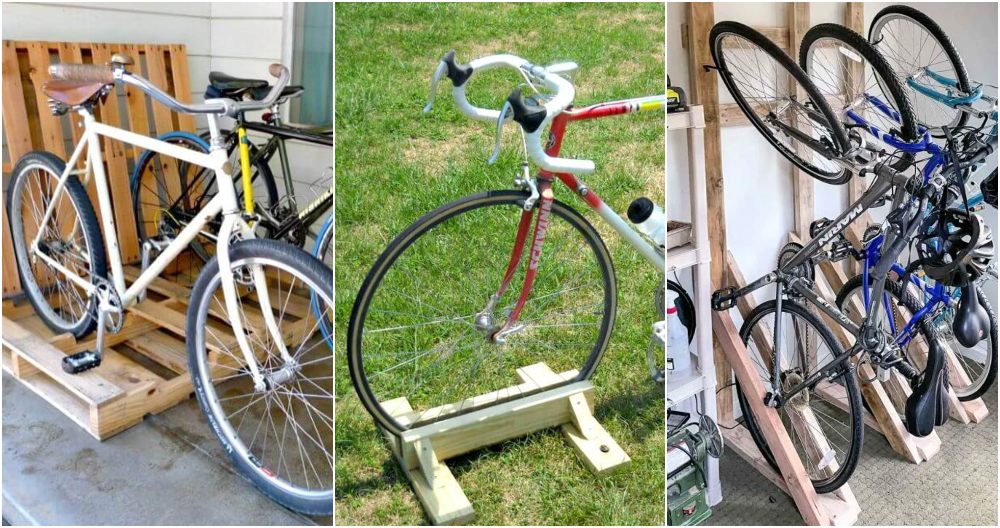
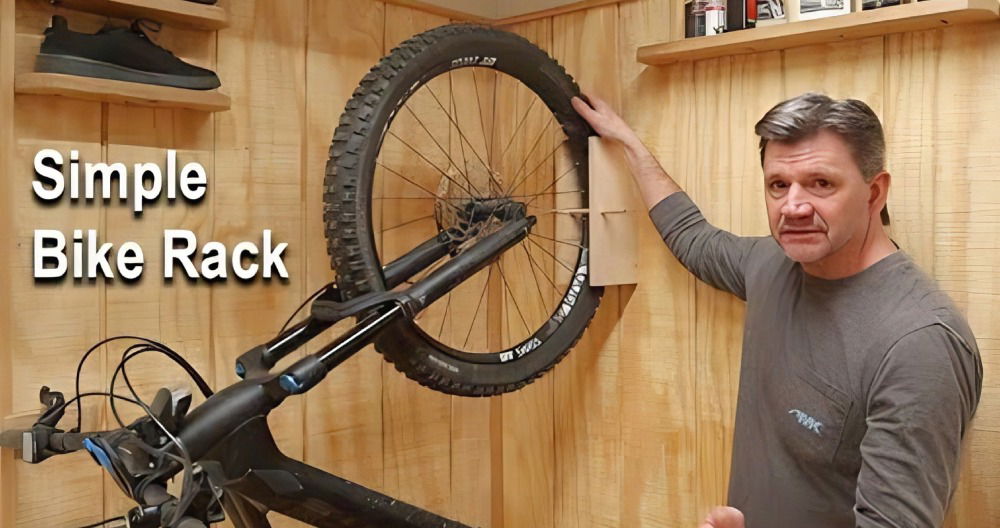
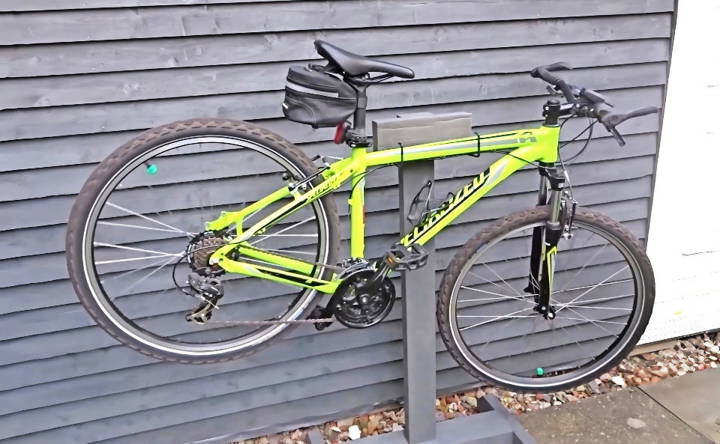
Making a DIY bike repair stand can save money and offer convenience. I wanted a repair stand for my bike, but most store-bought options were expensive. Building my own seemed like the perfect solution. With some simple materials and easy instructions, I managed to put one together.
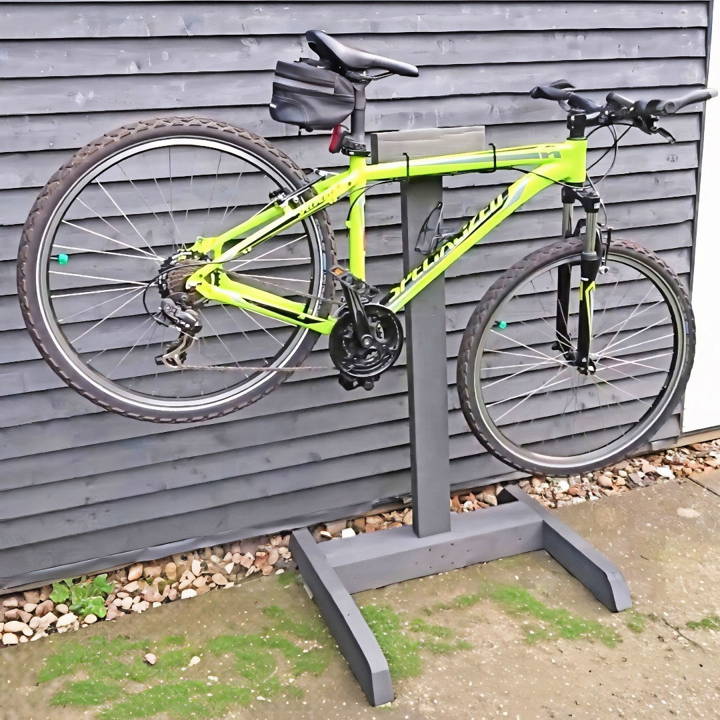
If you love biking like I do, a repair stand is super useful. It keeps your bike steady while you fix it. This project will show you how to make your own bike stand. I'm sharing this to help you get started and make things easier for bike repairs.
Taking on projects like this can be rewarding. You'll save money and learn new skills. Believe me, building your repair stand is a great step toward better bike maintenance. Try it, and see how it helps you keep your bike in top shape!
Materials Needed and Their Purpose
- Scrap Wood: Specifically, I used a piece of 2x4 for the main upright and some 2x3 pieces from old pallets for the base. The choice of wood is crucial for ensuring the stand's durability and sturdiness.
- Old Scaffold Board: This was used for the top section where the bike rests. It needs to be sturdy to support the weight of the bike.
- Long Wood Screws: These are essential for joining the pieces of wood securely together.
- Camping Mat (Foam): To protect your bike's paintwork, a piece of an old camping mat acts as a cushioning pad.
- Instant Grab Adhesive: For attaching the foam to the wood securely.
- Rubberized Hooks: These are perfect for holding the bike in place without damaging it.
- Coach Bolts, Screws: For attaching the base securely to the upright section and for additional support.
- Outdoor Fence Stain: Lastly, to give the stand a finished look and protect it from the elements.
Step by Step Instructions
Learn how to build a DIY bike repair stand with step-by-step instructions, customization ideas, and essential tips for preparation, assembly, and adjustments.
Preparation and Assembly
- Start with the Base: Cut the 2x3 pieces to the length you require for the base and sand down any rough edges. Angling the ends can give your stand a cleaner look, but this is optional.
- Prepare the Upright: The 2x4 will serve as the main support for your bike, so make sure it's of a good length. I cut mine to about 5 feet.
- Assemble the Top Section: Attach the old scaffold board to the top of your 2x4. This will hold your bike up. Ensure it's centered and secure it with long wood screws.
- Construct the Base: Layout the base pieces and attach them to the bottom of the upright section. It's critical to ensure that the base protrudes more at the front to counterbalance the weight of the bike.
- Adding Support: For additional support, I added extra wood pieces between the front and back sections of the base, glued them, and screwed them together.
- Attach the Base to the Upright: Use coach bolts for a strong, sturdy connection.
Finishing Touches
- Cushion the Top Section: Cut a piece of the camping mat to size and attach it to the top section with instant grab adhesive. This prevents any damage to your bike.
- Install the Hooks: Place the rubberized hooks on the top section where your bike will hang. Space them according to your bike's frame size.
- Paint: I chose to paint the stand with an outdoor fence stain to match my workshop. This step is optional but recommended to protect the wood.
Testing and Adjustments
Once everything was assembled and dried, it was time for the most gratifying part — testing. I placed my bike onto the stand, and I was pleased to find it held the bike securely and steadily. This not only made repairs easier but also doubled as a convenient storage solution.
Customization Ideas for Your DIY Bike Repair Stand
When it comes to DIY projects, personalization not only adds a unique touch but also ensures that the end product meets your specific needs. Here are some customization ideas for your DIY bike repair stand:
Choose the Right Materials
Start by selecting materials that are both durable and easy to work with. For example, PVC pipes are lightweight and easy to cut, making them ideal for a portable stand. On the other hand, metal pipes offer more stability and can support heavier bikes.
Adjustable Height and Angle
Incorporate adjustable features to accommodate different bike sizes and repair positions. You can add a simple clamp system to change the height and a rotating head to hold the bike at various angles.
Tool Organizer
Attach a magnetic tool tray or pegboard to keep your tools within reach. This will save time and help you stay organized while working on your bike.
Mobility Features
If you need to move your stand frequently, consider adding caster wheels to the base. Ensure they have locking mechanisms to keep the stand stable during repairs.
Foldable Design
For those with limited space, a foldable design can be a game-changer. Implement hinges or quick-release mechanisms to easily collapse and store your stand.
Protective Padding
To prevent scratches on your bike, add soft padding where the bike frame contacts the stand. Use materials like foam or rubber for cushioning.
Personal Touches
Finally, make your bike stand truly yours by adding personal touches. Paint it in your favorite color, or add decals and stickers that reflect your personality or cycling achievements.
The key to a successful DIY project is planning ahead and considering each feature's utility.
Advanced Features and Upgrades
Enhancing your DIY bike repair stand with advanced features can significantly improve its functionality and your overall bike maintenance experience. Here are some upgrades you might consider:
Quick-Release Adjustments
Incorporate quick-release mechanisms for fast and effortless adjustments. This can be particularly useful for the clamp holding the bike, allowing you to quickly secure or release the bike with minimal effort.
Integrated Hydraulic Lift
For those looking for a more professional setup, adding a hydraulic lift system can make lifting the bike effortless. This is especially helpful for heavier bikes or when you need to work on the underside of the bike.
LED Work Light
Good lighting is crucial when working on intricate parts of your bike. Mount an LED work light onto your stand to ensure you have a well-lit workspace, which can be particularly handy for late-evening repairs.
Tool Dispenser
A tool dispenser or a retractable tool board can keep your most-used tools at hand. This could be a simple magnetic strip or a custom-made board with slots for each tool.
Digital Angle Gauge
For precision tasks, a digital angle gauge attached to the stand can help you align parts perfectly. This is particularly useful for tasks like setting up your bike's geometry.
Stabilizing Anchor Points
If you're working outdoors or on uneven surfaces, add anchor points to your stand that can be secured with stakes or weights, providing extra stability.
Bluetooth Speaker
For those who enjoy listening to music while working, integrate a Bluetooth speaker into your stand. This can make the repair process more enjoyable and keep your phone or music player safely out of the way.
Solar Charging Station
For the eco-conscious, a small solar panel can be attached to the stand to power the LED light or charge your devices, reducing the need for electrical power.
Add advanced features to your DIY bike repair stand to make repairs easier and more fun. The best upgrades meet your needs and personalize your project.
Troubleshooting Common Issues
Building a DIY bike repair stand can be a rewarding project, but it's not uncommon to encounter a few hiccups along the way. Here's a guide to troubleshooting some of the most common issues you might face:
Stability Concerns
If your stand wobbles or feels unstable:
- Check the Base: Ensure that the base is wide enough and properly balanced. A wider base provides better stability.
- Adjust the Weight Distribution: Place heavier materials at the base to lower the center of gravity.
- Secure Connections: Tighten all joints and connections. If using screws, ensure they're the correct size and fully tightened.
Difficulty in Adjusting Height
If adjusting the height of your stand is challenging:
- Lubricate Moving Parts: Apply a silicone-based lubricant to any clamps or sliders to ease movement.
- Simplify the Mechanism: Consider switching to a simpler adjustment mechanism, like telescoping poles with pin locks.
Bike Slipping Off the Stand
To prevent your bike from slipping:
- Enhance Grip: Add rubber grips or non-slip pads where the bike contacts the stand.
- Use Proper Clamping: Ensure the clamping mechanism is suitable for your bike's frame size and shape.
Parts Rusting Over Time
To protect against rust:
- Choose Rust-Resistant Materials: Stainless steel or coated metals can resist rust better than untreated metals.
- Regular Maintenance: Wipe down metal parts after use, especially if they've been exposed to moisture.
Difficulty in Assembly
If you're finding the assembly process difficult:
- Follow Instructions Carefully: Revisit the assembly guide to ensure all steps are followed correctly.
- Seek Help: Don't hesitate to ask a friend for an extra set of hands or seek advice from DIY forums online.
Tools and Parts Misplacement
To keep tools and parts organized:
- Implement Storage Solutions: Add a small shelf or tool rack to your stand.
- Use Labels: Label compartments and shelves to easily locate tools and parts.
Fixing these issues will make your DIY bike repair stand both functional and enjoyable. Patience and flexibility are key to a successful project.
Safety Precautions
When making a DIY bike repair stand, safety is paramount. Here are some essential safety precautions to keep in mind:
Work Area
- Keep it Clean: Maintain a clean and clutter-free work area to prevent accidents.
- Well-Lit: Ensure your workspace is well-lit to avoid mishaps while using tools.
Tools and Equipment
- Wear Protective Gear: Always wear safety glasses and gloves when working with power tools or sharp objects.
- Inspect Tools: Before use, check tools for damage. Do not use damaged tools as they can be hazardous.
Building the Stand
- Follow Instructions: Carefully follow the building instructions to ensure the stand is constructed correctly.
- Secure Fasteners: Double-check that all bolts and screws are tightened securely to prevent the stand from collapsing.
Using the Stand
- Test Stability: Before placing your bike on the stand, test its stability with a gentle push.
- Correct Placement: Position the bike correctly on the stand, ensuring it is balanced and won't fall.
After Use
- Store Tools Safely: Put away all tools and materials after use to prevent accidents.
- Regular Checks: Periodically inspect the stand for wear and tear, especially if it's used frequently.
Follow these safety tips to ensure a safe and effective DIY experience with your bike repair stand. Safety first is always worth it.
FAQs About DIY Bike Repair Stand
Get answers to common questions about DIY bike repair stands. Learn materials, tools needed, and troubleshooting tips. Ideal for cycling enthusiasts!
Stability can be achieved by using a sturdy base like a heavy-duty metal flange or a solid wooden platform. Ensure all joints are securely fastened, and consider adding a weighted base or attaching the stand to a fixed object if necessary.
Yes, there are designs available that do not require welding or advanced tools. For example, you can build a stand using PVC pipes that are cut and assembled with simple hand tools, or repurpose old bicycle parts for a custom stand.
The most cost-effective method is to use materials you may already have, such as scrap wood or metal. Alternatively, purchasing inexpensive plumbing parts like galvanized pipes and fittings can be a budget-friendly option.
When building and using a DIY bike repair stand, always ensure the bike is securely fastened to avoid accidents. Be cautious when working with tools and materials, and follow the instructions carefully to prevent injuries.
When selecting a design for your DIY bike repair stand, consider the space you have available, your budget, and your skill level with tools. There are various designs ranging from simple PVC stands to more complex metal stands requiring welding. Bench-mounted stands are great for those with limited space, while free-standing models offer more flexibility. Review different designs online, watch tutorial videos, and choose one that suits your needs and abilities. Remember to prioritize safety and stability in whichever design you choose.
Conclusion
Wrapping up, making a DIY bike repair stand with easy instructions can be a rewarding project. A DIY bike repair stand not only saves you money but also gives you the flexibility to fix your bike whenever you need it.
Building a bicycle repair stand is straightforward with the right guidance. Follow these tips, and you'll have a sturdy DIY bike maintenance stand up and ready in no time. Happy biking!


