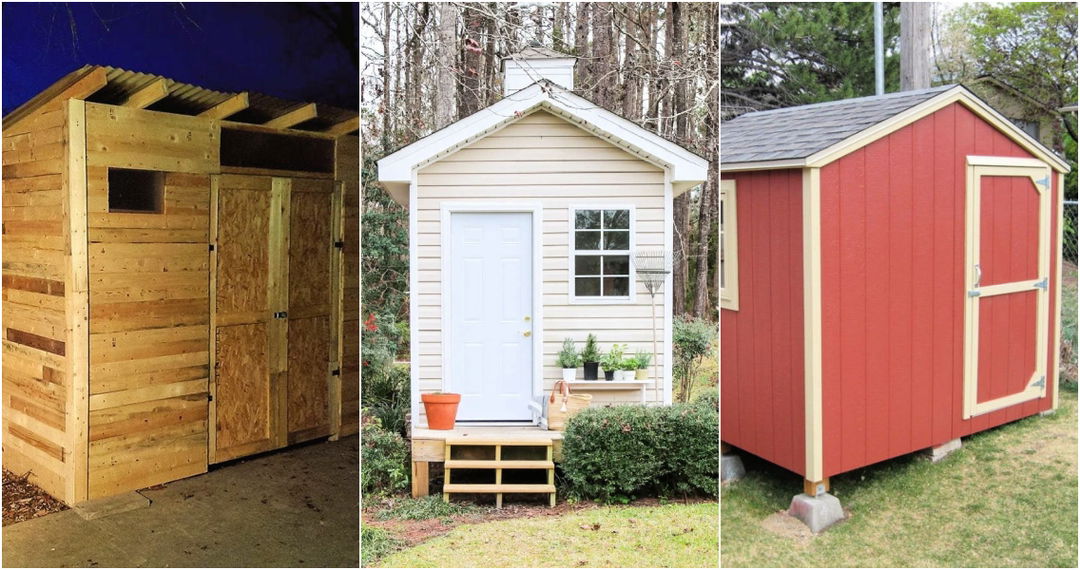
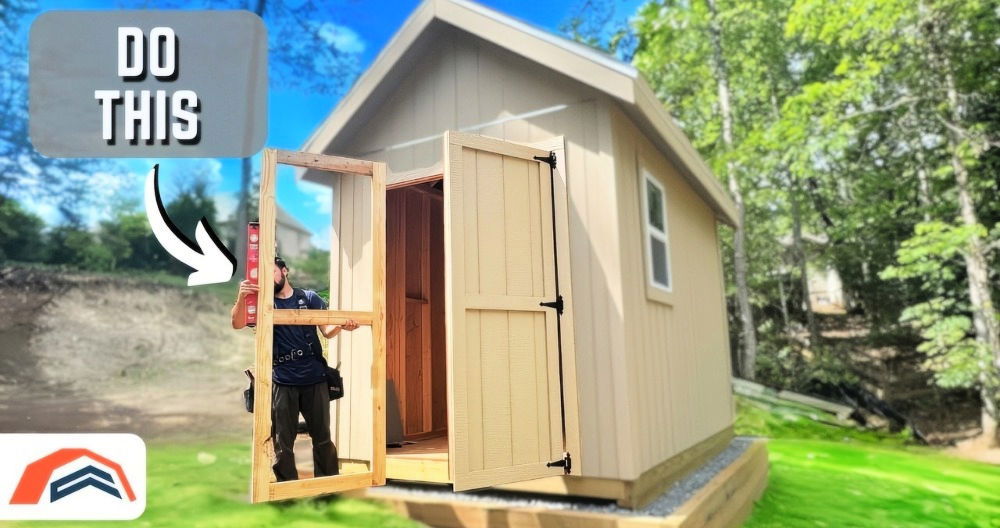
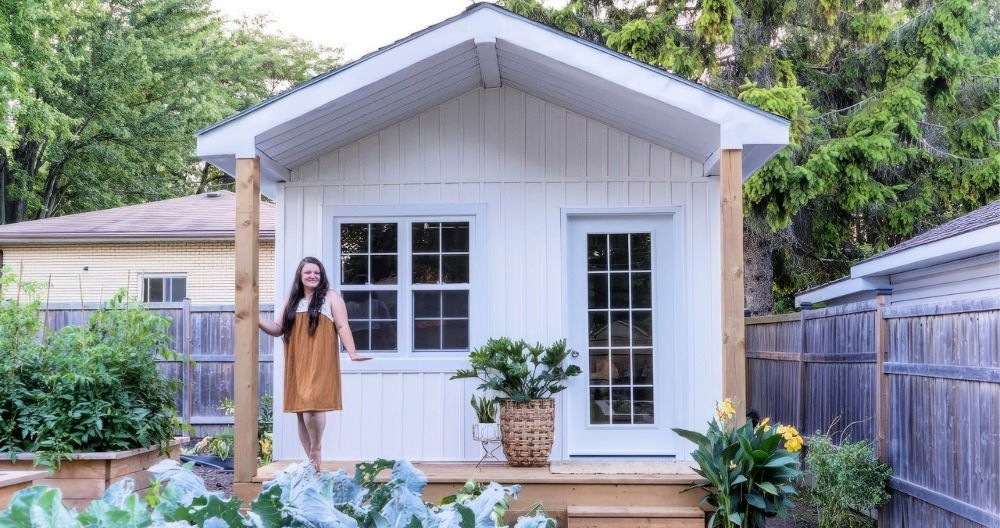
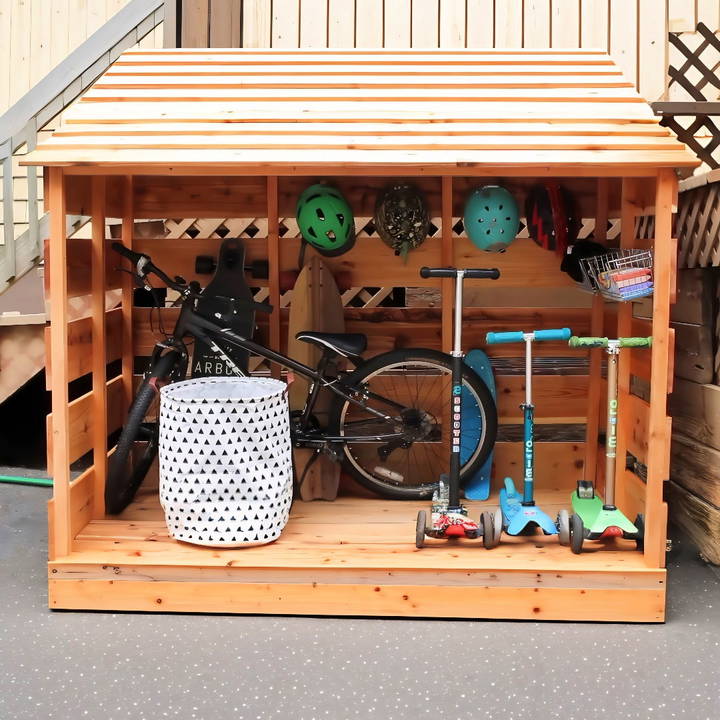
Building a bike storage shed for your outdoor space can be a fun and rewarding project, even for those with basic woodworking skills. I recently took on this challenge to give my kids a dedicated space to store their outdoor toys, bikes, and scooters. My garage is also my workshop, filled with tools and equipment that I don't want the kids playing around.
So, I decided to build a cedar shed, and while the process wasn't without its mistakes, I learned a lot along the way. Here's my step-by-step guide to building a DIY bike shed, along with my personal tips, lessons learned, and suggestions for anyone looking to take on a similar project.
Why Build a DIY Bike Shed?
Building your own bike storage shed not only provides a functional outdoor storage solution but also offers a sense of accomplishment. For me, it was about making a safe space where my kids could easily access their outdoor toys without having to rummage through my garage. The cedar shed is durable, weather-resistant, and looks great in the backyard. Moreover, by building it myself, I could customize the design to fit our specific needs and space constraints.
Materials Needed for the DIY Bike Shed
Before starting, it's essential to gather all the necessary materials. Here's a breakdown of what I used and why each material is important:
- Pressure-Treated Wood (for the Base): Essential for the shed's foundation as it will come into direct contact with the ground, offering resistance to moisture and pests.
- 2x2 Lumber (for the Frame): Lightweight yet sturdy, 2x2 lumber is perfect for making the frame of the shed without making it too heavy or bulky.
- Cedar Planks (for the Exterior): Cedar is naturally resistant to rot and insects, making it an excellent choice for outdoor structures. Plus, it adds a pleasant aesthetic.
- Circular Saw: A versatile tool for making both straight and angled cuts.
- Clamps: Essential for holding pieces in place during assembly.
- Jigsaw: Useful for making precise cuts, especially when working with notches.
- Screws and Nails: Used for attaching different parts of the structure securely.
- Wood Glue: Provides additional stability and strength to the connections.
- Thompson's Water Seal (Cedar Color): To protect the wood from the elements and enhance the natural beauty of the cedar.
Step by Step Instructions
Learn how to build a DIY bike shed with our step-by-step instructions. From planning to finishing touches, get practical tips and avoid common mistakes.
Step 1: Planning and Preparing Your Workspace
The first step in any DIY project is planning. I can't stress enough how important it is to have a clear plan before starting. Initially, I made the mistake of not measuring correctly and ended up with a few issues that could have been avoided with better planning. Measure the area where you plan to build the shed and sketch out your design. Think about the shed's size, shape, and the number of bikes or toys it needs to accommodate.
My Lesson Learned: Start by Laying Out Your Cuts
To streamline the process, I decided to cut all the pieces at once. I used my circular saw and a homemade cutting guide to ensure straight, accurate cuts. The guide I made was a simple right-angle jig that saved me a lot of time and effort. By clamping multiple boards together and cutting them simultaneously, I kept my cuts consistent and saved a significant amount of time.
Step 2: Building the Base
The base is the most critical part of the shed, providing the foundation upon which everything else rests. I used pressure-treated wood for the base because it's designed to resist rot and insect damage, making it perfect for outdoor use.
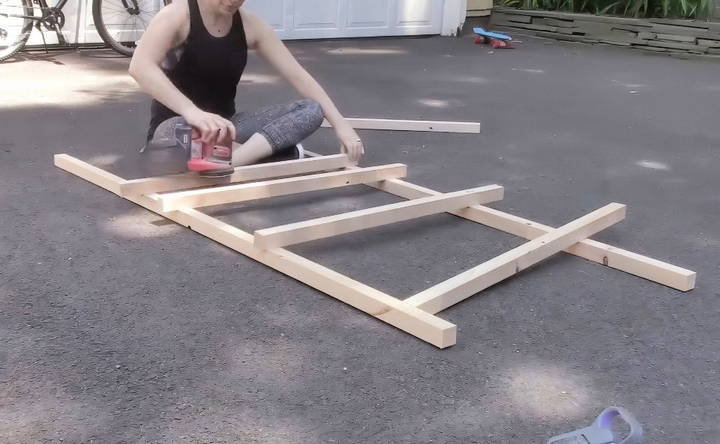
- Cut and Assemble the Base Frame: After cutting the pieces to size, I started by assembling the base frame. I used both screws and wood glue to ensure a sturdy foundation.
- Attaching the Uprights: One mistake I made was assembling the sides before attaching them to the base. Instead, I should have attached the two upright pieces to the base first, which would have provided better support and alignment.
My Tip: Double Check Your Measurements
One of my major mistakes during this stage was not accounting for the difference between outside and inside measurements, causing the sides to bow out at the top. I ended up having to disassemble and trim off an inch and a half from each end to correct this. Always double-check your measurements, especially when working with angles and joints.
Step 3: Building the Frame
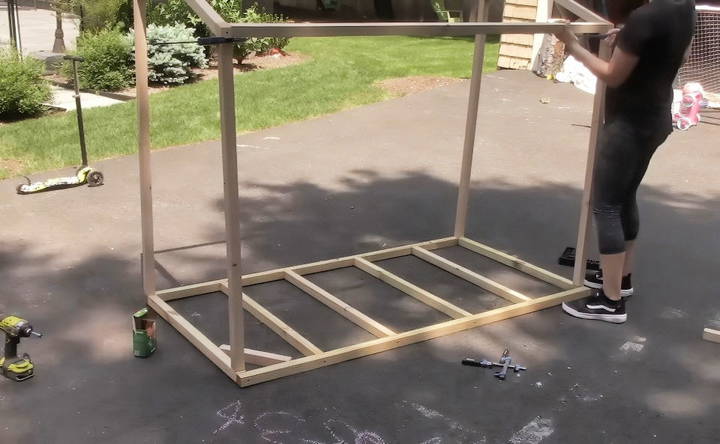
With the base ready, it was time to build the frame of the shed. I used 2x2 lumber for this, which is easy to handle and provides sufficient strength for a small shed.
- Cutting the Angled Roof Supports: I wasn't sure of the exact angle to cut the roof supports but settled on 22.5 degrees, which seemed to work well. After cutting, I sanded all the pieces to smooth out any rough edges.
- Assembling the Sides: After some trial and error, I found that attaching the horizontal stretcher pieces first helped in maintaining the correct alignment of the uprights.
- Roof Supports: Attaching the roof supports was straightforward once I had the frame properly aligned. I ensured they were square to each other to provide a solid base for the roof panels.
Step 4: Attaching the Cedar Panels
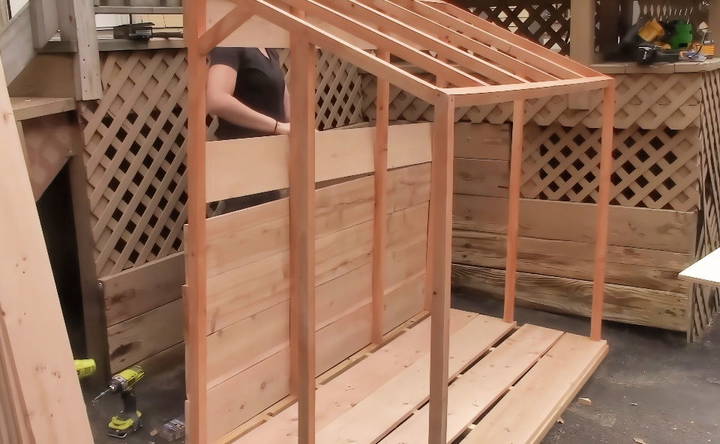
For the exterior, I chose cedar planks because of their durability and natural resistance to weather elements. Installing them required careful planning to ensure even spacing and alignment.
- Cutting the Panels to Size: This part was relatively easy but required precision. I first attached the panels using nails, but found that screws were much more efficient and provided a more secure hold.
- Adjusting for Spacing: To maintain even spacing between the panels, I cut a spacer based on the measurements of the available space. This method ensured uniform gaps, although I later realized I preferred smaller gaps. Unfortunately, I ran out of material and decided to stick with the wider gaps.
My Experience: Importance of Material Planning
I realized that it's better to overestimate the amount of material you'll need. Running out of material halfway through can force you into making compromises. However, I found that the larger gaps still provided a sturdy structure and allowed for better ventilation, which is a plus for outdoor storage.
Step 5: Installing the Roof
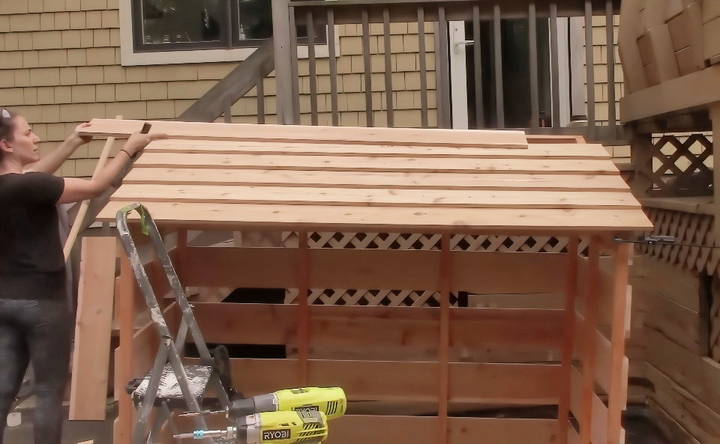
The roof is perhaps the most crucial part of the shed as it protects everything inside from the elements. I chose bevel cedar siding for the roof because it matched the aesthetic of our outdoor space and seemed simple enough for a beginner like me to install.
- Overlapping the Siding: After some research, I learned that cedar siding should overlap by at least an inch to ensure water runoff. I marked all the boards and carefully aligned them before nailing them into place.
- Dealing with Angles: For the angled cuts at the top, I used an angle finder to get the correct angle, which worked perfectly when cutting the panels while they were attached.
- Exploring Other Roofing Options: If you are looking for alternatives, there are many other roofing materials to consider, such as asphalt, metal, or even living roofs, depending on your preference and budget.
Step 6: Finishing Touches
Once the structure was complete, I applied Thompson's Water Seal in a cedar color to protect the wood from moisture and UV damage. It was easy to apply and gave the cedar a rich, natural finish. However, this sealant may need to be reapplied annually, which I'm okay with given the ease of application.
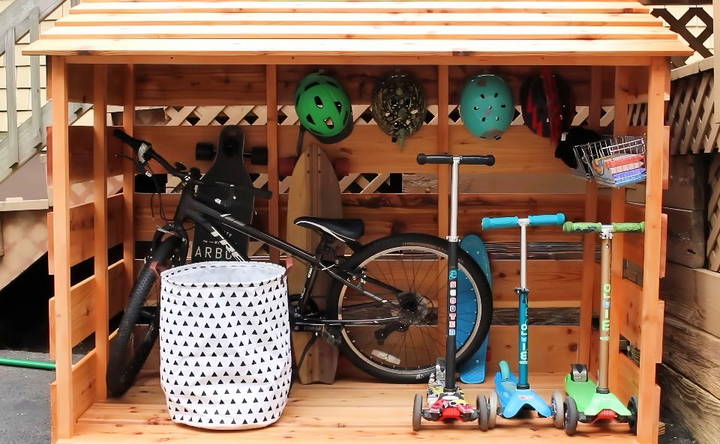
- Adding Accessories: To maximize the utility of the shed, I added hooks and holders for storing my kids' helmets, chalk, and safety gear. This made the shed more organized and functional.
- Evaluating Potential Issues: One area of concern was the gap at the roof edge. I'm not an expert in roofing, so I'm still unsure if this will hold up well during heavy rains. I may need to add a drip edge in the future, but for now, I'll wait and see how it performs.
Customization Ideas
Customizing your DIY bike shed can make it more functional and visually appealing. Here are some practical and creative ideas to consider:
Security Features
- Locks and Alarms: Adding a sturdy lock is essential for keeping your bikes safe. Consider using a combination lock or a padlock with a key. For added security, install a battery-operated alarm system that triggers if the shed door is tampered with.
- Motion Sensor Lights: Install motion sensor lights around the shed. These lights will deter potential thieves by illuminating the area when movement is detected.
Aesthetic Enhancements
- Paint and Finishes: Choose a weather-resistant paint to protect the shed from the elements. You can match the color to your house or garden for a cohesive look. Adding a clear sealant will provide extra protection against moisture.
- Decorative Elements: Personalize your shed with decorative elements like window boxes, shutters, or even a small garden around the base. These touches can make the shed blend seamlessly into your backyard.
Functional Additions
- Shelving and Hooks: Install shelves and hooks inside the shed to organize tools, helmets, and other biking accessories. This will keep the floor space clear and make it easier to find what you need.
- Bike Racks: Adding bike racks inside the shed can help keep your bikes upright and prevent them from getting scratched or damaged. You can build simple wooden racks or purchase metal ones.
Environmental Considerations
- Green Roof: If you're environmentally conscious, consider adding a green roof to your shed. This involves planting vegetation on the roof, which can help with insulation and reduce rainwater runoff.
- Solar Panels: Installing solar panels on the roof can provide a sustainable energy source for lighting and other small electrical needs inside the shed.
Comfort and Convenience
- Ventilation: Ensure your shed has proper ventilation to prevent moisture buildup, which can damage your bikes. You can add vents or small windows that can be opened for airflow.
- Lighting: Good lighting is crucial, especially if you'll be accessing the shed in the early morning or late evening. Consider installing LED lights, which are energy-efficient and provide bright illumination.
Seasonal Adjustments
- Insulation: If you live in an area with extreme temperatures, consider insulating the shed. This will protect your bikes from the cold in winter and the heat in summer.
- Weatherproofing: Apply weatherproofing treatments to the shed's exterior to protect it from rain, snow, and UV rays. This will extend the life of the shed and keep your bikes in good condition.
Enhance your bike shed to make it secure, functional, and attractive, protecting your bikes and adding property value.
Maintenance Tips
Maintaining your DIY bike shed is crucial to ensure it remains in good condition and continues to protect your bikes. Here are some practical tips to help you keep your shed in top shape:
Regular Upkeep
- Cleaning: Regularly clean the shed inside and out. Sweep the floor to remove dirt and debris. Wipe down surfaces with a damp cloth to prevent dust buildup. This will keep the shed looking neat and prevent damage from dirt and grime.
- Inspect for Damage: Periodically check the shed for any signs of damage. Look for cracks, leaks, or any structural issues. Early detection of problems can prevent them from becoming major repairs.
Seasonal Care
- Weatherproofing: Apply a weatherproof sealant to the exterior of the shed. This will protect it from rain, snow, and UV rays. Reapply the sealant as needed, especially before the rainy season.
- Ventilation: Ensure the shed is well-ventilated to prevent moisture buildup. Moisture can lead to mold and mildew, which can damage your bikes and the shed itself. Open windows or vents regularly to allow air circulation.
Protecting Against Pests
- Seal Gaps: Check for any gaps or holes in the shed and seal them. This will prevent pests like rodents and insects from entering. Use caulk or weatherstripping to close any openings.
- Pest Control: If you notice signs of pests, take action immediately. Use traps or natural repellents to keep them at bay. Regularly inspect the shed for any signs of infestation.
Structural Maintenance
- Roof Inspection: Regularly inspect the roof for any signs of wear and tear. Look for loose or missing shingles and repair them promptly. A well-maintained roof will prevent leaks and water damage.
- Foundation Check: Ensure the foundation of the shed is stable. Look for any signs of shifting or settling. If you notice any issues, address them immediately to prevent further damage.
Paint and Finish
- Repainting: Over time, the paint on your shed may fade or peel. Repaint the shed as needed to keep it looking fresh and to protect the wood from the elements. Choose a high-quality, weather-resistant paint for the best results.
- Protective Coating: Apply a protective coating to the shed's exterior. This will add an extra layer of protection against moisture and UV rays. Reapply the coating every few years to maintain its effectiveness.
Interior Organization
- Shelving and Storage: Keep the interior of the shed organized. Install shelves and hooks to store tools and biking accessories. This will make it easier to find what you need and keep the shed tidy.
- Floor Protection: Place mats or rugs on the floor to protect it from scratches and dirt. This will also make it more comfortable to walk on and easier to clean.
By following these maintenance tips, you can ensure your DIY bike shed remains in excellent condition for years to come. Regular upkeep will not only protect your bikes but also extend the life of the shed.
FAQs About DIY Bike Sheds
Discover essential answers to FAQs about DIY bike sheds. Learn about materials, costs, and best practices for building your bike shed.
The space needed depends on the number of bikes you plan to store. A small shed for one or two bikes might only need a few square meters. For multiple bikes, consider a larger shed with enough room to move around. Ensure the shed is placed in a dry, level area to protect your bikes from the elements.
Building a bike shed protects your bikes from weather damage, theft, and clutter. It also extends the lifespan of your bikes by keeping them dry and secure. Additionally, a bike shed can free up space in your garage or home, making it a practical storage solution.
Yes, you can customize your bike shed to fit your needs. Add shelves for helmets and gear, hooks for tools, or even a small workbench for bike repairs. You can also paint or stain the shed to match your home or garden decor.
Permit requirements vary by location. In some areas, small sheds under a certain size may not require a permit. However, it's always best to check with your local building authority to ensure compliance with any regulations or zoning laws.
To keep your bike shed organized, consider installing hooks for hanging bikes and shelves for storing accessories. Use labeled bins for small items like tools and spare parts. Keeping the floor clear and using vertical space efficiently can help maintain an organized and functional shed.
Final Thoughts: What I Learned
Building this DIY bike storage shed was a fantastic learning experience. While I did make several mistakes along the way, such as misjudging measurements and running out of material, each error taught me something valuable. The most important takeaway is the need for meticulous planning and measuring before starting any build. It's always better to measure twice and cut once, as the old saying goes.
I'm pleased with how the shed turned out, and most importantly, my kids now have a dedicated space for their outdoor toys. If you're considering building a similar shed, remember to take your time, plan carefully, and don't be afraid to learn from your mistakes. The satisfaction of completing a project like this is well worth the effort.


