Making my own DIY bird bath was a challenge I didn't know I needed. At first, I thought it would be a simple project. I gathered materials like a large shallow bowl and some stones from around my yard. The aim was to make a spot where birds could come, drink, and bathe in peace.
As I assembled the bird bath and placed it in my garden, I realized this was more than just a project. It was about making a welcoming space for nature in my backyard. My hope was that this small gesture would bring more life and beauty into our outdoor space. With the bird bath set up, I stood back, excited to see the first feathered visitor make use of it.
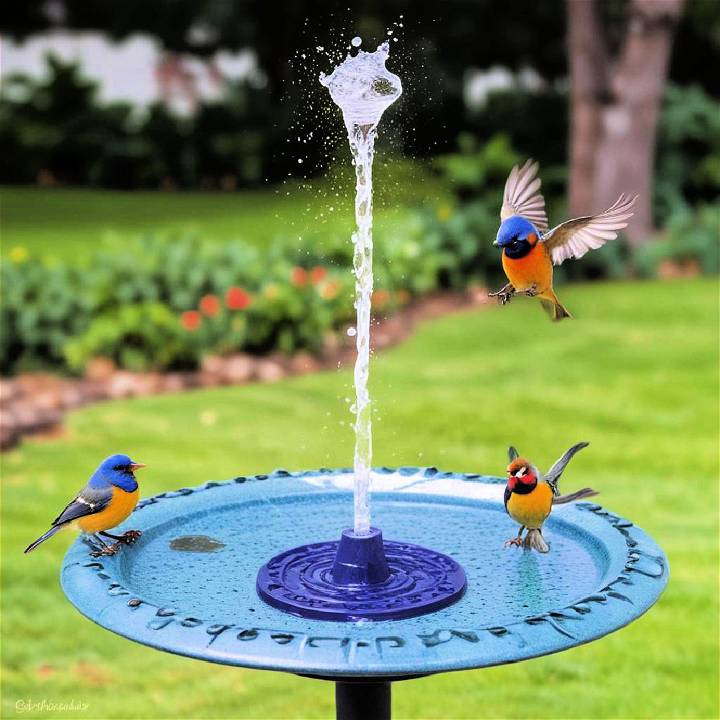
I'm here to share this experience, hoping it inspires you to make your own bird bath and bring a piece of nature closer to your home.
Materials Needed:
- Soda Bottle: Any size or color will do, but a clear one might just be your best bet.
- Turkey Baster: Available at almost any store — I found mine at Walmart for a couple of dollars. It comes with a handy brush that is useful for feeder cleaning.
- Solar Fountain Kit: These are widely available online or in garden shops.
Why These Materials?
- Soda Bottle: It serves as the water reservoir. Affordable, easily replaceable, and almost always available at home.
- Turkey Baster: It becomes the dispensing end of the fountain, perfect for the birds to drink from.
- Solar Fountain Kit: It powers the fountain, making it energy-efficient and convenient to place anywhere under the sun.
Steps to Make Your DIY Bird Bath:
Learn how to make a DIY bird bath in just a few simple steps. From preparing the soda bottle to assembling the fountain, follow along for an easy bird bath setup.
Preparing the Soda Bottle
- Trim the Bottle: Using a soldering iron, pierce a hole to start cutting along a marked line around the bottle. Ensure smooth edges that birds can safely interact with.
- Remove Labels: For aesthetic purposes, peel off any labels. A clean, transparent bottle can be more visually appealing to your feathered guests.
- Make Notches: Using a soldering iron, make a small notch on the side of the bottle. This helps keep the solar fountain kit's cord in place.
Setting Up the Turkey Baster
- Making a Hole: You'll need to make a hole at the top of the turkey baster for the tubing from the solar fountain kit. This can be done either with scissors or a soldering iron, depending on your comfort level.
- Insert Tubing: Whether you opt for the provided straw in the kit or procure separate tubing, insert it through the turkey baster hole carefully.
Assembling the Fountain
- Attach the Turkey Baster: Securely attach it to the soda bottle. This will be where the magic happens — water will flow through this, mimicking a gently bubbling creek that hummingbirds love.
- Adjust the Solar Panel: Connect the solar fountain kit following the manufacturer's instructions. Position the solar panel in a sunny spot to ensure the fountain's continuous operation.
- Fill with Water and Test: Before sealing everything tightly, fill the soda bottle with water and test the fountain to ensure it works smoothly. Adjust the tubing length as necessary, cutting any excess.
- Final Touches: Add some puffy fabric paint or similar non-toxic materials to the edges of the bottle for an artistic touch and additional perch spots for the birds.
Additional Tips:
- Experiment with Placement: Find a spot that receives ample sunlight throughout the day but also provides enough cover for the birds to feel secure.
- Maintenance: Regularly clean the fountain and refill it with fresh water to keep it inviting and safe for the birds.
- Observation: Enjoy the view! Hummingbirds are more likely to visit the fountain during early morning or late afternoon hours.
Seasonal Adjustments for Your DIY Bird Bath
Making a bird bath that can withstand the changing seasons is crucial for providing a reliable water source for birds throughout the year. Here's how you can ensure your DIY bird bath remains functional and inviting, no matter the weather.
Preparing for Summer
- Keep it Cool: During hot months, water can evaporate quickly. Place your bird bath in a shaded area to slow evaporation and keep the water cooler for birds.
- Add Fresh Water Regularly: Refill your bird bath with fresh water every day to prevent algae growth and maintain cleanliness.
Transitioning to Autumn
Clean and Check: As leaves begin to fall, they can clutter the bird bath. Regularly remove debris and check for any cracks or damage that may have occurred during the summer.
Winterizing Your Bird Bath
- Insulate: To prevent freezing, wrap the exterior of your bird bath with insulating materials like burlap or foam.
- Use a Heater: Consider installing a small, safe heater designed for bird baths to keep the water from freezing.
Welcoming Spring
- Deep Clean: Give your bird bath a thorough cleaning to remove any grime accumulated over the winter.
- Restore Water Levels: Ensure your bird bath is filled to the appropriate level for birds to bathe and drink comfortably.
By following these tips, you'll provide a welcoming spot for birds year-round, and your bird bath will become a focal point of natural beauty in your garden.
Attracting Diverse Bird Species to Your Bird Bath
Welcoming a variety of birds to your garden enriches the environment and provides endless moments of natural beauty. Here's how you can make your DIY bird bath a hotspot for diverse bird species.
Location, Location, Location
- Find the Sweet Spot: Place your bird bath where birds feel safe. A quiet corner, away from foot traffic but with a clear view of the sky, is ideal.
- Nearby Perches: Birds prefer to survey the area before splashing in. Position your bird bath close to trees or shrubs where they can perch.
Water Features
- Keep it Shallow: Birds don't need deep water. An inch or two is perfect for them to bathe and drink without fear.
- Add Some Movement: A gentle fountain or dripper can make the water more attractive and audible to birds, drawing them in.
Food Sources
- Supplement with Feeders: Nearby bird feeders with a variety of seeds will encourage birds to stop by your bird bath.
- Natural Food Plants: Consider planting berry bushes or nectar-rich flowers to provide natural food sources.
Safety Measures
- Predator Deterrents: Ensure the bird bath isn't too close to potential hiding spots for predators.
- Cleanliness: Regularly clean the bird bath to prevent the spread of diseases among the bird population.
FAQs for Your DIY Bird Bath
When it comes to making a DIY bird bath, many enthusiasts have questions. Here's a helpful section addressing some of the most common inquiries, designed to make the process as clear and straightforward as possible.
What materials are safe for birds?
Use natural, non-toxic materials like terracotta, stone, or recycled glass. Avoid metals that can heat up in the sun or treated woods that may leach chemicals.
How deep should the water be?
Keep the water shallow, no more than 1-2 inches deep. This depth is safe for small birds and allows even the tiniest visitors to enjoy a dip without danger.
How often should I clean my bird bath?
Clean your bird bath at least once a week to prevent algae buildup and maintain a healthy environment for the birds.
How do I keep mosquitoes away?
Change the water every few days and consider adding a water agitator or fountain to discourage mosquitoes from laying eggs.
Can I use my bird bath in winter?
Yes, but you may need a heater to prevent the water from freezing. Insulate the bath or use a solar-powered heater designed for outdoor use.
Closing Thoughts
In the end, seeing birds flock to the homemade bath was incredibly rewarding. It's a simple joy, but it's a reminder of the impact we can have on our environment and the creatures that share it with us. I encourage anyone to try this simple project; it's a small way to connect with nature and add beauty to your garden.


