Making a homemade DIY bird feeder for kids can be a fun and educational activity. It encourages kids to engage with nature while learning the basics of crafting. This project is perfect for families wanting to spend quality time together. With simple materials and steps, children can make a DIY bird feeder that will attract birds to their garden, providing endless hours of bird-watching joy.
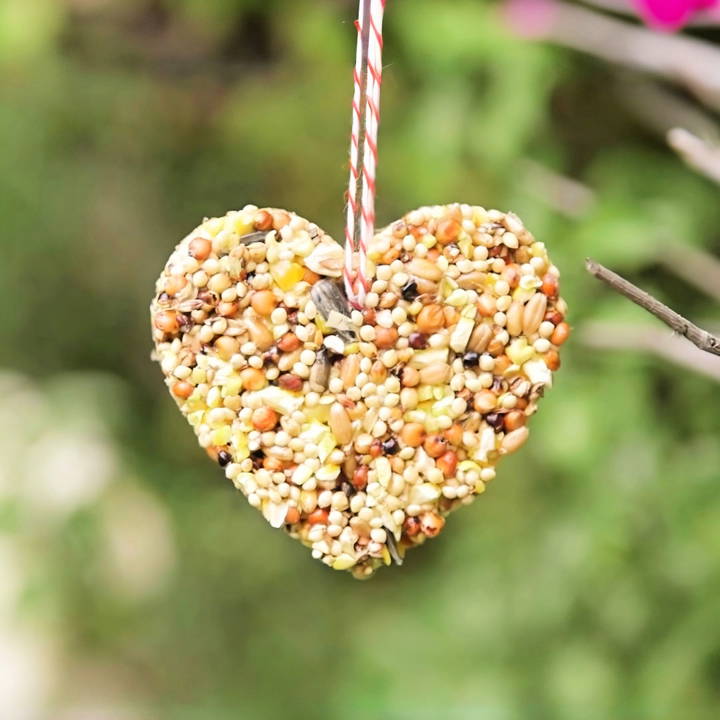
A DIY bird feeder for kids requires common household items, making it both accessible and affordable. This project not only teaches resourcefulness but also instills a love for wildlife. By crafting a homemade bird feeder, kids can witness the results of their work and understand the importance of caring for the environment.
Ready to get started? Let's move on to the materials and steps needed to make a homemade bird feeder that birds will love.
Why Make a Bird Feeder?
Making a bird feeder isn't just about giving our feathered friends some food. It's an excellent way for kids (and adults alike) to connect with nature, learn about different bird species, and understand the importance of caring for other creatures. Plus, it's a simple, rewarding craft that doesn't need a plethora of materials or complex skills, making it accessible to everyone.
Tools and Materials: Keeping It Simple
You'll need just a few things to get started:
- Bird Seed: Opt for a mix that caters to a variety of birds. This is the main attraction for your feathered guests.
- Gelatin: This acts as a binder for the bird seeds, holding everything together.
- Cookie Cutters: These will shape your bird feeders. Feel free to pick fun shapes that your kids love.
- Boiling Water: Needed to dissolve the gelatin.
- Spoon and Bowl: For mixing the ingredients.
- Craft Mat or Parchment Paper: To keep your working surface clean.
- String and Needle (or a Toothpick): For hanging your finished bird feeders.
Why These Materials?
Each material plays a crucial role in this craft. Birdseed feeds the birds, obviously, but the variety in the mix also invites different bird species to your yard. Gelatin, harmless to birds, binds the seeds together, ensuring they don't just fall apart. Cookie cutters allow for creative shapes, making each feeder unique and fun to look at. Finally, the string ensures that once done, these feeders can hang proudly on trees, inviting birds into your garden.
Step by Step Instructions
Make a DIY bird feeder for kids with our easy step-by-step instructions! Engage children in this fun and educational home activity today!
Step 1: Gelatin Mixture
First, dissolve one pack of gelatin in a quarter cup of boiling water. Stir until it's completely dissolved. This step is crucial as it ensures your birdseed sticks together.
Step 2: Mix in the Birdseed
Add three-quarters of a cup of birdseed to the gelatin mixture. Mix thoroughly. You'll notice it doesn't solidify immediately, but that's okay. Ensure the seeds are evenly coated with the gelatin mixture.
Step 3: Shape Your Feeders
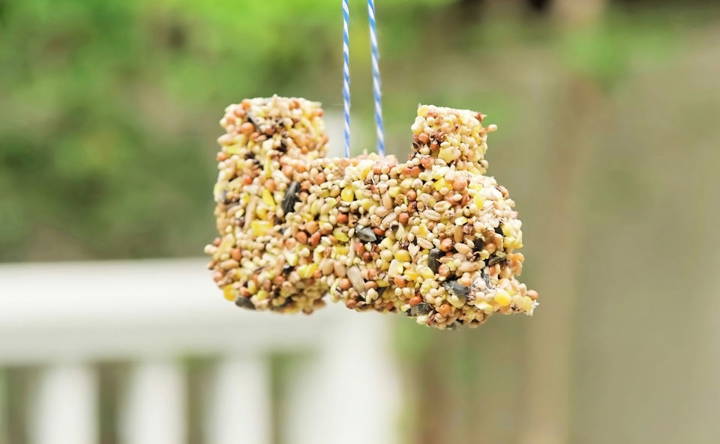
Place your cookie cutters on a craft mat or parchment paper. Scoop the birdseed mixture into the cookie cutters, pressing down firmly. You need to pack the seeds tightly, filling every nook to shape the feeder properly.
Step 4: Let Them Set
Leave your filled cookie cutters undisturbed for a few hours to harden. For quicker results, you can refrigerate them.
Step 5: Thread the String
Once hardened, gently pop the birdseed shapes out of the cookie cutters. Thread a string through each feeder. If you find it challenging to make a hole at this stage, remember to make one before the mixture sets completely next time.
Step 6: Hang and Enjoy
Find a nice spot in your garden or on your balcony to hang the bird feeders. Then, watch and wait for the birds to visit!
Personalization Ideas for Kid-Friendly Bird Feeders
Building a bird feeder lets kids feed birds, be creative, and connect with nature. Here are some fun personalization ideas:
- Choose a Theme: Encourage kids to pick a theme they love, like their favorite colors, seasons, or cartoon characters. This can guide their choices in design and decoration.
- Decorate with Nature: Use natural materials like leaves, twigs, and pinecones to decorate the bird feeder. It's a great way to blend the feeder with the natural environment and teach kids about using sustainable resources.
- Paint and Color: Provide non-toxic, weather-resistant paints for kids to add a splash of color to their bird feeders. They can paint patterns and pictures or even camouflage the feeder to see if it attracts different birds.
- Name That Feeder: Just like pets, kids can name their bird feeders. This adds a personal touch and can make them more invested in taking care of their creation.
- Add Fun Elements: Attach small bells or wind chimes that make gentle sounds when birds visit. This auditory cue can alert kids to the presence of birds and add an element of surprise.
- Educational Markings: Incorporate learning by adding numbers, letters, or simple words to the feeder. As birds land, kids can practice reading or counting.
- Photo Journal: Set up a camera or use a smartphone to take pictures of the birds that visit. Kids can make a photo journal, documenting the different species and their visits over time.
The goal is to make each child's bird feeder unique, fostering pride and ownership. Personalizing them helps kids enjoy creativity, appreciate wildlife, and care for the environment.
Maintenance and Care for Your DIY Bird Feeder
Taking care of a bird feeder is important for the birds' health and safety. Here's how you can maintain and care for your DIY bird feeder in simple steps:
- Regular Cleaning: Clean the bird feeder once a week. Use warm, soapy water and rinse it well to remove any old food or droppings.
- Check for Damage: Look for any damage or sharp edges that could hurt the birds. If you find any, fix them right away.
- Keep It Dry: Make sure the bird food stays dry. Wet food can grow mold and make birds sick. If it rains, bring the feeder inside or cover it.
- Refill Food Often: Fill the feeder with fresh food regularly. This will keep the birds coming back and ensure they always have a healthy meal.
- Watch for Pests: Sometimes, pests like squirrels or rats might come to the feeder. If this happens, look for ways to keep them away without hurting them.
- Location: Place the feeder where you can see it from a window, but not too close. This way, you can enjoy watching the birds without scaring them.
By following these tips, you'll ensure your bird feeder remains a safe and clean place for birds to visit.
FAQs About DIY Bird Feeder for Kids
Discover answers to faqs about DIY bird feeders for kids. Learn materials, steps, and safety tips to make a fun and educational project!
Kids can get creative by:
Painting Popsicle stick feeders in bright colors
Adding glitter or sequins for sparkle
Using natural items like feathers or leaves for decoration
Always ensure decorations are safe for birds and the environment.
Absolutely! Making bird feeders can teach children about:
Nature and wildlife
The importance of ecosystems
Craftsmanship and creativity
Responsibility in caring for other living beings
It’s a great hands-on learning experience.
To ensure safety:
Avoid sharp edges or small parts that can be swallowed
Use food-safe materials
Ensure the feeder is sturdy and won’t fall
Place the feeder in a safe location away from predators
Remember, the goal is to provide a safe haven for our feathered friends.
Recycling is not only good for the planet, but it's also a creative way to craft a bird feeder. Here's how you can use recycled materials:
Clean plastic bottles: Use them as the main structure for the feeder. Cut openings for the birds to access the seeds and add perches using wooden spoons.
Milk cartons: A cleaned-out milk carton can be cut open to make a simple feeder. Decorate it with non-toxic paints or markers.
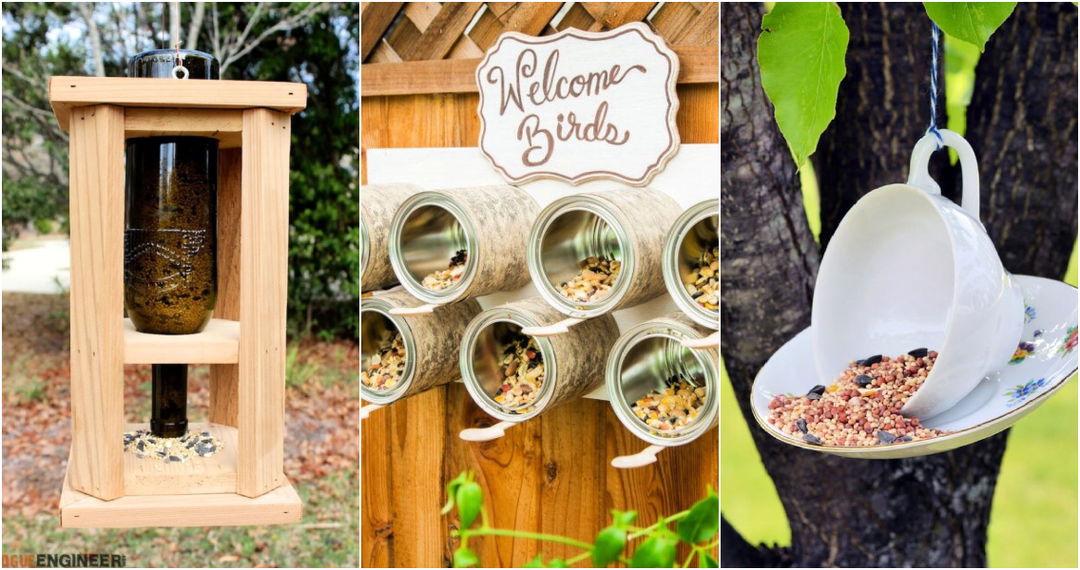
Old teacups or dishes: Glue a teacup to a saucer, fill it with birdseed, and hang it up with a string or ribbon.
The best food for your bird feeder will attract a variety of birds and provide them with good nutrition:
Black oil sunflower seeds Attract many types of birds and are easy to eat.
Suet: Good for insect-eating birds, especially in winter.
Millet: Attracts ground-feeding birds like doves and sparrows.
Nectar: For hummingbirds, you can make a sugar solution (4 parts water to 1 part sugar).
Conclusion:
Wrapping up, making a homemade DIY bird feeder for kids is a fantastic way to get them involved with nature. This simple and educational project can spark creativity, teach responsibility, and provide endless fun. By making your own DIY bird feeder for kids, you offer an opportunity to learn about birds and their habits. So gather your supplies and enjoy making a homemade bird feeder together!


