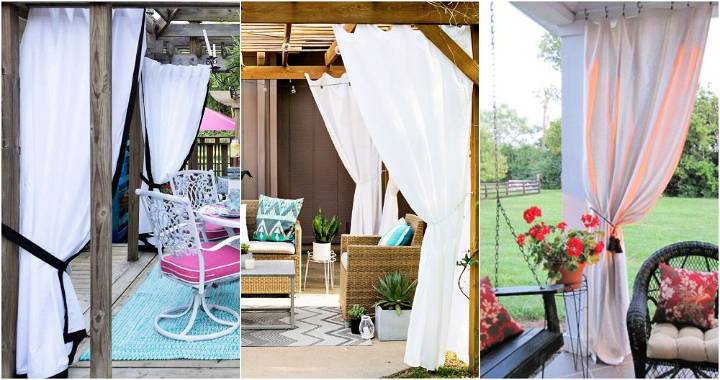
Making DIY blackout curtains brings true satisfaction. One day, my bedroom had too much light, and I couldn't sleep well. I decided to make my own blackout curtains. Gathering materials like thick fabric, a sewing machine, and curtain hooks was easy. It took a Sunday afternoon to finish, and the next night, sleep was perfect again. This simple project made a huge difference.
If making blackout curtains interests you, I'm here to help. Follow the easy steps below. You'll need some basic tools and a bit of time. This guide is clear and straightforward. Soon, your room can be darker, and you sleep better. Give it a try, and you'll see the benefits.
Understanding Blackout Curtains
Blackout curtains are more than just window coverings; they are a functional addition to any home that can significantly improve your living space. Here's what you need to know about them:
What Are Blackout Curtains?
Blackout curtains are designed to block out light completely. They are often made from heavy, dense fabrics that prevent sunlight from entering a room. This makes them ideal for bedrooms, nurseries, and media rooms where controlling light is essential.
Why Choose Blackout Curtains?
The primary reason for choosing blackout curtains is to make darkness in a room. Whether you're a night shift worker needing to sleep during the day, a parent with young children, or someone looking to enhance their home theater experience, blackout curtains can provide the dark environment you need.
Benefits of Blackout Curtains
- Improved Sleep Quality: By simulating nighttime, blackout curtains can help you fall asleep faster and stay asleep longer.
- Energy Savings: These curtains can help insulate your rooms, keeping them warmer in the winter and cooler in the summer, which can lead to lower energy bills.
- Noise Reduction: The thick material of blackout curtains can also help dampen outside noise, contributing to a quieter room.
- Protecting Interior: They protect furniture and floors from sun damage by blocking harmful UV rays.
How Do They Work?
Blackout curtains usually have several layers, including a dense foam layer that not only blocks light but also helps with insulation and noise reduction. Some options come with a reflective layer that further enhances their energy-saving properties.
Choosing the Right Blackout Curtains
When selecting blackout curtains, consider the following:
- Fabric Weight: Heavier fabrics block more light.
- Color: While darker colors generally block more light, today's technology allows even light-colored fabrics to effectively darken a room.
- Size: Ensure the curtains are large enough to cover the entire window area to prevent light leaks.
The effectiveness of blackout curtains depends on proper installation. They should be mounted close to the window frame and extend beyond the window's width and height to ensure complete coverage.
Gathering Your Materials
Discover why each material is essential in our 'gathering your materials' guide. Prepare effectively with detailed explanations for every item.
Why Each Material is Needed:
- Blackout Fabric: The main component. Blackout fabric will block out light and provide the darkening effect. I bought mine from a local fabric store on sale, which saved me money. Ensure you get enough to cover your window size.
- Curtain Rings with Clips: These are essential for hanging your blackout fabric behind your existing curtains. They attach easily and allow for quick adjustments.
- A Measuring Tape: To measure the window and the fabric ensures you buy and cut the right amount.
- Scissors (optional): If you need to trim the fabric, though asking the store to cut it for half might eliminate this need.
Step by Step Instructions
Learn how to make DIY blackout curtains with our step-by-step guide. Perfect for blocking light and improving your sleep.
1. Measure Your Window
Begin by measuring the width and height of your window to determine how much blackout fabric you'll need. It's better to have a little extra than not enough. My window required 4.5 yards to make two panels.
2. Purchase Your Blackout Fabric
With your measurements in hand, head to your local fabric store. Look out for sales or discounts, as blackout fabric can sometimes be pricier than regular material. I chose a lighter weight blackout fabric because it was easy to handle and was on a 40% off sale.
3. Get the Fabric Cut
If you're like me and sewing is not your forte, ask the store to cut the fabric in half to make two panels based on your measurements. This step makes the process simpler when you get home.
4. Hanging Your Blackout Curtains
Once home, take your curtain rings with clips and attach them to the top edge of the blackout fabric. The beauty of clips is their adjustability and ease of use. If you opted for fabric that's too long, you could fold the top over before clipping.
5. Clip and Hang Behind Existing Curtains
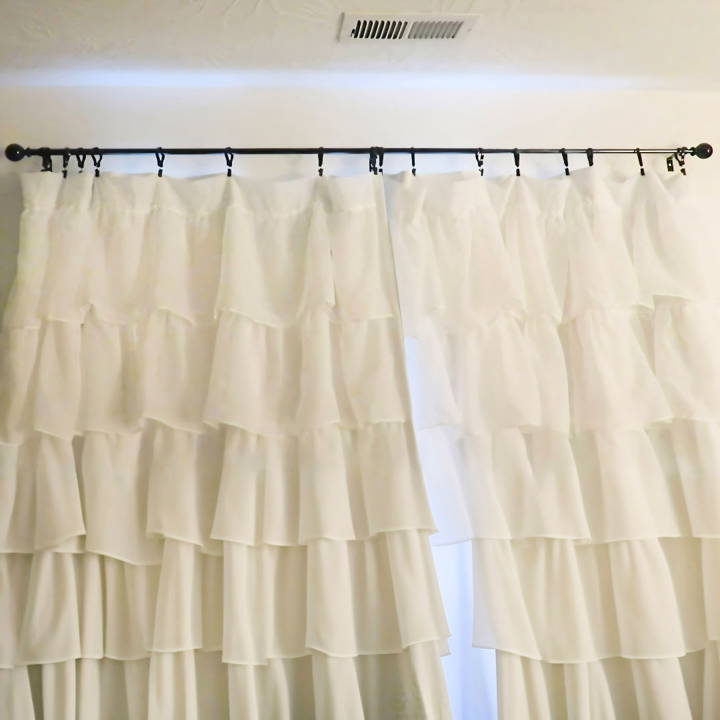
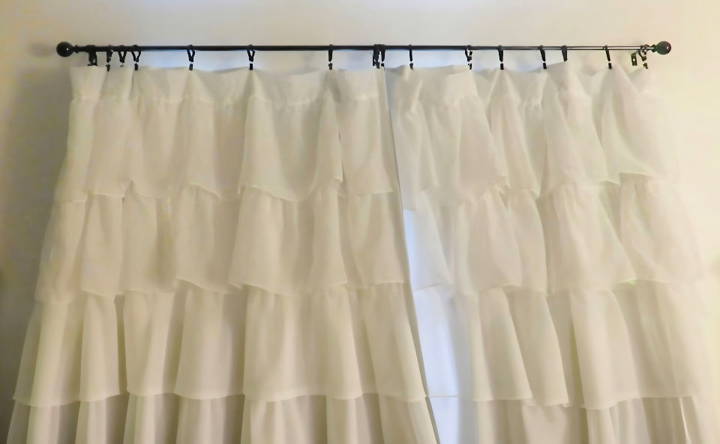
I had already installed pretty ruffled curtains in my room, so I simply clipped the blackout fabric panels behind these existing curtains. The curtain rings clipped onto the rod easily, and the transformation was almost instant.
Additional Tips for Success
- Choosing the Right Rings: Make sure the curtain rings with clips you choose are sturdy enough to hold the weight of the blackout fabric.
- No Need for Perfect Matches: Since the blackout fabric sits behind your decorative curtains, it doesn't need to match perfectly. Focus more on functionality.
- Adjustments Are Okay: After hanging, step back and look. You might need to adjust the clips for even distribution or to ensure full coverage.
Customization Ideas for Blackout Curtains
When it comes to blackout curtains, functionality meets creativity. You can tailor them to fit your style and room decor while maintaining their practical benefits. Here are some customization ideas to inspire you:
- Color and Pattern Selection: Choose colors and patterns that complement your room. You don't have to stick with dark colors; many light-colored fabrics can effectively block out light. Patterns can add a touch of personality and style.
- Layering: Layer your blackout curtains with sheer drapes. This allows you to enjoy natural light during the day and have complete darkness when needed. It also adds depth and texture to your windows.
- Trim and Accessories: Add decorative trim, such as ribbons or pom-poms, along the edges or bottom of your curtains for a unique touch. You can also use stylish tiebacks or holdbacks to keep the curtains open.
- DIY Prints: For those who love DIY projects, try adding hand-painted designs or stencils to plain blackout curtains. This can be a fun activity and a way to personalize your space.
- Combining Function with Fashion: Incorporate blackout fabric into existing curtains by sewing a liner onto the back. This way, you keep the look you love while gaining the benefits of blackout curtains.
- Top Treatments: Consider adding a valance or cornice board above your blackout curtains. This hides the hardware and gives a polished look to your window treatments.
- Thermal Backing: For added insulation, attach a thermal backing to your blackout curtains. This helps regulate room temperature and can save on energy costs.
- Magnetic Edges: Install magnets along the sides and bottom of your curtains to seal them against the window frame. This prevents light leaks and enhances the blackout effect.
- Adjustable Length: Make hemlines with Velcro or buttons, making it easy to adjust the length of your curtains without sewing. This is particularly useful for renters or frequent decor changers.
- Personalized Pulls: Swap out standard curtain pulls for something more personal, like vintage brooches or handmade tassels.
Customize blackout curtains to add a personal touch and boost functionality. Balance aesthetics with the practicality of blackout curtains.
Troubleshooting Common Issues with DIY Blackout Curtains
When making DIY blackout curtains, you might encounter a few hiccups along the way. Here's how to solve some of the most common issues:
Curtains Aren't Blocking Out All the Light
- Solution: Ensure that your curtains overlap the window frame on all sides. Use a wrap-around curtain rod or add extra width and length to your curtains. Check for any gaps and seal them with magnetic strips or draft stoppers.
Fabric Is Too Heavy for the Rod
- Solution: Heavy blackout fabric can sometimes cause the rod to sag. Opt for a sturdier, thicker curtain rod, or install additional support brackets to hold the weight.
Seams Are Visible
- Solution: If you can see the seams where panels are joined, it might be due to the fabric not being aligned properly. Use a seam ripper to carefully remove the stitching and resew the panels, making sure the edges match up perfectly.
Fabric Is Wrinkling
- Solution: Blackout fabric often has a foam backing that can wrinkle. Iron the fabric on a low heat setting with a protective cloth between the iron and the fabric. Alternatively, hang the curtains and use a handheld steamer to remove the wrinkles.
Curtains Don't Slide Easily
- Solution: If your curtains are sticking and not sliding smoothly, try using silicone spray on the rod, ensuring it's safe for the material of your rod and curtains. You can also opt for rings with clips for easier movement.
Blackout Liner Peeling Off
- Solution: If you've attached a blackout liner and it's peeling off, reattach it using fabric glue or fusible webbing tape that can be ironed on for a more secure bond.
Curtains Look Too Bulky
- Solution: Blackout curtains can look bulky due to the layers. To reduce bulkiness, choose a lighter fabric for the decorative layer or consider a professional-looking pinch pleat that compacts the fabric neatly.
Light Leaks at the Top
- Solution: Install a valance or a cornice box to cover the top of the window frame, or adjust the curtain rod higher to ensure the fabric covers the light gap.
Fixing these common issues ensures your DIY blackout curtains look good and work well. Patience and detail matter in DIY. If you face an unlisted problem, seek advice from DIY online forums.
Maintenance and Care for Blackout Curtains
Taking care of blackout curtains is straightforward, but it's important to do it right to maintain their effectiveness and appearance. Here's a simple guide to help you keep your blackout curtains in top condition:
- Regular Dusting and Vacuuming: Dust and dirt can accumulate on the fabric, so gently dust your curtains regularly with a soft cloth or use the upholstery attachment on your vacuum cleaner to remove surface dust.
- Spot Cleaning: For small stains, use a damp cloth with a little mild soap. Dab the stain gently rather than rubbing it to avoid damaging the fabric. Always test a small, inconspicuous area first to ensure the fabric's colorfastness.
- Washing Blackout Curtains: If your curtains are machine washable, follow the manufacturer's instructions carefully. Use cold water and a mild detergent, and set your washing machine to a gentle cycle. For non-washable curtains, consider taking them to a professional cleaner.
- Drying: Never wring out blackout curtains, as this can damage the lining. If machine drying is allowed, use a low heat setting. Otherwise, hang them out to dry naturally, away from direct sunlight, to prevent the backing from melting or warping.
- Ironing: If wrinkles persist after washing and drying, use a warm iron on the front side of the curtains only. Place a protective cloth between the iron and the blackout fabric to avoid heat damage.
- Avoiding Sun Damage: Even though blackout curtains are designed to block sunlight, the fabric can still suffer from prolonged exposure. Rotate your curtains occasionally to ensure even wear and to prevent fading on one side.
- Storage: When not in use, store your blackout curtains in a cool, dry place. Fold them loosely or roll them to avoid creases and place them in a breathable container, like a cotton bag, to protect them from dust and moisture.
By following these maintenance and care tips, your blackout curtains will continue to look great and function effectively for years to come.
FAQs About DIY Blackout Curtain
Discover essential FAQs about DIY blackout curtains, from materials needed to installation tips, enhancing sleep with effective light blocking.
You can attach blackout fabric to your curtains using iron-on adhesive or by sewing. For a no-sew method, measure the blackout fabric to match your curtain’s dimensions, then use the adhesive to bond the fabrics together along the top hem. This allows the blackout fabric to hang naturally without altering the curtain’s drape.
Yes, you can make blackout curtains without sewing by using iron-on adhesive. This method involves cutting the blackout fabric to size and using the adhesive to attach it to the back of your existing curtains. It’s a quick and easy way to achieve blackout curtains without the need for sewing skills.
DIY blackout curtains can be just as effective as store-bought ones if you choose the right materials and attach them properly. Ensure the blackout fabric is thick enough to block out light and that it’s securely attached to your curtains. You can test the effectiveness by shining a light behind the fabric to see how much is blocked.
Blackout curtains offer several benefits:
They block out light, making your room darker for better sleep
They can provide thermal insulation, keeping your room warmer in winter and cooler in summer
They help reduce noise from outside, making a quieter environment
They can save energy by reducing the need for heating and cooling.
Selecting the right color for your blackout fabric depends on both functionality and aesthetics:
Functionality: A lighter color may reflect light and heat better, which is ideal for keeping a room cool. Conversely, a darker color will absorb light and heat, which can help in retaining warmth in a room.
Aesthetics: Choose a color that either complements or contrasts with your existing curtains. Common blackout fabric colors include white, off-white, ecru, or gray. If you're unsure about the color, use your phone's flashlight to test how the fabric looks with light behind it.
Conclusion:
With some effort, you can make your own customized DIY blackout curtains. It's a rewarding project that improves your home and well-being. So grab your materials and start today!


