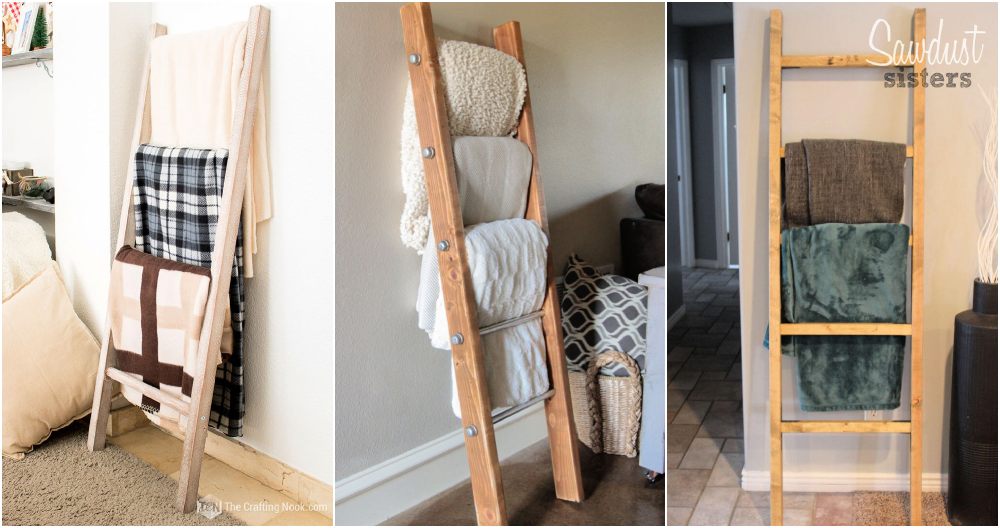
Finding easy DIY projects is my favorite way to spend my free time. Last weekend, I decided to make a DIY blanket ladder for under $5. It turned out to be a simple and fun project. I felt proud of my work because it added a nice touch to my living room and kept my blankets organized and easily accessible.
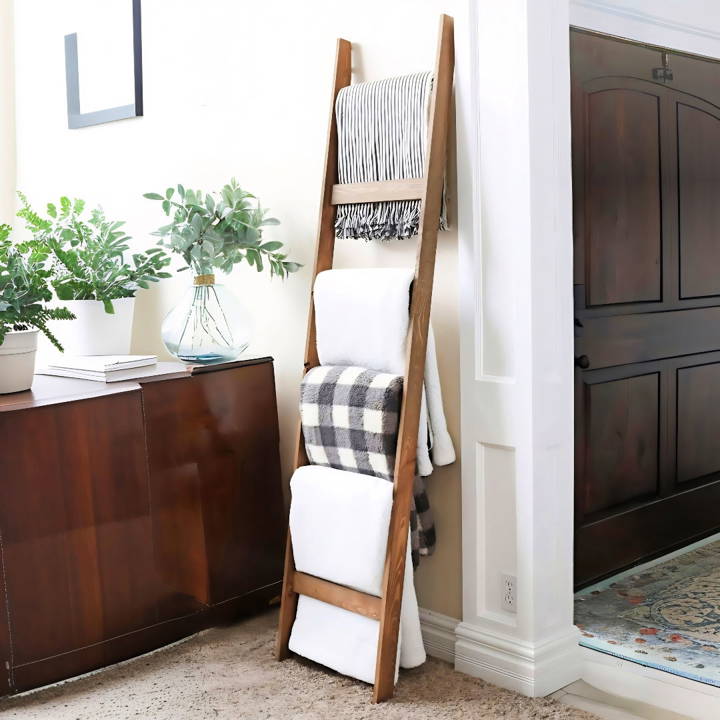
Making a blanket ladder was straightforward and didn't need many tools. I used some wooden dowels, screws, and a bit of paint. It took me just a few hours to finish. This simple task can transform your home while saving money. Now, I'm here to show you how you can do it, too.
Following these steps can make a DIY blanket ladder quick and easy. Follow the simple instructions below to give this project a try. I'm helping with it. It's a great way to start a new DIY project that is useful and affordable.
Materials Needed and Their Purpose
- 3 1x3 Boards: These boards lay the foundation of our ladder. Their size makes them easy to handle and perfect for a sturdy yet lightweight ladder. I picked mine up for a total of $5, which is a steal! The boards serve as the rails and rungs of our ladder.
- 24 Screws: These are crucial for assembling the ladder and ensuring its stability. Screws provide a strong hold, making our ladder both durable and reliable.
- Sandpaper: Before we start cutting or assembling, it's important to sand the boards. This not only prepares the surface for paint or stain but also removes any splinters, ensuring safety during assembly.
Step by Step Instructions
Learn how to build a DIY blanket ladder from scratch with our step-by-step instructions: cutting boards, preparing ladder ends, attaching rungs, and finishing touches.
Cutting the Boards: The First Step
The first step in our project is to cut the 1x3 boards into two 72-inch pieces (ladder rails) and six 17-inch pieces (ladder rungs). I used a circular saw for precise cuts, but you can use any saw you're comfortable with. Remember, accuracy is key to ensuring all pieces fit together properly.
Preparing the Ladder Ends
Here's where you can add a personal touch. You can either leave the ladder rails' ends square or cut them at an angle for a more refined look. I chose to cut a 10-degree angle at the bottom for stability and an 80-degree cut at the top to lean comfortably against the wall. This step, albeit optional, adds to the ladder's aesthetic and functional design.
Attaching the Rungs
With your ladder rails and rungs cut to size, the next step is attaching the rungs to the rails. I opted for a pocket hole jig to drill holes in the rungs, securing them with screws to the rails. This method hides the screws for a cleaner look, but you can also attach the rungs by drilling directly through the rails if you don't have a pocket hole jig.
Finishing Touches
For finishing, I went with an Ashwood accelerator to give the ladder a weathered look. However, you can choose any finish that matches your decor. Sanding the ladder before applying the finish ensures better absorption and a smoother look. Once dry, I added felt pads at the bottom of the rails to protect the floor and prevent sliding.
Final Step: Enjoy Your Creation
Place your ladder against the wall at a slight angle, drape your favorite blankets over the rungs, and step back to admire your handiwork. Not only have you buildd a functional piece for storage, but you've also added a decorative element to your home.
Reflecting on the Project
This project was not just about building a blanket ladder; it was a journey in creativity, problem-solving, and skill development. With every cut and screw, I not only followed a set of instructions but also made a piece that reflected my style. Plus, the satisfaction of completing a DIY project is unparalleled.
Customization Ideas for Your DIY Blanket Ladder
Building a DIY blanket ladder is not just about functionality; it's also an opportunity to add a personal touch to your home decor. Here are some customization ideas to make your blanket ladder uniquely yours:
- Choose Your Style Start by deciding on the overall look you want to achieve. Do you prefer a rustic farmhouse feel or a sleek, modern design? Select materials that reflect this style. For a rustic ladder, use reclaimed wood and leave the natural grain visible. For a modern touch, consider painting the wood in a high-gloss finish or using metal pipes.
- Paint and Finish Painting your ladder can transform its appearance. Choose a color that complements your room's palette, or go bold with a contrasting shade. If you're using wood, you can also stain it to enhance the natural beauty of the grain. Always seal your finished product with a clear coat to protect it from wear and tear.
- Decorative Elements: Add decorative elements to give your ladder character. Attach hooks to hang small planters or fairy lights. Use stencils to add patterns or inspirational quotes. Even something as simple as wrapping twine around the rungs can add a charming touch.
- Adjustable Features Consider making your ladder adjustable. Install hinges at the joints so you can fold them flat when they are not in use. Add adjustable feet to ensure stability on uneven floors. This not only adds functionality but also makes your ladder more versatile.
- Personalization: Personalize your ladder by adding initials or important dates. This could be done through wood burning, carving, or attaching metal letters. It's a great way to commemorate a special occasion or add sentimental value to your piece.
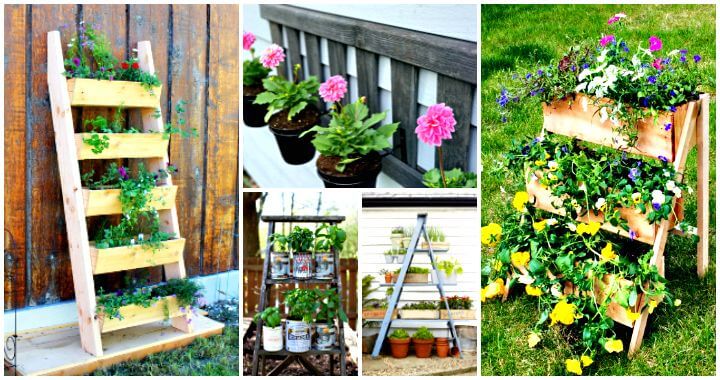
- Functionality Beyond Blankets Think beyond blankets. Your ladder can also serve as a magazine rack, a place to display art, or even as a unique towel rack in the bathroom. Design your ladder with these alternate uses in mind to increase its functionality.
A DIY project shines when it's personal. Use these ideas as a base. Be creative and enjoy making something useful and stylish.
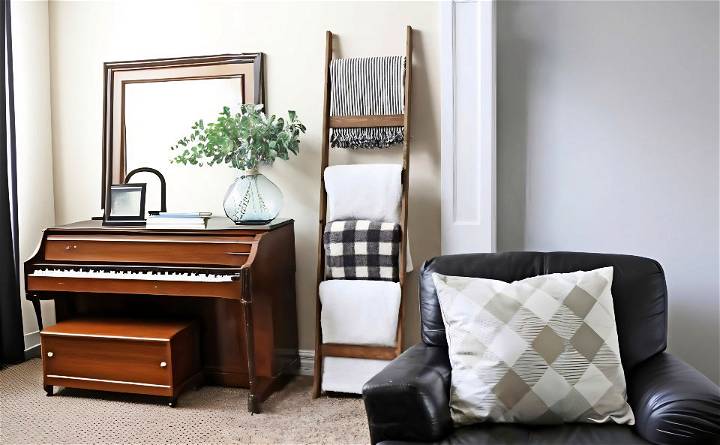
Advanced Techniques for Crafting Your DIY Blanket Ladder
When you're ready to take your DIY blanket ladder to the next level, incorporating advanced techniques can enhance both its durability and aesthetic appeal. Here's how you can apply some sophisticated woodworking methods to your project:
- Joinery Excellence Instead of simple screws or nails, try using dovetail joints or mortise and tenon joints for the corners of your ladder. These classic carpentry techniques build strong interlocking connections that are visually pleasing and can bear more weight.
- Wood Finishing: A superior finish not only protects your ladder but also brings out the beauty of the wood. After sanding your ladder smoothly, apply a wood conditioner before staining. This will help the stain absorb evenly. Consider using a polyurethane or tung oil finish for a durable and attractive sheen.
- Adjustable Rungs Build rungs that can be moved or removed. This allows you to adjust the spacing between them according to what you're hanging. Use grooves and sliding dovetails for a secure fit that can still be repositioned.
- Collapsible Design For those who need space-saving solutions, design your ladder to be collapsible. Incorporate hinges or folding brackets that allow the ladder to be folded flat against the wall when not in use.
- Precision Cutting: Use a miter saw for precise cuts, especially if you're making angled feet for stability. Accurate measurements and cuts are crucial for a professional-looking final product.
- Routing for Detail: A router can be used to add decorative edges or to hollow out areas for inset rungs. Experiment with different router bits to achieve various profiles and designs.
With these techniques, your DIY blanket ladder will be functional and showcase your woodworking skills.
Troubleshooting Common Issues
When crafting a DIY blanket ladder, you might encounter a few hiccups along the way. Here's a guide to help you troubleshoot some common issues, ensuring your project is successful and enjoyable.
Wood Splitting
- Solution: Pre-drill holes before inserting screws, especially near the ends of the wood. Choose the correct screw length; it should not be longer than the thickness of the two pieces of wood you're joining.
Ladder Leaning or Wobbling
- Solution: Ensure all your cuts are straight and angles are correct. Use a level to check the ladder's balance during assembly. Adjust the feet or add stabilizers if necessary.
Rungs Slipping
- Solution: Secure the rungs with wood glue before screwing them in place. If they're meant to be adjustable, make sure the fitting is snug but allows movement.
Paint or Stain Not Adhering
- Solution: Sand the wood thoroughly before applying any finish. Clean off all dust, and apply a primer if painting. For staining, use a pre-stain wood conditioner for even absorption.
Rough Edges or Surfaces
- Solution: Sand the wood with progressively finer grits until smooth. Always sand in the direction of the grain to avoid scratches.
Difficulty in Assembly
- Solution: Lay out all your pieces and hardware before starting. Follow the instructions step by step, and don't rush. It's helpful to have an extra pair of hands to hold pieces in place.
By anticipating these issues and knowing how to handle them, you'll be better prepared to build a beautiful and sturdy blanket ladder. Remember, patience and careful attention to detail will yield the best results.
Maintenance and Care for Your DIY Blanket Ladder
Taking care of your DIY blanket ladder is essential to ensure it lasts long and continues to look great in your home. Here's a straightforward guide on maintaining and caring for your ladder:
Regular Dusting
- Keep your ladder dust-free with regular dusting. Use a soft cloth or a duster to gently remove dust from the rungs and sides.
Avoid Moisture
- If your ladder is made of wood, moisture is its enemy. Keep it away from damp areas and wipe any spills immediately to prevent water stains or warping.
Periodic Tightening
- Over time, the screws or joints may loosen. Check them every few months and tighten as needed to keep the ladder stable.
Protective Pads
- If you're leaning the ladder against a wall, use felt pads on the back to prevent scratches on your wall paint.
Sunlight Exposure
- Direct sunlight can fade the wood stain or paint over time. Position your ladder in a spot where it's not exposed to harsh sunlight for prolonged periods.
Refreshing the Finish
- Every year or so, consider refreshing the finish. A new coat of paint or wood stain can make your ladder look brand new again.
Handling with Care
- When moving the ladder, lift it rather than dragging it across the floor to avoid damaging both the ladder and your flooring.
By following these simple care instructions, your DIY blanket ladder will remain a beautiful and functional part of your home for years to come. A little bit of care goes a long way!
FAQs About DIY Blanket Ladder
Discover everything you need to know with faqs about DIY blanket ladders, from materials needed to step-by-step instructions and styling tips.
The height of your blanket ladder can vary based on your preference and the ceiling height of your room. A common height is 6 to 6 1/2 feet. This allows for easy reach while providing ample space for hanging blankets. Adjust the height to suit your needs, keeping in mind that taller ladders may require more rungs for stability.
Safety is paramount when making a DIY blanket ladder. Ensure that the feet are cut at a 15-degree angle for stable leaning against the wall. When drilling holes for the rungs, use painter’s tape on the auger bit as a visual stop to avoid drilling through the board. Always follow safety precautions when using power tools, like wearing eye protection and keeping loose clothing away from the saw blade.
Absolutely! You can customize your blanket ladder in various ways. Consider doubling the number of rungs, widening the legs for larger blankets, or using rungs of different diameters for a unique look. Finish options include chalk paint, milk paint, wood stain, or even shou sugi ban (burnt wood). Remember to seal your finished ladder with clear polyurethane to protect your blankets from any residue.
When spacing the rungs, aim for a gap of 12 to 15 inches between each. This allows enough room to hang blankets without overcrowding. To ensure even spacing, lay out the side rails on the ground, place the rungs between them, and adjust until you’re satisfied with the arrangement. Measure the gaps to confirm they’re even, then mark the positions on the rails before drilling.
For a smooth finish, start by sanding the wood with fine-grit sandpaper. Once sanded, you can apply the finish of your choice. Popular options include stain, paint, or varnish. If you're going for a rustic look, consider techniques like distressing or whitewashing. Always finish with a sealant like polyurethane to protect both the wood and your blankets from damage and wear.
Conclusion:
In conclusion, making a simple DIY blanket ladder under $5 is a fantastic way to add style and functionality to your home. This DIY project is affordable, easy, and doesn't require advanced carpentry skills. By following our guide on how to make a blanket ladder, you'll have a beautiful piece of decor that showcases your personal touch. Plus, it's an excellent project for those looking to save money while updating their space. Don't let a tight budget stop you; start your DIY blanket ladder project today!


