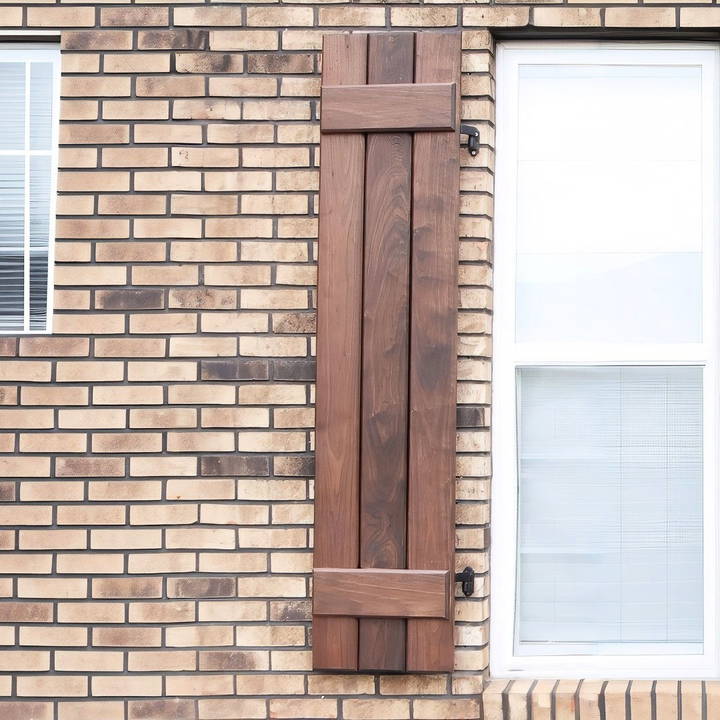
Looking to add a charming, rustic touch to your home's exterior? These DIY board and batten shutters offer a classic aesthetic appeal while being surprisingly easy to build. With just a few tools and a bit of time, you can transform the look of your home and boost its curb appeal. Here's a step-by-step guide to help you build and install these shutters yourself.
What You'll Need
Before you begin, gather the necessary tools and materials. This project is versatile, so feel free to adjust these specifications to match your desired look and the specific dimensions of your windows.
Tools:
- Saw (for cross-cutting wood)
- Drill (a standard drill is fine, but a hammer drill is helpful for mounting on brick)
- Sanding tool (optional but recommended for a smooth finish)
Materials:
- Wood (1x6 boards or similar)
- Wood screws (make sure they are the right length to avoid protruding through the shutter)
- Wood glue (for added strength)
- Exterior-grade stain and finish (protects against the elements)
Pro Tip: Choose wood that complements the style of your home. Walnut or cedar works well for a traditional look, while pine is a cost-effective alternative. You can source wood from a lumber yard or a hardware store like Lowe's or Home Depot.
Step by Step Instructions
Learn how to make DIY board and batten shutters with this detailed step-by-step guide, from measuring to installation and finishing touches.
Step 1: Measure Your Shutters
Your first task is to measure the height and width of your shutters. Typically, shutters should match the height of the window they frame and be around ⅓ to ½ the width of the window. Measure carefully, as these dimensions are essential for a well-balanced look.
- Height: The shutter should match the window's height exactly for a cohesive appearance.
- Width: Shutters are usually narrower than the window itself. Adjust this width to your taste, as wider shutters can look bold while narrower ones keep things subtle.
Step 2: Cut the Boards to Size
Now that you have your measurements, it's time to cut the boards to size. For this tutorial, let's assume each shutter will use three boards.
- Rip the Boards: If your boards are wider than desired, use a saw to rip them down to your chosen width. The goal is to have three even boards side-by-side.
- Cross-Cut to Length: Using your height measurement, cut each board to the exact height of your window.
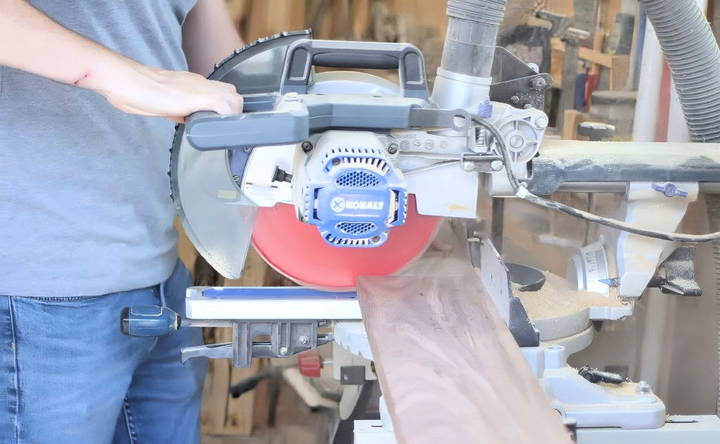
Note: If you're using walnut or any hardwood, handle it carefully. Hardwood can dull blades faster, so make sure your tools are sharp.
Step 3: Chamfer the Edges
Chamfering the edges (slightly beveling them) adds character and helps the boards fit together more naturally. Use a router if you have one, or sand the edges to round them slightly.
- Mark the Chamfers: Lightly mark each edge you want to chamfer.
- Chamfer Each Board: Go over the edges to build a slight bevel, which not only improves appearance but also prevents splinters.
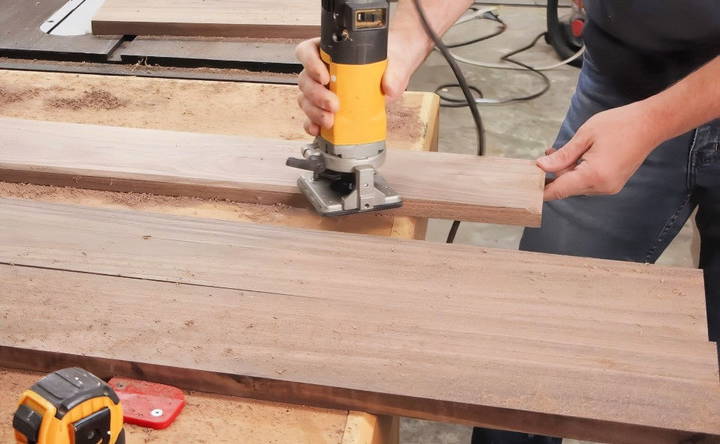
Why Chamfer? Chamfering allows the boards to come together with a slight gap, which can help prevent moisture buildup and warping.
Step 4: Sand the Boards
Sanding is essential to achieve a smooth finish and to remove any burn marks or rough spots that might have developed during cutting.
- Start with a Coarse Grit: Use a 120-grit sandpaper to smooth down the surface.
- Finish with a Fine Grit: Go over the boards again with a 220-grit sandpaper to build a polished look.
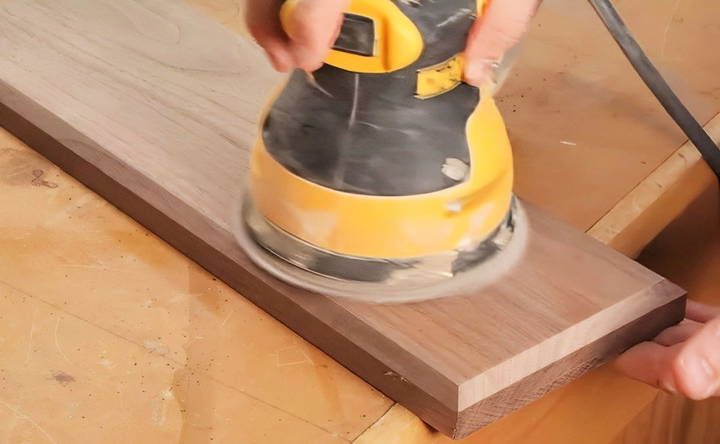
This step is crucial if you're staining the shutters, as a smooth surface absorbs stain evenly.
Step 5: Assemble the Shutter
Now, you'll attach the battens (horizontal boards) to the vertical boards to hold them together. This classic arrangement gives the shutters their distinctive look.
- Lay Out the Boards: Position the vertical boards side by side, leaving a small gap between each board for expansion.
- Attach the Battens: Place the battens horizontally across the vertical boards – one at the top, one at the bottom, and, optionally, one in the center.
- Glue and Screw: Apply wood glue to the contact points, then screw the battens into place. Ensure your screws are the right length to avoid them poking through.
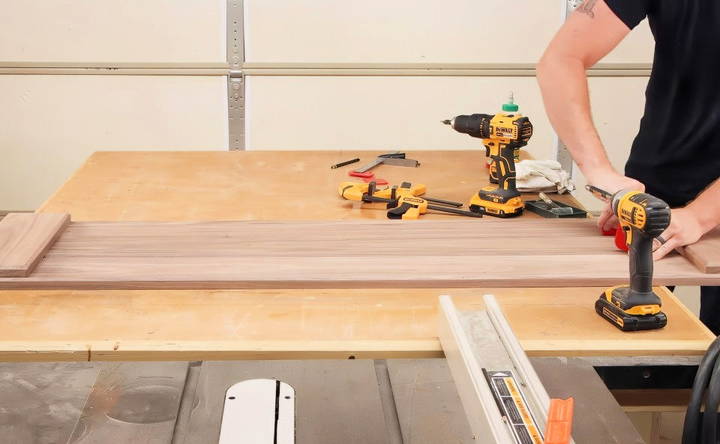
Tip: Avoid over-tightening the screws, as this can cause the wood to crack. The glue provides most of the holding power, with the screws adding extra security.
Step 6: Apply Stain and Finish
Once assembled, staining and finishing your shutters is essential to protect them from the elements, especially if they will be exposed to direct sunlight or rain.
- Stain: Choose a stain that complements your home. A dark walnut or cedar tone works beautifully with brick or stone exteriors. Apply the stain evenly and let it dry completely.
- Finish: Use an exterior-grade finish or outdoor oil to seal the wood. This helps protect it from UV rays, rain, and humidity.
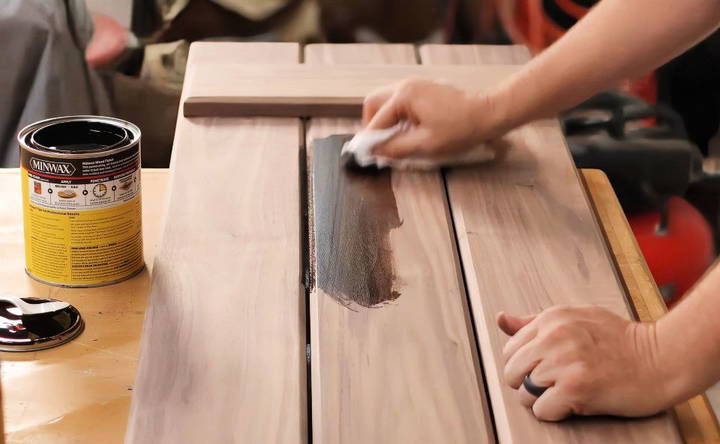
Maintenance Note: Exterior wood finishes typically need refreshing every year or two. When you notice signs of wear, lightly sand the shutters and reapply the finish.
Step 7: Install the Shutters
Now it's time to mount the shutters. Here's where you'll need your drill and any masonry tools if mounting to a brick or concrete surface.
- Choose Hinges and Pintles: To give your shutters a traditional look, use decorative hinges and pintles. Although these shutters are not fully functional, the hinges will allow them to swing slightly, adding to their authentic appeal.
- Mark the Placement: With the shutters held in place, mark where the hinges and pintles will attach to the wall.
- Drill Mounting Holes: Use a hammer drill if mounting into masonry. Drill holes where you've marked the positions, then attach the pintles or hinge bases securely.
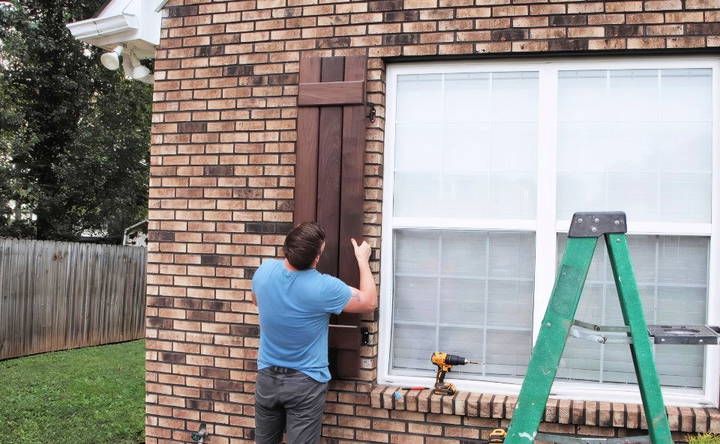
Aesthetic Tip: For a more rustic look, choose dark metal hinges. Brass or stainless steel provides a more polished, modern look.
Step 8: Final Adjustments and Touch-Ups
Once mounted, double-check the alignment and make any necessary adjustments to ensure the shutters sit evenly against the wall. Now, take a step back and admire your work!
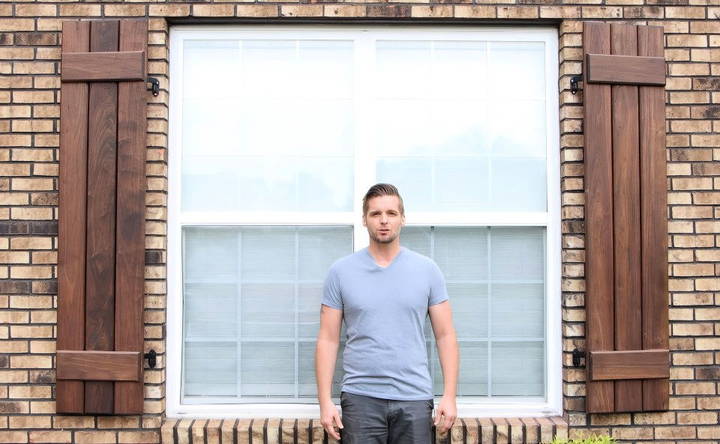
Tips and Tricks for a Successful DIY Shutter Project
- Plan for Weather: If you live in a humid or rainy area, consider adding extra protection with a clear water-resistant sealant.
- Consider Size Variations: For windows of different sizes, adjust the board and batten count. For example, smaller windows may look better with just two vertical boards.
- Try a Colorful Finish: Dark stains work well, but you could also experiment with bright paint for a more vibrant look.
- Re-stain as Needed: Periodic maintenance keeps your shutters looking new and protects them from long-term wear and tear.
Conclusion:
By following these steps, you'll have beautiful DIY board and batten shutters that add a touch of timeless charm to your home. With just a bit of effort, you can build a lasting impact on your home's curb appeal while developing your woodworking skills.
FAQs About DIY Board and Batten Shutters
Explore FAQs about DIY board and batten shutters. Learn how to build, install, and maintain these charming accents for your home.
Yes! If you want shutters that fully cover your windows and can close, make sure they are wide enough to match the window. You’ll also need sturdy hinges that can handle frequent use.
Cedar, redwood, or walnut are great choices for exterior shutters due to their natural resistance to moisture. Avoid softwoods like pine unless properly sealed and treated.
Refresh the finish every one to two years. Lightly sand the shutters and reapply the stain and finish to keep them looking their best.
Yes, but you’ll need special masonry anchors or adhesive mounts designed for heavy loads. Alternatively, consider using shutters that attach to wooden window frames instead.
To stop shutters from swinging, especially on windy days, attach decorative shutter dogs (metal brackets) to the wall to hold them in place. Alternatively, use an eye hook attached to the house and the back of the shutter, secured with thin-gauge wire for added stability.
A 1/2-inch chamfer router bit is commonly used for this project. It adds a subtle bevel to the edges, enhancing the look while preventing sharp edges and splinters.
Consider using vinyl siding clips, attaching them to the back of the shutters. Alternatively, you can mount a wood casing or a base plate onto the siding and then attach the shutters to it. This method avoids the need for drilling directly into the vinyl siding.
These board and batten shutters are mostly decorative, meant to enhance curb appeal. They aren't designed to fully cover or protect the window, though you could make functional adjustments by widening them to cover more surface area.
When planning dimensions, ensure that each shutter covers half of the window width for an aesthetic balance. Include slight gaps between boards for wood movement and between the shutters and the window frame to prevent binding during installation.
Cutting more than one board at a time can be unsafe and is generally discouraged. This practice may lead to binding or kickback. To ensure safety, cut each board individually, even if it seems time-consuming.
Yes, you can use an interior stain if you apply an exterior-grade finish on top. The finish will protect against outdoor elements, preserving the shutters' look and durability over time.
If the shutters look undersized, install them closer to the window edge or consider adding an extra board. For functional shutters, you might also look into bifold designs to increase coverage without overwhelming the window frame.


