After missing too many ducks last season, I knew I needed a better boat blind. I decided to build one myself to save money and customize it to my needs. Gathering materials from the local hardware store, I planned out a simple design that would blend in with the marsh.
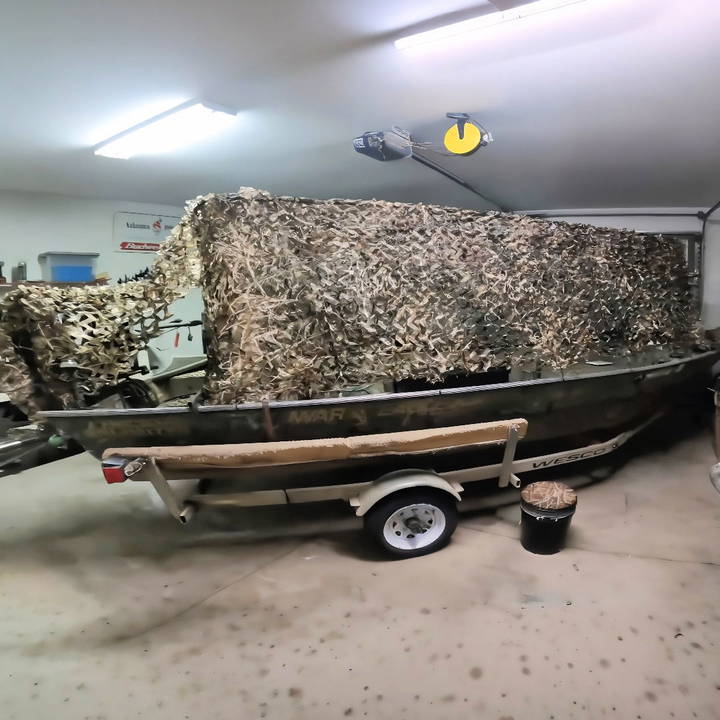
Working on weekends, I assembled the frame and attached camouflage netting. It wasn't easy, but seeing it come together was rewarding. The first time I used it, I could get much closer to the ducks without spooking them. Building my own DIY boat blind made my hunting trips more successful and enjoyable.
Building your own boat blind can be a rewarding project. Let me share what I learned to help you get started.
Materials Needed:
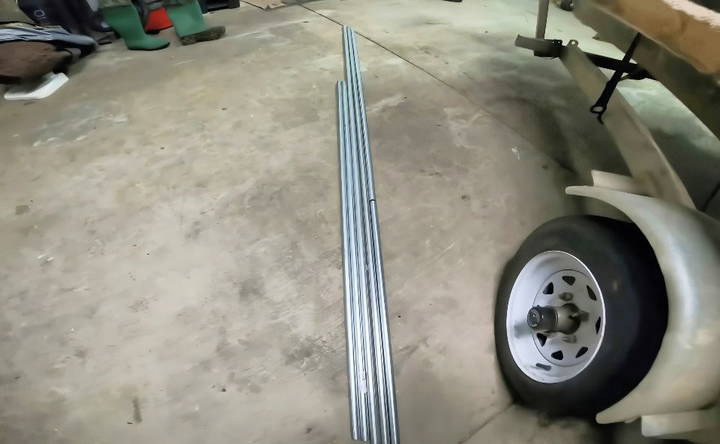
- Three 10-foot, three-quarter inch EMT conduits - For the main structure.
- Two 5-foot EMT conduits - To be cut for supporting structures.
- C-Clamps - To secure the structure.
- Three-quarter inch 90-degree elbows and screw couplings - For connecting the conduits.
- Various nuts, bolts, and washers - To secure joints and make it sturdy.
- Angle grinder - For cutting conduits.
- Pin lockers - To secure movable sections.
- Camouflage netting - For the blind cover.
- Spray paint - To reduce glare from the metal parts.
- Measuring tape and marker - For accurate cutting.
Step by Step Instructions
Follow these DIY boat blind instructions for a perfect camouflage setup, from gathering materials to final touches, ensuring ultimate outdoor success.
Step 1: Gather Your Materials
Before you start, gather all necessary materials. This will save you countless trips to the store and keep you organized. I got most of the items from Home Depot.
Step 2: Cut the Conduits
Start by cutting the two 5-foot conduits in half. These will form the arms of the scissor mechanism. Measure carefully and mark the spots before cutting with an angle grinder.
Step 3: Assemble the Main Frame
Now, connect the three 10-foot conduits using the 90-degree elbows and screw couplings. This will form the rectangular frame of your blind. Ensure all connections are tight so the structure is stable.
Additional Tips on Assembling:
- Use bolt washer washer nut combinations at joints for maximum stability.
- Measure twice, cut once to avoid mistakes.
Step 4: Install the Cross Members
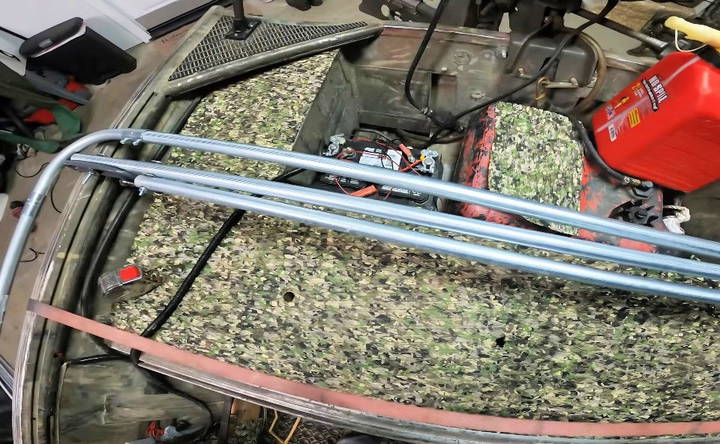
Next, attach the cross members using C-clamps. These will run horizontally across the frame, giving it additional support. Position one cross member at the center and another at the front.
How to Attach:
- Place the cross member on the desired spot.
- Secure it in place using C-clamps.
- Tighten the clamps ensuring they grip the conduit firmly.
Step 5: Build the Scissor Mechanism
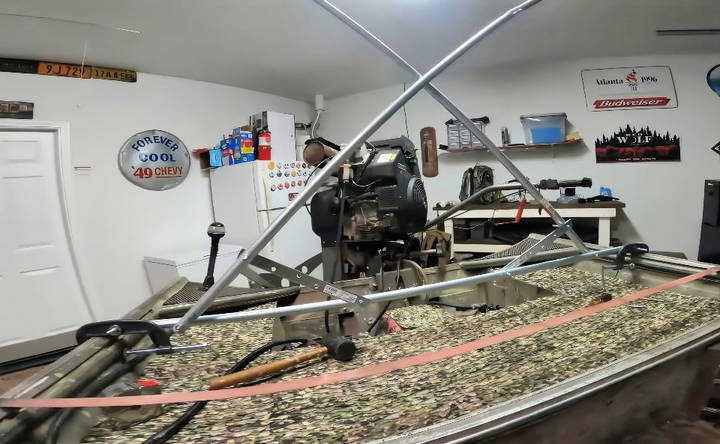
The scissor mechanism allows the blind to fold up and down. Here's how you can make it:
- Take the 5-foot conduits you cut in half.
- Attach these to the central cross member with pin lockers.
- Secure each end with bolts and nuts to form a hinge.
Notes:
- Ensure the scissor mechanism can fold smoothly.
- Check for obstructions and make adjustments as needed.
Step 6: Fine-tuning the Design
In my first attempt, I realized the flip top was sticking out too much. To adjust for a better fit, I added two more 10-foot sections and modified the angle and length. Ensure the flip top sits at shoulder height, providing maximum cover with only your head exposed.
Adjustments:
- Cut additional 10-foot sections if needed.
- Bolt the flip top to the newly adjusted sections.
- Make sure it aligns well with the main frame.
Step 7: Paint the Blind
Reflective metal can scare away ducks. To solve this, I painted the entire structure with non-reflective spray paint. Set up in the backyard and make sure each part is evenly coated. Allow it to dry for a day.
Spray Paint Tips:
- Use multiple light coats for even coverage.
- Paint in a ventilated area to avoid inhaling fumes.
Step 8: Attach the Camouflage Netting
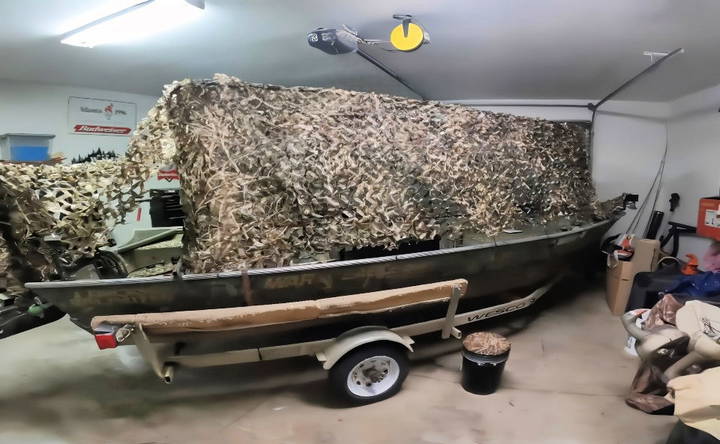
Once the paint is dry, attach the camouflage netting using zip ties or bungee cords. Secure it tightly so it doesn't flap in the wind. Cover the entire frame for maximum concealment.
How to Attach Netting:
- Drape the netting over the frame.
- Secure it with zip ties at several points.
- Ensure it reaches the bottom edge of the boat for full coverage.
Step 9: Test and Adjust
Setup the blind on your boat and test its functionality. Ensure it withstands movement and wind. If needed, make minor adjustments to bolts or netting.
Testing:
- Shake the frame to test stability.
- Ensure the scissor mechanism works smoothly.
- Check for any loose parts and tighten them.
Step 10: Final Touches
If the blind is too tall or short, make adjustments by cutting or adding sections as needed. It's better to err on the side of caution and keep materials handy for an immediate fix.
Final Tips:
- Smaller diameter screws might make it more compact.
- Use matching washer sizes for a professional finish.
Customization Tips for Your DIY Boat Blind
Building a DIY boat blind gives you the flexibility to tailor it to your specific needs and preferences. Here are some tips to help you customize your boat blind for maximum efficiency and comfort:
- Choose the Right Camouflage: Depending on where you plan to use your boat blind, the camouflage pattern should blend with the environment. For marshes, use reed and grass patterns. For open water, opt for blue and grey tones.
- Adjustable Height: Make sure your blind's height is adjustable. This allows for better visibility and shooting angles while still providing ample concealment.
- Portable Design: Consider making your boat blind lightweight and detachable. This makes it easier to transport and set up in various locations.
- Storage Solutions: Incorporate pockets and compartments for storing gear. This keeps your equipment organized and within easy reach.
- Seating Comfort: Add cushioned seats or benches that can be folded away when not in use. Comfort is key during long hours of waiting.
- Silent Operation: Ensure that all moving parts, like flaps and doors, operate quietly to avoid startling wildlife.
- Weatherproofing: Use materials that can withstand different weather conditions. Waterproof fabrics and rust-resistant metals are good choices.
- Safety Features: Include safety elements such as sturdy railings and non-slip surfaces to prevent accidents.
By considering these customization tips, you can build a boat blind that not only serves its purpose but also enhances your overall experience. The goal is to build a functional, comfortable, and safe space that allows you to blend seamlessly with nature.
Safety Considerations for DIY Boat Blinds
When constructing and using a DIY boat blind, safety is paramount. Here are key safety considerations to keep in mind:
- Stable Construction: Ensure your boat blind is securely attached to the boat. It should withstand movement and not tip over, even in choppy waters.
- Visibility: Maintain clear lines of sight in all directions. This is crucial for navigating waterways safely and spotting other vessels.
- Fire Safety: If you plan to use a heater, make sure it's designed for marine use. Keep flammable materials away from heat sources.
- Emergency Access: Design the blind with quick and easy access to emergency equipment like life jackets and fire extinguishers.
- Ventilation: Good airflow is essential, especially if you're using a heater or cooking equipment to prevent carbon monoxide buildup.
- Weight Distribution: Balance the weight evenly when adding the blind to your boat. Uneven weight can make the boat unstable.
- Noise Control: Use materials that dampen noise to avoid startling wildlife and to keep your presence discreet.
- Reflective Markings: Add reflective tape or markings to your blind to make it visible to other boaters in low light conditions.
- Regular Checks: Before each use, inspect your boat blind for any wear and tear or loose fittings that need attention.
Prioritize safety to enjoy a secure and successful DIY boat blind outing. Never compromise on measures that keep everyone safe on the water.
FAQs About DIY Boat Blind
Discover comprehensive answers to all your FAQs about DIY boat blinds and learn how to build your own boat blind efficiently and effectively.
A DIY boat blind is a custom cover designed to camouflage a boat for hunting or birdwatching. It’s typically made from materials like PVC pipes, EMT conduit, or natural foliage, and can be built to fit any boat size.
To build a basic frame, measure the length and width of your boat's interior. Cut PVC pipes or EMT conduit to match these dimensions, making a rectangular frame. Use T-connections for PVC or couplings for EMT to assemble the pieces. Ensure the frame is sturdy and fits snugly inside your boat.
Yes, a collapsible boat blind is possible by making a scissor-style frame. This involves hinged joints that allow the frame to fold down. You can use a combination of SteelTek pipes and connectors for a metal frame that's adjustable and collapsible.
To enhance comfort, consider lining the interior side of the blind with a tarp to block wind and retain heat. Additionally, ensure there's enough room to move and sit comfortably, and consider adding pockets or loops for storing gear.
Safety is paramount when constructing and using a DIY boat blind. To ensure it's secure, use sturdy materials like EMT conduit, which can handle the outdoor elements and resist bending. Secure the frame to the boat using clamps or ties that can withstand movement and wind. Always check local regulations to ensure your blind meets safety standards. Additionally, test the blind's stability in a controlled environment before heading out.
Conclusion
Building your own DIY duck boat blind is not only cost-effective but also highly rewarding. This project cost me around $150 and provided a customized solution tailored to my needs. I hope this guide empowers you to build your own duck boat blind and enhance your hunting experience. Happy hunting and stay concealed!
I hope you found this step-by-step guide easy to follow. Feel free to share your experiences or modifications you might have made in the comments below.


