Making a fairy castle book nook is a delightful project that will add a touch of enchantment to any bookshelf. Follow this comprehensive guide to craft your very own fairy castle nestled in a whimsical landscape.
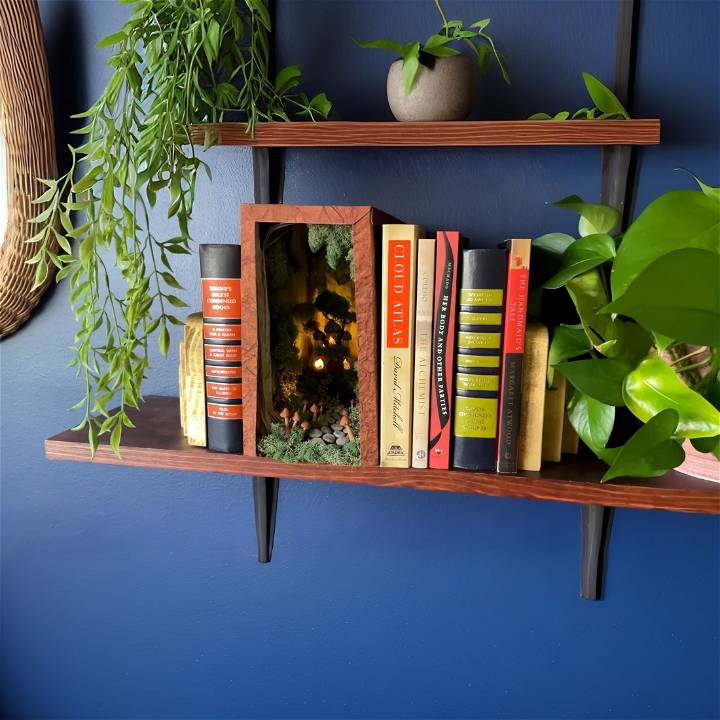
Materials Needed:
- White Sculpey Primo Clay
- Knife and sculpting tools
- Oven for baking clay
- Acrylic paint (various colors)
- Real moss and tree bark (for decoration)
- Foam core board
- Hot glue gun and glue sticks
- LED string lights
- Polymer clay (for mushrooms and stone path)
- Leather-look paper (for covering)
- X-Acto knife
Step by Step Instructions
Learn how to make a magical fairy castle book nook with step-by-step instructions.
Crafting the Fairy Castle:
- Design Planning: Begin by sketching your fairy castle design. This visual reference will guide you through the crafting process.
- Sculpting the Castle: Using the Sculpey Primo Clay, start with the base of the castle and then sculpt the main pillars. Join the pieces securely to ensure stability. Sculpt conical roofs and add texture to mimic cobblestones and wooden doors.
- Baking: Once your castle is sculpted, bake it in the oven at 275 degrees Fahrenheit for 30 minutes. Allow it to cool before proceeding.
- Painting: Paint the castle according to your theme. Experiment with colors to achieve a stone texture for the castle and woodsy tones for elements like trees.
- Adding Moss: Glue real moss around the castle and roof peaks for a touch of greenery.
Making the Book Nook Shell:
- Measuring and Cutting Foam Core: Measure the dimensions needed to fit your bookshelf. Cut foam core pieces for the sides, top, and bottom of your book nook.
- Painting the Background: Use acrylic paints to make a forest background on the foam core. Be imaginative with greens, browns, and a hint of mystical colors.
- Light Installation: Carefully cut small holes in the foam core for LED string lights. This step is easier if done before assembling the book nook shell.
- Assembling the Shell: Use hot glue to assemble the foam core pieces into a box shape, leaving one side open for easy access.
Final Touches:
- Decorative Details: Incorporate elements like polymer clay mushrooms, a stone path made from baked clay pieces, and additional moss to make a lush landscape around your fairy castle.
- Stained Glass Windows: Craft faux stained glass for the castle windows using plastic sheets, a sharpie, and a mix of acrylic paint and food coloring. Glue these behind the castle windows once dry.
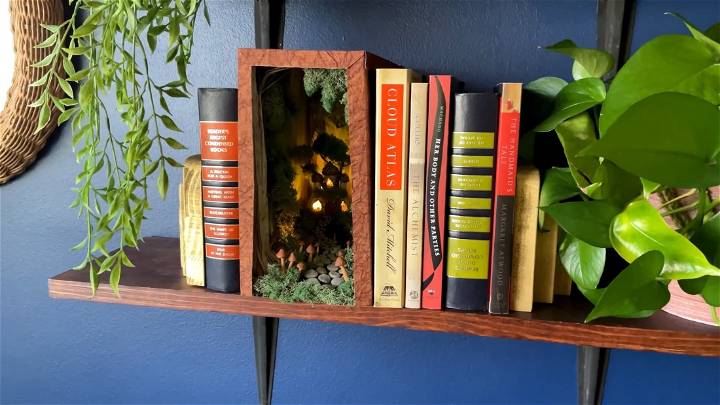
- Assembly: Position the fairy castle within the book nook shell. Arrange lighting, moss, and decorative details to your liking. Use hot glue to secure components in place.
- Exterior Finish: Cover the outer sides of the book nook with leather-look paper for an elegant finish.
Video Tutorial
For a step-by-step video tutorial on making a Fairy Castle Book Nook, watch this YouTube video.
It pairs well with this written guide, offering a visual perspective that compliments the crafting instructions provided here. Witness the transformation from simple materials to a magical book nook marvel, all demonstrated in clear and comprehensive detail.
Congratulations, you've now completed your very own Fairy Castle Book Nook! Place it between books on your shelf and enjoy the magical ambiance it brings to your space. Remember, the key to a successful project is patience and creativity.
Customization Ideas for Your DIY Book Nook
Making a DIY book nook is not just about building a functional piece of furniture, it's also about expressing your personal style. Here are some ideas to customize your book nook:
Choose a Theme
Consider choosing a theme for your book nook. This could be based on your favorite book, a particular era, or a specific design style. For example, you could make a Harry Potter-themed book nook or a vintage-style nook.
Add Personal Touches
Incorporate elements that reflect your personality or interests. This could be anything from a favorite quote painted on the side, to a handcrafted bookmark left inside for the next reader.
Play with Colors
Don't be afraid to use color. Whether you prefer bold, vibrant hues or soft, calming pastels, the right color can bring your book nook to life.
Incorporate Lighting
Consider adding a small reading light or fairy lights for a cozy and inviting feel. Not only does this make the nook more functional, it also adds a touch of magic.
Add Comfort
Make your book nook comfortable with cushions, blankets, and pillows. Choose fabrics and patterns that complement your theme.
The most important thing is that your book nook reflects you and the stories you love.
Troubleshooting Your DIY Book Nook Project
During your DIY book nook project, you may encounter some common issues. Here are some troubleshooting tips to help you overcome these challenges:
Problem: The Book Nook Doesn't Fit the Shelf
Solution: Measure your shelf space carefully before you start building. If your book nook is too big, you may need to trim it down. If it's too small, consider adding a border or frame to make it fit.
Problem: The Paint Isn't Sticking
Solution: Make sure the surface you're painting is clean and dry. If the paint still isn't sticking, you might need to use a primer first.
Problem: The Book Nook Isn't Stable
Solution: Check all your joints and make sure they're secure. You might need to add more glue or use nails or screws for extra stability.
Problem: The Decorations Keep Falling Off
Solution: Make sure you're using the right adhesive for your materials. Some decorations might need a stronger adhesive, like hot glue or super glue.
Remember, every problem has a solution. Don't get discouraged if things don't go perfectly the first time. With a little patience and creativity, you can make a beautiful and functional book nook.
Maintenance and Care for Your DIY Book Nook
Taking care of your DIY book nook can ensure its longevity and keep it looking fresh and inviting. Here are some tips on how to maintain and care for your book nook:
Regular Cleaning
Dust and clean your book nook regularly. Use a soft cloth to avoid scratching the surfaces. For hard-to-reach corners, consider using a small brush.
Avoid Direct Sunlight
If possible, place your book nook away from direct sunlight. Prolonged exposure to sunlight can fade the colors and damage the materials.
Handle with Care
While your book nook is designed to be sturdy, it's still a handmade item. Handle it with care to prevent any damage.
Check for Wear and Tear
Regularly check your book nook for any signs of wear and tear. If you notice any, consider doing minor repairs or touch-ups.
Rotate Books
If you're using your book nook to store books, consider rotating them regularly. This can prevent any one book from bearing too much weight for a prolonged period.
A well-cared-for book nook can provide a cozy reading spot for years to come.
FAQs About DIY Book Nooks
Here are some frequently asked questions about DIY book nooks:
1. What materials do I need to build a book nook?
You'll need a sturdy material like wood or cardboard for the structure, paint or paper for decoration, and adhesives for assembly. The exact materials can vary depending on your design.
2. How much time does it take to build a book nook?
The time can vary depending on the complexity of your design, but on average, you can expect to spend a few hours to a few days on this project.
3. Can I build a book nook if I don't have any DIY experience?
Absolutely! A book nook is a great beginner-friendly project. Just make sure to follow the instructions carefully and take safety precautions.
4. How can I make my book nook more comfortable?
Adding soft elements like cushions, blankets, and pillows can make your book nook more comfortable. You can also consider adding a small reading light.
5. Can I customize my book nook?
Yes, you can customize your book nook in many ways, from the color scheme and decorations to the overall theme.
6. How do I maintain my book nook?
Regular cleaning and careful handling can help maintain your book nook. If it's made of wood, you might also consider applying a protective finish.
7. What should I do if my book nook doesn't fit my shelf?
If your book nook doesn't fit, you may need to adjust its size. Always measure your shelf space before you start building.
8. What kind of paint should I use for my book nook?
Acrylic paint is a good option for most book nooks. It's versatile, easy to work with, and comes in a wide range of colors.
9. Can I build a book nook with my kids?
Yes, building a book nook can be a fun family activity. Just make sure to supervise any steps involving sharp tools or toxic materials.
10. Where can I find more ideas for my book nook?
There are many resources online, from DIY blogs to Pinterest, where you can find inspiration for your book nook.
Conclusion:
Wrapping up this article, the world of DIY book nook creation is full of endless possibilities and creativity. Whether you're a book lover or a craft enthusiast, making your own book nook can be a fun and fulfilling project. Get ready to unleash your creativity and immerse yourself in this delightful craft!


