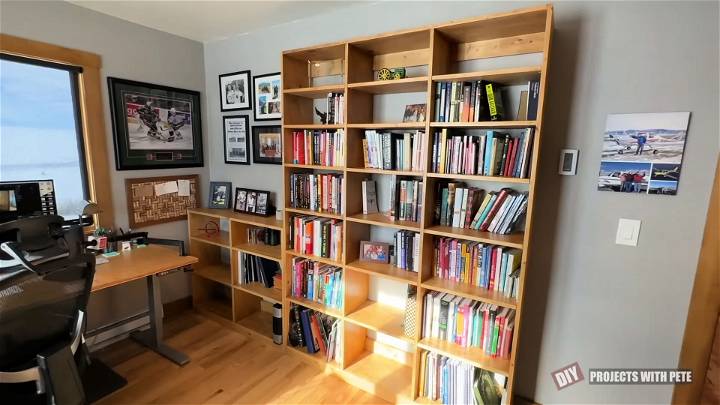
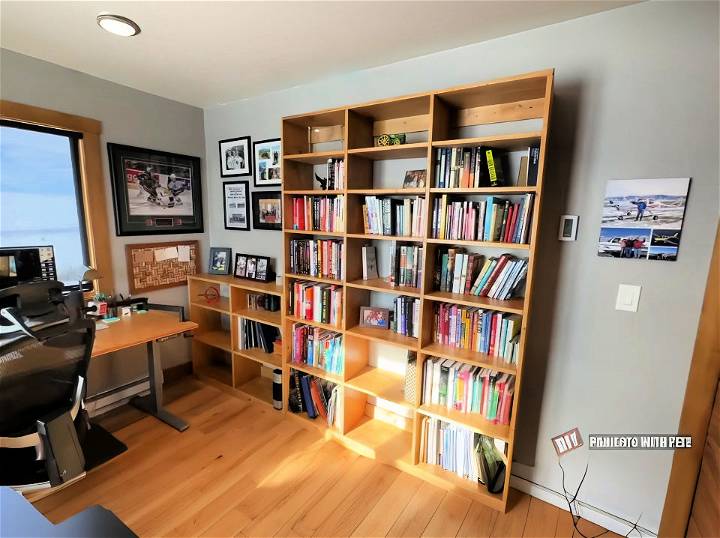
Building bookshelves can seem daunting, but with some patience and the right tools, it's a project that can transform any space in your home. I recently decided to take on the challenge of making custom shelving for our home office. The process taught me a lot about woodworking, and I'm excited to share these insights to make your project a bit easier.
Materials and Tools Needed
Discover the essential materials and tools required to make DIY bookshelves in this helpful guide. Get started on your next project today!
Materials:
- Plywood Sheets - I used three-quarter-inch Radiata Pine plywood for its quality and affordability.
- Wood Glue - Essential for reinforcing the connections between wood pieces.
- 1 and 1/4 Inch Coarse Thread Screws - These will hold the pieces together securely.
- Wood Stain - I chose Golden Oak by Minwax to match the other wood finishes in my house.
- Polyacrylic Sealer - For a durable finish that dries quickly.
- Shelf Pins - Necessary for adjustable shelving.
Tools:
- Table Saw and Miter Saw - For cutting wood to the correct dimensions.
- Kreg Jig - For drilling pocket holes easily.
- Orbital Sander - For smoothing out all surfaces of the wood.
- Drill - With a countersink bit for pre-drilling screw holes.
- Nailer - An 18 gauge nailer works well for attaching the trim.
Building Process
Design and Planning
First, measure your space. My room was 12 feet by 10 feet, so I planned for one smaller unit and one larger. It's crucial to sketch your design to ensure the final product will fit.
Cutting the Wood
Using the table saw, I trimmed my plywood sheets to the desired widths. Precision is key here to ensure all pieces will fit together smoothly.
Assembling the Frame
I began with the smaller unit, using pocket holes for assembly. The Kreg Jig made drilling these holes straightforward and ensured a strong connection. For the supports and shelves, measure carefully to ensure everything will fit exactly as planned.
Adding the Trim and Kick Plate
I cut thin strips from a 1x4 board to use as trim, giving the bookshelf a polished look. For the kick plate, I trimmed another piece of plywood to fit the base, which also helps stabilize the shelf.
Sanding, Staining, and Sealing
I sanded down all the wood pieces with a 220-grit sandpaper before applying a pre-stain wood conditioner, which helps the stain apply more evenly. After staining, I sealed the wood with a polyacrylic sealer for durability.
Installation
I secured the shelves to the wall using wood screws into the studs. This step is crucial for safety and stability.
Customization Options for Your DIY Bookshelves
When it comes to building your own bookshelves, customization is the key to making a piece that perfectly fits your space and style. Whether you're a seasoned DIY enthusiast or a beginner, here are some creative ideas to take your bookshelves to the next level:
1. Adjustable Shelves
Make It Versatile
- Why? Adjustable shelves allow you to adapt your bookshelves to different book sizes, decorative items, or changing storage needs.
- How? Use shelf pins or metal standards to build slots for adjustable shelves. This way, you can move them up or down as needed.
2. Hidden Compartments
Secret Storage
- Why? Hidden compartments add an element of intrigue and practicality to your bookshelves.
- How? Incorporate a false back panel or a removable shelf to build a hidden compartment. Use it to store valuables, documents, or small items you want to keep out of sight.
3. Integrated Lighting
Showcase Your Collection
- Why? Proper lighting enhances the display of your books and decorative pieces.
- How? Install LED strip lights along the edges of the shelves or use battery-operated puck lights. Highlight specific sections or build a warm ambiance.
4. Decorative Trim
Elevate the Aesthetics
- Why? Decorative trim adds visual interest and sophistication to your bookshelves.
- How? Attach crown molding, baseboard trim, or picture rail molding to the top or bottom edges. Paint or stain it to match your overall design.
5. Wallpaper or Fabric Backing
Add Texture and Color
- Why? A patterned or textured backing can transform plain bookshelves into a focal point.
- How? Measure the back of your bookshelves and apply wallpaper or fabric. Use adhesive or double-sided tape for easy installation.
6. Painted Back Panels
Build Contrast
- Why? Painting the back panel of your bookshelves adds depth and contrast.
- How? Choose a complementary color or a bold accent shade. Apply the paint evenly to the back surface.
7. Display Nooks
Highlight Special Items
- Why? Display nooks break up the monotony of straight shelves and allow you to showcase specific items.
- How? Carve out small recessed areas within the shelves. Use them for displaying collectibles, framed photos, or small sculptures.
The beauty of DIY bookshelves lies in their uniqueness. Feel free to mix and match these customization options to make bookshelves that reflect your personality and enhance your living space!
FAQs About DIY Bookshelves
Learn all about DIY bookshelves with our FAQs – from materials to designs, get all the answers you need to start your DIY project today!
1. What Type of Wood Is Best for Building Bookshelves?
Choosing the Right Material
When building bookshelves, the type of wood you select significantly impacts the final result. Here are some popular wood options:
- Plywood: Birch plywood is a cost-effective choice. It's sturdy, easy to work with, and has a smooth surface.
- Hardwoods: Oak, maple, and cherry are durable and offer a beautiful grain pattern. They're ideal for a classic or refined look.
- Softwoods: Pine and cedar are lighter and more affordable. They're great for rustic or casual bookshelves.
Remember to consider your budget, aesthetics, and the overall style of your room when choosing wood.
2. How Do I Ensure Sturdy Construction?
Building Solid Bookshelves
- Measure Twice, Cut Once: Accurate measurements prevent mistakes. Use a square to ensure your cuts are straight.
- Joinery Techniques: Consider using techniques like dado joints, pocket screws, or dowels for strong connections.
- Back Panel Support: Attach a sturdy back panel to prevent sagging and add stability.
3. What's the Ideal Shelf Depth?
Finding the Right Dimensions
- Standard Depth: Most bookshelves have a depth of around 10 to 12 inches (25 to 30 cm). This accommodates most books and decorative items.
- Customization: Adjust the depth based on your specific needs. Deeper shelves can hold larger items, while shallower ones work well for paperbacks.
4. How Can I Achieve a Professional Finish?
Sanding and Painting Tips
- Sanding: Sand all surfaces thoroughly to remove rough edges and achieve a smooth finish.
- Primer and Paint: Apply a primer before painting. Use a brush or roller for an even coat. Consider using a semi-gloss or satin finish for durability.
5. What Are Some Creative Design Ideas?
Personalizing Your Bookshelves
- Color Blocking: Paint the shelves in different colors for a playful look.
- Geometric Patterns: Arrange shelves asymmetrically or in unique shapes (e.g., zigzags, hexagons).
- Ladder-Style Shelves: Build a ladder effect by angling the shelves.
Remember, DIY bookshelves allow you to express your creativity. Feel free to adapt these ideas to suit your space and taste!
Final Thoughts
Building these bookshelves was more than just a weekend project. It was a chance to build something that perfectly fit our space and needs. The adjustable shelves offer flexibility, allowing us to customize the spacing based on what we're storing.
Through this experience, I learned the importance of precision, from measuring and cutting to drilling and staining. Each step required patience and attention to detail, but the result was well worth the effort.
If you're considering building your own bookshelves, I encourage you to take the leap. It's a rewarding project that not only enhances your space but also builds your woodworking skills. Remember to plan thoroughly, work carefully, and take pride in each step of the process. Good luck, and happy building!


