If you're a bow enthusiast, you know how essential it is to have the right equipment for maintaining and adjusting your bow. Whether you're making minor adjustments to the string, installing a peep sight, or fine-tuning your D-loop, a bow press is a tool that becomes necessary. However, most people don't need a bow press often enough to justify purchasing an expensive one. This article walks you through building a DIY bow press that works just as well as the store-bought versions—without spending a dime if you have the necessary materials on hand.
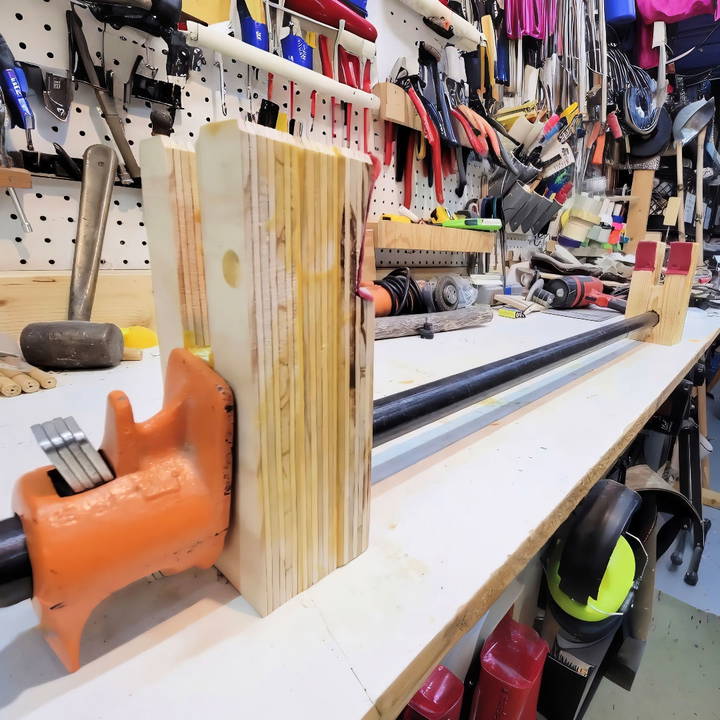
In this guide, I'll break down everything you need to know to build a sturdy, reliable, and safe bow press at home. It's simple enough for even the most casual DIY enthusiast to put together, and all you need are a few basic tools and materials, most of which you might already have lying around your workshop.
Materials You'll Need
Before we dive into the step-by-step instructions, let's go over the materials required for this project. The good news is that you won't need any exotic or expensive components. If you're like me and have some basic DIY supplies at home, this project could even be free.
Here's what you'll need:
- 3/4" Pipe Clamp: This is the core component of your DIY bow press. You need a heavy-duty pipe clamp for this, as lighter clamps won't handle the necessary force.
- 3/4" Steel Pipe: A steel pipe of your chosen length, typically available at any hardware store. You'll attach this to the pipe clamp ends.
- Scrap Wood: Use plywood or two-by-fours. Ideally, three layers of 3/4" plywood are recommended for strength and durability.
- Felt or Cloth Padding: To protect your bow limbs from damage, you'll want to apply a soft material to the wooden blocks.
- Basic Tools: You'll need a saw, drill, screws, and potentially a hammer.
Why Build Your Own Bow Press?
Discover why building your own bow press is cost-efficient, safer than other DIY methods, and customizable to your needs. Learn more now!
Cost Efficiency
Store-bought bow presses can cost anywhere from $80 to several hundred dollars, depending on the brand and features. If you're only making occasional adjustments to your bow—such as changing a string or adding a twist—a DIY version is a much more affordable and practical solution.
Safety Concerns with Other DIY Methods
Many people consider using cheaper alternatives like ratchet straps, but this method can be extremely dangerous. Ratchet straps don't provide the same level of control and can suddenly release, damaging your bow—or worse, causing injury. Another cheap method involves a wire and screw press, but these can also damage your bow's limbs and make it difficult to access certain parts for adjustments.
Customization
Building your own bow press allows you to tailor it to your needs. You can customize the length of the pipe, the size of the wooden blocks, and even modify the design to fit different bow types. Plus, you'll have the satisfaction of knowing you built it yourself.
Step by Step Instructions
Learn how to build a DIY bow press with step-by-step instructions, from choosing a pipe clamp and steel pipe to assembling and adjusting wooden blocks.
Step 1: Choose the Right Pipe Clamp
The heart of your bow press is the pipe clamp. Ensure you select a heavy-duty one, as this clamp needs to handle a significant amount of pressure. The clamp should have a wide steel pipe (at least 1 inch in diameter) to prevent bending when under stress.
- Note: Avoid using cheap bar clamps like the ones you can find at discount hardware stores. These are often too lightweight and can buckle under the force required to press the bow limbs.
Step 2: Get a Steel Pipe
Once you've chosen your pipe clamp, head to your local hardware store and grab a length of steel pipe. The great thing about this project is that you can choose the length of the pipe based on your personal needs. Some archers prefer a longer press for ease of use.
The pipe simply needs to thread into the ends of the clamp. Once attached, the pipe and clamp form the framework of your bow press.
Step 3: Build Wooden Blocks
Now it's time to build the two blocks that will hold your bow in place. These blocks will need to be cut from plywood (three layers of 3/4" plywood stacked together for strength) or a 2x4. Here's how you build them:
- Cut two blocks from your plywood or two-by-four.
- Drill a 1-inch hole through the center of each block. This hole allows the blocks to slide over the steel pipe.
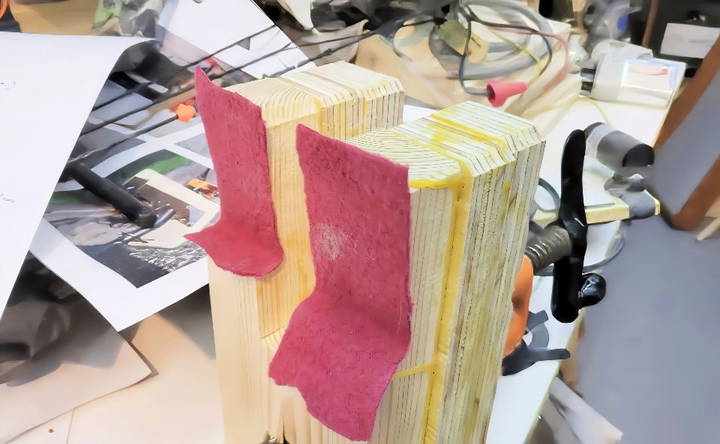
- Cut a notch at the end of each block that aligns with the angle of your bow limbs. The notches will help provide clearance for the bow's cams, ensuring a snug fit.
Step 4: Assemble and Adjust the Blocks
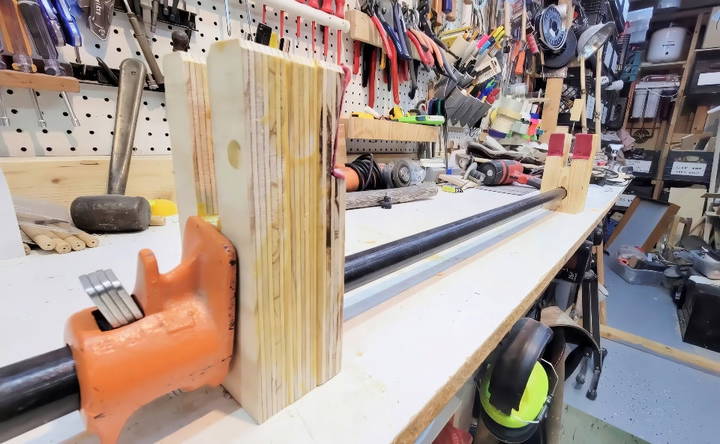
Slide the blocks onto the pipe, positioning them to hold your bow securely. The notches you've cut should align with the natural curve of the limbs, providing support without exerting too much pressure on any one part.
To prevent damage to your bow, add padding where the wooden blocks touch the limbs. Use a soft material like felt or an old cloth and glue it to the blocks. This will cushion your bow and protect it from scratches or dents.
Step 5: Grease the Wooden Blocks (Optional)
A helpful tip from many DIYers is to grease the ends of the blocks to make tightening and loosening the press smoother. When the press is under tension, the wood can sometimes bind against the pipe, making it difficult to release. Greasing the ends allows for a smoother transition when you're applying or releasing pressure.
If you don't have grease on hand, you can use a hammer to tap the block lightly while loosening the clamp, ensuring a gradual release of tension.
Using Your DIY Bow Press
Learn to use your DIY bow press with easy steps. Set the bow, tighten, make adjustments, and loosen the press for perfect results.
Step 1: Set the Bow in Place
To use your new bow press, set the bow inside the wooden blocks, making sure the cams align with the notches you've cut. The bow should sit snugly without too much pressure on any one area.
Step 2: Tighten the Press
Once the bow is positioned, slowly tighten the clamp. You'll want to do this smoothly and gradually to avoid putting too much force on the limbs all at once. As the clamp tightens, the limbs will begin to bend, allowing you to adjust your bowstring, D-loop, or peep sight.
Step 3: Make Your Adjustments
Once the bow is under enough tension, you can make the necessary adjustments to your bowstring or other components. Be sure to work carefully and methodically to avoid damaging the string or other parts.
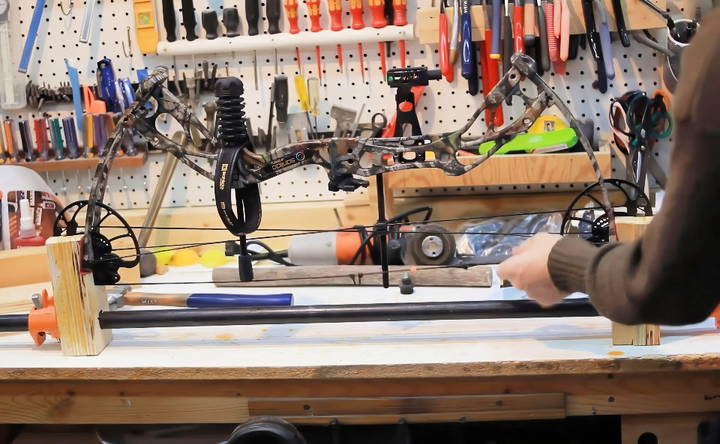
Step 4: Loosen the Press
When you've finished making adjustments, slowly loosen the clamp. Be cautious here; a sudden release of tension can be dangerous. If you greased the blocks, the release should be smooth. If not, use a hammer to gently tap the blocks, allowing the tension to ease out gradually.
Tips for Success
- Safety First: Always work slowly and carefully when using the bow press. A sudden release of tension can cause damage to your bow or injury.
- Secure the Clamp: Some users prefer to mount their clamp permanently to a workbench for added stability. If you prefer a more portable setup, simply store the parts in a bucket or toolbox when not in use.
- Inspect Your Press Regularly: Ensure the pipe, clamp, and blocks are in good condition before each use. Check for any signs of wear, particularly around the wooden blocks.
Conclusion: A Simple, Effective, and Affordable Solution
A DIY bow press is not only a cost-effective solution but also a rewarding project for any bow enthusiast. By using strong, reliable materials like a heavy-duty pipe clamp and plywood, you can build a press that rivals expensive store-bought options in terms of functionality and safety. Whether you're making small adjustments to your bow or just want to be prepared for maintenance, this homemade press will serve you well.
The design is simple, durable, and adaptable to various types of bows, making it perfect for those who don't need a press frequently but still want a reliable tool. So if you're in the market for a bow press but don't want to break the bank, give this DIY method a try. It's a practical, safe, and free alternative!
FAQs for DIY Bow Press
Discover expert answers to common FAQs about DIY bow presses. Learn how to build, use, and troubleshoot your bow press effectively and safely.
You should use a heavy-duty 3/4" pipe clamp, preferably with a solid steel pipe. Lighter clamps, like bar clamps from discount stores, won’t handle the necessary force and could bend under pressure. The pipe should be threaded on one end for the clamp to secure properly.
Yes, it can work with crossbows, but the setup might be wobbly. For extra stability, you may need to clamp the press or use steel blocks instead of wood to handle the additional force.
The DIY press allows you to remove the bowstrings, but for full limb replacement, you might need more room to work around the cams. You may need a different design or modification for better access.
Plywood works well, but some users prefer more robust wood, like cedar or hickory, for additional strength. You can also use oversized blocks for extra durability.
Greasing the wooden blocks where they contact the pipe can prevent binding. Alternatives like candle wax or floor wax can also work as lubricants for smoother operation.
Using ratchet straps is not recommended due to safety concerns. The straps can release tension unexpectedly, which can cause injury or damage to your bow. The pipe clamp method is much safer and provides better control.
While this DIY design is better suited for home use, you can look into portable options like the Bowmaster, which is lightweight and easier to transport, though it offers less durability compared to this heavy-duty press.
The plywood blocks should be about 2.25" thick (using three layers of 3/4" plywood). Typical dimensions are 9" tall and 4" wide, but they can be adjusted depending on your bow's size and the clearance needed.
This press design may not work well for beyond-parallel limb bows without modifications, as the wood blocks could limit access to the limbs and cams. You might need to adjust the design to fit these bows better.
Yes, you can use this press to remove and replace the string and cables. Ensure that the cables are attached securely to the pins in front of the wood blocks for safe operation.


