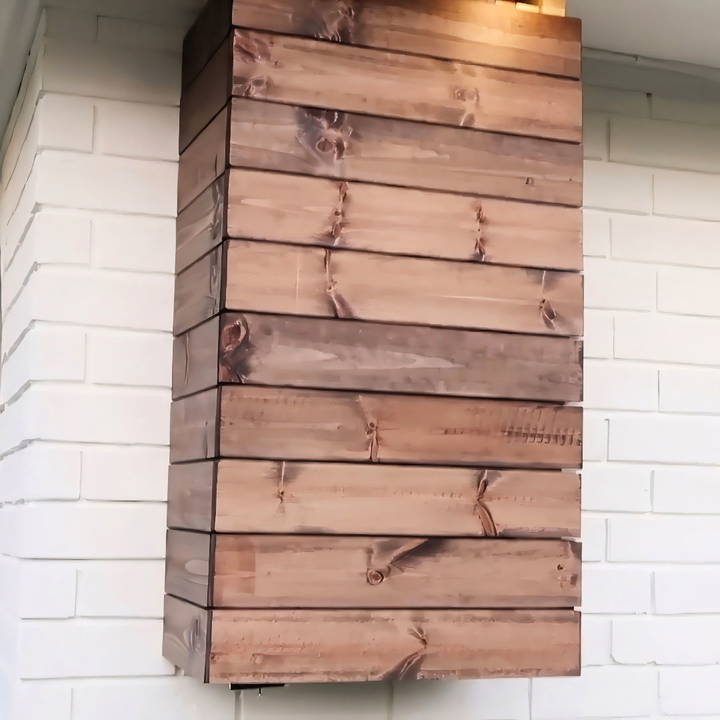
When we repainted our house a crisp, clean white, we loved the new fresh look. Everything came together beautifully—everything except for the glaringly unattractive electrical panel at the corner of our home. It stood out like a sore eye, and it became clear that a creative solution was needed. Inspired and eager to embark on a new DIY project, we decided to build a custom electrical panel cover complete with a door and lock. Today, I'm going to share my experience and guide you step by step through the process of building your own DIY breaker box cover.
Gathering the Right Materials
The first step in any DIY project is assembling the necessary materials. Here's a quick rundown of what you'll need and why:
- One-by-Ones and One-by-Threes: These will form the framework and exterior of your cover. We opted for these sizes as they are sturdy yet manageable. You could also use fence boards if you prefer.
- Hinges and a Latch or Lock: Essential for making a functional door that can easily be opened and closed.
- Hammer Drill and Lag Bolts: Required for securing the structure into the brick of your house. We chose three-and-a-half-inch lag bolts to ensure stability, especially with our home being in a windy area.
- Wood Screws (Two and a Half Inch): Useful for assembling some of the components if you don't have a nail gun handy.
- Stain and Seal, or Paint: Choose based on the look you want. We went with Minwax wood stain for a natural yet attractive finish.
Why These Materials Matter
Using durable and suitable materials is critical. Ensuring your wood is weather-resistant will prolong your enclosure's life, especially since it's exposed to the elements. Lag bolts and anchors provide stability, and your homemade cover won't easily detach even in adverse conditions. A good sealant or stain protects the wood from weather damage and adds visual appeal.
Safety First: Check with Your Electrical Company
Before jumping in, ensure that any modifications to your electrical panel area comply with local regulations. We reached out to our electric company to confirm that enclosing the panel wouldn't interfere with their access or violate any codes. Guidelines can vary significantly, so it's crucial to get this step right.
Step by Step Instructions
Learn how to build a custom DIY breaker box cover with our step-by-step guide. Perfect for anyone looking to enhance their home's aesthetics and safety!
Step 1: Measuring Your Electrical Box
Begin by accurately measuring your electrical panel. This will dictate all further dimensions of your cover. Our panel was particularly large, so our cover measured 37 inches high, 20 inches wide, and 12 inches deep.
Step 2: Cutting the Wood
Precision is important when cutting your boards. Using a saw, cut the following pieces:
- For the structure (one-by-ones):
- Two 18-inch pieces
- Six 37-inch pieces
- Four 10-inch pieces
- For the cover (one-by-threes):
- Twenty-two 12-inch pieces for both the left and right sides
- Eleven 20-inch pieces for the front
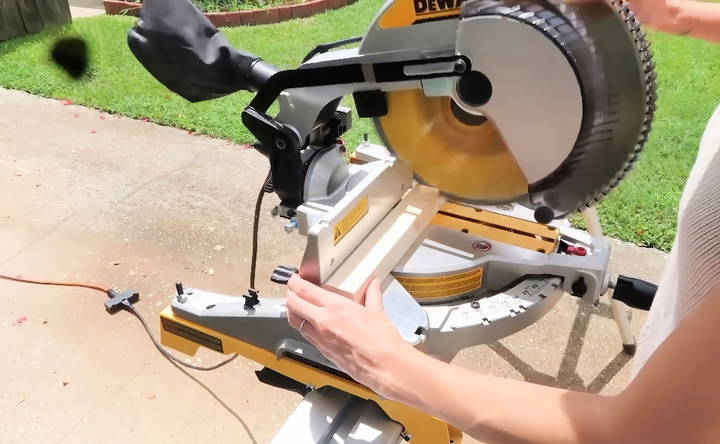
Step 3: Staining the Wood
Before assembly, stain your wood. Pre-staining makes the process quicker and results in a more even finish. We used Minwax wood stain in ‘Honey' for a warm tone while skipping stain on the one-by-ones, opting to seal those with Thompson water seal for additional protection against moisture.
Step 4: Assembling the Structure
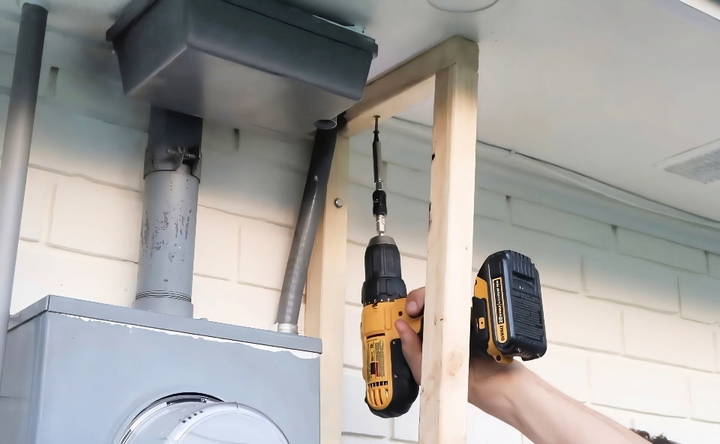
Pre-drilling your screw holes will make attaching the structural boards to the wall much more straightforward. Ensure you mark exact spots before drilling into the brick to avoid unnecessary holes.
Position your one-by-ones (37 inches) vertically, beginning with one side. Once drilled, insert the anchors, then secure your boards with lag bolts. Repeat this on the opposite side, ensuring precise alignment so that your front boards line up perfectly.
Step 5: Building the 'Box'
After your vertical supports are in place, attach the 10-inch boards horizontally at the top and bottom, like constructing an ‘L' shape. This builds a stable framework to build upon.
Step 6: Building the Door
Construct the door frame and position it to fit snugly inside your completed frame. Our goal was to ensure the door sat flush for a seamless finish.
After assembling the door, glue one-by-threes onto it, securing them additionally with a nail gun. Using screws instead of nails can provide more strength if necessary, depending on the weight and height of the board pieces.
Step 7: Attaching the Door
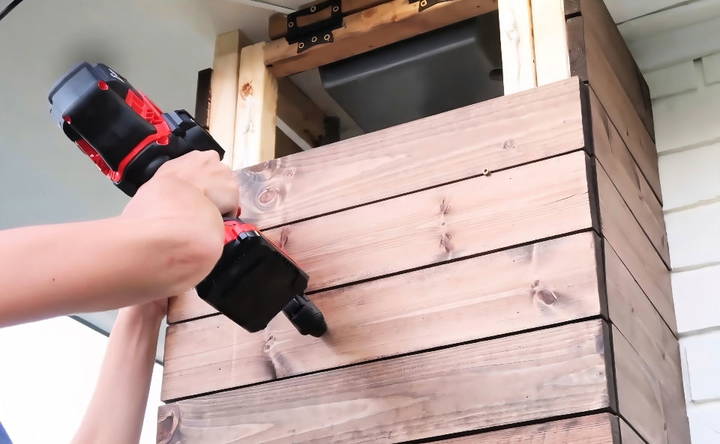
Here comes a critical step—attaching your door. After aligning the door within the structure, use hinges to secure one side to the support, ensuring smooth operation. Attach a latch or a lock for security and functionality.
Step 8: Finishing Touches
Finally, assess for any imperfect alignments or gaps. We decided to paint the top to blend with our home's soffit rather than custom-cut a fitting top piece. Feel free to customize based on visibility and preference.
Assessing Your Finished Product
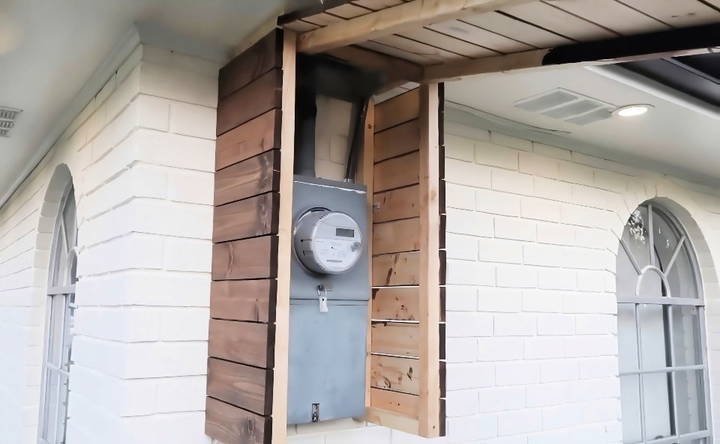
Take a step back and appreciate the difference your creative cover makes. It not only hides an eyesore but now adds an element of decor to your home exterior. Our adventure with this DIY project inspired us to tackle other exposed utilities too.
Alternative Uses
This design is versatile. Apart from electrical panels, you can adapt it to conceal other outdoor items like gas meters or AC units. Adjust the dimensions and you can build cohesive beauty for any external elements you wish to hide.
Final Thoughts and Tips
From start to finish, this project requires planning, attention to detail, and some basic carpentry skills. Here are a few extra tips to make your DIY journey smoother:
- Double-Check Measurements: It cannot be overstated how crucial precise measurements are. Double-check everything before making any cuts.
- Practice Patience: DIY projects can be meticulous, but rushing often leads to mistakes that require redoing. Enjoy the process!
- Invest in Quality Tools: Having the right tools makes a huge difference. A hammer drill was a game-changer for us, providing necessary power when embedding hardware into the brickwork.
- Safety Gear: Always wear protective eyewear and gloves, especially when drilling or handling treated woods.
- Seek Help if Needed: Don't hesitate to ask for assistance if you're feeling unsure about any step. DIY projects can be wonderful community activities.
Creative Design Ideas
Building a DIY breaker box cover can be both functional and stylish. Here are some creative design ideas to help you make a cover that not only hides the breaker box but also enhances your home decor.
Rustic Charm
- Materials: Use reclaimed wood or pallet boards for a rustic look.
- Finish: Sand the wood lightly and apply a stain or varnish to bring out the natural grain.
- Hardware: Add wrought iron hinges and a latch for an authentic rustic feel.
Modern Minimalist
- Materials: Opt for sleek, smooth materials like acrylic or metal.
- Color: Choose neutral colors such as white, black, or grey.
- Design: Keep the design simple with clean lines and no unnecessary embellishments.
Vintage Vibes
- Materials: Use old picture frames or antique window frames.
- Decor: Add vintage knobs or handles for an extra touch of nostalgia.
- Finish: Paint the frame in pastel colors and distress it slightly for a worn look.
Artistic Expression
- Canvas Cover: Use a blank canvas as the cover and paint a custom design.
- Themes: Choose themes that match your room, like abstract art, nature scenes, or geometric patterns.
- Personal Touch: Involve family members in painting to make it a fun project.
Functional and Decorative
- Storage: Incorporate small shelves or hooks on the cover for added functionality.
- Multi-Purpose: Use the cover as a bulletin board or chalkboard for notes and reminders.
- Customization: Add pockets or clips to hold important documents or keys.
Eco-Friendly Options
- Recycled Materials: Use materials like recycled plastic or repurposed wood.
- Green Design: Incorporate plants or a small vertical garden on the cover.
- Sustainable Finishes: Use eco-friendly paints and finishes.
Tips for Customization
- Paint and Stencils: Use paint and stencils to add patterns or designs.
- Decals and Stickers: Apply decals or stickers for an easy and quick design update.
- Fabric Covers: Use fabric to cover the breaker box, adding texture and color.
Final Touches
- Lighting: Add LED strip lights around the cover for a modern touch.
- Handles and Knobs: Choose decorative handles or knobs that match your home decor.
- Magnetic Closure: Use magnetic closures for a sleek and seamless look.
Use creative design to make your breaker box cover stylish and functional. Choose materials and designs that match your style and home decor.
Common Mistakes to Avoid
When making a DIY breaker box cover, mistakes can be easy to make, affecting both the functionality and safety of your project. Here are some common pitfalls to watch out for and how to avoid them.
Ignoring Safety Precautions
- Mistake: Not turning off the power before starting the project.
- Solution: Always ensure the power is off at the main switch before working on the breaker box. Use a voltage tester to confirm there is no live current.
Using Inappropriate Materials
- Mistake: Choosing flammable or non-durable materials.
- Solution: Use fire-resistant and sturdy materials like metal, treated wood, or high-quality plastic. Avoid materials that can easily catch fire or degrade over time.
Incorrect Measurements
- Mistake: Not measuring the breaker box accurately.
- Solution: Measure the height, width, and depth of the breaker box carefully. Double-check your measurements before cutting any materials to ensure a proper fit.
Poor Ventilation
- Mistake: Covering the breaker box without allowing for ventilation.
- Solution: Ensure there are ventilation holes or gaps to prevent overheating. Proper airflow is crucial for the safe operation of the breaker box.
Blocking Access
- Mistake: Making the cover difficult to remove or access.
- Solution: Design the cover so it can be easily opened or removed for maintenance and emergencies. Use hinges, magnets, or other mechanisms that allow quick access.
Neglecting Aesthetics
- Mistake: Focusing solely on functionality and ignoring design.
- Solution: Balance functionality with aesthetics. Choose materials and designs that complement your home decor while still being practical.
Overcomplicating the Design
- Mistake: Building a design that is too complex or difficult to build.
- Solution: Keep the design simple and straightforward. Start with a basic design and add features gradually if needed.
Inadequate Finishing
- Mistake: Not properly finishing the cover, leading to rough edges or splinters.
- Solution: Sand all edges and surfaces smoothly. Apply paint, varnish, or other finishes to protect the material and enhance its appearance.
Ignoring Local Codes and Regulations
- Mistake: Not adhering to local building codes and regulations.
- Solution: Check local codes and regulations regarding electrical installations. Ensure your cover complies with all safety standards and requirements.
Lack of Maintenance
- Mistake: Forgetting to maintain the cover after installation.
- Solution: Regularly inspect the cover for any signs of wear or damage. Clean and maintain it to ensure it remains functional and attractive.
Avoid these mistakes to ensure a safe, functional, and attractive breaker box cover. Planning and attention to detail are crucial for DIY success.
FAQs About DIY Breaker Box Covers
Discover essential FAQs about DIY breaker box covers, including installation tips, safety guidelines, and design ideas for a stylish finish.
Covering your breaker box can improve the aesthetics of your space. Breaker boxes are often unsightly and can disrupt the look of a well-decorated room. A cover can help blend it into your decor, making your space look more cohesive and tidy. Additionally, a cover can provide a layer of protection against dust and accidental contact.
Safety is crucial when working around electrical panels. Here are some tips:
Accessibility: Ensure the cover can be easily removed for quick access in case of an emergency.
Ventilation: Make sure the cover does not block ventilation to prevent overheating.
Non-conductive Materials: Use materials that do not conduct electricity to avoid any risk of electric shock.
Clearance: Maintain at least 3 feet of clearance in front of the panel as required by the National Electrical Code.
Yes, you can use a door to cover your breaker box. This can be a stylish and functional option. Ensure the door is easy to open and does not interfere with the operation of the breaker box. You can use an old cabinet door, a shutter, or even a custom-built door to match your decor.
Yes, there are some important requirements to keep in mind:
Accessibility: The cover must be easily removable to allow quick access to the breakers.
Clearance: Maintain a minimum of 3 feet of clearance in front of the breaker box.
Labeling: Ensure all breakers are clearly labeled and visible when the cover is removed.
Ventilation: Do not block any ventilation openings on the breaker box.
Decorating your breaker box cover can be a fun and creative project. Here are some ideas to help you get started:
Paint: Use paint to match the cover with your wall color or add a unique design.
Wallpaper: Apply wallpaper that complements your room's theme.
Stencils and Decals: Use stencils or decals to build patterns or designs.
Magnetic Boards: Attach a magnetic board to the cover for a functional and decorative touch.
Corkboard: Add a corkboard to pin notes, photos, or reminders.
Conclusion:
With this guide, you're prepared to take on a project that not only addresses a functional need but also enhances the appearance of your home. Embrace the art of DIY, and soon enough, your new cover will be the highlight of your household exterior improvements.


