Building a DIY brick patio can be a rewarding and enjoyable project for anyone interested in enhancing their outdoor space. This guide on installation will walk you through the fundamental steps required to lay a brick patio. From choosing the right materials to understanding the tools needed, this overview provides clear and concise information to ensure your patio is sturdy and aesthetically pleasing.
Learning how to build a brick patio is not only satisfying but also allows for a personalized touch to your exterior area. By following these straightforward instructions, you can achieve professional results without the high costs.
Ready to start your project? Continue reading to discover detailed steps for each stage of your DIY brick patio installation.
Choosing Your Pavers
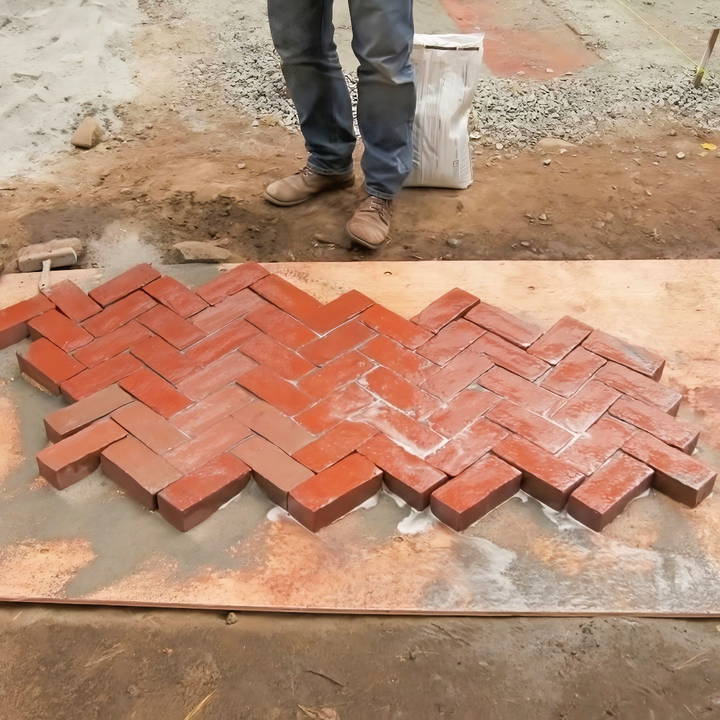
When deciding on materials, durability and aesthetics are key. I went with SNH pavers, known for their longevity and classic look, matching the appearance of my house's chimney. Remember, the paver's dimensions can influence the pattern you choose; for mine, I decided on a herringbone pattern. It's a little more complex but absolutely worth the effort for its striking visual.
Necessary Materials:
- SNH Pavers: Chosen for their aesthetic compatibility with my house.
- Crusher Run and Stone Dust: For a solid foundation that ensures longevity.
- Polymeric Sand: Keeps the pavers in place and prevents weed growth.
Step by Step Instructions
Learn how to build a DIY brick patio with our step-by-step guide. From excavation to paver layout, follow these easy instructions for a stunning patio.
Step 1: Excavate the Patio Area
The first step is to dig out the patio area to a depth of 12-18 inches. This ensures all the soft, loamy soil is removed, stopping the pavers from shifting over time.
Step 2: Lay the Foundation
Next, I filled the excavated area with a mix of crusher run and stone dust. Compact it well to build a stable base about 3 inches below the desired finished grade.
Step 3: Add Stone Dust
Above the compacted base, spread a layer of pure stone dust. This will be your final leveling layer where the bricks will lay. It's important for this to be flat and compact.
Laying the Pavers
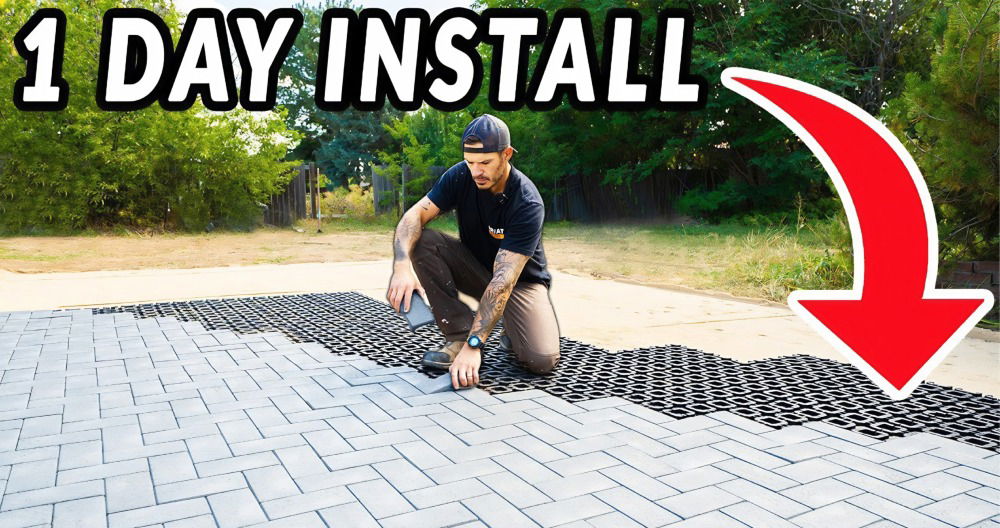
Laying pavers requires patience and precision, especially for a herringbone pattern, which is more complex than a straightforward grid.
Step 1: Set Up a Guide
I set up a main line at a 90-degree angle to my house. This ensured that my pavers would be aligned properly and would have the necessary slope for water runoff.
Step 2: Spread More Stone Dust
Using rails and a metal screed, I spread another thin layer of stone dust across my work area. This ensured a uniform height for the bedding layer.
Step 3: Start Laying Pavers
The fun part begins. I laid each paver by hand, giving it a gentle tap to set it into the stone dust. The precision here is critical, ensuring each paver sits flush and follows the desired pattern.
Step 4: Add a Border
For the patio's edge, I installed a sailor course - a row of bricks laid on their edge. Not only does this keep the interior pavers in place, but it also adds a neat, finished look to the patio.
Polymeric Sand
After laying all pavers, I swept polymeric sand into the joints. This special sand hardens, locking the pavers in place, repelling ants and weeds—a final but crucial step.
Watering
With the polymeric sand in place, I gently watered the patio surface. This activates the sand and binds the pavers together. After letting it sit and dry, my patio was complete.
Custom Features for Your DIY Brick Patio
Adding custom features to your DIY brick patio can transform a simple outdoor space into a personalized oasis. Here's how you can enhance your patio with unique elements:
Built-In Seating
Built-in seating is both functional and stylish. Consider constructing bench seating along the patio's perimeter. Use the same bricks as your patio for a cohesive look. Add cushions for comfort and color.
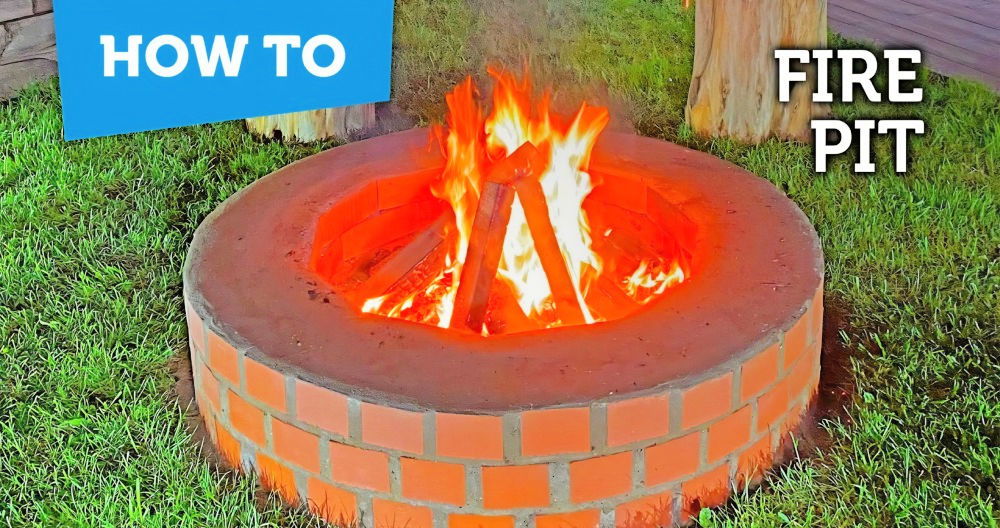
Fire Pits
A fire pit serves as a focal point and gathering spot. You can build a circular fire pit in the center or a rectangular one at the edge of your patio. Ensure it's safely distanced from any flammable structures.
Planters
Incorporate planters into the patio design. They can be built at the corners or as part of the seating. Fill them with flowers, herbs, or small shrubs to add greenery and fragrance to your patio.
Water Features
A small water feature, like a fountain or birdbath, can add a calming effect. Position it where it can be enjoyed from the seating areas without obstructing foot traffic.
Lighting
Install lighting to enjoy your patio at night. Solar-powered lights are eco-friendly and can be placed along the edges or hung above for ambiance.
Outdoor Kitchen
For those who love to cook and entertain, an outdoor kitchen is a great addition. It can be as simple as a built-in grill or as elaborate as a full-service kitchen with appliances.
Artistic Touches
Add artistic touches with mosaic patterns or personalized engravings on certain bricks. This can give your patio a unique signature that reflects your personality.
Enhance your patio's usability and look. Plan with your space and use in mind. These features will make your brick patio beautiful and reflect your lifestyle.
Installation Techniques for a DIY Brick Patio
When it comes to installing a DIY brick patio, the right techniques can make all the difference. Here's a straightforward guide to help you lay bricks like a pro:
Choosing the Pattern
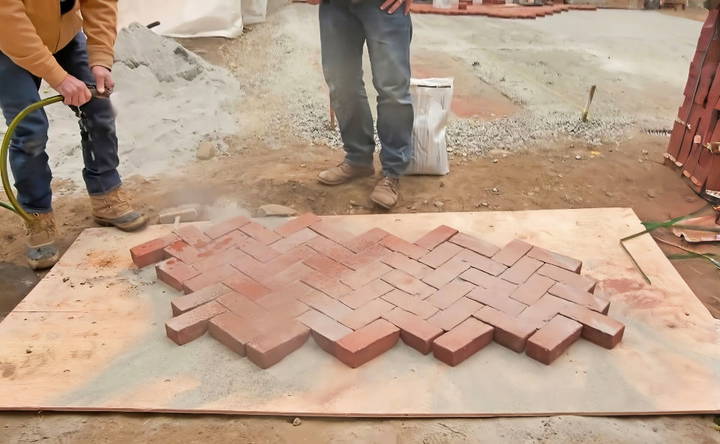
First, decide on a pattern. The running bond is popular for its simplicity and strength. For something more decorative, the herringbone pattern is a great choice.
Laying the Bricks
Begin by laying bricks at a corner or along a straight edge. Use a rubber mallet to tap them into place gently. Keep checking for level and alignment.
Spacing and Mortar
Leave equal spaces between bricks for sand or mortar. If using mortar, mix it to a peanut butter consistency. Apply it with a trowel and scrape off the excess.
Cutting Bricks
You'll likely need to cut bricks to fit your space. A brick chisel and hammer work for rough cuts. For cleaner cuts, consider renting a brick saw.
Finishing Touches
Once all bricks are laid, fill the gaps with sand or mortar. Sweep the surface clean. Wetting the patio can help settle the sand and lock the bricks in place.
Pro Tips
- Always start with a level base.
- Use a string line to keep rows straight.
- Wear safety gear when cutting bricks.
By following these steps, you'll ensure your brick patio is not only beautiful but also durable. Taking your time to do it right will pay off in the long run.
Maintenance and Upkeep of Your Brick Patio
Keeping your brick patio in top condition is essential for prolonging its life and maintaining its beauty. Here's a simple guide to help you take care of your patio:
Regular Cleaning
Sweep your patio regularly to remove debris. For a deeper clean, use a mild detergent and a stiff brush to scrub away stains. Rinse with water.
Weed Prevention
To prevent weeds, apply polymeric sand between the bricks. It hardens and blocks weed growth. Reapply every few years as needed.
Managing Moss and Algae
In damp areas, moss and algae can be a problem. Remove them with a vinegar solution or a commercial moss killer. Always follow the product instructions.
Sealing the Bricks
Consider sealing your patio with a brick sealer. This can protect against stains and weather damage. Reapply the sealer every two to three years.
Fixing Loose Bricks
If bricks become loose, reset them promptly. Remove the brick, add fresh sand or mortar, and replace the brick. Tap it down firmly.
Addressing Efflorescence
White powdery residue, known as efflorescence, can appear on bricks. It's salt pulled from the brick. Brush it off, or use an efflorescence remover.
Follow these tips to keep your brick patio beautiful and functional. Regular care prevents costly repairs and maximizes your outdoor space.
FAQs About DIY Brick Patio
Explore FAQs about DIY brick patios. Get expert insights on materials, installation tips, and maintenance to build your perfect outdoor space.
First, mark the area for your patio and dig about 10 inches deep. Fill it with a 6-inch layer of gravel for drainage. Compact the gravel, then add a layer of landscape fabric followed by a layer of sand to set your bricks on.
Start by laying bricks at one corner and work your way out. Use a pattern that fits your style, like a traditional running bond or a simple basketweave. Ensure the bricks are level and fill the gaps with sand to secure them in place.
Brick patios are low maintenance. Regularly sweep off debris and rinse with water. For stubborn stains, use a mild detergent solution. To prevent weed growth, refill the joints with polymeric sand as needed.
It depends on your location. Some areas require a permit for any type of construction, including patios. Check with your local city office to learn about building code requirements, zoning laws, or land use restrictions that may apply to your project.
Proper drainage is crucial to prevent water from pooling on your patio. Ensure your patio has a slight slope away from any structures, typically a 1/4-inch drop per linear foot of patio length. This will allow water to run off efficiently. Additionally, using polymeric sand in the joints can help minimize water absorption and maintain the integrity of your patio.
Reflections
In conclusion, a DIY brick patio installation can transform your outdoor space into a stylish and functional area. By following this DIY brick patio installation guide and learning how to lay a brick patio, you'll have a beautiful and durable surface to enjoy. So, roll up your sleeves and start your project today!


