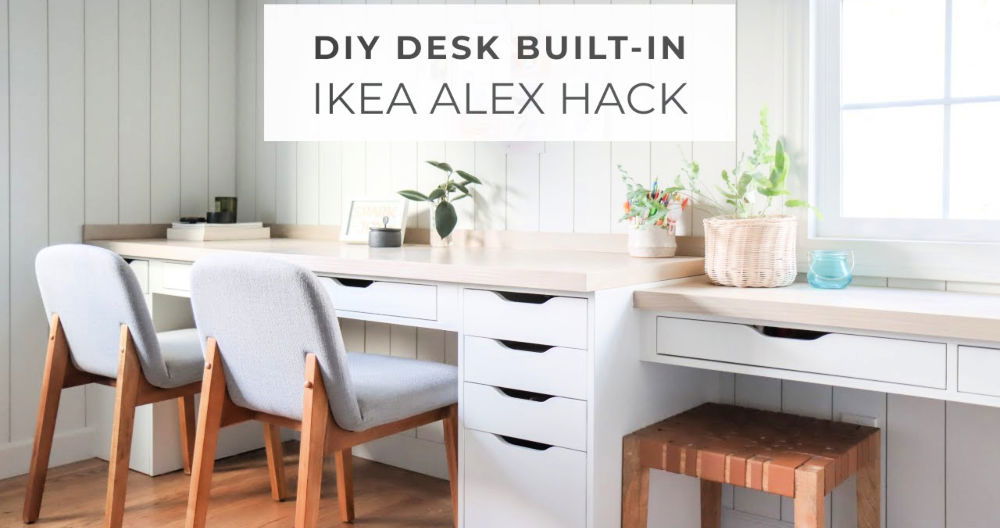
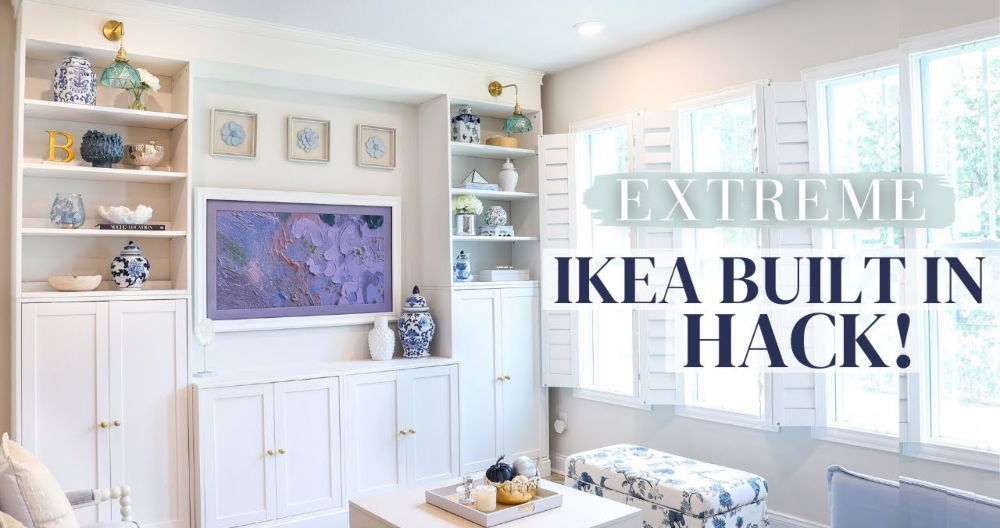
Transforming my home office into a more functional and aesthetic space was something I had been pondering for quite some time. I had a combination of IKEA Hemnes pieces, including two bookcases and a chest of drawers, that were initially bought as temporary storage solutions.
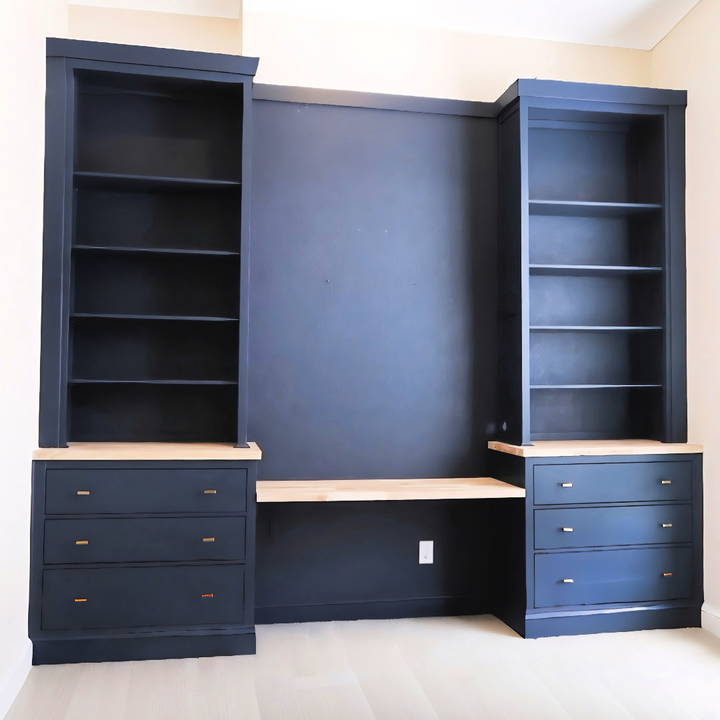
Though functional, these pieces lacked the appealing built-in look I desired for my office. With just a bit of creativity and a willingness to learn, I decided to transform these basic IKEA pieces into chic built-in desks and bookshelves.
Why I Started This Project
My home office was functional but lacked personality and coherence. With a few IKEA pieces - two bookcases and a chest of drawers, I envisioned a more integrated and customized space. Inspired by the built-in look, I decided to undertake this DIY project, hoping to elevate my workspace while incorporating personal elements like my father's artwork.
Materials Needed and Why
- IKEA Hemnes Bookcases and Chest of Drawers: The base of our project. These affordable pieces are versatile and easy to modify.
- Wood Filler: To fill in unused shelving holes for a smoother look.
- Carpenter Square and Sander: Essential for measuring and preparing the wood for modifications and painting.
- Paint and Primer: To refresh and customize your pieces. I chose a color inspired by my favorite artwork.
- Butcher Block: To build a cohesive countertop across the drawer units.
- Brackets and Screws: For securing the butcher block and adding a floating desk.
- Baseboards and Trim: To give the built-ins a finished, integrated appearance.
- Caulk and Wood Filler: This is used to fix imperfections and ensure seamless transitions between pieces.
Step by Step Instructions
Learn how to build a stylish DIY IKEA Hemnes home office desk and bookshelf with easy step-by-step instructions. Transform your space today!
Preparing the IKEA Pieces
First, I removed all shelves and hardware from the bookcases, planning to restack them atop the chest of drawers. Realizing I needed another chest for symmetry, I scored an identical piece on Marketplace for a bargain, highlighting how second-hand finds can be a goldmine for DIY enthusiasts.
Modifying and Sanding
Next, I had to make the bookcase sit flush with the drawer unit, which involved removing its legs and lower bar. Using a carpenter Square for accuracy, I marked and carefully sawed off the legs. A quick sanding prepped them for painting, ensuring the new paint would adhere well.
Painting
Not being a professional didn't stop me from achieving a professional finish with a paint sprayer. After applying a primer, I coated the pieces in a navy blue paint that complemented my decor. The spray gun made this step surprisingly enjoyable and straightforward.
Countertop and Floating Desk Install
Purchasing butcher block countertops from a local store added warmth and unity to the project. Before securing them to the drawer units, I sealed them for protection and a natural look.
For the floating desk, I installed steel brackets into wall studs, ensuring a stable and functional workspace. The butcher block, cut to size, served as a matching desktop.
Adding Trim and Final Touches
This phase involved adding baseboards and trim to blend the IKEA pieces with their surroundings, making everything look built-in. Even with some initial hiccups in measuring and cutting, caulk and wood filler were my best friends for achieving a polished look.
The Reveal
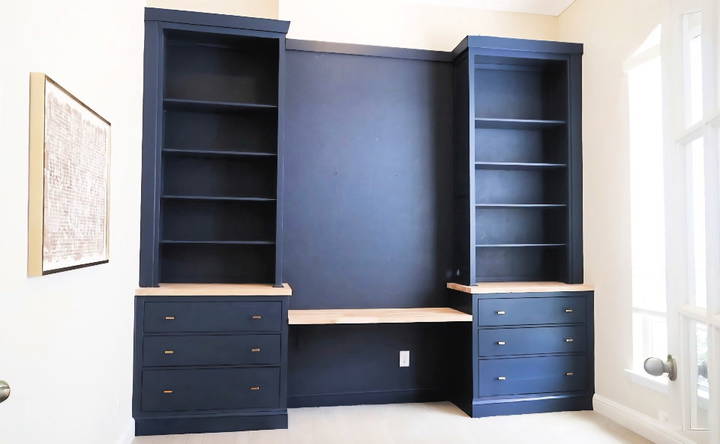
The transformation was nothing short of dramatic. From a mismatched storage area to a cohesive, built-in home office, this project exceeded my expectations. The floating desk offered a defined workspace without compromising on design or functionality. Plus, incorporating my dad's artwork lent the room a personal, inspired vibe that colors every workday.
Tips for Your DIY IKEA Hack
- Design as You Go: Don't be afraid to adjust your plans as you progress. Flexibility can lead to even better custom solutions.
- Invest in Good Tools: A paint sprayer and a good saw can make a huge difference in the quality and ease of your project.
- Patience is Key: Especially with sanding, painting, and waiting for things to dry. Rushing can result in mistakes.
- Utilize Online Marketplaces: You can find IKEA pieces for less, perfect for painting or hacking.
Customization Ideas for Your Built-In Desk
When it comes to making a built-in desk that perfectly fits your needs and style, customization is key. Here are some ideas to inspire you to personalize your workspace:
- Choose Your Style: Start by selecting a design that reflects your personal taste. Whether you prefer a modern minimalist look, a rustic charm, or a sleek industrial vibe, your built-in desk should complement the overall aesthetic of your room.
- Pick the Perfect Color: The color of your desk can set the mood for your work area. Light colors can make a small space feel larger, while dark hues can add a sense of sophistication. Consider the color scheme of your room and choose a desk color that harmonizes with it.
- Add Functional Features: Think about what you need from your desk. Do you require a lot of storage? Would you like built-in outlets for easy charging? Maybe a pull-out keyboard tray or a hidden compartment for your gadgets? List the features that would make your desk functional for you.
- Incorporate Adjustable Elements: To ensure comfort and ergonomics, include adjustable components such as shelves or monitor stands. This will allow you to build an ergonomic setup that can be modified as needed.
- Personal Touches: Make the desk truly yours by adding personal touches. This could be anything from a custom drawer knob that you love to a unique piece of art that inspires you. These details make your space feel more personal and inviting.
- Lighting: Good lighting is crucial. Consider adding under-cabinet lights or a stylish desk lamp to ensure you have adequate lighting for your tasks.
- Material Matters: The materials you choose for your desk affect the look and durability. Hardwoods are long-lasting, while bamboo offers a sustainable option.
- DIY Decor: If you're crafty, add handmade elements to your desk. This could be a hand-stitched desk mat or custom-made organizers that fit your style and needs.
Make a space where you're comfortable and productive. Plan and execute your ideas, resulting in a functional and attractive desk.
Storage Solutions for Your Built-In Desk
Building efficient storage solutions is essential for keeping your workspace organized and clutter-free. Here's how you can design storage for your built-in desk that's both practical and stylish:
- Maximize Vertical Space: Use the wall space above your desk for shelves or cabinets. This keeps items off the desk but within easy reach. You can adjust the height of the shelves to accommodate different items, from books to small office supplies.
- Drawers for Documents: Incorporate drawers of varying sizes. Shallow drawers are perfect for pens and notepads, while deeper ones can store papers and files. Consider using drawer organizers to keep everything in place.
- Hidden Compartments: For a sleek look, add hidden compartments or pop-up sections where you can store your gadgets and accessories when they're not in use. This helps maintain a clean desk surface.
- Cable Management: Cables can build clutter. Include built-in cable management solutions like grommets or channels to keep cords organized and out of sight.
- Customizable Storage Units: Use modular storage units that can be rearranged or expanded as your needs change. This flexibility allows you to adapt your storage without having to rebuild or buy new furniture.
- Use Every Inch: Don't waste any space. If there's a gap between your desk and the wall, turn it into a narrow shelf for books or binders. Even small spaces can be transformed into useful storage.
- Personalize Your Storage: Make your storage match your workflow. If you use certain tools frequently, have them on open shelves or hanging boards for easy access. Less used items can go in closed cabinets.
- Think Ergonomics: Place items you use often within arm's reach. This reduces the need to stretch or strain to get what you need, making your workday more comfortable.
Consider these storage solutions to build a stylish and functional built-in desk that supports your work habits and organization.
Troubleshooting Common Issues
When embarking on a DIY built-in desk project, you might encounter a few hiccups along the way. Here's a guide to troubleshooting some common issues, ensuring your project stays on track:
Uneven Surfaces
- Solution: Check your work area with a level before installation. If the floor or wall is uneven, use shims to balance out the desk. Always measure twice and cut once to ensure accuracy.
Weak Desk Support
- Solution: Ensure that you have enough brackets and that they're properly anchored into the wall studs. Use appropriate screws and hardware for the material of your wall.
Drawers Not Sliding Smoothly
- Solution: Verify that the drawer slides are installed straight and level. Lubricate the slides with a silicone-based product if they stick.
Difficulty in Fitting Components Together
- Solution: Dry-fit all parts before final assembly. If pieces don't align, double-check measurements and cut edges to ensure they're straight and clean.
Visible Screws or Hardware
- Solution: Use wood plugs or caps to cover screw heads. Choose hardware that matches the color and style of your desk for a seamless look.
Insufficient Workspace
- Solution: Plan your desk dimensions based on the tasks you'll perform. Consider a pull-out extension or a fold-down section to add more surface area when needed.
Poor Finish Quality
- Solution: Prep your surfaces properly before painting or staining. Sand down any rough areas and clean off dust. Apply thin, even coats and allow ample drying time.
Desk Wobbling
- Solution: Tighten all connections. If the problem persists, add diagonal bracing underneath the desk or secure the top to a more stable base.
Anticipating issues and knowing how to address them better prepares you for any DIY project challenges.
FAQs About DIY Built-In Desk
Discover answers to all your questions about DIY built-in desks. Get tips, tricks, and step-by-step guides for your perfect home office setup.
The standard height for a desk is 30 inches, including the desktop. For depth, 20-24 inches is typical, but you can opt for a shallower desk if space is limited. Measure the distance between walls or cabinets to determine the length of your desk. Remember to account for any overhang of the desktop and the thickness of cabinet doors, if applicable.
Absolutely! You can customize your built-in desk with various storage options, such as drawers for office supplies, filing cabinet drawers, bookshelves, a cabinet to hide a computer tower, and a printer cabinet. The configuration can be tailored to your specific needs and the space available.
After constructing the cabinets and desktop, you’ll need to fill any gaps with wood filler, sand the surfaces, and apply primer. Then, paint or stain the desk to your liking. Once dry, secure the desk to the wall or cabinets using brackets and screws, ensuring it’s level and stable.
To secure your built-in desk to the wall, you should use corner brackets and 3 1/2" wood screws. Locate the studs in your wall using a stud finder, and attach the brackets to these points. Ensure the desk is level before securing it. If you’re attaching the desk to cabinets, make sure they are also anchored to the wall for added stability.
When designing your built-in desk, consider the following:
Ergonomics: Ensure the desk height is comfortable for typing and the monitor is at eye level.
Space: Utilize vertical space for shelves or cabinets if the desk area is small.
Lighting: Incorporate task lighting or position the desk near a natural light source.
Power: Plan for easy access to power outlets for your computer and other devices.
Aesthetics: Choose a style and finish that complement the room's decor.
Closing Thoughts
Wrapping up, a DIY built-in desk can transform your space into a functional and stylish area. Building it yourself gives you the freedom to customize it to fit your needs and preferences. With a little effort and the right tools, you can build a workspace that increases productivity and adds a personal touch to your home. Start your project today, and enjoy the satisfaction that comes with making your own custom desk.


