Getting started with building a DIY built-in entertainment center might seem like a big task, but with the right approach, it's more manageable than you think. When I first decided to build one, I realized how important planning is. You don't need to be a pro to make something functional and attractive. With some basic tools and materials, you can make a custom piece that fits perfectly in your space.
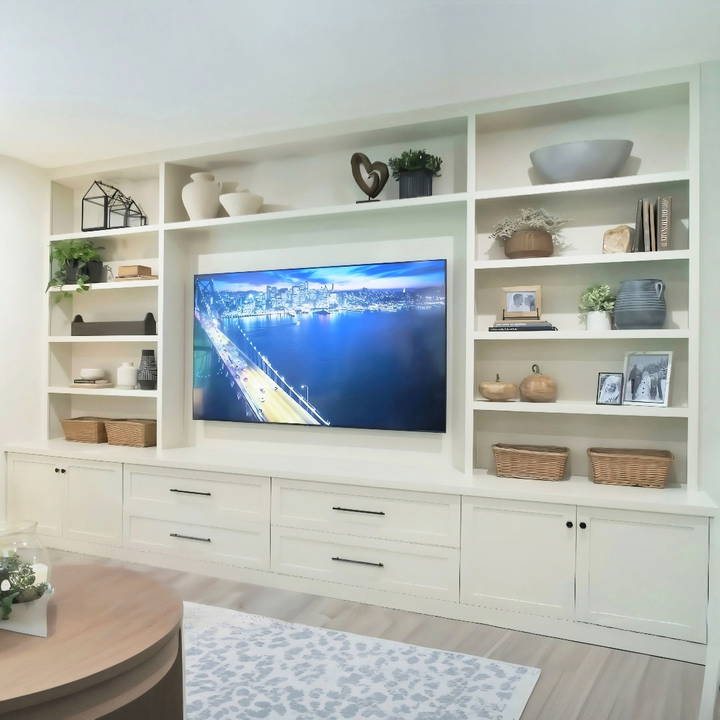
I'm here to help you get started on your own project. This guide will walk you through the steps I took, making sure you avoid common mistakes. From measuring your space to picking the right materials, these tips will make the process smooth. Get ready to build something that will transform your room—building a DIY built-in entertainment center is easier than you think!
Materials Needed and Why
- Pre-finished plywood: Ideal for cabinets due to its durability and the ready-to-go glossy finish that saves time on painting or staining.
- Two by fours: Used for constructing the platform, they provide a strong, stable base for the cabinets.
- Drawer slides: Essential for smooth operation of the drawers.
- Biscuit joints and pocket screws: For joining pieces of plywood together securely, ensuring durability.
- 1x2 and 1x4 lumber: Used for trimming and finishing touches, giving the project a polished look.
- Primer and paint: To give the entire structure a cohesive and customized color.
- Caulk and wood filler: For filling gaps and imperfections, ensuring a smooth finish.
- Drawer fronts and doors: Purchased pre-made for convenience and quality.
Step by Step Instructions
Learn how to build a DIY built-in entertainment center with step-by-step instructions, from cabinet design to hardware installation—ideal for home improvement.
Step 1: Designing and Building the Cabinets
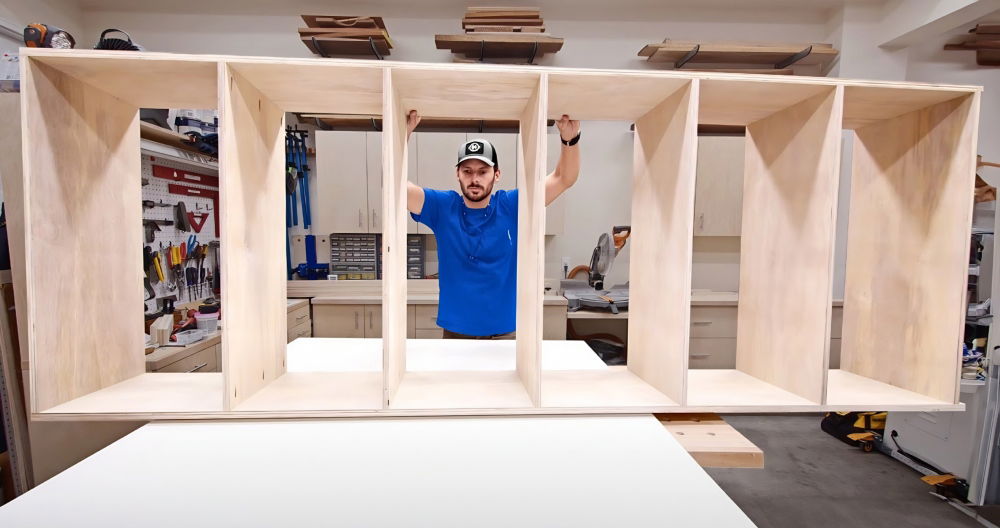
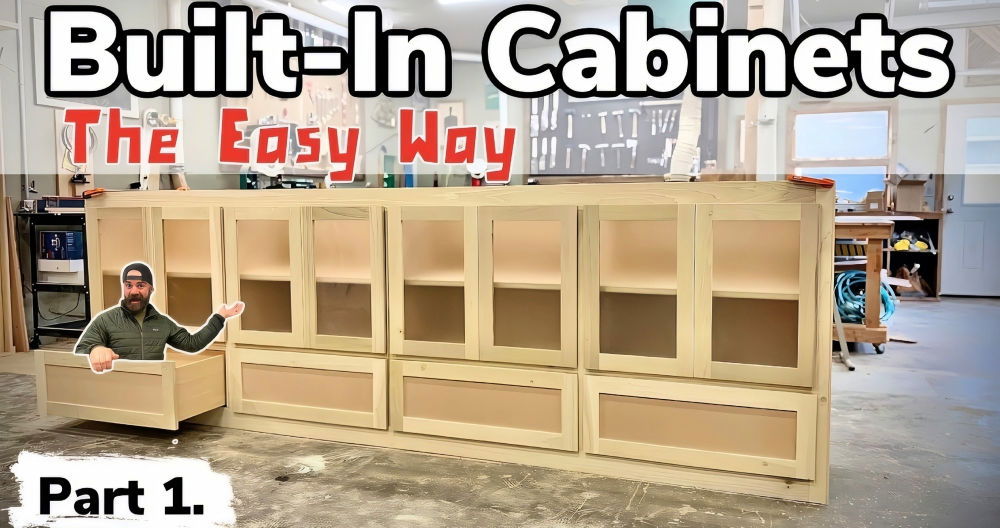
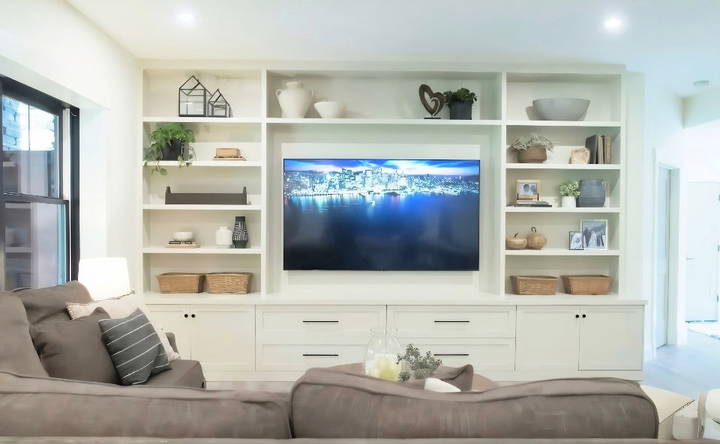
Initially, I sketched out my vision, deciding on four cabinets, two with doors and two with massive drawers. Using pre-finished plywood, I crafted these components, ensuring they were 2 feet tall and deep. The choice of material here was crucial for achieving a high-quality interior look without the added step of finishing.
Step 2: Crafting the Drawers
Next, I turned my attention to the drawers. Precision was key, ensuring the drawers were sized correctly to fit the slides and the cabinet openings. This step required careful measurement and adjustment.
Step 3: Constructing the Platform
With the cabinets assembled, I built a platform from two-by-fours, anchoring it to the wall. This ensured a level base for the cabinets, crucial for the overall stability of the media center.
Step 4: Installing the Cabinets
Once the platform was set, I placed and secured the cabinets. Ensuring everything was level at this stage prevented future issues with drawer and door alignment.
Step 5: Building and Installing the Top
For the top, I chose to double-up plywood for thickness and rigidity, seamlessly joining them with biscuit joints and pocket screws. This buildd a durable and attractive surface spanning the entire length of the media center.
Step 6: Adding Bookcases and Trim
To flank the TV, I built bookcases from plywood, measuring meticulously to fit the space from the top of the media center to the ceiling. I then trimmed the entire structure with 1x2s and capped it with 1x4s for a finished look, highlighting the importance of attention to detail in achieving a professional-grade appearance.
Step 7: Finishing Touches (Caulk, Fill, Prime, and Paint)
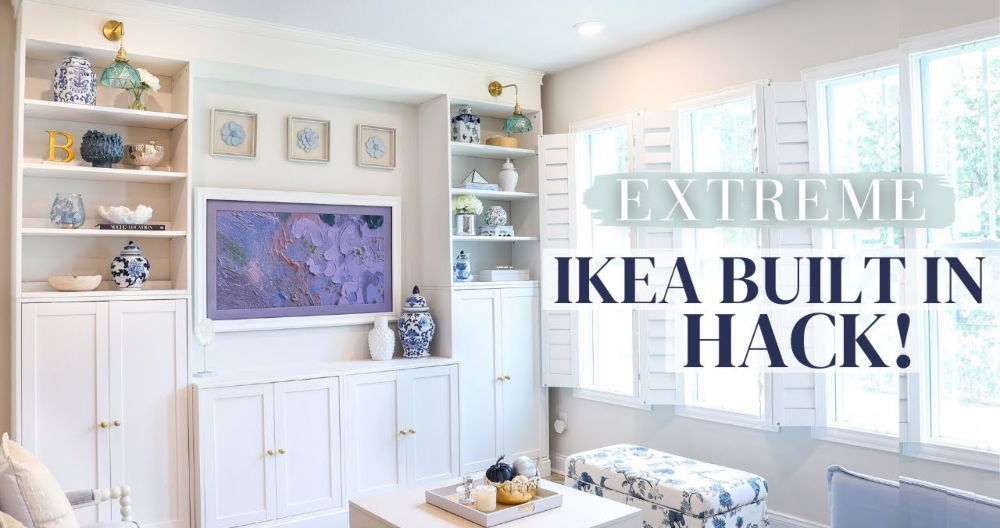
After assembly, I tackled the caulking, filling, and sanding of the entire structure. Choosing high-quality products like DAP's Extreme Stretch caulk and Premium Wood Filler made all the difference in making a flawless finish. Finally, priming and painting transformed the raw wood into a cohesive, elegant built-in fit for any home.
Step 8: Drawer Fronts, Doors, and Hardware Installation
Opting for pre-made doors and drawer fronts from a local woodworking shop saved time and ensured quality. Installing them proved tricky due to their size, but careful planning and precise measurements ensured a perfect fit. The hardware added the final touch of functionality and style.
The Importance of the Right Materials and Tools
Throughout this project, choosing the right materials and tools was paramount. Whether it was the finish of the plywood or the specific type of caulk and paint, each decision played a critical role in the project's success. Using an airless sprayer, for instance, gave the paint job a smooth, professional finish that would have been hard to achieve otherwise.
Personalization and Customization
Personalization and customization are crucial in making a built-in entertainment center that matches your style and needs. Here's how to add a personal touch:
- Choose a Theme or Style Start by deciding on a theme that resonates with you. Whether it's modern, rustic, or minimalist, the style you choose will guide the design elements and materials you select.
- Select Colors and Textures Pick colors and textures that complement the room's decor. If you're going for a warm, cozy feel, consider wood tones. For a sleek look, think about using metal or glass accents.
- Functional Design Think about the devices you'll be housing. Make spaces for your TV, gaming consoles, and media players. Ensure there's enough room for ventilation to prevent overheating.
- Custom Storage Design storage solutions tailored to your collection. If you have a lot of DVDs or video games, include shelving that fits them perfectly. If you're a gamer, build a designated area for your controllers and accessories.
- Built-In Charging Stations Incorporate charging stations within the entertainment center. This can be as simple as adding power strips in drawers or making a dedicated charging shelf with built-in USB ports.
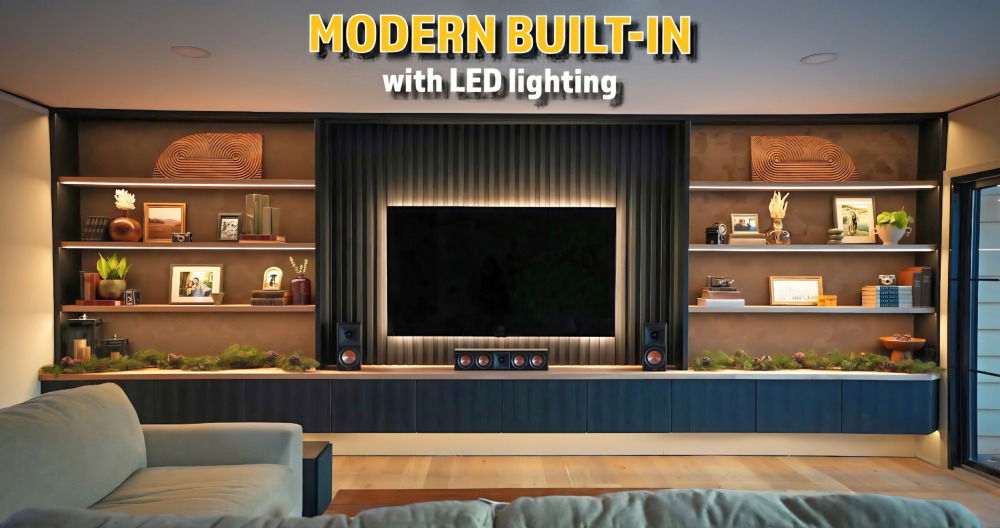
- Lighting Install adjustable lighting to enhance the atmosphere. LED strip lights can be placed behind the TV or under shelves to build ambient lighting that can change color to match your mood.
- Acoustic Considerations If you're integrating speakers, consider the acoustics. Use materials that enhance sound quality and design the layout to prevent sound from being muffled.
- Display Areas Leave some open spaces to display personal items like photos, artwork, or collectibles. These areas can be easily changed to refresh the look whenever you like.
- Flexibility for Future Changes Design your entertainment center with adaptability in mind. As technology and your preferences change, you'll appreciate being able to update without a complete overhaul.
Follow these tips to design an entertainment center that's functional and reflects your personality.
Cable Management Solutions and Integrated Sound System Setup
Discover top cable management solutions and expert tips for integrated sound system setup. Enhance aesthetics and sound quality today!
Cable Management Solutions
Discover top cable management solutions, including concealed channels, cable clips and ties, in-wall wiring, and cord covers for a clutter-free space.
Concealed Channels:
- Problem: Cables can build visual clutter and disrupt the clean lines of your entertainment center.
- Solution: Install concealed channels or raceways behind the entertainment center to hide cables. These channels can be painted to match the wall color, making them virtually invisible.
Cable Clips and Ties:
- Problem: Wires often dangle and get tangled.
- Solution: Use adhesive cable clips or zip ties to bundle and secure cables. Route them neatly along the back of the entertainment center or inside designated cable channels.
In-Wall Wiring:
- Problem: Exposed wires can be unsightly.
- Solution: Consider running cables through the wall. Use in-wall rated HDMI and power cables for a seamless look. Consult an electrician if needed.
Cord Covers:
- Problem: Cords running from the entertainment center to power outlets can be messy.
- Solution: Install cord covers that match your wall color. These plastic or fabric covers hide cords along the baseboard or floor.
Integrated Sound System Setup
Master integrated sound system setup: speaker placement, wire routing, acoustic considerations, and subwoofer placement for optimal audio experience.
Speaker Placement:
- Problem: Poorly placed speakers can affect sound quality.
- Solution: Position speakers strategically. Place front speakers at ear level, surround speakers slightly above ear level, and center speakers below the TV.
Wire Routing:
- Problem: Exposed speaker wires can be unsightly.
- Solution: Conceal speaker wires by routing them along baseboards, under rugs, or behind furniture. Use cable clips or adhesive tape to secure them.
Acoustic Considerations:
- Problem: Sound reflections and echoes.
- Solution: Opt for acoustic panels or curtains to absorb sound. Arrange furniture and decor to minimize sound bounce.
Subwoofer Placement:
- Problem: Subwoofers can build an uneven bass distribution.
- Solution: Experiment with subwoofer placement. Corners or near walls often work well. Adjust settings based on room acoustics.
A well-organized entertainment center with thoughtfully managed cables and optimized sound placement enhances both aesthetics and functionality.
Custom Lighting Options
Lighting is not just about making a room bright. It's about setting the right mood, highlighting your style, and enhancing the functionality of your space. Here's how you can light up your entertainment center in a way that's both practical and stylish:
Layer Your Lights
- Why: Different activities need different kinds of light.
- How: Combine overhead lights with task lighting and accent lights. For example, use recessed lighting for a soft overall glow, add focused reading lamps, and install strip lights behind the TV for drama.
Go for LED
- Why: LEDs are energy-efficient and long-lasting.
- How: Choose LED bulbs and strips for your entertainment center. They come in various colors and can be dimmed to suit your mood.
Smart Lighting
- Why: Control your lights with ease.
- How: Install smart bulbs that you can control with your phone or voice. Change colors or set schedules without leaving your couch.
Indirect Lighting
- Why: Soften the light and reduce glare.
- How: Place lighting behind panels or furniture to cast a gentle glow. This is especially good for reducing screen glare during TV time.
Textured Light Fixtures
- Why: Add depth and interest to your space.
- How: Use light fixtures with interesting textures like rattan or frosted glass. They diffuse light beautifully and become a focal point.
Unique Shapes
- Why: Make a statement.
- How: Choose light fixtures with unique shapes that reflect your personal style. Think beyond the traditional and pick designs that catch the eye.
By considering these lighting options, you can build an entertainment center that shines in all the right ways.
Hidden Storage Solutions
The best storage is the kind you don't see. It keeps your space tidy and your items easily accessible. Here's how to master hidden storage in your entertainment center:
Under-Stair Drawers
- Why: Use wasted space.
- How: If your entertainment center is near a staircase, turn the empty space underneath into drawers for games, blankets, or electronics.
Built-In Wall Storage
- Why: Keep things out of sight.
- How: Build storage behind the wall panels of your entertainment center. Perfect for hiding away DVDs, remote controls, and gaming accessories.
Furniture with Secret Compartments
- Why: Surprise storage!
- How: Choose or build furniture like ottomans or coffee tables with hidden compartments. Store your items without anyone knowing.
Under-Floor Compartments
- Why: Innovative and unexpected.
- How: If you're up for a project, install under-floor storage in your entertainment room. Lift a floor panel to reveal a hidden world of storage.
Concealed Drawers in Staircases
- Why: Smart and sleek.
- How: Turn each step into a drawer for extra storage. It's a clever way to keep your entertainment accessories organized.
With these custom lighting and hidden storage solutions, your entertainment center will not only look great but also function beautifully, keeping your space clutter-free and well-lit.
Finishing Techniques
Finishing your built-in entertainment center is like adding the final touches to a masterpiece. It's not just about protection; it's about bringing out the beauty of your work and giving it a personality. Here's how to finish your project with flair:
Choose Your Finish
- Why: The right finish enhances the wood's natural beauty and provides protection.
- How: Decide between paint, stain, or varnish. Paint offers a wide range of colors, stain brings out the wood grain, and varnish provides a durable, clear coat.
Preparation is Key
- Why: A smooth finish starts with proper preparation.
- How: Sand the wood thoroughly, starting with a coarse grit and moving to a finer grit. This builds a smooth surface for even application of your finish.
Test It Out
- Why: Avoid surprises with the final look.
- How: Apply your chosen finish to a small, inconspicuous area first. This way, you can see the actual color and effect before committing to the entire piece.
Apply Evenly
- Why: An even coat looks professional.
- How: Use quality brushes or rollers. Apply thin, even coats, and follow the wood grain. For varnish or stain, wipe off excess with a clean cloth.
Let It Dry
- Why: Patience leads to perfection.
- How: Allow each coat to dry completely before applying the next. Rushing can lead to a tacky finish or visible brush strokes.
Protect Your Work
- Why: Keep your entertainment center looking great.
- How: Once the final coat is dry, apply a sealant if desired. This adds an extra layer of protection against scratches and spills.
By following these steps, you'll ensure your DIY built-in entertainment center not only looks stunning but also stands the test of time.
FAQs About DIY Built-In Entertainment Center
Discover answers to FAQs about DIY built-in entertainment centers. Learn everything you need to know for your home project!
The cost of building a DIY entertainment center can vary widely depending on the size, materials, and design complexity. On average, you can expect to spend anywhere from $200 to $1,000. This is significantly less than hiring a professional, which can cost several thousand dollars. Keep in mind that prices for lumber and other materials may fluctuate.
Yes, even if you're a beginner, you can tackle a DIY entertainment center project. Start with a simple design and follow step-by-step instructions available online. There are plans tailored for beginners that will guide you through the process. It's a great way to learn and improve your woodworking skills.
Measure your space carefully and consider the size of your TV and other media components. Think about storage needs for items like DVDs, gaming consoles, and accessories. Customizing your design allows you to create an entertainment center that perfectly fits your space and meets your specific requirements.
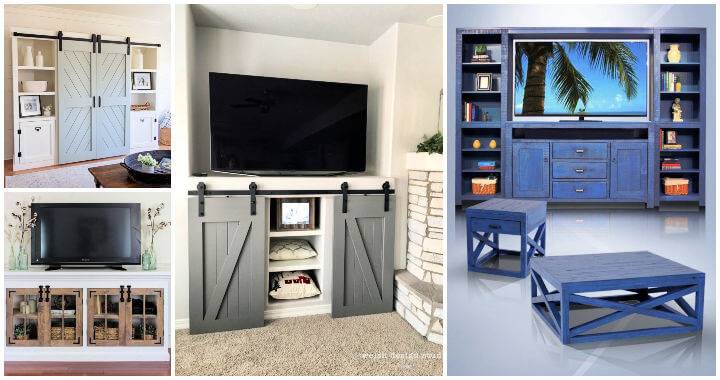
There are numerous design ideas for DIY entertainment centers. You can opt for a minimalist look with clean lines, incorporate bookshelves for a library feel, or add decorative moldings for a more traditional aesthetic. Consider adding features like LED lighting, glass doors, or a space for a soundbar to enhance functionality and style.
For a modern twist on your DIY entertainment center, consider incorporating sleek lines and a minimalist design. Use materials like high-gloss finishes, metal accents, and glass shelves. You can also integrate smart storage solutions like hidden compartments and cable management systems to maintain a clean and uncluttered appearance. Adding LED strip lighting can build a contemporary ambiance and highlight your entertainment setup. Remember, the beauty of a DIY project is that you can tailor it to your personal style and the latest trends.
Final Thoughts
In the end, it's all about taking the first step. You'll gain confidence as you move forward, and soon, you'll have a finished DIY built-in entertainment center project you'll be proud of. Let's get started with this guide—it'll help you every step of the way!


