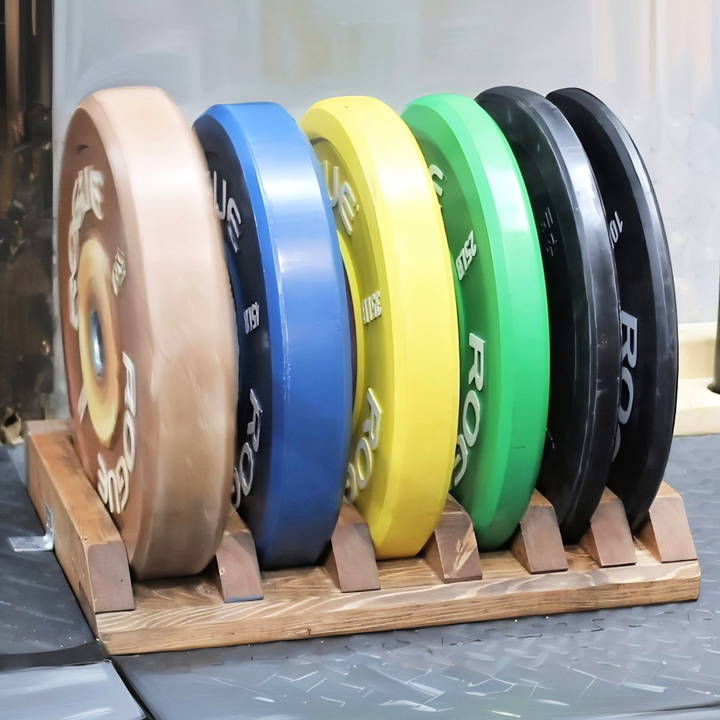
If you're building a home gym, organizing your equipment is essential. A great way to store your bumper plates efficiently is by building a DIY toaster rack. This project offers a simple and affordable solution for keeping your plates in order while maintaining a clean workout space. Here, we'll guide you through each stage of building a DIY bumper plate storage rack, covering everything necessary for a smooth start.
Why Build Your Own Toaster Rack?
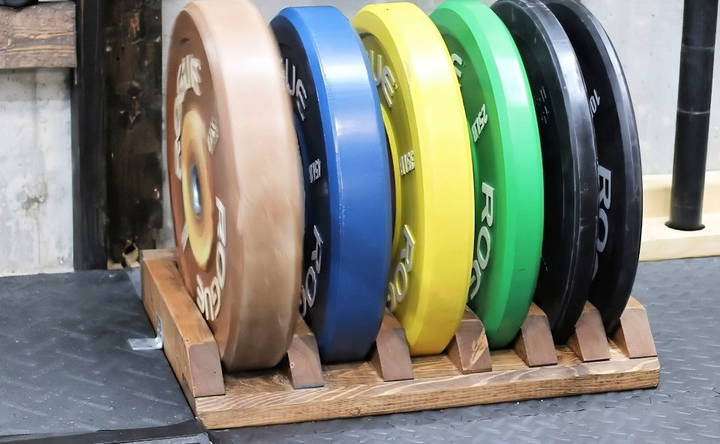
Storing bumper plates can be tricky without proper racks. This project provides a practical and space-saving way to store your plates horizontally on the floor. The "toaster rack" design allows you to roll plates in and out easily. This setup is perfect if you have plates of various sizes and want an easy way to keep them organized.
Building this rack yourself is not only cost-effective but also customizable. You can adjust it to match the size of your gym and the number of plates you own.
Project Overview
- Time to build: 1 - 1.5 hours
- Difficulty: Medium
- Cost: $12-$15 (based on standard 2x4 wood pieces and basic supplies)
Materials and Tools
Here's what you'll need to gather before you start building:
Materials:
- 2 - 7ft 2x4 wood pieces
- Titebond III wood glue: A strong and durable adhesive to secure the wooden pieces.
- 3-inch wood screws: For joining the wood pieces together.
- Early American wood stain: This is optional but recommended to give the rack a polished look.
Tools:
- Sliding mitre saw: To make clean and accurate cuts.
- Cordless drill: For driving screws and assembling the pieces.
- Table saw: Helpful for precision cuts and for beveling edges (optional).
- Random orbit sander: To smooth the wood and remove splinters.
- Jigsaw: Needed for cutting out sections of the 2x4s.
- Rafter square: To ensure straight lines when marking measurements.
Step by Step Instructions
Learn how to make a DIY bumper plate storage with step-by-step instructions, from measuring to assembly, ensuring safety and ease of use.
1. Get Your Measurements Right
Before making any cuts, measure the space where you plan to store your bumper plates. This project is customizable, so you can adjust the measurements based on the number of plates and their diameters.
For the average bumper plate set, you will want to cut your 2x4s into 14 ¼ inch sections. These pieces will form the dividers for your plates. If you have larger or smaller plates, adjust the length accordingly.
- Pro tip: Set up a jig (a tool used to control the location and motion of another tool) to speed up cutting multiple pieces to the same length. You'll need to cut 14 of these pieces.
2. Cut the Front and Back Pieces
Once your dividers are ready, it's time to cut the 2x4s that will form the front and back of the rack. These will hold everything together. Measure and cut four pieces based on the width of your entire plate stack, plus a little extra room for movement.
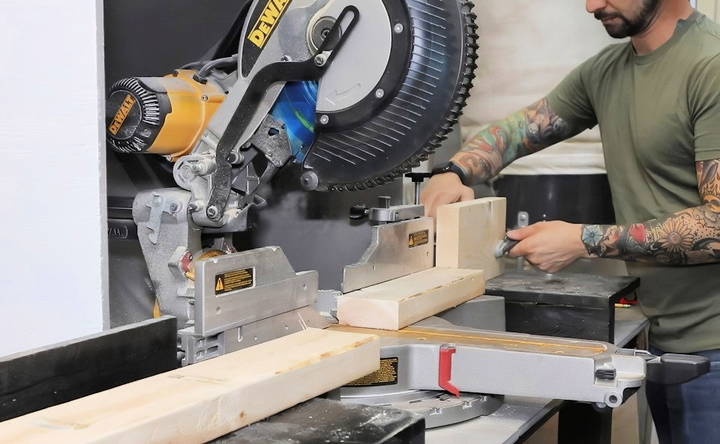
For example, if you're storing five 45-lb plates and three 25-lb plates, leave at least ½ inch of extra space between the plates. This allows easy access when you need to roll them out of the rack.
3. Cut Notches for a Perfect Fit
The design's key feature is how the front 2x4 sits flat on the ground, allowing the plates to roll easily into place. To achieve this, you'll need to cut notches into the shorter 2x4 pieces (your dividers).
Using a combination square, mark out 1.5 inches by 3 inches on each end of the dividers. These cutouts will allow the front 2x4 to fit flush with the dividers. Use your jigsaw to carefully cut along these lines. Don't worry if the lines aren't perfect; the cuts just need to be close enough to fit snugly.
4. Angle Your Cuts for Easier Plate Movement
To make it even easier to roll the plates into the rack, you'll bevel the edges of the longer 2x4 pieces. Set your table saw at a 45-degree angle and carefully cut along the edges. This step is optional, but it can enhance the functionality and aesthetic of your rack.
5. Smooth the Wood for Safety
Once all the cuts are made, it's time to sand the wood. Use your random orbit sander to smooth out any rough edges or splinters. This will not only make the rack safer to handle but also ensure the plates don't get scratched.
6. Assemble the Rack
It's finally time to put everything together. Start by gluing the sides of your dividers to the front and back pieces. Once the glue has dried, secure the pieces with wood screws.
- Attach the side pieces first, applying wood glue and then driving in the screws.
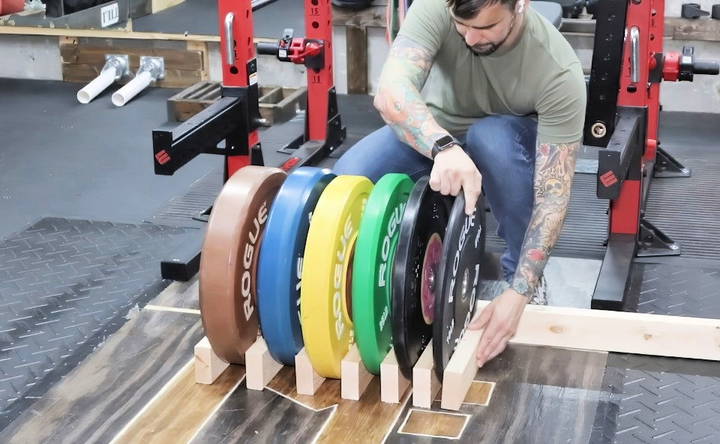
- Place the weights in the rack to determine the proper spacing between the dividers.
- Once the weights are in place, add two screws to secure the back of each divider.
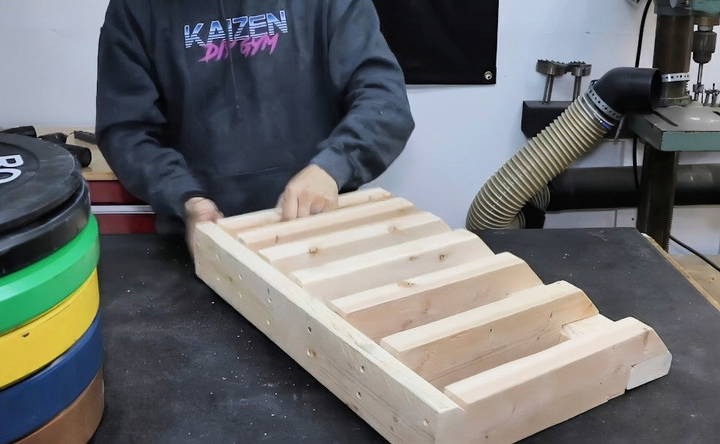
For the front side, use a single screw driven in at an angle to secure the front piece to each divider. This screw placement will keep the dividers locked in place without obstructing plate movement.
7. Final Touches
To finish off the project, give the entire rack another pass with the sander to smooth any rough spots. You can then apply wood stain to give it a polished look. Let it dry overnight before using the rack.
Safety First
Whenever you're working with power tools, safety is a priority. DIY projects are fun and rewarding, but they come with risks if you're not careful. Before you start cutting, drilling, or sanding, make sure to wear protective eyewear and gloves. Familiarize yourself with your tools and never rush through cuts.
Conclusion: An Easy-to-Build, Custom Storage Solution
Building your own bumper plate storage rack is a rewarding project that will keep your gym organized while saving you money. The toaster rack design allows you to store plates in a space-efficient way, and the custom nature of the build lets you adjust it to fit your exact setup. With just a few basic tools and some affordable materials, you can have your plates neatly stored in no time.
Not only does this project look great, but it also makes grabbing the right plate much easier during your workouts. Whether you have bumper plates, iron plates, or a mix of both, this storage solution will enhance the functionality and appearance of your home gym.
So grab your tools and get started on your DIY toaster rack today!
FAQ for DIY Bumper Plate Storage Rack
Discover how to build a DIY bumper plate storage rack with our step-by-step faq guide, ensuring organized and efficient gym space.
Yes! If you need to move your plates around frequently, you can add wheels to the bottom. Just make sure to select casters that can handle the weight of the plates. You’ll want to use heavy-duty, locking casters to ensure the rack stays stable.
Absolutely. The process is the same, but you’ll want to use your iron plates as the template for spacing the dividers. Since iron plates are typically thinner than bumper plates, you can fit more plates in the rack or reduce the overall width of the rack.
This is a matter of personal preference. Some people choose to place plywood on the bottom to help with stability and to prevent damage to the floor. However, if you don’t plan on moving the rack often, you can skip the plywood and allow the plates to rest directly on the floor.
Yes, though it may take more time and effort. Use hand saws and manual screwdrivers instead of power saws and drills. Ensure your cuts are accurate and clean, but note that manual work will increase your build time significantly.
If you plan to store heavier plates, consider reinforcing the rack with thicker wood or metal brackets. Also, ensure the base is stable by adding more screws or using plywood beneath the rack for extra support.
If space is an issue, consider wall-mounting your plates. This method works well, especially for thicker plates, like Eleiko XF plates, which are too wide for standard toaster racks.
Yes, some users have repurposed items like bike racks for plate storage, though the fit may not be perfect. Crash cushions with cut grooves also work well for a more customized fit.
To move the rack around easily, add heavy-duty castor wheels to the bottom. Make sure the wheels can support the total weight of the plates and have locking mechanisms to keep the rack stable.
Yes, the same design works for iron plates, but you’ll need to adjust the spacing between dividers as iron plates are generally thinner than bumper plates.
Yes, beveling both the front and back rails helps the plates roll in smoothly. Without this, the plates may not fit or move as easily.
Staining is optional but gives the rack a polished look. It also adds a protective layer to the wood, helping prevent wear and tear over time.
If your dividers feel too tight, you can allow an extra ¼ to ½ inch between each divider for easier access and plate movement. This extra space ensures the plates slide in and out smoothly.
While it can be moved outdoors, prolonged exposure to the elements may damage the wood. If you plan to use the rack outdoors frequently, consider sealing the wood or using weather-resistant materials.


