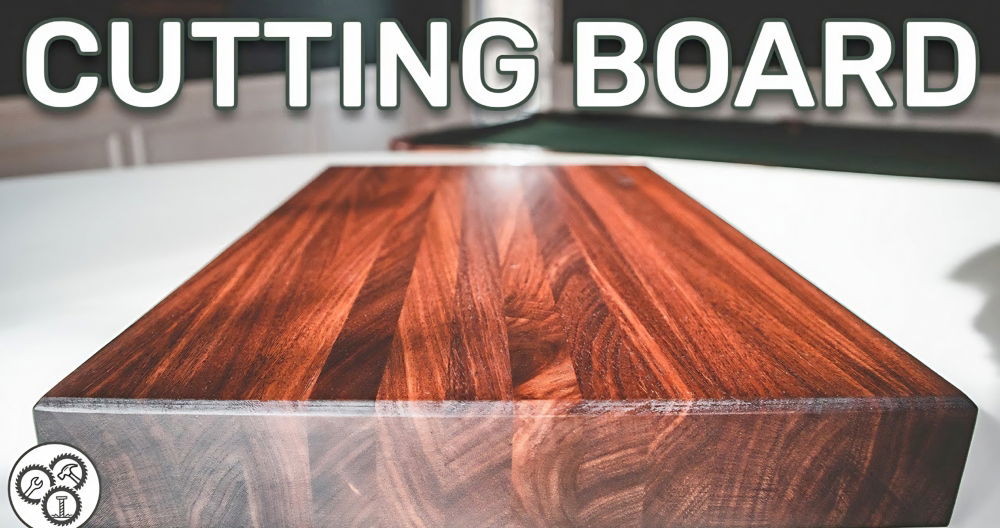
Making your own DIY butcher block countertop can be a fun and rewarding project. It's perfect for anyone interested in adding a natural, sturdy touch to their kitchen. This task is more straightforward than you might think, requiring only basic tools and a bit of patience. The end result is a beautiful, functional piece that adds warmth and character to your home.
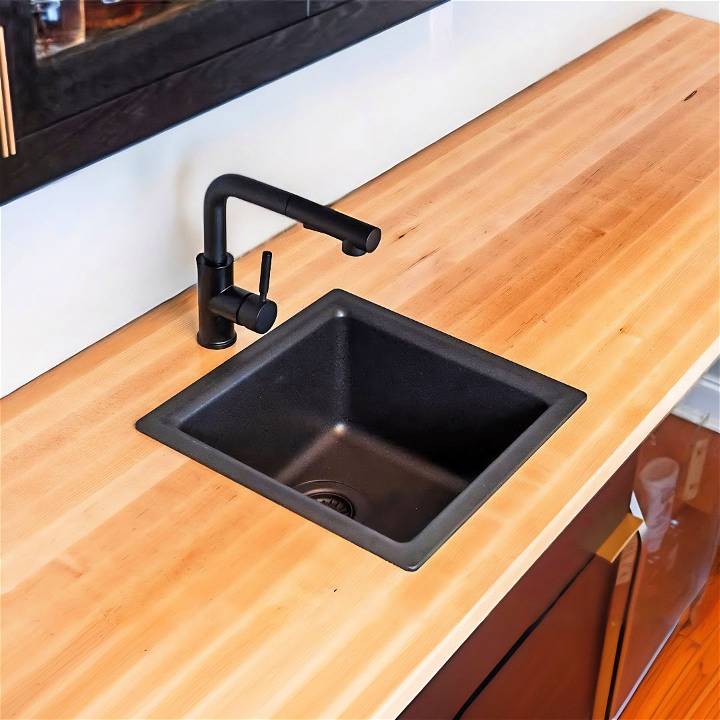
Learning how to make butcher block countertops involves several essential steps. These include selecting the right wood, cutting and assembling the pieces, and finally, sanding and sealing the surface. Each step is crucial in ensuring that the countertop is both durable and visually appealing. Keep reading to explore detailed instructions and helpful tips to create your own butcher block countertop.
Understanding Butcher Block Countertops
Butcher block countertops are a blend of beauty and function that have been part of kitchen designs for many years. Originating from the heavy-duty chopping blocks found in butcher shops, these countertops have evolved into a popular choice for homeowners looking for a warm, natural look in their kitchens.
What is Butcher Block?
Butcher block is made by gluing straight cuts of wood together to form a solid, sturdy slab. While traditionally made from maple, a hard wood with a clear grain, today’s butcher blocks can include a variety of woods like oak and cherry or even exotic options like teak.
Why Choose Butcher Block?
One of the main reasons people choose butcher block is its durability. If you take good care of it, wood can last for decades, developing a rich patina that adds character to your kitchen over time. Unlike other materials, if your butcher block does get scratched or nicked, you can simply sand the area and re-oil it to make it look as good as new.
Another advantage
Its natural antibacterial properties. When sealed properly, wood surfaces can be incredibly hygienic, making them ideal for food preparation. Plus, the warmth of wood can make any kitchen feel more inviting, balancing out the coldness of stainless steel appliances and stone countertops.
Maintenance and Care
To keep your butcher block looking great, it’s important to seal it right after installation and maintain it regularly. Sealing helps protect the wood from moisture, which can cause warping or staining. You’ll also want to oil your countertop periodically to keep the wood from drying out.
Cost-Effectiveness
Butcher block countertops are often more affordable than other materials like marble or quartz. The cost can vary, but generally, it’s a budget-friendly option, especially if you’re handy and can handle the installation yourself.
Butcher block countertops add timeless charm and warmth to kitchens. Though they need care and proper upkeep, they last years. Ideal for home chefs or wood lovers, they're a great blend of style and function.
Why Butcher Block Countertops?
Choosing the material for the countertop was a crucial decision. I opted for hard maple due to its durability, hardness, and tight grain structure, which is resistant to bacteria and dirt accumulation. It’s a traditional choice for butcher blocks and for all the right reasons.
Materials and Tools Needed
Before diving into the process, here are the materials and tools you’ll need and why:
- Hard Maple Boards: The base material for the countertops.
- Jointer and Table Saw: To ensure the boards are perfectly flat rip them into strips.
- Bandsaw: For safer ripping of the boards, consider that hard maple can be tension-filled.
- Outfeed Roller: To support the long boards during cutting.
- Glue Spreader and Clamps: These are used to glue the strips together.
- Dust Collector: Because woodworking is messy.
- Planer: To make all the surfaces and edges smooth and even.
- Router and Chamfer Bit: This is used to chamfer the edges.
- Sanding Supplies: To smoothen the surface after scraping.
- Faucet: For the sink in the bar.
- Silicone: To seal the sink.
- Finish: I used a marine-grade finish for durability against water damage.
Step by Step Instructions
Learn how to create DIY butcher block countertops with step-by-step instructions, from cutting boards to final installation and finishing.
Cutting the Boards into Strips
- Cut Rough Length: I started by cutting the boards to a rough length of 101 inches, a bit more than my required 99.5 inches, to account for any errors.
- Joint and Rip: Using the jointer, I ensured one edge of each board was perfectly flat before ripping them into strips with the bandsaw, a safer choice due to the tension in the hard maple.
Preparing for Glue Up
- Planning: After ripping, I planned the two faces that would be glued together for a clean glue line and a flat surface.
- Gluing: Using a glue spreader, I applied glue evenly and clamped the strips together, ensuring they were flat and aligned.
Assembling the Sections
- Creating Sections: I planned to glue the countertop in three sections. This approach made managing the project more feasible and allowed for easier flattening later on.
- Flattening: With all the sections glued, I used my jointer and planer to make them perfectly flat.
Final Assembly and Finishing
- Dominoes for Alignment: I used dominoes to align the sections during the final glue-up, ensuring a seamless surface.
- Sanding and Routing: After the full countertop was assembled, I sanded the entire surface and used a router to chamfer the edges for a smooth finish.
- Applying Finish: I sprayed the countertop with a marine-grade finish, ensuring durability and resistance to water.
Installing the Countertop
- Attaching the Countertop: I drilled oversized holes in the stretchers beneath the countertop for attachment, allowing for wood movement.
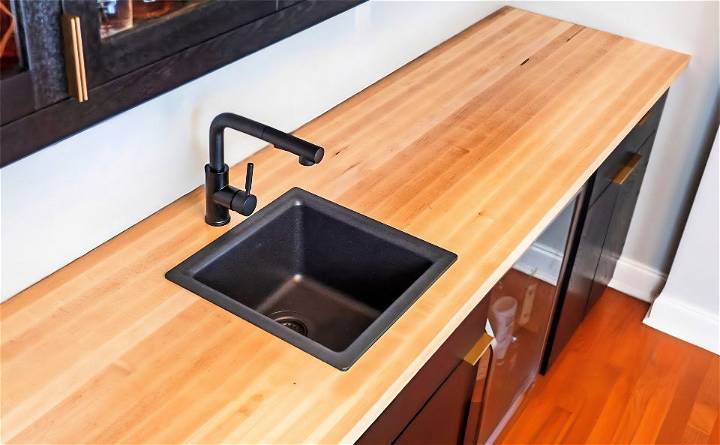
- Cutting for the Sink: I traced and cut out the area where the sink would be installed, making sure it was aligned correctly.
- Installing the Sink and Faucet: I applied silicone around the edges of the sink, placed it in the hole, and installed the faucet as per the manufacturer's instructions.
Customization Ideas for Butcher Block Countertops
When it comes to personalizing your kitchen, butcher block countertops offer a world of possibilities. They are not just a practical work surface but also a way to express your style and enhance the overall look of your kitchen. Here are some creative ideas to customize your butcher block countertops:
- Choose Your Wood Wisely Different woods can change the look and feel of your countertops. Classic choices like maple and oak offer durability and a traditional look. For a darker, more luxurious appearance, consider walnut. If you’re on a budget, birch or beech can be cost-effective yet beautiful options.
- Pick the Perfect Finish A butcher block’s finish can influence both its aesthetics and functionality. For a natural look and the ability to cut directly on the surface, a food-safe mineral oil finish is ideal. If you prefer a low-maintenance option, a sealed varnish finish might be the way to go.
- Edge Profiles The edge profile of your countertop can add a subtle but significant touch to your kitchen’s design. Options range from a simple square edge to a more decorative ogee or bullnose profile. Each provides a different level of sophistication and style.
- Color Customization Staining your butcher block can align it with your kitchen’s color scheme. From light, airy tones to deep, rich stains, the color of your butcher block can dramatically affect the ambiance of your space.
- Incorporate Unique Features Consider adding features like a built-in cutting board that slides out or a trivet for hot pots. These functional customizations not only add convenience but also a professional touch to your kitchen.
- Mix Materials For a modern twist, mix materials by incorporating sections of stone or metal into your butcher block countertop. This not only creates visual interest but can also designate specific areas for different tasks.
- Add a Personal Touch Engraving a personal design or family crest can make your countertop truly one-of-a-kind. This is especially popular for islands that serve as the focal point of the kitchen.
Implement these ideas to make your butcher block countertop durable, functional, and stylish. Balance aesthetics with practicality for a lasting, cherished kitchen feature.
Troubleshooting Common Issues with Butcher Block Countertops
Butcher block countertops are a stunning addition to any kitchen, offering a warm, natural aesthetic and a sturdy work surface. However, like any material, they can encounter issues over time. Here’s a guide to help you troubleshoot common problems, ensuring your butcher block remains in top condition.
Dealing with Stains and Discoloration
Stains can occur from spills or prolonged exposure to colored liquids. To remove stains:
- Clean the surface immediately after any spill.
- For persistent stains, gently sand the area and reapply oil or finish.
Preventing and Fixing Cracks
Wood can dry out and crack, especially in low humidity. To prevent and fix cracks:
- Maintain a consistent oiling schedule to keep the wood hydrated.
- If cracks appear, fill them with wood filler that matches your countertop, then sand and oil the area.
Avoiding Water Damage
Water is wood’s enemy. To avoid water damage:
- Always wipe up spills promptly.
- Don’t let standing water sit on the countertop.
- Consider installing a sink with an adequate overhang to prevent water from dripping onto the countertop edges.
Handling Scratches and Dents
Scratches and dents are inevitable with regular use. To handle them:
- For minor scratches, sand lightly and re-oil.
- For deeper dents, steam can help raise the wood grain. Place a damp cloth over the dent and apply a hot iron for a few seconds. Then sand and oil as usual.
Combating Heat Marks
Hot pots and pans can leave scorch marks. To combat heat marks:
- Use trivets or hot pads to protect the surface.
- If marks occur, sand the area lightly and reapply oil or finish.
Addressing Mold and Bacteria
Wood has natural antibacterial properties, but mold can still form. To address mold and bacteria:
- Keep the countertop dry and clean.
- Use a vinegar solution for cleaning to help kill bacteria and mold spores.
Managing Seasonal Wood Movement
Wood expands and contracts with seasonal humidity changes. To manage this:
- Allow for slight gaps between the countertop and walls during installation to accommodate wood movement.
- Don’t seal the wood too tightly against other surfaces.
Addressing issues promptly ensures butcher block countertops stay beautiful and functional for years. Regular maintenance and some TLC preserve their natural beauty.
Maintenance and Care for Butcher Block Countertops
Keeping your butcher block countertops in top shape doesn’t have to be a chore. With a little know-how and regular attention, you can ensure they remain both beautiful and functional for many years. Here’s a straightforward guide to maintaining your butcher block countertops.
- Daily Cleaning: Every day, give your countertops a quick clean. Use a soft cloth and some warm, soapy water to wipe them down. Rinse with a clean, damp cloth and dry thoroughly to prevent water from soaking into the wood.
- Deep Cleaning Once in a while, your countertops might need deeper cleaning, especially after working with raw foods. Mix equal parts water and white vinegar in a spray bottle. Spray the solution onto the countertops and wipe them down with a clean cloth. This will help disinfect the surface.
- Oiling Your Countertops: To keep the wood from drying out and cracking, oil your countertops regularly. Use a food-safe mineral oil or a specialized butcher block conditioner. Apply the oil with a clean cloth, let it soak in for an hour, then wipe off any excess. Doing this every few months will help maintain the wood’s natural sheen.
- Handling Scratches and Nicks: It’s normal for butcher block countertops to get scratched over time. When this happens, lightly sand the area with fine-grit sandpaper until smooth. After sanding, clean the area and apply mineral oil to protect the surface.
- Repairing Cracks If you notice small cracks, you can fill them with a food-safe wood filler. Once the filler is dry, sand the area smooth and apply oil or conditioner to seal it.
- Preventing Mold and Rot Butcher block is prone to mold and rot if left wet. Always wipe up spills and puddles immediately. If you do spot mold, clean the area with the vinegar solution mentioned earlier.
- Seasonal Care Wood expands and contracts with changes in humidity. To accommodate this, leave a small gap between the countertop and the wall during installation. Also, don’t seal the wood too tightly against other surfaces to allow for this natural movement.
By following these simple steps, you can keep your butcher block countertops looking as good as new. Regular maintenance not only preserves their appearance but also ensures they remain a hygienic surface for food preparation.
FAQs About DIY Butcher Block Countertop
Explore faqs about DIY butcher block countertops. Get expert tips, installation steps, and maintenance advice for your home project.
A butcher block countertop is a durable, attractive surface made from straight cuts of wood that are glued together to create a solid piece. It’s commonly used in kitchens for its warm, natural look and its practicality.
Common woods for butcher block countertops include maple, alder, teak, birch, ash, and walnut. Soft maple is a popular choice because it’s dense yet easy to work with and finishes beautifully.
Maintain your butcher block by cleaning it regularly with mild soap and water, oiling it every few months to prevent drying out, and sanding and re-oiling any scratches or marks to keep it looking new.
Yes, you can cut directly on a butcher block countertop. However, it’s recommended to use a cutting board to avoid scratches and preserve the surface. If you do cut on it, sand out any marks and re-oil the surface to protect it.
Butcher block countertops are quite durable, but they are not heatproof. It’s best to avoid placing hot pots and pans directly on the wood surface as it can scorch or burn the wood. Always use a trivet or hot pad to protect your countertop from heat damage.
Conclusion
In conclusion, these DIY butcher block countertops offer a fantastic way to elevate your kitchen space. By following the steps in this how to make butcher block countertops guide, you'll gain confidence and experience in creating your own stunning and functional countertops. Enjoy the process and the beautiful result!


