As someone who loves spending time in my workshop crafting bird feeders and birdhouses every spring, I wanted to try something a bit different this year. I decided to build a DIY butterfly house—a cozy, inviting spot for butterflies to rest and shelter. I'd made one a few years back, and while it held up for a while, I learned a few things about how to make it better. This time around, I aimed to make a more durable and attractive butterfly house.
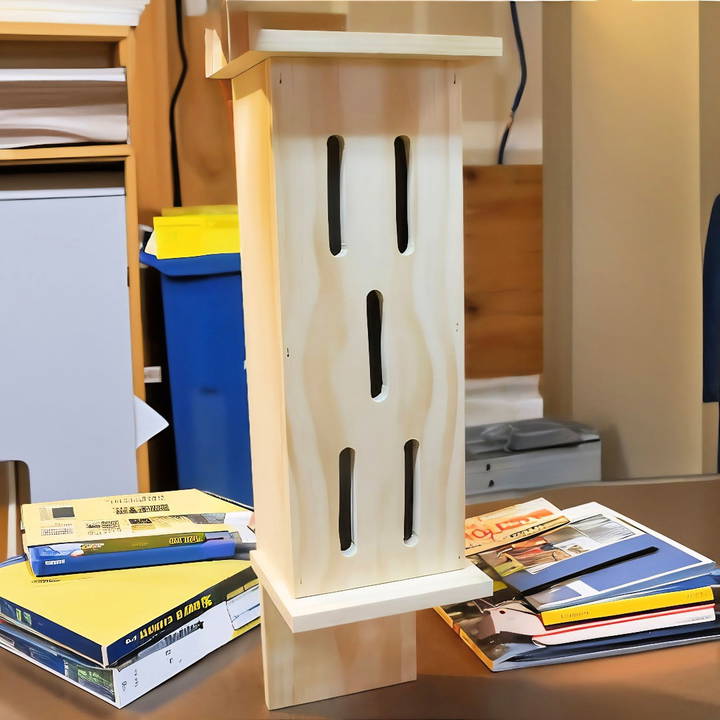
I followed a plan from a book by AJ Hammler, called Easy to Build Birdhouses. I've always been a fan of AJ's work; his plans are simple and straightforward, making them perfect for both beginners and seasoned woodworkers. If you're new to woodworking or just looking for an easy project to knock out in a couple of hours, this butterfly house is a fantastic choice.
Now, let's dive into how I made this butterfly house step-by-step. I'll share my materials, tips, and experiences along the way to make your journey as enjoyable as mine.
Materials and Tools Needed for Building a Butterfly House
Before we jump into the steps, let's start with the materials and tools needed for this project. I found that having everything laid out beforehand made the whole process smoother. Here's what I used:
Materials:
- Half-inch Pine Board: I used pine because it's easy to work with and relatively inexpensive. The plan called for a half-inch thick board for both the front and back of the house.
- Exterior Rated Wood Glue: This glue is crucial for holding everything together, especially since the butterfly house will be outdoors and exposed to the elements.
- Brad Nails: These are used to secure the pieces of wood together.
- Branches or Sticks: These are attached inside the house for butterflies to perch on.
- Screw for the Lid: To make the house easy to clean, I followed the plan's suggestion of attaching the top with a screw.
Tools:
- Table Saw (or Miter Saw or Handsaw): I used a table saw to cut the pine board, but you could easily use a miter saw or even a handsaw if that's what you have.
- Drill and Half-Inch Drill Bit: Needed to start the slots in the front panel.
- Jigsaw: Essential for cutting out the slots.
- Bandsaw: I used a bandsaw to split the branches in half, making them easier to attach inside the house. If you don't have one, you can use a hand saw or any method to flatten one side.
- Clamps: Helpful for holding pieces in place while the glue dries.
Step by Step Instructions
Learn how to make a butterfly house with our step-by-step DIY guide. Easy instructions from cutting wood to finishing touches.
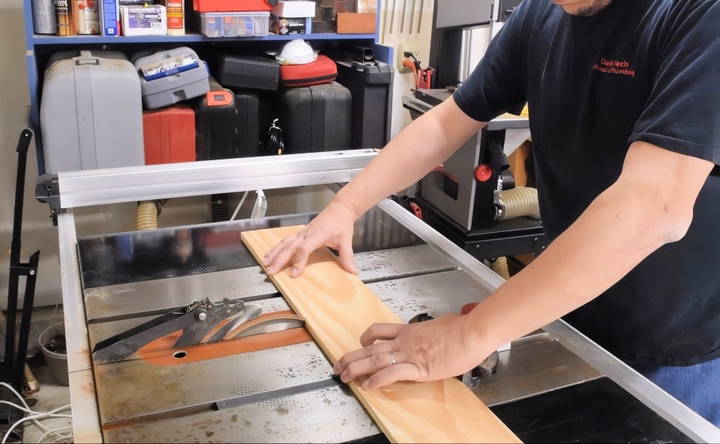
Step 1: Cutting the Wood Pieces
The first step is to cut all the pieces for the butterfly house. The plan I followed called for specific dimensions:
- Front and Back Panels: 15 inches long and 5.5 inches wide.
- Side Panels: 15 inches long and 3.5 inches wide.
I used my table saw to cut these pieces to size, but if you have a miter saw or even just a handsaw, that would work fine too. I prefer using a table saw because it gives me straight and clean cuts, but the key here is to use whatever you're comfortable with.
One thing I've learned from past projects is to double-check my measurements before cutting. It's a simple tip, but it saves a lot of frustration later on.
Step 2: Building the Slots in the Front Panel
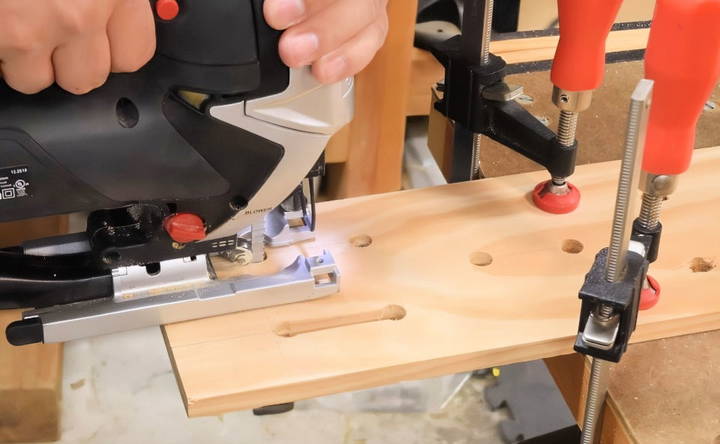
With all the boards cut, the next step was to work on the front panel. This part is essential because the slots are where the butterflies will enter and exit the house. The plan called for five slots, and to make these, I first used a half-inch drill bit to start at each end of a slot.
I drilled at both ends of where each slot would be and then used a jigsaw to cut out the slots, connecting the two drilled holes. Using a jigsaw can be tricky if you're not used to it, so take your time. My cuts weren't perfect—my jigsaw work definitely needs improvement—but they got the job done. I remind myself that the butterflies won't care if the slots aren't perfectly straight!
Step 3: Preparing the Perching Branches
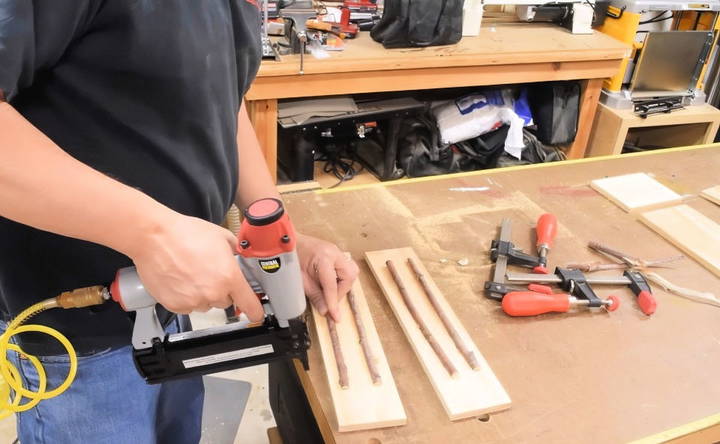
To give the butterflies something to perch on inside the house, I attached some small branches to the interior walls. Before attaching them, I used a bandsaw to cut them in half lengthwise. This way, they have a flat side that makes attaching them easier.
If you don't have a bandsaw, don't worry. You can flatten one side of the branches with a hand saw or even use whole branches if that's easier. The main thing is that they're securely attached, either with brad nails or even staples. Butterflies like having a textured surface to cling to, so feel free to use natural, rough branches.
Step 4: Assembling the Butterfly House
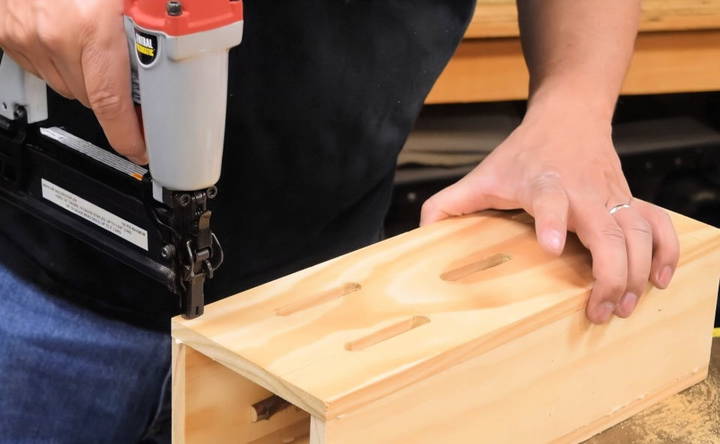
Now comes the fun part—putting everything together! I started by attaching the side panels to the back panel using exterior-rated wood glue and brad nails. I made sure to apply enough glue to hold everything securely but not so much that it seeped out. Clamps can be helpful here to hold the pieces together while the glue dries.
Next, I attached the front panel with the slots. I used the same process—glue and brads. After that, I attached the top and bottom pieces to complete the box. I opted for a screw to secure the lid, as suggested by the plan. This makes it easy to remove the lid and clean the house if needed.
Step 5: Painting and Finishing Touches
Once the assembly was complete, I took a moment to admire my work. The structure looked solid, and everything fit together nicely. The last step was to give the butterfly house a bit of color. I haven't decided on a final color yet, but I'm leaning towards something bright like yellow to make it stand out in the garden.
Before painting, I lightly sanded the entire house to smooth out any rough edges. I find that sanding between coats of paint or varnish gives a much nicer finish. Plus, it helps the paint adhere better.
Customization Ideas
Customizing your butterfly house can make it more attractive and functional. Here are some simple and creative ideas to personalize your butterfly house:
1. Design Variations
Discover unique design variations by exploring paint and decorate options and different materials to enhance your space.
Paint and Decorate:
- Bright Colors: Use bright, non-toxic paints to attract butterflies. Colors like red, yellow, and purple are particularly appealing.
- Patterns: Add patterns such as flowers, leaves, or butterflies to make the house visually appealing.
- Natural Look: For a more natural look, use wood stains or leave the wood untreated to blend with the garden environment.
Different Materials:
- Wood Types: Experiment with different types of wood like cedar, pine, or reclaimed wood. Each type offers a unique look and durability.
- Recycled Materials: Use recycled materials like old wooden pallets or leftover construction wood to build an eco-friendly butterfly house.
2. Seasonal Adjustments
Discover essential summer and winter modifications for optimal seasonal adjustments in your home or business. Enhanced comfort year-round!
Summer Modifications:
- Ventilation: Ensure proper ventilation by adding small holes or slits to keep the house cool.
- Shade: Place the house in a shaded area to protect butterflies from excessive heat.
Winter Modifications:
- Insulation: Add insulation materials like straw or dried leaves inside the house to keep it warm.
- Weatherproofing: Apply a weatherproof sealant to protect the house from rain and snow.
3. Functional Enhancements
Discover the best functional enhancements for your home: feeding stations and water sources. Improve convenience and efficiency today!
Feeding Stations:
- Nectar Feeders: Attach small nectar feeders to the house to provide an additional food source.
- Fruit Trays: Place trays with overripe fruit near the house to attract butterflies.
Water Sources:
- Puddling Stations: Build small puddling stations with shallow dishes of water and sand. Butterflies need these for hydration and minerals.
- Moist Sponges: Place moist sponges inside the house to maintain humidity.
4. Decorative Elements
Enhance your space with stunning roof decorations and unique hanging ornaments. Discover exquisite decorative elements for every style.
Roof Decorations:
- Green Roof: Plant small, low-maintenance plants on the roof for added beauty and insulation.
- Decorative Shingles: Use decorative shingles or tiles to give the roof a unique look.
Hanging Ornaments:
- Wind Chimes: Hang small wind chimes to add a soothing sound to your garden.
- Butterfly Ornaments: Attach butterfly-shaped ornaments or garden stakes around the house for added charm.
5. Personal Touches
Discover how personal touches, including name plates and interactive features, can enhance your space with unique, individualized elements.
Name Plates:
- Custom Signs: Build a custom sign with the name of your butterfly house or a special message.
- Engraving: Engrave your name or a short message on the wood for a personal touch.
Interactive Features:
- Observation Windows: Add small, clear windows to observe butterflies without disturbing them.
- Educational Plaques: Attach plaques with information about butterflies and their lifecycle to educate visitors.
By incorporating these customization ideas, you can make a unique and inviting butterfly house that not only looks great but also supports the needs of butterflies throughout the year.
Common Issues and Solutions
Building and maintaining a butterfly house can come with its own set of challenges. Here are some common issues you might face and practical solutions to address them:
1. Lack of Butterfly Visitors
Issue: Despite your efforts, butterflies are not visiting your house.
Solution:
- Location: Ensure the butterfly house is placed in a sunny, sheltered spot. Butterflies prefer warm, sunny areas.
- Attractive Plants: Plant nectar-rich flowers like milkweed, lantana, and zinnias nearby to attract butterflies.
- Avoid Pesticides: Refrain from using pesticides in your garden as they can deter or harm butterflies.
2. Pests and Predators
Issue: Unwanted pests or predators are invading the butterfly house.
Solution:
- Regular Cleaning: Clean the house regularly to remove any pests or debris.
- Predator Guards: Install predator guards or mesh screens to keep out birds and other predators.
- Natural Repellents: Use natural repellents like garlic spray to deter pests without harming butterflies.
3. Weather Damage
Issue: The butterfly house is damaged by harsh weather conditions.
Solution:
- Sturdy Materials: Use durable materials like cedar wood, which can withstand various weather conditions.
- Weatherproofing: Apply a weatherproof sealant to protect the house from rain and snow.
- Secure Placement: Ensure the house is securely anchored or mounted to prevent it from being blown away by strong winds.
4. Mold and Mildew
Issue: Mold or mildew is growing inside the butterfly house.
Solution:
- Proper Ventilation: Ensure the house has adequate ventilation to prevent moisture buildup.
- Regular Cleaning: Clean the house with a mild bleach solution to remove mold and mildew.
- Dry Environment: Place the house in a dry, well-ventilated area to reduce humidity.
5. Structural Issues
Issue: The butterfly house is falling apart or showing signs of wear and tear.
Solution:
- Quality Construction: Build the house using high-quality materials and sturdy construction techniques.
- Regular Maintenance: Inspect the house regularly for any signs of damage and repair as needed.
- Protective Coating: Apply a protective coating to the wood to extend its lifespan.
6. Overcrowding
Issue: Too many butterflies or other insects are crowding the house.
Solution:
- Multiple Houses: Consider building multiple butterfly houses to distribute the population.
- Spacious Design: Ensure the house has enough space and compartments to accommodate multiple butterflies comfortably.
- Monitor Population: Regularly monitor the butterfly population and make adjustments as needed.
7. Inadequate Food Sources
Issue: Butterflies are not finding enough food near the house.
Solution:
- Nectar Plants: Plant a variety of nectar-rich flowers around the house to provide a continuous food source.
- Fruit Feeders: Place fruit feeders with overripe fruit near the house to attract butterflies.
- Water Sources: Provide shallow dishes of water with sand or pebbles for butterflies to drink from.
Solve these common issues to make your garden a safe haven for butterflies. This will ensure your butterfly house remains welcoming and secure for them.
FAQs About DIY Butterfly Houses
Discover answers to common questions about DIY butterfly houses, including materials, placement, and maintenance tips. Enhance your garden today!
A butterfly house is a small, enclosed structure designed to provide shelter for butterflies. Building one can help attract butterflies to your garden, offering them a safe place to rest and hide from predators. It also adds a charming decorative element to your outdoor space.
Place your butterfly house in a sunny spot, about 2-3 feet off the ground. Ensure it’s near flowering plants that attract butterflies. Avoid placing it in areas with strong winds or heavy foot traffic to provide a peaceful environment for the butterflies.
To maintain your butterfly house:
Clean it regularly: Open the house and remove any debris or pests.
Check for damage: Repair any cracks or loose parts to keep it sturdy.
Refresh the interior: Replace any twigs or bark inside the house to keep it inviting for butterflies.
A butterfly house can attract various species of butterflies, depending on your location and the plants in your garden. Common species include Monarchs, Swallowtails, Painted Ladies, and Red Admirals. Planting nectar-rich flowers like milkweed, coneflowers, and butterfly bushes nearby can help attract these butterflies.
Yes, you can paint or decorate your butterfly house, but it's important to use non-toxic, water-based paints and finishes. Bright colors can attract butterflies, but avoid using dark colors that can absorb heat and make the house too warm. Adding decorative elements like stencils or small carvings can also make your butterfly house a unique garden feature.
Final Thoughts and Tips
Building this DIY butterfly house was a straightforward project that only took a few hours, but it was incredibly satisfying. Here are a few things I learned along the way that might help you:
- Take Your Time with the Jigsaw: If you're new to using a jigsaw, practice on some scrap wood first. The more comfortable you are, the better your slots will turn out.
- Use Exterior Rated Products: Since the butterfly house will be exposed to weather, it's crucial to use exterior-rated wood glue, nails, and paint to ensure longevity.
- Experiment with Design: While I stuck pretty closely to AJ Hammler's plan, there's always room for customization. Consider adding decorative elements or experimenting with different shapes for the slots.
Building a butterfly house is a rewarding project that not only adds charm to your garden but also provides a safe haven for these beautiful creatures. I encourage you to give it a try, add your unique touches, and enjoy the process of crafting something with your hands.


