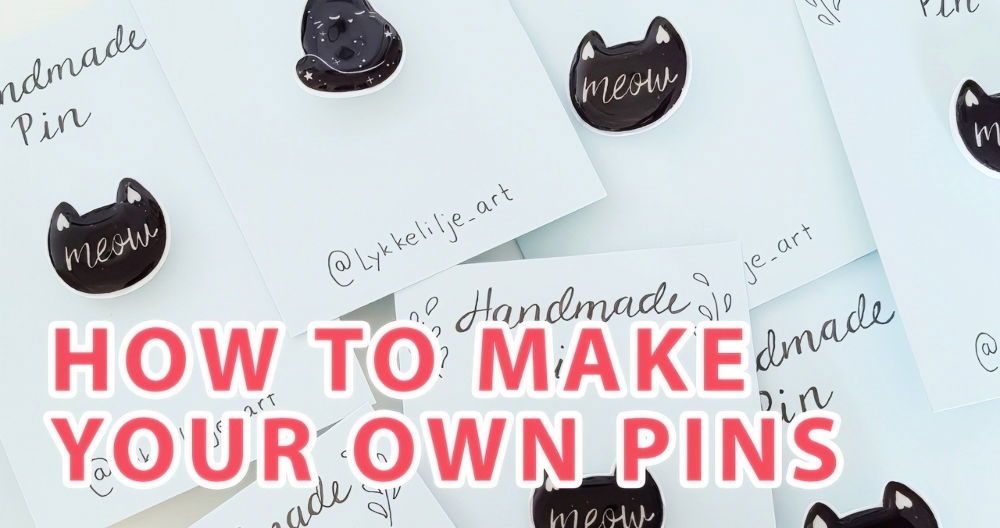
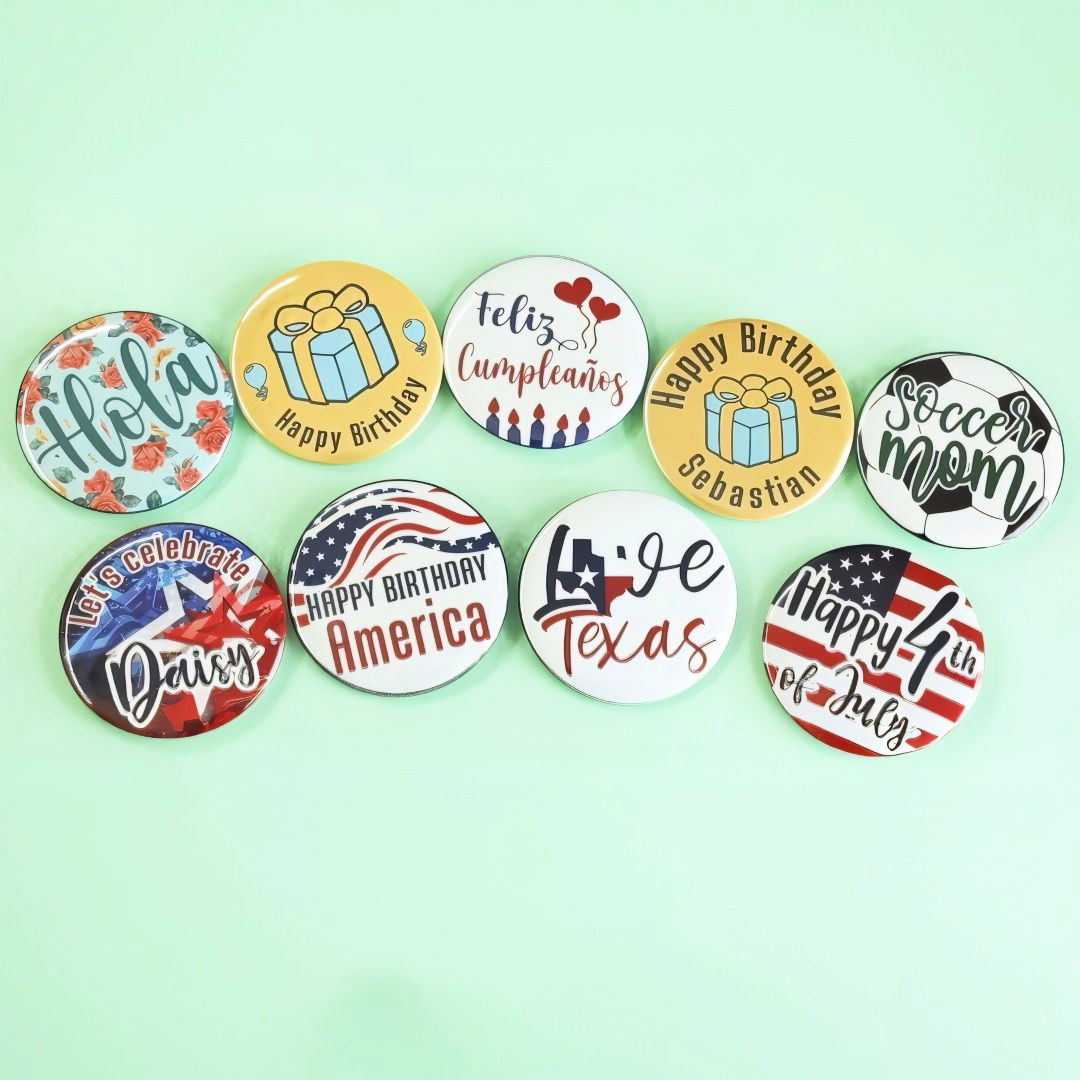
Here's how you can make personalized DIY button pins using a Cricut and Vevor Button Maker machine. If you're looking to make unique, custom buttons for promotional events, parties, or even personal collections, follow this process step by step. I'll walk you through everything from designing to assembling your buttons, using easy-to-follow instructions.
Step by Step Instructions
Learn how to make DIY button pins with our step-by-step guide. From designing in cricut to assembling with Vevor, make unique buttons easily!
Step 1: Materials You Need
Before we get into the steps, here are the materials you'll need to make custom button pins:
- Vevor Button Maker Machine: This is the heart of the project. You'll use this to assemble the buttons.
- Cricut Machine: For precise cutting of your designs.
- Color Printer: To print your designs (Canon Pixma Mega Tank or similar is recommended).
- Koala 30 lb Glossy Photo Paper: This is ideal for getting high-quality print results.
- Button Maker Kit: This kit usually comes with button parts, such as the back plate, front cover, and transparent film.
- Cutting Mat: You'll need this for the Cricut to cut your designs.
These are the essentials, and most of them can be found easily online or in stores. I've personally used these materials and found them to work well for making sharp and professional-looking buttons. Be sure to adjust as needed based on what you have available!
Step 2: Designing Your Buttons in Cricut Design Space
Start with your design. The Cricut Design Space is where you'll make the artwork for your button. If this is your first time using Cricut, don't worry—I'll explain it step by step. Let's aim for a 2.25-inch button, but feel free to adjust the size based on your preferences.
- Insert a Circle Shape: Open Cricut Design Space and go to the "Shapes" menu to insert a circle. Set the size to 2.25 inches—this will be the front of your button. Make sure it's selected before proceeding to the next step.
- Add an Offset: Offset adds a border around your design. Set the offset to 0.225 inches to allow for a fold when assembling the button. This is important because part of your design will fold into the edges of the button.
- Choose Your Design: Now, the fun part—adding your image or text. For instance, I maked a birthday button by using a free image from Cricut's image library. You can go to the "Images" tab and search for something relevant, like "birthday." Add it to your canvas and resize it to fit inside the white area of your circle.
- Adding Text: If you want to include text, go to the “Text” tool and type in your message. For example, "Happy Birthday!" works great. Then, choose a font you like (I used Mistaris), adjust the size, and place it over the design.
- Curving Text: You can even curve the text around the button! Use the "Curve" tool in Cricut Design Space to adjust the curvature, making the text follow the shape of the circle. This makes a professional and fun look.
- Flatten Your Design: Once everything looks good, select all the layers and click on “Flatten.” This step is crucial because it prepares your design for printing and cutting.
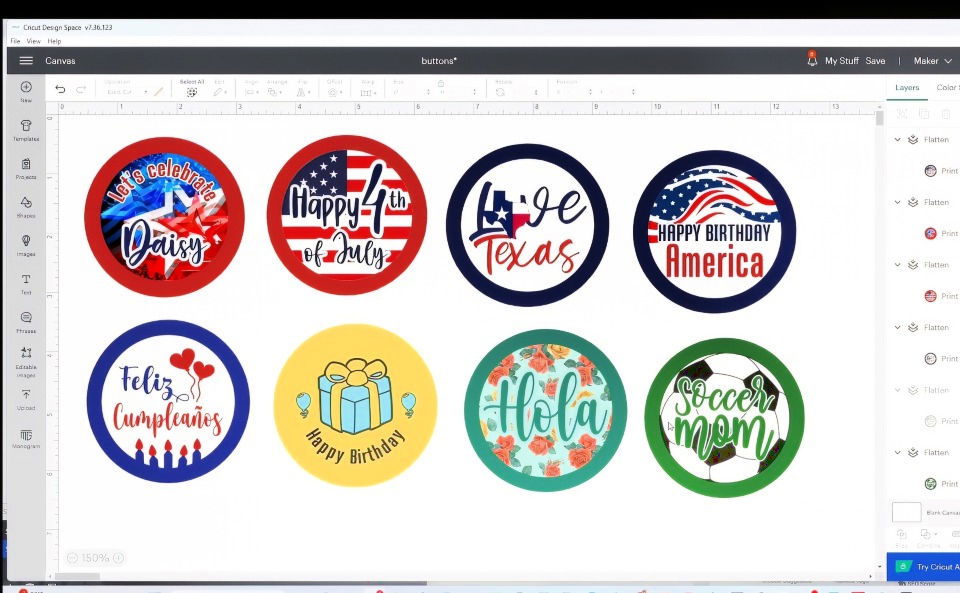
Step 3: Printing Your Design
After your design is complete, it's time to print it on photo paper. I recommend using glossy or matte photo paper, depending on the look you're aiming for. Here's how to get the best results from your printer:
- Select the Printer: When you're ready to print, click on "Make It" in Cricut Design Space. Choose the correct printer in the settings.
- Adjust Print Settings: For the highest quality prints, go to "Preferences" and choose "Photo Printing." Select Glossy Photo Paper or Matte Photo Paper for the media type and High for the print quality.
- Print Your Design: Once settings are correct, hit print. I used my Canon Pixma Mega Tank printer for this, and it gave me sharp, vibrant colors that are perfect for button-making.
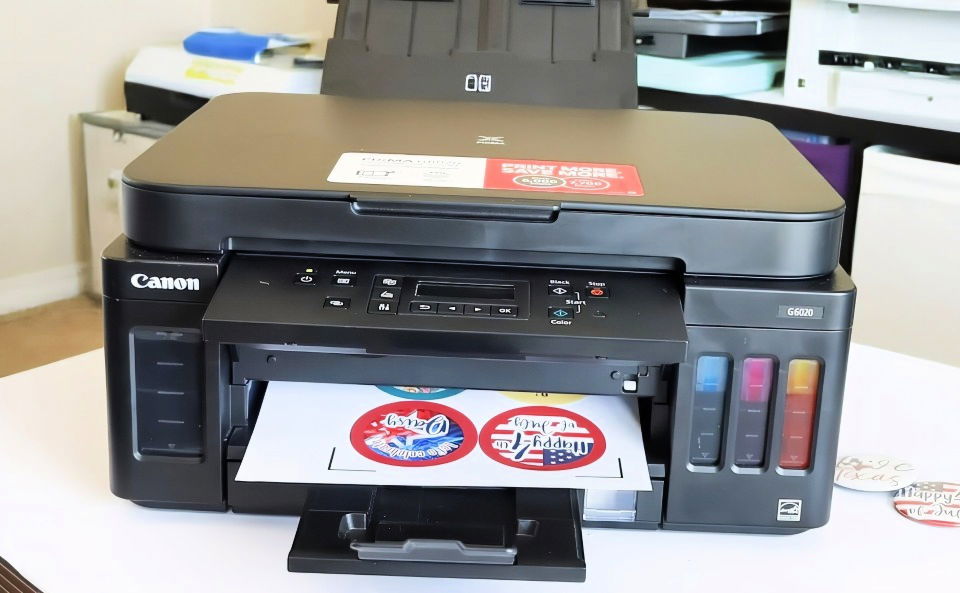
Step 4: Cutting Your Design with the Cricut
After printing, you'll use your Cricut machine to cut out the button designs.
- Select the Material: In Cricut Design Space, select the material you're cutting. Since you're using 30 lb glossy photo paper, choose Light Cardstock as the cutting material.
- Place the Print on the Mat: Place the printed sheet on a green Cricut mat (the standard grip mat works well for this). Align it properly so that the Cricut can cut the design accurately.
- Start Cutting: Load the mat into the Cricut machine and press "Go." The machine will cut out your circles with precision. This step is a real time-saver, especially if you're making multiple buttons!
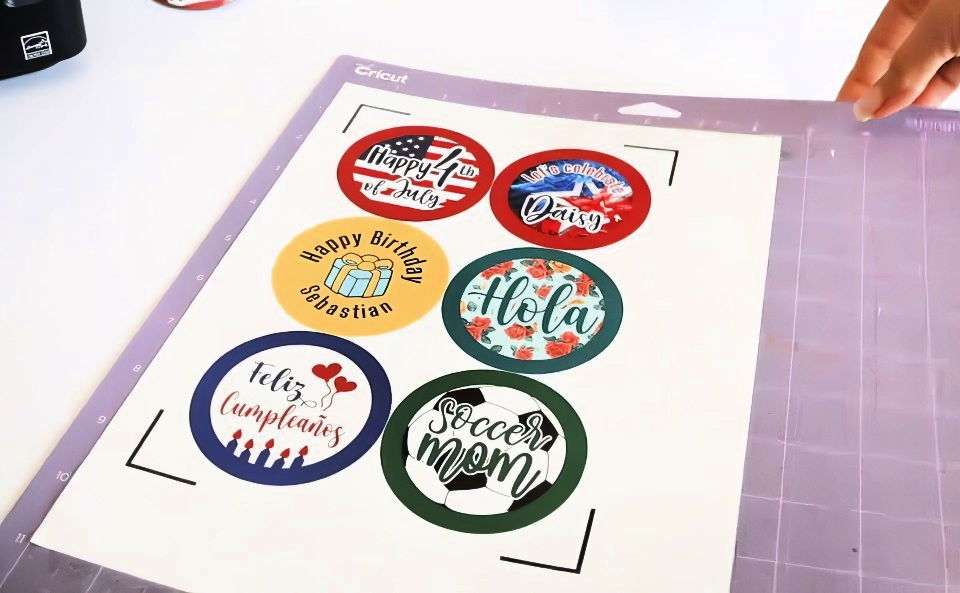
Step 5: Assembling the Button Using Vevor Button Maker
Once you've cut your designs, it's time to assemble the buttons with the Vevor Button Maker machine.
Assembling the Metal Back Buttons
- Place the Front Cover: Start by placing the metal front cover of the button in the left mold of the button maker machine.
- Add Your Design: Next, place your printed design on top of the metal cover. Make sure the design is facing up and centered.
- Add the Transparent Film: Place a transparent film (it should come with your button kit) over the design. This will protect the design and give the button a glossy finish.
- Press the Handle: Rotate the left mold to the center and press the machine's handle firmly. This part secures the design of the metal cover.
- Add the Metal Back Plate: Now, place the metal back plate on the right mold. This part of the button includes the pin.
- Assemble the Button: Rotate the right mold to the center and press the handle again. Your button should now be fully assembled, with the pin securely attached.
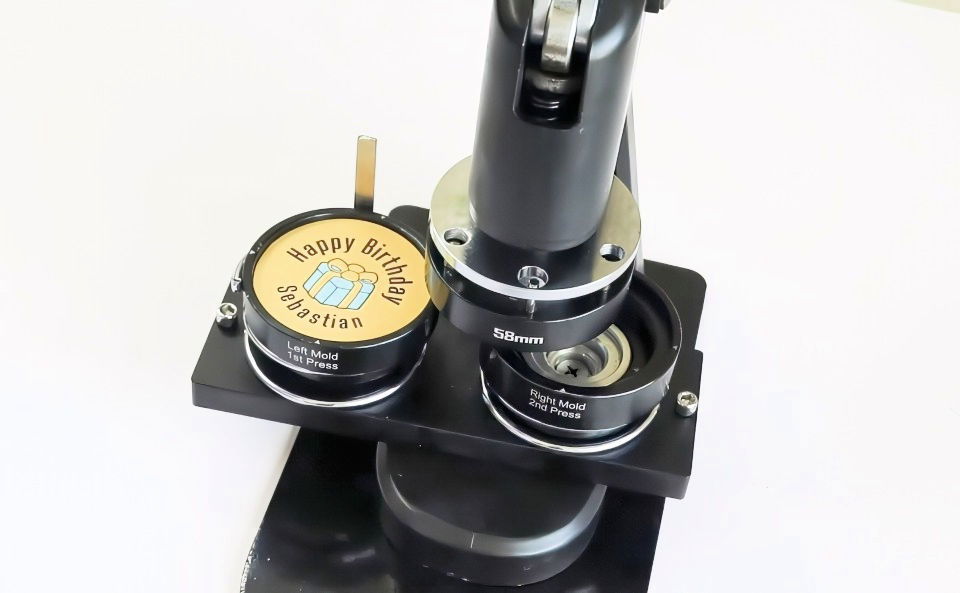
Assembling the Plastic Back Buttons
For buttons with plastic back plates, follow the same steps, but you don't need to use the green ring during assembly. Plastic backs are lighter and might be more suitable for certain projects, depending on your needs.
Step 6: Enjoy Your Custom Buttons!
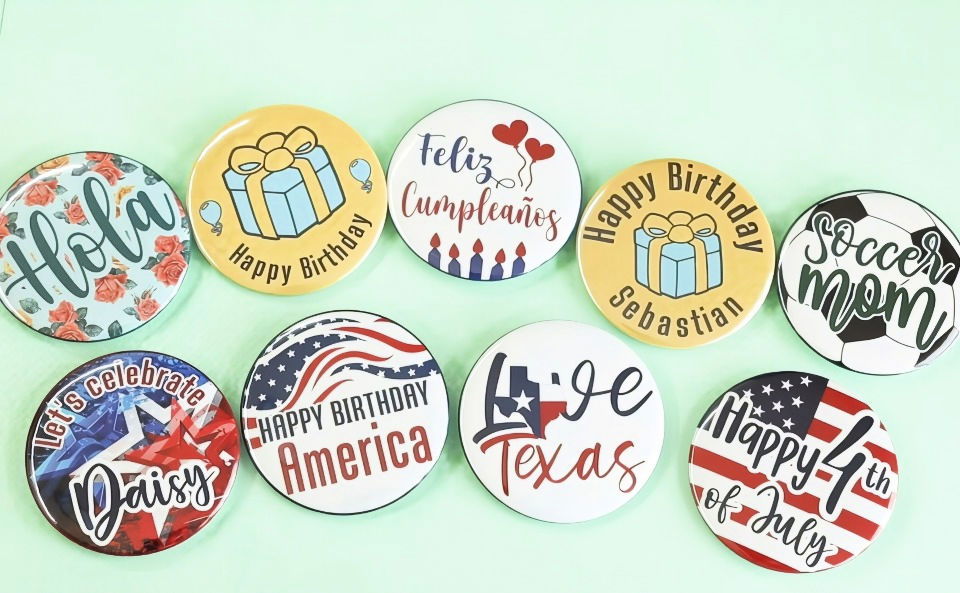
Once you've completed these steps, your custom buttons are ready! These buttons are perfect for all kinds of events, from birthdays to company promotions. Whether you use metal or plastic backs, your buttons will have a professional finish that's sure to impress.
Tips and Tricks
- Design Flexibility: You can experiment with different fonts, images, and colors to suit various themes or occasions.
- Bulk Production: If you're making a lot of buttons, consider printing multiple designs on one page to save paper.
- Maintenance: Keep your Cricut mats clean and replace them when they lose their stickiness for the best cutting results.
Troubleshooting Common Issues
Making DIY button pins can be a fun and rewarding activity, but sometimes, things don't go as planned. Here are some common issues you might encounter and how to fix them.
Misaligned Designs
Problem: Your design doesn't line up correctly on the button pin.
Solution:
- Check Your Template: Ensure you are using the correct template size for your button maker.
- Center Your Design: Use a ruler or grid lines to center your design before cutting it out.
- Practice: Make a few practice pins with scrap paper to get the alignment right.
Faulty Pin Backs
Problem: The pin back falls off or doesn't stay attached.
Solution:
- Quality Check: Use high-quality pin backs that fit your button maker.
- Secure Attachment: Ensure the pin back is properly aligned and pressed firmly during assembly.
- Glue Option: If the pin back is loose, use a small amount of strong adhesive to secure it.
Bubbles Under the Mylar
Problem: Air bubbles appear under the mylar cover.
Solution:
- Smooth Application: When placing the mylar, smooth it out from the center to the edges to remove air bubbles.
- Check Mylar Quality: Use high-quality mylar that is less prone to bubbling.
- Proper Pressure: Apply even pressure when pressing the button to avoid trapping air.
Faded or Blurry Designs
Problem: The printed design looks faded or blurry.
Solution:
- High-Resolution Images: Use high-resolution images for your designs to ensure clarity.
- Quality Printer: Print your designs using a high-quality printer with good ink.
- Paper Choice: Use bright white, high-quality paper to make colors pop.
Difficulty Cutting Designs
Problem: Cutting out designs is difficult or uneven.
Solution:
- Sharp Tools: Use sharp scissors or a craft knife for clean cuts.
- Cutting Mat: Use a cutting mat to protect surfaces and make cutting easier.
- Cutting Guides: Use a template or guide to ensure even cuts.
Pin Not Closing Properly
Problem: The pin doesn't close or latch properly.
Solution:
- Check Alignment: Ensure the pin mechanism is aligned correctly during assembly.
- Test Before Finalizing: Test the pin mechanism before completing the button to ensure it works.
- Adjust if Needed: If the pin is misaligned, gently adjust it with pliers.
By addressing these common issues, you can ensure your DIY button pins turn out perfectly every time.
Care and Maintenance
Proper care and maintenance of your DIY button pins can ensure they stay in great condition for a long time. Here are some simple tips to help you keep your button pins looking their best.
1. Cleaning Tips
Discover effective cleaning tips for regular and deep cleaning, ensuring a spotless home effortlessly. Expert advice for every nook and cranny!
Regular Cleaning:
- Dust Removal: Use a soft, dry cloth to gently wipe off any dust or dirt from the surface of the button pin.
- Spot Cleaning: For small stains, use a damp cloth with a mild soap solution. Gently dab the stained area and avoid soaking the pin.
Deep Cleaning:
- Materials Check: Ensure the materials used in your button pin can withstand water or cleaning solutions.
- Gentle Scrubbing: Use a soft toothbrush with a mild soap solution to clean more stubborn stains. Be gentle to avoid scratching the surface.
2. Preventing Damage
Protect your belongings with our preventing damage tips. Learn how to avoid moisture and handle with care to keep items safe and intact.
Avoid Moisture:
- Keep Dry: Store your button pins in a dry place to prevent rusting or damage to the design.
- Waterproofing: Consider using a clear sealant spray to make your button pins more resistant to moisture.
Handle with Care:
- Avoid Dropping: Handle your button pins carefully to avoid bending the pin back or damaging the design.
- Proper Use: Attach and remove the pins gently to prevent wear and tear on the pin mechanism.
3. Storage Solutions
Discover top storage solutions for organized storage with protective measures to keep your items safe. Find the best options now!
Organized Storage:
- Pin Boards: Use a corkboard or fabric-covered board to display and store your button pins. This keeps them organized and easily accessible.
- Storage Boxes: Store your button pins in small, compartmentalized boxes to keep them separated and prevent scratching.
Protective Measures:
- Soft Liners: Line storage boxes with soft fabric or foam to cushion the pins and prevent damage.
- Individual Bags: Store each button pin in a small plastic bag to protect it from dust and scratches.
4. Long-Term Care
Discover essential long-term care tips with regular checks and expert repair advice to maintain and extend the life of your belongings.
Regular Checks:
- Inspect Regularly: Periodically check your button pins for any signs of wear or damage. Address any issues promptly to prevent further damage.
- Maintenance Routine: Establish a regular cleaning and maintenance routine to keep your button pins in top condition.
Repair Tips:
- Loose Pin Backs: If the pin back becomes loose, use a small amount of strong adhesive to secure it.
- Design Touch-Ups: For minor design damage, use matching paint or markers to touch up any scratches or faded areas.
By following these care and maintenance tips, you can ensure your DIY button pins remain vibrant and functional for years to come.
FAQs About DIY Button Pins
Discover answers to common questions about DIY button pins, including materials, steps, and tips for making your own custom designs.
Yes, you can make button pins without a machine. Use a strong adhesive to attach your design to a metal or plastic cover, and then attach the pin back. This method is more time-consuming but still effective.
Simple, bold designs with clear lines and high contrast work best. Avoid overly detailed images, as they may not print well on small surfaces.
Yes, button pins come in various sizes, typically ranging from 1 inch to 3 inches in diameter. Choose a size that best fits your design and purpose.
To make custom shapes, use a button maker that supports different molds or dies. Alternatively, you can hand-cut designs and attach them to standard round button-backs using adhesive.
Popular themes include:
Pop culture references (movies, TV shows, music)
Inspirational quotes
Custom logos for businesses or events
Seasonal designs (holidays, seasons)
Personalized photos or artwork
Conclusion:
With practice, you'll get faster and more confident at making your own custom DIY button pins. Whether you're making them for an event or as a gift, these buttons are a fun and creative way to add a personal touch to any occasion!


