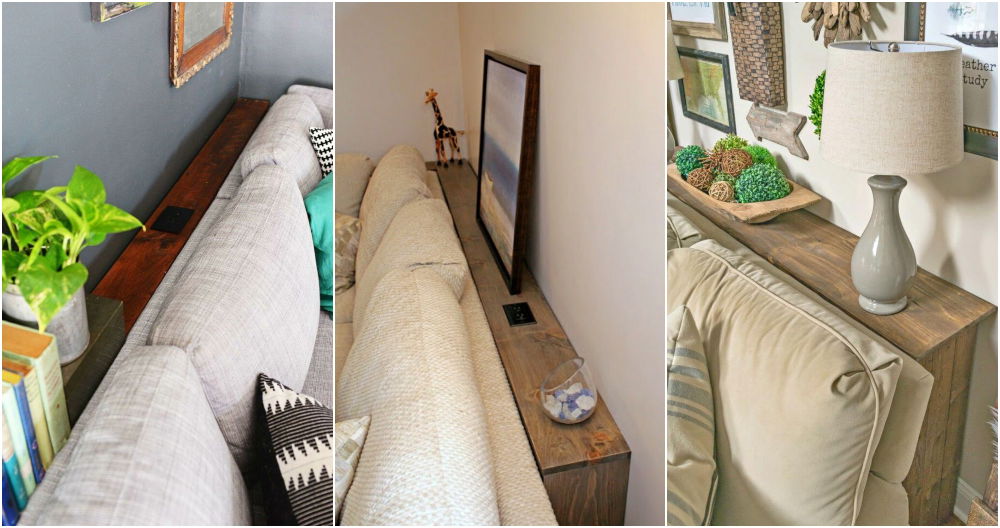
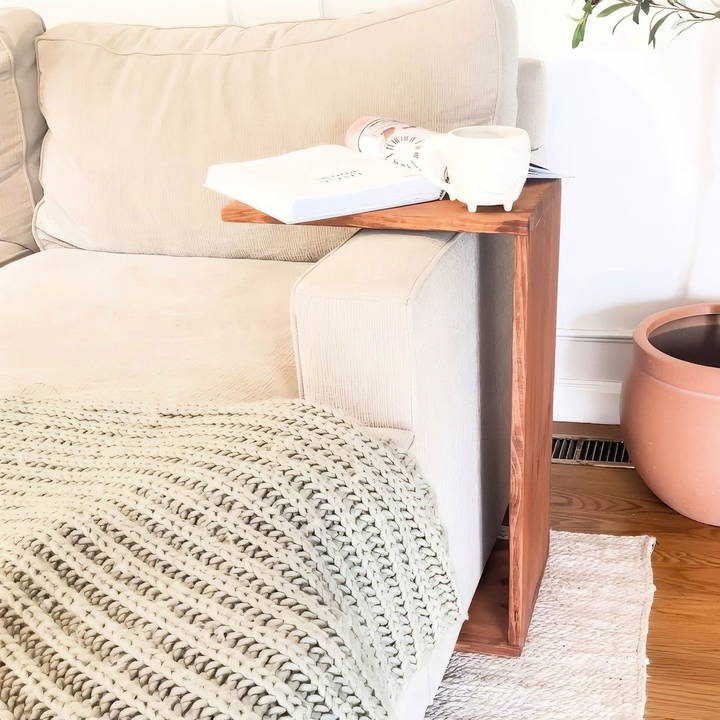
C-tables are versatile and functional pieces of furniture that provide the perfect solution for compact living spaces. They slide neatly over the arm of a couch, making them ideal for holding drinks, laptops, or books. Instead of spending hundreds of dollars on a store-bought version, you can build a custom DIY C-table for less than $60. This guide provides a step-by-step approach, covering all the materials, tools, and techniques needed to build a stylish and functional table.
Materials and Tools Needed
To build two C-tables, you'll need the following supplies. Adjust quantities as necessary if you only want to build one.
Materials
- Wood Boards: 2 pieces of 1x12x6 common boards (for $12.33 each).
- Trim Head Screws: 1 box of 8x3 1/8 screws (ideal for a clean finish).
- Wood Filler: For covering screw holes and imperfections.
- Wood Glue: Adds extra strength to the joints.
- Sandpaper or Sander: Use 80-grit sandpaper for smoothing edges.
- Stain: Choose a stain that complements your decor.
- Polyurethane Spray: A water-based polyurethane to seal and protect the wood.
Tools
- Miter Saw: Perfect for precise cuts, though a circular or jigsaw will work as well.
- Cordless Drill: For drilling and securing screws.
- Mouse Sander: Speeds up the sanding process.
- Triangle or Square: Ensures your angles are accurate and square.
- Measuring Tape: Critical for accurate measurements.
Step by Step Instructions
Learn how to build a DIY c table with easy step-by-step instructions, tips, and customization ideas to build your perfect piece of furniture.
Step 1: Plan and Measure
Before starting your project, measure the area where you plan to use your C-table. Focus on three key dimensions:
- Height: The table should comfortably slide over your couch arm.
- Width: Ensure the table is not too wide for the space.
- Depth: Adjust based on how far you want the table to extend.
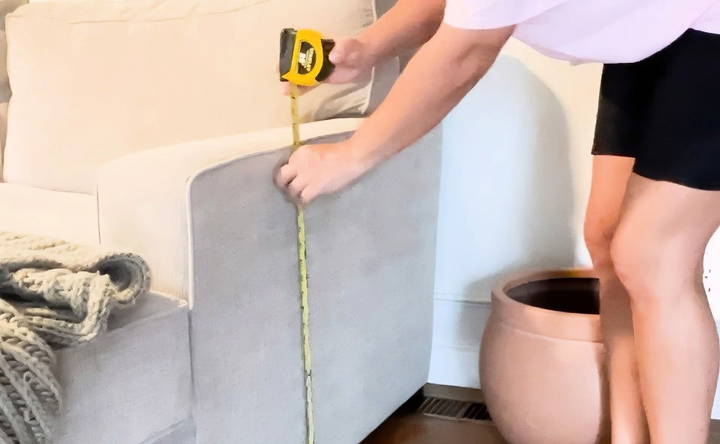
Keep in mind that different couches may require slight variations in size, so always customize your cuts accordingly.
Step 2: Cut Your Wood
Using a miter saw, cut the boards to size. For this project:
- Cut 2 pieces to 24 inches (for the vertical sides).
- Cut 4 pieces to 16 inches (for the horizontal sections).
If you're building a single table, you'll only need one 24-inch piece and two 16-inch pieces. Ensure your cuts are clean and even, as this will help with assembly later.
Step 3: Assemble the Frame
- Lay Out Your Pieces: Pair one 24-inch board with two 16-inch boards to form the main structure.
- Apply Wood Glue: Spread wood glue on the edges where the boards will meet. This step is optional but recommended for added stability.
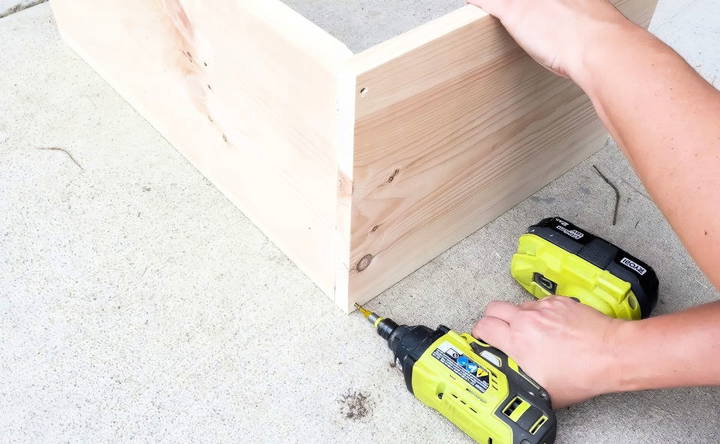
- Screw the Boards Together: Use trim head screws for a sleek finish.
- Drill three screws per joint (top, middle, and bottom) to secure the horizontal and vertical pieces firmly.
Tips:
- Use a triangle or square to ensure all corners are at 90-degree angles.
- Wipe away excess glue immediately to avoid messy stains later.
Step 4: Fill and Sand
Learn how to fill and sand your DIY c table for a smooth, professional finish. Step-by-step tips for perfect preparation and durability.
Filling Screw Holes:
- Apply wood filler to all screw holes and any imperfections on the wood surface.
- Allow the filler to dry completely. This typically takes a few hours, depending on the product.
Sanding:
- Use an 80-grit sandpaper or a mouse sander to smooth the entire surface.
- Pay special attention to edges and corners to remove any sharp or rough spots.
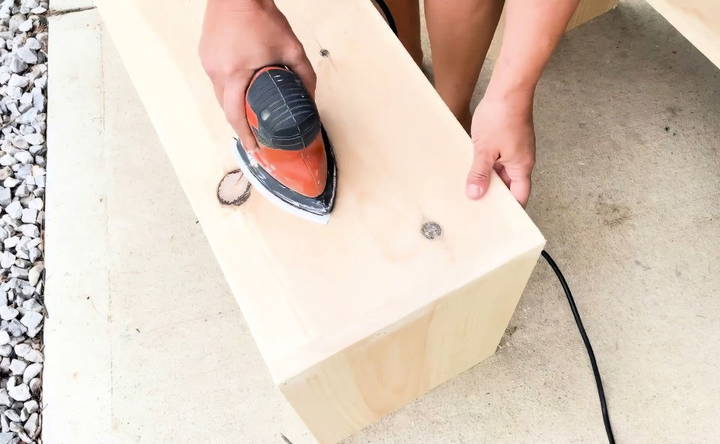
Sanding ensures a professional-looking finish and helps the stain adhere evenly.
Step 5: Stain the Wood
- Choose Your Stain: Select a stain color that complements your home decor.
- For this project, a “Varathane Early American” stain was used. However, ensure consistency by mixing the stain before application.
- Apply the Stain: Use a brush or a clean cloth to apply the stain evenly.
- Wipe off excess stain to prevent blotches.
- Drying Time: Allow the stain to dry for 24 hours before applying a finish.
Step 6: Seal with Polyurethane
- Apply Polyurethane: Use a water-based polyurethane spray for a smooth, protective finish.
- Spray evenly across the entire surface, ensuring full coverage.
- Final Touches: If excess polyurethane pools in certain spots, use a brush to even it out.
- Drying Time: Let the polyurethane dry thoroughly before using the table. This may take several hours.
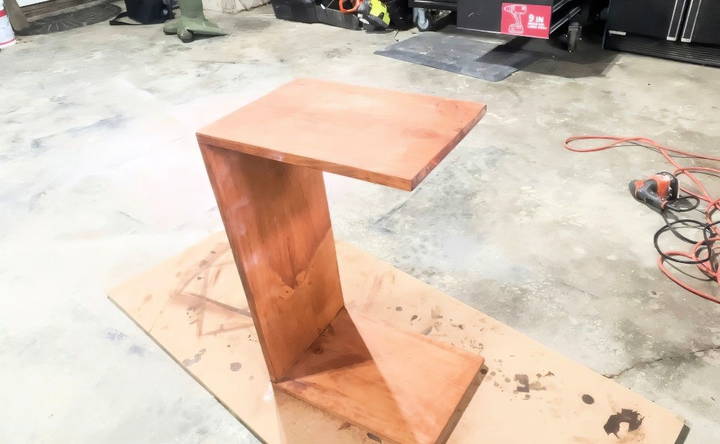
Step 7: Test and Style Your Table
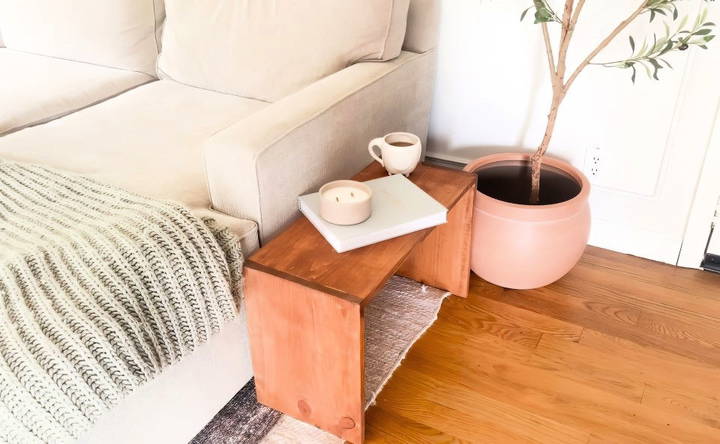
Once your C-table is fully dry, place it in your desired location. It's perfect for:
- Holding coffee mugs or snacks.
- Supporting a laptop for work-from-home setups.
- Displaying books or decorative items.
The versatility of this table allows it to double as a traditional side table or to slide over the couch arm for convenience.
Budget Breakdown
Here's a quick cost summary to show how affordable this DIY project can be:
- Wood Boards: $24.66 (2 boards at $12.33 each).
- Trim Head Screws: $6–$8 per box.
- Wood Filler and Glue: $10.
- Stain and Polyurethane: $15–$20.
- Total Cost: Under $60 for two tables.
By building two tables, you maximize the value of your materials and time, making a cohesive look for your living space.
Customization Ideas
Take your DIY C-table to the next level with these creative touches:
- Paint Instead of Stain: Use a bold color for a modern aesthetic.
- Add Shelving: Incorporate additional shelves for extra storage.
- Decorative Hardware: Install corner brackets or metal accents for an industrial look.
- Alternate Wood Types: Choose a high-quality wood like oak or maple for a more luxurious feel.
Safety Tips
- Always wear proper safety gear, including gloves and eye protection, when handling tools.
- Use clamps to stabilize wood during cutting and drilling to prevent accidents.
- Work in a well-ventilated area when applying stain and polyurethane.
Final Thoughts
Building a DIY C-table is a rewarding project that combines style, functionality, and affordability. With just a few materials and tools, you can build a custom piece tailored to your needs and preferences. Whether you're a seasoned DIYer or a beginner, this step-by-step guide equips you with everything you need to succeed.
Enjoy your new C-table, and don't forget to show off your creation to friends and family. They'll be amazed at your craftsmanship—and the fact that you made it for less than $60!
FAQs About DIY C Tables
Find answers to common faqs about DIY C-tables, including materials, assembly tips, customization ideas, and troubleshooting solutions.
You can customize your table by choosing different stains or paint colors, adding decorative hardware, or incorporating shelves for extra storage. Adjust the dimensions based on your couch or intended use.
A circular saw or jigsaw works well for cutting the boards. If using these tools, secure the wood firmly and measure carefully to ensure straight cuts.
Mix the stain thoroughly before applying and test on a scrap piece of wood. Sand down the uneven areas and reapply the stain if necessary.
Add a central support beam between the horizontal boards. This additional reinforcement prevents sagging under weight.
While wood glue can hold the table together, screws provide added stability and strength, ensuring durability over time.
Wear protective goggles and gloves, use tools in a well-ventilated area, and secure your wood to prevent slips during cutting or drilling.
Adjust the cut dimensions to match your space. For example, use shorter boards for a compact table or longer boards for a taller one.
With all materials ready, the project can be completed in a day, including time for cutting, assembly, sanding, staining, and sealing.
Yes, reclaimed wood adds character and sustainability to your table. Ensure the wood is clean and smooth before use.
Wipe spills immediately and avoid placing heavy items on the unsupported areas. Reapply polyurethane periodically to maintain the finish.


