Installing DIY cable railing for your deck can enhance its appearance and safety. This guide covers everything you need to know about DIY cable railing projects, including choosing the right materials and tools. With a step-by-step approach, this guide makes it easy to understand how to install cable railings yourself. You'll find valuable tips that ensure your project is successful and meets safety standards.
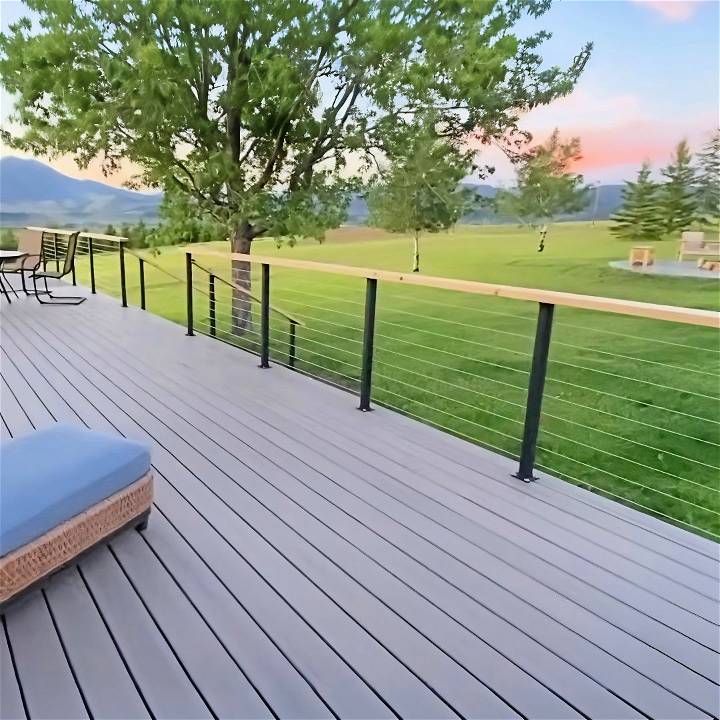
Whether you need to upgrade your deck or build a new one, this comprehensive guide will help you get started. Learn how to measure and cut your cables accurately and secure them for a professional look.
Interested in learning more about the benefits and installation process? Continue to the next section for detailed instructions and helpful advice on starting your DIY cable deck railing journey.
Step by Step Instructions
Learn how to install DIY cable railing with our step-by-step instructions. From gathering materials to the final touches, find all you need to get started.
Step 1: Gathering Materials
The idea of building the railing system myself was daunting at first, but I was determined. I began by gathering all the necessary materials. I needed two-inch square tubing for the posts, a quarter-inch thick steel flat bar for the top and bottom plates, and stainless steel cabling for the railing itself.
Why each material?
- Two-inch square tubing: Strong and durable, perfect for the posts.
- Quarter-inch steel flat bar: Ideal for making stable top and bottom plates that secure the posts.
- Stainless steel cabling: Provides the clean, minimal look I wanted without obstructing the view.
Step 2: Cutting and Welding
I started by cutting the square tubing and flat bar to the required sizes. Precision is key here to ensure everything fits together perfectly in the end. The metal squares, soon to be top and bottom plates, needed holes drilled into them to accommodate the cable railing.
All pieces were securely clamped during cutting and welding to maintain accuracy and safety. Remember, taking your time in this step pays off with the quality of the final build.
Step 3: Drilling Holes
Every post required nine holes drilled through them for the cabling. Ensuring they were evenly spaced and straight was crucial for the final look and structural integrity of the railing. This was perhaps the most time-consuming part, but using a drill press made the job much easier and the results more precise.
Step 4: Painting and Finishing
Despite having the option to get the metal posts powder coated for a more durable finish, time constraints led me to spray them with rust-oleum matte black paint. It still provided a sleek finish aligning with my vision for the deck. Properly cleaning and degreasing the metal before painting ensured the paint adhered well and would last.
Step 5: Installation
Installing the posts required strategic planning. They were spaced about four feet apart to prevent any sagging of the top rail and to ensure the cabling would be tight and secure. Each post was bolted down with four 3/8 inch diameter, 5-inch long galvanized bolts, ensuring stability and sturdiness.
Leveling each post as they were installed was critical. Even with careful planning and measuring, slight adjustments were often needed to ensure everything was perfectly upright and aligned.
Step 6: Adding the Cable
Running the cable through the pre-drilled holes in the posts was straightforward but required attention to detail. The crimping tool was invaluable here, securing the cables within the hardware and maintaining tension across the system. Despite initial worries, this step was simpler than anticipated and quite satisfying, seeing the railing come together.
Step 7: The Final Touches
The last step was adding the top rail, cut from 2x6 cedar boards, matching the aesthetic of the deck and providing a comfortable resting place for arms or a cup of coffee. Sealing the wood with a clear, water-based deck stain not only protected it from the elements but also brought out the natural beauty of the cedar without altering its color too much.
Cost Breakdown
The project's total cost came to around $1545, significantly less than the quoted prices I found during my initial research. The sense of accomplishment and the money saved made every moment of this project worth it.
Troubleshooting Common Issues
When installing a DIY cable deck railing, you might encounter a few hiccups along the way. Here’s a helpful guide to troubleshoot common issues:
Cable Tensioning
- Problem: Cables are sagging or not taut.
- Solution: Adjust the tension using the turnbuckle or cable tensioner. Turn it clockwise to tighten. Do this gradually, checking the tension every few turns to avoid over-tightening.
Alignment
- Problem: Cables are not perfectly horizontal.
- Solution: Loosen the fittings slightly, adjust the cables to the desired position, and then retighten. Use a level as a guide to ensure straight lines.
Post Stability
- Problem: Posts are wobbly after cable installation.
- Solution: Check the base of the posts to ensure they’re securely attached to the deck framing. If necessary, reinforce the posts with additional hardware or bracing.
Corrosion
- Problem: Signs of rust or corrosion on cables or fittings.
- Solution: Use a stainless steel cleaner to remove surface rust. For prevention, ensure you’re using marine-grade stainless steel, especially in coastal areas.
Cable Fraying
- Problem: Cables are fraying or have broken strands.
- Solution: Replace the damaged cable section. To prevent fraying, ensure that the cable ends are properly cut and not twisted during installation.
Fitting Issues
- Problem: Fittings are not holding the cable securely.
- Solution: Double-check that you have the correct size fittings for your cable thickness. If the fittings are slipping, they may need to be swaged again or replaced.
Safety first! Always wear protective gear for DIY projects. Unsure? Consult a pro. Follow these tips for a beautiful, secure cable deck railing.
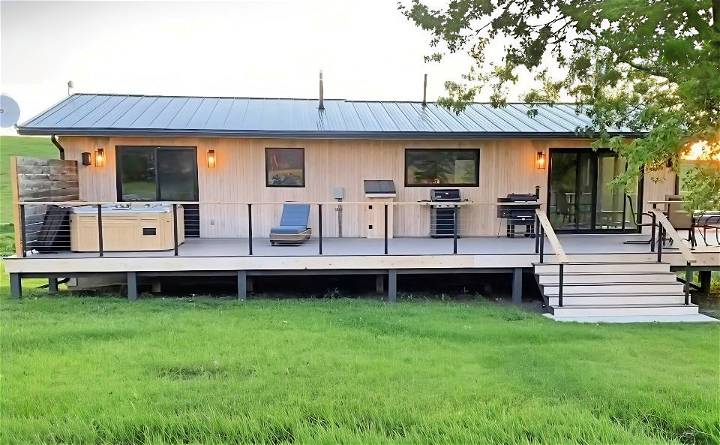
Maintenance and Care Tips
Keeping your cable deck railing in top condition is crucial for both aesthetics and safety. Here’s a straightforward guide to maintaining your railing:
Regular Cleaning
- Routine: Clean your cables and posts every 3-6 months with soapy water and a soft brush. Rinse thoroughly to prevent soap residue.
Inspection
- Checklist: Look for loose fittings, damaged cables, or signs of wear. Tighten any loose parts and replace damaged sections promptly.
Protecting Against Rust
- Materials: Use a stainless steel cleaner for spots and a rust inhibitor for ongoing protection. This is especially important in salty or humid environments.
Lubrication
- Procedure: Apply a marine-grade lubricant to turn buckles and fittings annually to ensure smooth operation and prevent seizing.
Avoiding Scratches
- Care: When cleaning or adjusting your railing, use tools with care to avoid scratching the metal surfaces, which can lead to rust.
Cable Tension
- Adjustment: Check the tension of your cables periodically. They should be firm but not overly tight, as this can strain the posts.
Follow these steps to keep your cable deck railing durable and attractive. Regular maintenance extends its life and ensures safety for all.
Safety Precautions and Building Codes
When you’re building a cable deck railing, safety is paramount. Here’s a guide to help you navigate the safety precautions and building codes:
Understanding Local Codes
- Research: Start by checking with your local building department. They can provide the specific codes and standards for deck railings in your area.
Height Requirements
- Standard: Most codes require railings to be at least 36 inches high for residential decks. This can vary, so it’s important to verify.
Cable Spacing
- Regulation: Cables should be spaced so that a 4-inch sphere cannot pass through. This is to prevent small children from slipping through gaps.
Load Capacity
- Guideline: Railings must withstand a certain amount of force, typically 200 pounds applied in a downward or outward direction.
Post Strength
- Criteria: Posts should be strong enough to hold the tension of the cables without bending. Use sturdy materials and proper installation techniques.
End Fittings
- Check: Ensure that all end fittings are securely fastened and cannot be easily loosened by hand or by the tension of the cables.
Professional Assessment
- Advice: If you’re unsure about any aspect of the building codes, consult a professional. An expert can help ensure your railing is safe and compliant.
Follow safety measures and building codes to make a beautiful, secure cable deck railing. Safety first; these guidelines ensure it.
FAQs About DIY Cable Railing
Discover expert answers to FAQs about DIY cable railing. Enhance your space with easy, efficient, and stylish cable railing solutions.
A DIY cable deck railing is a modern, stylish railing system that uses stainless steel cables instead of traditional balusters. The cables can be strung horizontally or vertically and are tensioned between posts. This type of railing offers a sleek look and unobstructed views, making it a popular choice for decks.
When installed correctly, cable deck railing is very safe. It must meet local building codes, which often require the railing to be at least 36 inches tall and the cables spaced so a 4-inch sphere cannot pass through. The system should withstand a certain amount of force, ensuring it can support people leaning against it.
Advantages:
Low Maintenance: Stainless steel cables are corrosion-resistant and require minimal upkeep.
Clear Views: The thin cables do not obstruct views as much as other railing types.
Disadvantages:
Cost: Initial installation can be more expensive than traditional railing systems.
Installation: It can be complex and may require professional help to ensure safety and code compliance.
Maintenance is relatively simple. Regularly inspect the cables and fittings for wear and tension. Clean the cables with a moist cloth to keep them free of dirt and debris. No need to repaint or replace the cables often, making it a cost-effective, long-term option.
Yes, you can install cable deck railing yourself with some DIY skills. You’ll need to follow the manufacturer’s instructions carefully to ensure safety and compliance with building codes. It’s important to use the right tools and materials and to check the tension of the cables regularly after installation.
Lessons Learned
Wrapping up, making a DIY cable railing for beginners can transform your outdoor space with a modern and durable touch. This comprehensive guide ensures you have everything you need to successfully install your own DIY cable railing. Start your project today and enjoy the benefits of a beautiful DIY cable deck railing that adds value and aesthetic appeal to your home.


