As someone who loves baking, I've always been on the lookout for ways to make my cakes come out perfectly every time. One common challenge with baking cakes at home is getting a level top, free from the infamous dome. I discovered a simple yet effective solution: DIY cake baking strips. These homemade baking strips are designed to keep the edges of your cake pan cool, ensuring that your cake bakes evenly throughout. Here's how I made my own cake baking strip, and how you can, too.
Why Use Cake Baking Strips?
Before we dive into the how-to, let's talk about why these strips are beneficial. When you bake a cake, the edges tend to cook and firm up faster than the center, leading to a dome shape. This can be frustrating if you're aiming for a flat surface, especially for layer cakes. Baking strips help insulate the edges of your pan, slowing down the cooking process on the sides so that the entire cake cooks at the same rate. In short, they help you achieve that perfect level cake.
What You'll Need: Materials Explained
- Newspaper: I use newspaper because it's durable and easily available. It's ideal for soaking and wrapping around the pan to provide insulation.
- Heavy-Duty Aluminum Foil: Heavy-duty foil is perfect because it can endure multiple uses. The shiny side helps retain heat but also reflects some to prevent overheating the cake's sides.
- Scissors and Ruler: These basic tools help measure and cut the materials accurately to fit your cake pan.
Step by Step Instructions
Learn how to make DIY cake strips step by step for even baking. Easy instructions from measuring to baking and maintenance. Ideal for perfect cakes!
Step 1: Measure Your Pan
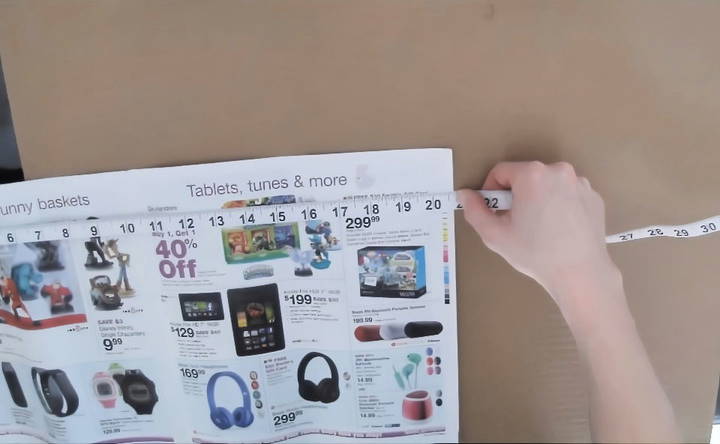
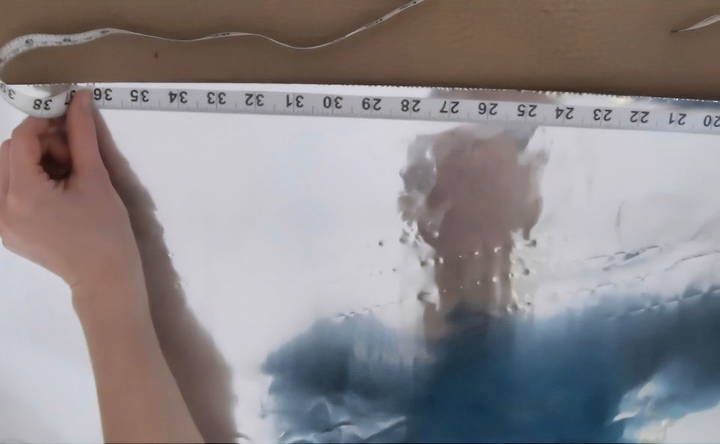
The first step in making your own baking strip is to measure the circumference of your cake pan. In my case, it was an 8-inch pan, measuring approximately 31.5 inches around. Accurate measurement is important to ensure that the strip fits snugly around the pan without being too tight or too loose.
Step 2: Prepare the Newspaper
Once I have my measurement, I cut a strip of newspaper to the corresponding length. It's important to fold the newspaper into layers about an inch and a half wide; this makes it easy to handle and ensures even coverage around the pan. The newspaper acts as the primary insulator when soaked in water.
Step 3: Soak the Newspaper
Soaking the newspaper is crucial because wet paper conducts heat more slowly than dry paper. I fill my sink with water and let the strip of newspaper soak thoroughly. This step ensures the paper is wet enough to prevent the edges of the cake from cooking faster than the center.
Step 4: Prepare the Aluminum Foil
While the newspaper is soaking, I take a piece of heavy-duty aluminum foil and cut it around four to six inches longer than the newspaper. The extra length ensures that there's enough foil to secure the ends together when wrapped around the pan.
Step 5: Assemble the Baking Strip
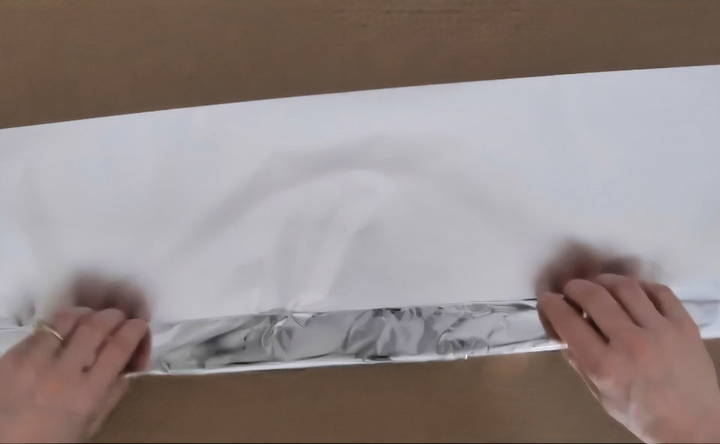
With the newspaper soaked and the foil ready, I lay the foil out with the shiny side down. I then place the wet newspaper at one end of the foil, leaving about an inch and a half margin on both sides. Once in position, I fold the foil over the newspaper, fully encasing it.
Step 6: Wrap and Secure the Strip
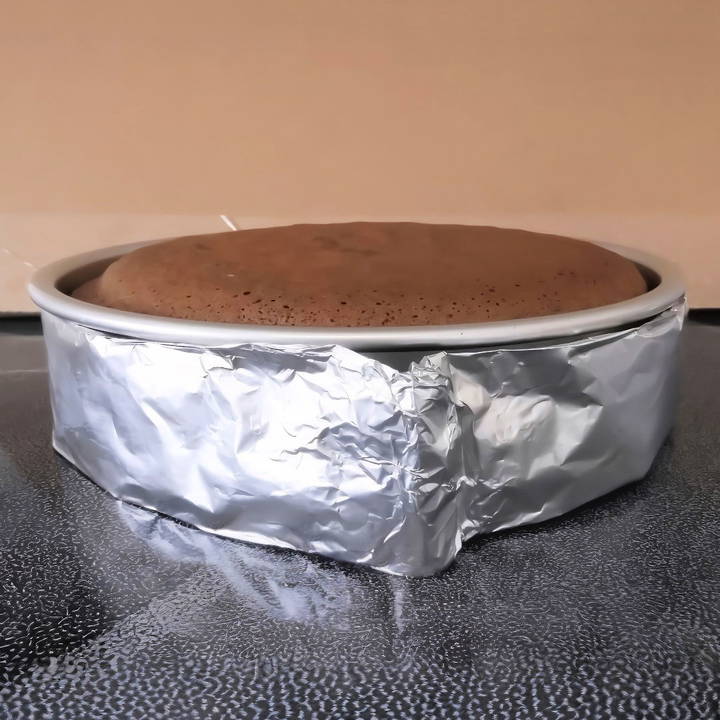
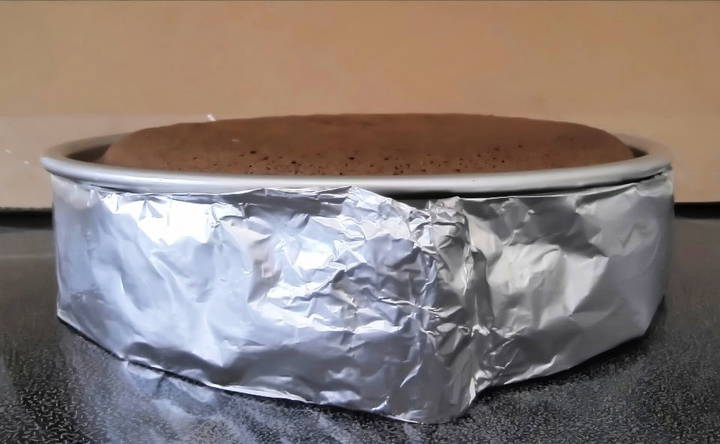
Now the strip is ready to use. I wrap it tightly around the outside of my cake pan, ensuring that the strip is flush with the top edge of the pan. The extra length I cut earlier allows me to overlap the ends of the foil and roll them together, securing the strip tightly around the pan. This is important to prevent it from shifting during baking.
Step 7: Bake With the Strip
After securing the strip, it's time to bake. Start by filling your cake pan as usual. Once in the oven, you can notice that the cake top stays level, eliminating any need for trimming later. The even baking temperature makes sure that the cake has a uniform texture throughout.
Step 8: Reuse and Maintenance
One of the best parts about these DIY baking strips is that they can be reused multiple times. After baking, I simply unfold the foil, remove the newspaper, and allow everything to dry. When I need to bake another cake, I soak the newspaper again and reassemble the strip, making it as good as new.
Tips for Best Results
- Tip 1: Double Check Measurements: In my early attempts, I sometimes cut the newspaper a bit long or short. Always double-check your measurements for a snug fit.
- Tip 2: Keep It Simple: Don't overthink the format of the strip. The key is having the paper thoroughly soaked and properly wrapped with foil.
- Tip 3: Experiment with Different Papers: While newspaper works great for me, feel free to experiment with other types of paper if you find newspapers aren't readily available.
Common Troubleshooting
- Paper Tears: If your newspaper tears during soaking, don't worry. Just double up the layers to make your strip more durable.
- Foil Doesn't Stick: If your foil strip tends to come undone, try pinching the aluminum ends tighter or use small clips to hold it in place.
Common Mistakes and How to Avoid Them
When making and using DIY cake strips, there are a few common mistakes that can affect your baking results. Here's how to avoid them:
Overlapping Strips Too Much
- Mistake: Overlapping the strips too much can cause uneven baking.
- Solution: Ensure the strips overlap just enough to stay secure. About 1-2 inches is usually sufficient.
Not Securing Strips Properly
- Mistake: If the strips are not secured tightly, they can fall off during baking.
- Solution: Use safety pins, clips, or even a bit of string to secure the strips tightly around the pan.
Using Dry Strips
- Mistake: Using dry strips can lead to uneven baking and burnt edges.
- Solution: Always soak the strips in water before wrapping them around the pan. Squeeze out excess water, but make sure they are still damp.
Incorrect Strip Size
- Mistake: Strips that are too short or too long can cause problems.
- Solution: Measure your pan carefully and cut the strips to fit snugly around it. They should cover the sides completely without overlapping too much.
Ignoring the Oven Temperature
- Mistake: Not adjusting the oven temperature can lead to uneven baking.
- Solution: Follow the recipe's temperature guidelines. If you notice uneven baking, you might need to adjust the temperature slightly.
Not Checking the Cake Midway
- Mistake: Not checking the cake midway through baking can result in overbaking or underbaking.
- Solution: Check the cake halfway through the baking time. Rotate the pan if necessary to ensure even baking.
Using the Wrong Type of Fabric
- Mistake: Using fabric that is too thick or too thin can affect the baking process.
- Solution: Use a medium-weight cotton fabric. It should be thick enough to retain moisture but not so thick that it insulates too much heat.
By avoiding these common mistakes, you can ensure that your cakes bake evenly and come out perfectly every time.
FAQs About DIY Cake Strips
Discover answers to FAQs about DIY cake strips and learn how they ensure even baking and prevent cake doming. Perfect for all baking enthusiasts!
DIY cake strips are homemade alternatives to commercial cake strips. They help your cakes bake more evenly by slowing down the baking process at the edges of the pan. This prevents the edges from over-browning and making a dome-shaped cake.
Prepare your cake batter as usual.
Soak your chosen material in water and wring out excess moisture.
Wrap the damp strips around the outside of your cake pan, securing them tightly.
Pour your batter into the prepared pan and bake as directed.
Yes, you can reuse most DIY cake strips. Simply wash and dry them after each use. If using fabric strips, make sure they are completely dry before storing them to prevent mold or mildew.
DIY cake strips can be just as effective as commercial ones when used correctly. They help make a more level cake with less doming, leading to a more professional-looking finished product.
It's important to ensure that your DIY cake strips are not too wet, as excess moisture can affect the baking process. Make sure to wring out any excess water before wrapping them around the pan. Additionally, be cautious when removing the strips after baking, as the pan and strips will be hot.
Final Thoughts on DIY Cake Baking Strips
Making your own DIY cake baking strips is an easy and cost-effective way to improve your baking results. This little bit of ingenuity goes a long way, allowing you to bake without stressing over uneven cakes. The materials are easy to find, and the steps are straightforward, making this a perfect project for any home baker. Not only does it testify to resourcefulness in the kitchen, but each homemade strip carries the satisfaction of making something with your own hands that elevates your baking.
As this guide proves, a few simple steps can drastically improve your baking experience. I encourage you to give this a try and enjoy beautifully even cakes with minimal fuss.


