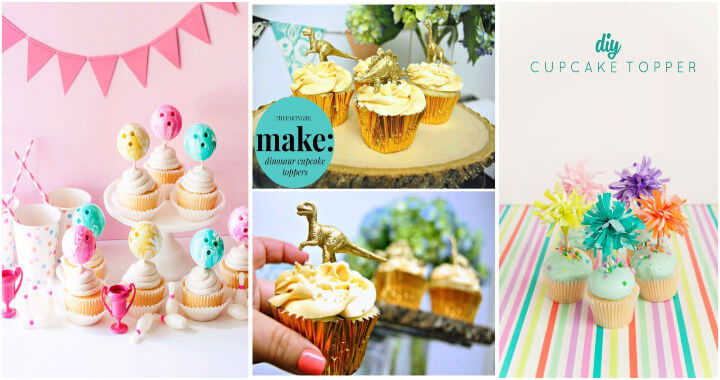
Making DIY cake toppers was something I stumbled upon when planning my daughter's birthday party. I wanted a unique topper for her cake but couldn't find anything special in the stores. So, I decided to make one myself. I gathered some craft supplies, watched a few tutorials, and got to work. The result was not only beautiful but also added a personal touch to the celebration.
This positive experience inspired me to continue making cake toppers for various occasions: anniversaries, weddings, and family gatherings. Each topper became a small project filled with creativity and love.
I'm sharing my tips and techniques to help you make stunning DIY cake toppers too. These easy steps and ideas will make sure your celebrations are as unique and memorable as mine were.
Getting Started: What You'll Need
First off, you're going to need a Cricut Maker 3. It's a fantastic tool that opened up a world of creativity for me. The machine came with a blade already installed, a neat compartment for tools, and a guide that was a lifesaver.
Materials Needed:
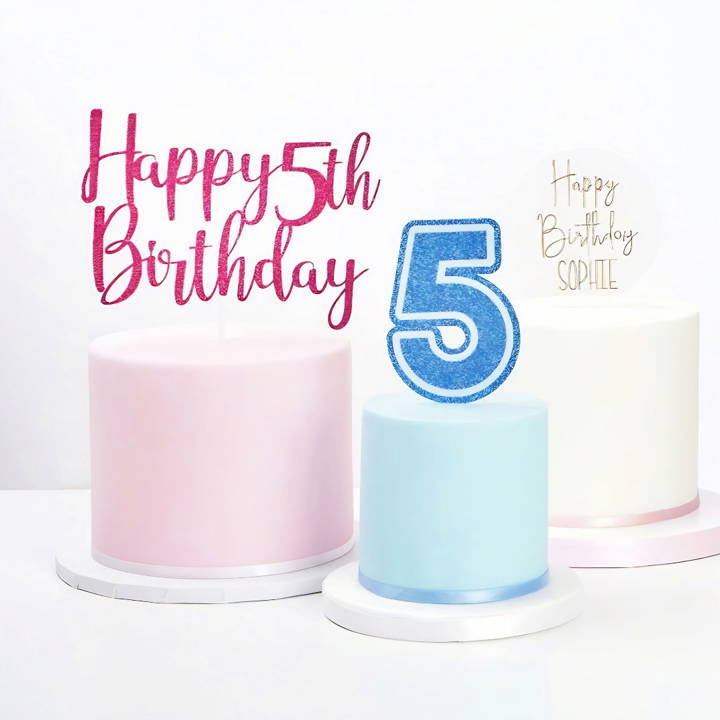
- Cricut Glitter Cardstock - I chose a vibrant pink for that extra sparkle. The glitter card turns ordinary cake toppers into eye-catching pieces of art.
- Standard Grip Mat - Essential for holding your material in place while the Cricut works its magic.
- Cricut Tools - Included in the Cricut Essential Toolkit, these tools helped me in weeding and finishing the cake topper with precision.
- Sticks - I used bamboo skewers to support the topper on the cake. You could also consider cake pop sticks based on your preference.
- Adhesive - Tacky double-sided tape or craft glue works well to fix the stick to the topper.
Why Each Material Is Needed
- Cricut Glitter Cardstock: Absorbs the cuts smoothly and adds an unbeatable charm with its sparkle.
- Standard Grip Mat: Ensures your material doesn't move during the cutting process, delivering precise cuts.
- Cricut Tools: They help in efficiently removing excess material and cleaning up your design.
- Sticks & Adhesive: They are necessary to mount your topper on the cake securely.
Step by Step Instructions
Discover easy DIY cake topper instructions. Follow our step-by-step guide to make stunning, personalized cake toppers for any occasion.
1. Setting Up the Cricut Maker 3
Open your Cricut Maker 3, and make sure it's powered on. The anticipation as the machine comes to life is incredible.
2. Choosing Your Design
I connected the Cricut to my computer and used the Cricut Design Space to make my first topper saying "Happy 5th Birthday." The software is user-friendly and allows you plenty of creative freedom.
3. Preparing the Material
I placed the pink glitter card on the standard grip mat, ensuring it adhered well to avoid any slip-ups during the cutting process.
4. Cutting the Design
After finalizing my design on the Design Space, I sent it to the Cricut Maker 3 for cutting. Watching the machine meticulously carve out my design was mesmerizing.
5. Weeding and Final Touches
Using the weeding tool, I removed the excess material around my design. It was intricate work but very satisfying.
6. Attaching the Stick
I chose bamboo skewers for my topper. A piece of tacky double-sided tape helped me secure the skewer to the back of the topper. Alternatively, craft glue can also be used for this step.
Personalization Ideas for DIY Cake Toppers
Personalizing a cake topper can turn a simple cake into a memorable centerpiece for any celebration. Here are some ideas to inspire your readers to make cake toppers that are as unique as their events:
Celebrate the Occasion:
- Birthdays: Use the birthday person's favorite colors or hobbies as a theme.
- Weddings: Incorporate the couple's initials or a silhouette of their romantic moment.
- Anniversaries: Numbers are classic, but why not add a touch of the couple's favorite pastime?
Play with Materials:
- Paper Art: Craft paper toppers with origami or quilling techniques for a delicate look.
- Edible Elements: Use fondant, gum paste, or chocolate to mold figures or shapes that guests can eat.
- Natural Touch: Flowers, leaves, or even twigs can add an organic feel to your cake.
Add a Personal Message:
- Quotes: A meaningful quote can be a powerful message on a cake.
- Names or Dates: Commemorate a special day with the guest of honor's name or a significant date.
- Custom Messages: Encourage readers to come up with their own short and sweet sayings.
Light It Up:
- LEDs: Small LED lights can make a cake topper sparkle, especially in dim settings.
- Candles: For a traditional approach, integrate candles into the design for a warm glow.
Interactive Toppers:
- Photo Frames: Let guests snap a picture with the cake by adding a small frame as part of the topper.
- Moving Parts: Make toppers with parts that move, like a spinning globe for a travel-themed party.
Seasonal Themes:
- Spring: Think fresh flowers and pastel colors.
- Winter: Incorporate snowflakes or miniature snowy landscapes.
Incorporate Hobbies:
- Music Lovers: Notes and instruments can make a cake sing.
- Sports Fans: Miniature equipment or team logos show off one's team spirit.
Use Technology:
- 3D Printing: Design and print a custom topper that's truly one-of-a-kind.
- Augmented Reality: Make a topper that comes to life with the help of a smartphone app.
Personalization hinges on knowing the recipient's tastes. Urge your readers to be creative and heartfelt. This way, they'll make a meaningful cake topper and a lasting memory.
Safety Precautions for DIY Cake Toppers
When making DIY cake toppers, safety is just as important as the design. Here's a comprehensive guide to ensure that your cake decorating is not only fun but also safe for everyone involved:
Material Safety:
- Edible vs. Non-Edible: Clearly distinguish between edible and non-edible materials. Never use toxic materials in topper designs.
- Food Grade: Use only food-grade materials that come into contact with the cake to avoid contamination.
Tool Safety:
- Sharp Objects: Be cautious with scissors, knives, or cutting machines. Keep them out of reach of children.
- Hot Tools: When using glue guns or other heating tools, work on a heat-resistant surface and handle with care to prevent burns.
Allergen Awareness:
- Common Allergens: Be aware of common allergens such as nuts, gluten, or dairy in edible toppers and notify guests if used.
- Clean Workspace: Maintain a clean workspace to prevent cross-contamination of allergens.
Choking Hazards:
- Small Parts: Avoid using small parts that could become choking hazards, especially if children will be present.
- Secure Attachments: Ensure all parts of the topper are securely attached to prevent them from falling off and posing a risk.
Environmental Considerations:
- Sustainability: Opt for biodegradable or recyclable materials when possible to minimize environmental impact.
- Disposal: Provide information on how to properly dispose of or recycle the topper after use.
Child Safety:
- Supervision: Always supervise children during crafting to prevent accidents.
- Age-Appropriate: Choose age-appropriate designs and materials for children's involvement in the project.
Fire Safety:
- Candles: If using candles, ensure they are securely fixed and never leave them unattended when lit.
- Flammable Materials: Keep flammable materials away from direct heat sources or open flames.
Following these precautions ensures your DIY cake topper is creative, personalized, and safe. Safety is key; always prioritize it in your crafts.
FAQs About DIY Cake Topper
Find answers to frequently asked questions about DIY cake toppers, including materials, techniques, and design ideas for your perfect cake.
You can still make a beautiful cake topper without a cutting machine. Start by choosing your design and printing it on cardstock. Then, carefully cut out the design with scissors or a craft knife. You can use tracing paper to transfer any complex designs onto the cardstock before cutting.
Absolutely! DIY cake toppers can be customized for any event, whether it's a birthday, wedding, or holiday celebration. You can make message toppers with phrases like “Happy Birthday,” “Best Wishes,” or any other custom message that fits the occasion.
There are many creative ideas you can explore, such as 3D figures, floral arrangements, banner-style toppers, or even toppers with shakers and confetti for added fun. You can also try layering different elements to add depth to your design.
To secure your cake topper, attach the design to one or two bamboo skewers with strong adhesive. Make sure the skewers are long enough to be inserted into the cake while holding the topper firmly in place. If the topper is heavier or larger, consider using more skewers for additional support.
Personalizing your cake topper is a great way to make your celebration even more special. You can add names, dates, or special messages using calligraphy or printed text. Incorporating elements that reflect the recipient's interests, such as favorite colors, hobbies, or themes, can also add a unique touch. For a more interactive element, consider adding movable parts or using materials like beads or fabric for texture.
Conclusion
In conclusion, making a DIY cake topper is an enjoyable and rewarding activity that can elevate any celebration. With just a few materials and some creativity, you can craft a unique topper that adds a personal touch to your cakes.


