Making a DIY camp shower is a cost-effective and convenient way to stay clean while enjoying the outdoors. Building your own DIY camping shower can be simple and rewarding, offering a refreshing solution after a long day of hiking or camping. With basic materials and a little effort, you can set up a functional and reliable shower that meets your needs.
A DIY camping shower comes in handy for maintaining hygiene and comfort during outdoor adventures. Various options are available, from solar-powered showers to gravity-fed designs, allowing you to choose what works best for you. With clear guidance, simple tools, and some creativity, building your DIY camp shower can enhance your camping experience.
Continue to the next section to explore step-by-step instructions and practical tips for making the perfect DIY camp shower for your next trip.
Why I Decided to Build a Portable Camp Shower
My journey began when I decided to go camping but realized I hadn't sorted out how I'd manage to stay clean. I wanted something easy, efficient, and portable. The answer? A DIY portable camp shower. This project turned out to be surprisingly straightforward and cheap, which was perfect for my budget.
What You'll Need
The materials I gathered were readily available at Home Depot, but you can find them at any similar store. Here's what I needed:
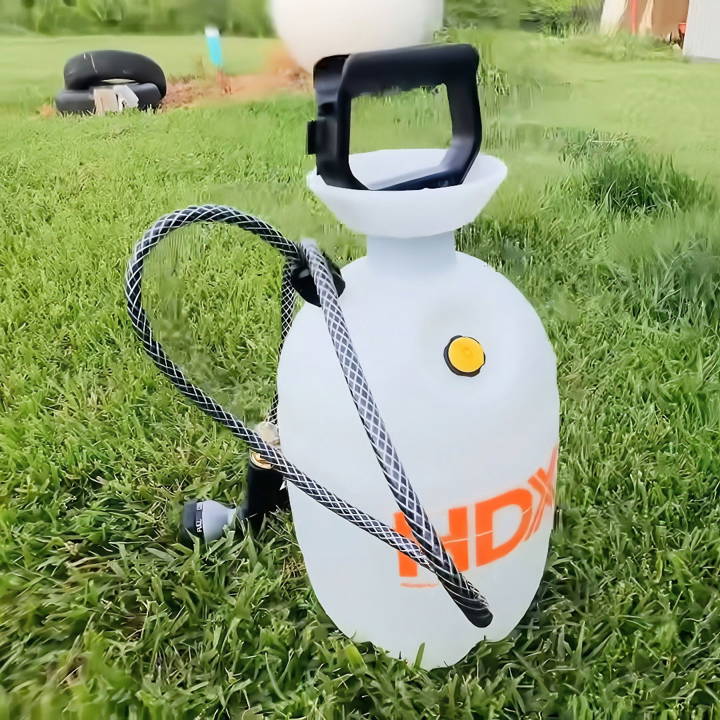
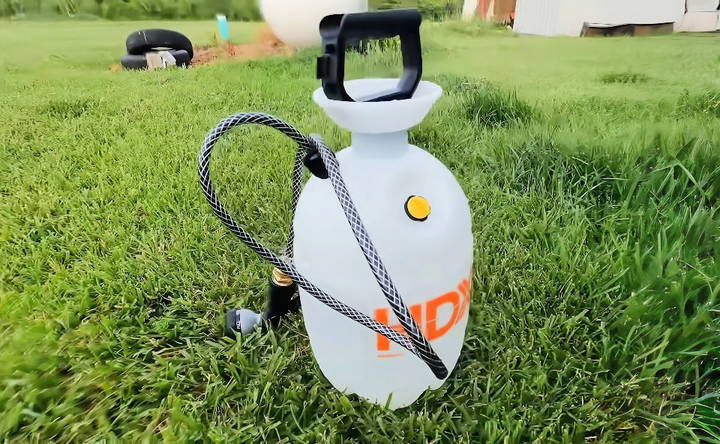
- A multi-use sprayer (I chose a 2-gallon for its balance between capacity and portability)
- A hose nozzle
- A garden hose adapter with a barb fitting and a nipple
- Two hose clamps
- Thread tape (optional, but recommended for ensuring water-tight connections)
Each of these materials serves a unique purpose. The multi-use sprayer serves as the water reservoir and pressure mechanism. The hose nozzle allows you to control the water flow like a typical shower, and the garden hose adapter along with the hose clamps ensure you can connect everything securely without leaks.
Step by Step Instructions
Learn how to make a DIY camp shower with our step-by-step guide. Easily assemble, attach the hose nozzle, and start using your portable shower.
Step 1: Assembling the Camp Shower
First, you need to connect the garden hose adapter (which I fitted with the barb and nipple for the male head connection) to the multi-use sprayer. This step is crucial because it transitions the sprayer into a more shower-like tool. I found that ensuring a tight fit here prevented any potential leaks.
If your hose is a bit stiff, don't worry. I had to apply a fair bit of pressure to get everything snugly connected. Remember, this is a low-pressure setup, so while perfection is ideal, there's a little room for learning.
Step 2: Attaching the Hose Nozzle
Next, I took the hose nozzle and attached it to the other end of the hose. I had already fitted this with a hose clamp to ensure a secure connection. The nozzle I chose had a variety of settings, but for shower purposes, I found the "shower" setting most fitting.
Step 3: Filling and Using Your Shower
After assembling the shower, I filled the reservoir with water. If like me, you're planning to use it in various locations, you'll appreciate the simplicity here. To pressurize the water, simply pump the multi-use sprayer's handle until you feel resistance.
I took my newly built camp shower out for a spin and was delighted by its efficiency. The spray was consistent, and it felt good to have a warm shower even in the middle of nowhere. Speaking of warmth, if you prefer warm showers, just leave the filled reservoir in the sun for a few hours, or mix hot water in for an immediate solution.
Maintenance and Upkeep Tips
Maintaining your DIY camp shower ensures it remains clean, functional, and safe to use. Here are some straightforward tips to help you keep your camp shower in top condition:
Regular Cleaning:
- After Each Use: Rinse the shower area to remove soap residue and debris.
- Weekly: Clean the shower bag and hose with a mild bleach solution to prevent mold and mildew. Rinse thoroughly.
Inspection and Repair:
- Check for Leaks: Regularly inspect the hose and connections for any signs of leaks. Patch up small holes with waterproof tape or a repair kit.
- Secure Connections: Ensure all fittings are tight and secure to prevent water wastage and potential damage.
Storage:
- Dry Completely: Before storing your camp shower, make sure all components are dry to avoid mold growth.
- Safe Storage: Store the shower in a cool, dry place away from direct sunlight to prevent material degradation.
Seasonal Care:
- Winter Prep: If you camp in cold weather, drain all water from the shower system to avoid freezing and cracking.
- Summer Refresh: In warmer months, check for any heat damage or warping that may have occurred during storage.
Water Quality:
- Use Clean Water: Always fill your shower with clean water to ensure hygiene and prevent contamination.
- Water Filtration: Consider adding a small filter to the hose to remove impurities from natural water sources.
Follow these tips to prolong your DIY camp shower's life and improve your outdoor shower experience.
Safety Considerations
When making a DIY camp shower, safety is paramount. Here's a detailed guide to ensure your setup is secure and user-friendly:
Structural Stability:
- Solid Foundation: Ensure your shower structure is anchored firmly to the ground to prevent tipping or collapsing.
- Weight Limits: Be mindful of the weight capacity of your shower setup, especially if you're using a hanging water bag.
Electrical Safety:
- Battery Safety: If your shower uses a battery-powered pump, check the batteries regularly for leaks or corrosion.
- Solar Panels: For solar-heated showers, install solar panels securely and away from water sources to avoid electrical hazards.
Water Temperature:
- Avoid Scalding: Monitor the water temperature closely. It should be warm, not hot, to prevent burns.
- Thermal Regulation: Consider a thermometer to keep track of the water temperature, especially if you're using solar heating.
Chemical Use:
- Biodegradable Soaps: Use environmentally friendly soaps that won't harm the natural surroundings or your skin.
- Storage of Chemicals: Keep shampoos and soaps in clearly marked containers to avoid confusion with drinking water or other liquids.
Emergency Preparedness:
- First Aid: Keep a first aid kit nearby in case of slips, falls, or minor burns.
- Plan B: Have an alternative cleaning method ready, such as biodegradable wipes, in case the shower fails.
Child and Pet Safety:
- Supervision: Never leave children or pets unattended in or near the camp shower.
- Accessibility: Make sure the shower is easily accessible for all users, with no tripping hazards.
By adhering to these safety considerations, you can enjoy a worry-free and secure showering experience in the great outdoors.
FAQs About DIY Camp Shower
Get answers to common questions about DIY camp showers, including setup, materials, and tips for an efficient outdoor shower experience.
A DIY camp shower is a homemade solution for bathing while camping, typically made from readily available materials. It allows campers to maintain hygiene in the outdoors without the need for built-in facilities.
You can make a handheld camp shower by drilling holes in the lid of a large container to mimic a showerhead. Fill the container with water, and you're ready to go. For a gravity-fed option, attach a showerhead to a portable water tank's spigot.
Yes, you can heat water for your camp shower. If you have a solar-heated bag, place it in direct sunlight. Alternatively, heat water over a camp stove and carefully pour it into your shower container.
For a better experience, ensure your shower container has an air vent to prevent pressure buildup. If using a gravity shower, hang it securely and use a rope with a handle for easy handling.
Yes, there are eco-friendly options like using a canvas bag with a brass showerhead, which is durable and reduces plastic use. Some companies also plant a tree for every purchase of their eco-friendly camp shower products.
Final Thoughts
Wrapping up, making your own DIY camp shower can enhance your outdoor experience. This project is simple, cost-effective, and highly rewarding. Stay fresh and clean on your adventures with your very own DIY camping shower.


