Are you tired of disorganized pantries and struggling to find space for all your canned goods? If so, a DIY rotating can dispenser might be the perfect solution for you. Not only does it help keep your pantry neat, but it also ensures a first-in, first-out (FIFO) system for your cans. This means you'll always be using the oldest cans first, minimizing food waste. This guide will lead you through the full process of building your own DIY can organizer, with clear, step-by-step instructions from a DIY food can dispenser plan.
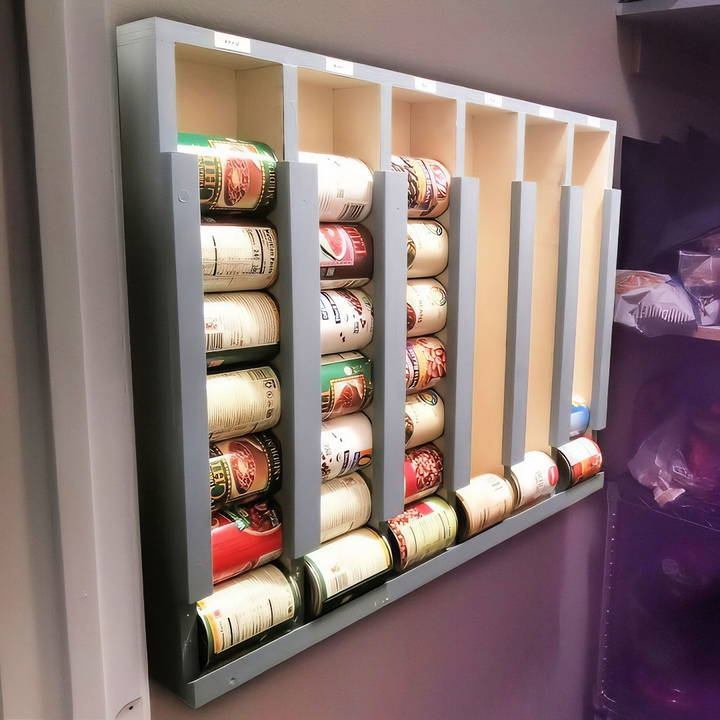
Why Build Your Own Can Organizer?
Building your own can organizer offers several benefits:
- Space Efficiency: A custom organizer allows you to maximize the space you have, whether it's in a pantry, closet, or on a wall.
- FIFO System: With a rotating can dispenser, you ensure the oldest cans are used first, preventing waste.
- Customization: You can adjust the size and capacity to fit your unique storage needs.
- Cost Savings: DIY projects are often more cost-effective than purchasing pre-made products, and you get the satisfaction of crafting them yourself.
Now, let's get started with the tools, materials, and the step-by-step process.
Tools and Materials Needed
Before you begin, gather all the necessary tools and materials. Here's a comprehensive list:
Tools
- Miter Saw or Circular Saw
- Table Saw (optional, but helpful for precision)
- Drill with a Countersink Bit
- Clamps (various sizes)
- Measuring Tape
- Stud Finder
- Level
- Screwdriver (Square drive head or Phillips head)
- Sandpaper or Electric Sander
Materials
- 1/4-inch plywood sheet (for the walls, dividers, top, and bottom)
- 2x4 wooden blocks (for angled support pieces)
- Wood glue
- Screws (Cabinet screws with washer heads are ideal)
- Cans (to test the size and spacing of the organizer)
- Paint or wood finish (optional, for a polished look)
- Support strip (for wall mounting)
With everything gathered, let's dive into the construction process.
Step by Step Instructions
Learn how to build a DIY can organizer with step-by-step instructions from measuring space to final adjustments for a custom storage solution.
Step 1: Measure Your Space
Before you start cutting wood, it's essential to measure the area where your can dispenser will be installed. Whether it's going in a closet or on a pantry wall, this measurement will dictate the overall dimensions of your can organizer.
In the original project, the available space was 30 inches wide, which allowed for a can organizer that could hold 42 cans. Your space might differ, so adjust the dimensions accordingly.
Step 2: Cutting the Plywood for the Frame
Once you've measured your space, it's time to cut the plywood for the main structure. You'll need:
- Two long pieces for the sides.
- Two pieces for the top and bottom.
- Five divider pieces (these will separate the cans).
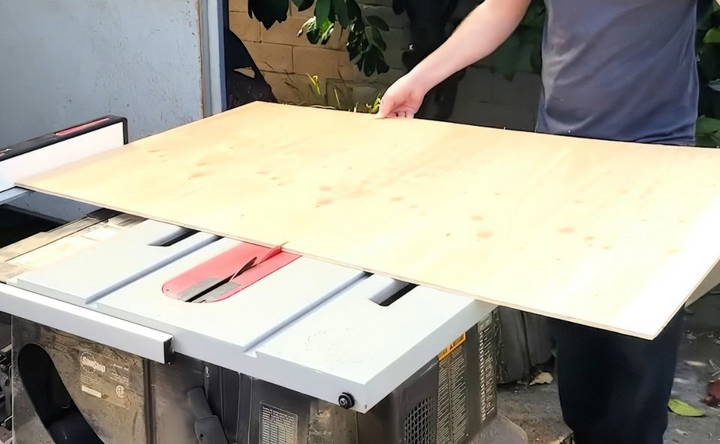
Use a miter saw to ensure clean, straight cuts. For uniformity, use a stop block on your saw to make sure all divider pieces are exactly the same length. In the original project, the dividers were cut to 23 1/8 inches long.
Step 3: Assemble the Frame
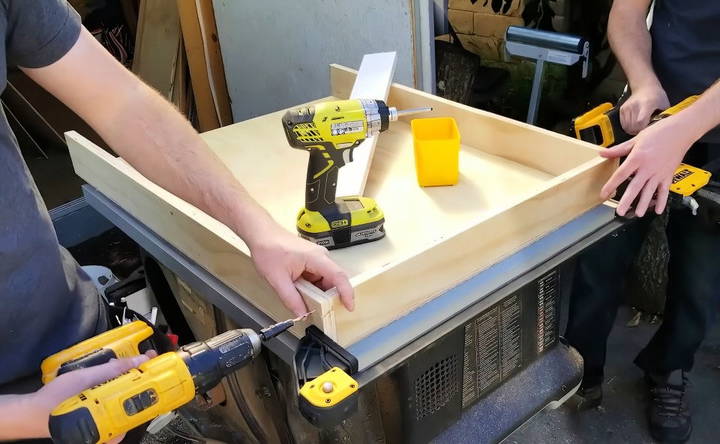
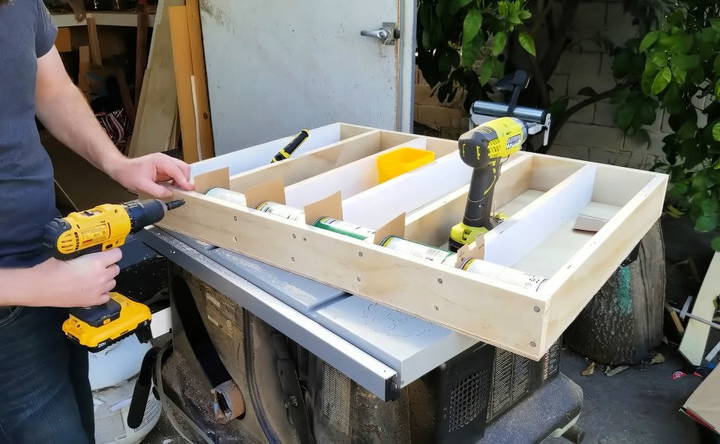
Start by attaching the top and bottom pieces to the two sidewalls. Use clamps to hold the plywood steady while you drill and screw the pieces together. A countersink bit will ensure that your screws sit flush with the wood, giving the organizer a sleek, professional finish.
- Pro Tip: Using screws with square drive heads instead of Phillips heads can make the assembly easier, as they are less likely to strip during installation.
Step 4: Attach the Dividers
Next, attach the five dividers to make individual compartments for the cans. To ensure proper spacing, place your cans between the dividers as a guide. A small box or other spacer can help maintain consistent spacing while you work.
Clamp each divider in place and then screw them into the top and bottom pieces. Be careful to align everything properly, as this will affect how smoothly the cans roll through the organizer.
Step 5: Secure the Dividers to the Back
To add stability, the dividers need to be secured to the back of the organizer. First, prop up the structure and drill small pilot holes where the dividers meet the back. Then, attach them with screws, ensuring everything stays straight and aligned.
If the plywood is slightly bent (which is common with thinner sheets), use screws to pull it taut and ensure it stays flush with the cans.
Adding the Can Dispensing Mechanism
Learn how to make the ramp for adding a can dispensing mechanism. Follow step-by-step instructions for effective results.
Step 6: Building the Ramp
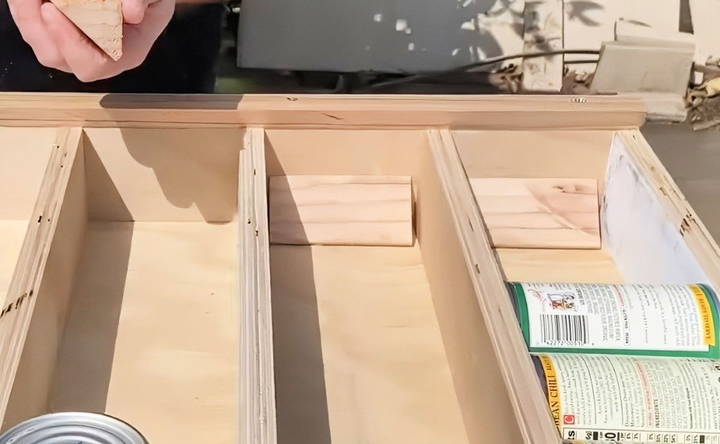
The key to a functional rotating can dispenser is a ramp system that pushes the cans forward as they are removed. To build this, you'll need to cut angled pieces at a 45-degree angle using a table saw or miter saw.
Once cut, glue these pieces to the bottom of each compartment, ensuring they guide the cans smoothly toward the front of the organizer. No need for clamps here; a technique called a “rub joint” will suffice. Simply apply wood glue and rub the pieces back and forth to make a strong bond.
Finishing Touches for a Professional Look
Achieve a polished look with our guide on front stops for cans and expert sanding and painting tips for professional results.
Step 7: Front Stops for the Cans
To prevent the cans from falling out of the organizer when it's vertical, you'll need to add a front stop. This can be made from any leftover wood or siding you have. Cut pieces to size and attach them to the front of each row.
This step is essential for safety and functionality, as it keeps the cans securely in place while still allowing easy access.
Step 8: Sanding and Painting
For a polished look, lightly sand the entire organizer to remove any rough edges. You can use sandpaper or an electric sander for this step. Once sanded, consider spray painting the inside of the organizer white or another color that matches your pantry.
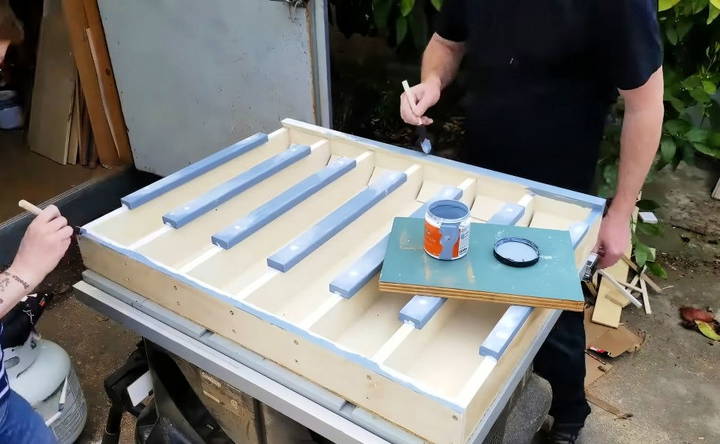
After painting, apply a clear wood finish or house paint to protect the wood and give it a clean, finished appearance.
Installing the Can Organizer
Learn how to efficiently mount the can organizer in this easy step-by-step guide. Optimize your kitchen storage with our expert tips!
Step 9: Mounting the Organizer
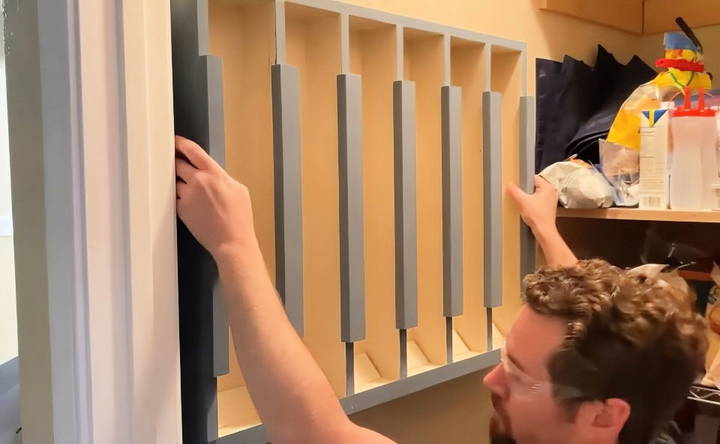
Now that your can organizer is complete, it's time to mount it. Use a stud finder to locate studs in your wall, and install a support strip that the can organizer can rest on. This strip will bear the weight of the loaded organizer and ensure it doesn't shift or sag over time.
Attach the organizer to the wall using cabinet screws with washer heads. These screws provide extra holding power and ensure the organizer stays securely in place, even when fully loaded with cans.
Testing and Final Adjustments
Once the organizer is installed, load it with cans and see how it works. Roll the cans from one side to the other and make sure they move smoothly. If any of the dividers are too tight, you can adjust them slightly by sanding down the edges or loosening a screw.
Customization Ideas for Your Can Organizer
While this guide provides the basics for building a can dispenser, you can customize it to suit your needs:
- Adjustable Dividers: If you store different sizes of cans, consider making the dividers adjustable.
- Larger Capacity: Build a larger organizer if you have more space or need to store more cans.
- Labeling System: Add labels to each row for easier organization by type or expiration date.
- Paint and Finish: Customize the look of your organizer to match your kitchen or pantry decor.
Conclusion: A Functional and Stylish Addition to Your Home
A DIY can organizer is a practical project that will help you save space, reduce food waste, and keep your pantry tidy. With the step-by-step instructions provided here, you can build your own rotating can dispenser and enjoy the benefits of a well-organized kitchen.
Not only is this project cost-effective, but it also gives you the satisfaction of building something functional with your own hands. So gather your tools, follow these steps, and get ready to enjoy a more organized pantry!
FAQs About DIY Can Organizer
Find answers to common questions about DIY can organizers, including materials, design tips, and assembly instructions to optimize your pantry.
Yes! You can easily modify the size of your organizer to accommodate larger or smaller cans. Measure the diameter of the largest can you plan to store, and ensure each divider is about 1/8 inch wider than that. This flexibility ensures that your organizer will work for various can sizes.
If cans are too loose, you can add additional spacers or adjust the dividers. If they are too tight, sanding down the edges of the dividers or slightly increasing the width of the compartments will help make a smoother fit.
Installing this can organizer on a door is not recommended unless you have reinforced hinges and screws that are long enough to reach the wall studs. The weight of the loaded cans can be too much for most standard door hardware to handle safely.
To account for different can sizes due to shrinkflation, build the organizer with the largest expected can size in mind. This approach will allow smaller cans to fit comfortably while preventing issues if the size of the cans fluctuates.
Using 3/4" plywood and mounting the organizer securely to wall studs with washer-head cabinet screws will provide the necessary support for the weight. The plywood and screws help evenly distribute the load, ensuring long-term stability.
At a minimum, you’ll need a drill, circular saw, and clamps. A miter saw and table saw can make the process easier and more precise, but they aren’t strictly necessary for a successful build.
Yes! Using pallets or scrap wood can work well, but make sure the wood is sturdy and straight. You may need to sand or plane the wood to ensure it fits together properly, especially for the dividers and ramp.
Over time, dust can accumulate, especially near the ramps. One way to prevent this is by making the ramps and angled supports slightly larger to fill gaps. Regularly cleaning with a vacuum or a narrow duster can also help maintain the organizer's cleanliness.
Yes, the basic tools like a drill and circular saw are enough to get the job done. While tools like a miter saw and table saw provide more precision, the project can be completed with simpler tools by carefully measuring and cutting.
If cans are rolling out too fast or falling out, consider raising the bottom rail or adjusting the angle of the back ramp. These small changes can help keep the cans securely in place while still allowing easy access.


