Making your own homemade DIY candle wick is a fulfilling and creative endeavor, perfect for those who love crafting and personalizing their home decor. The process, surprisingly straightforward, requires a few basic materials that you might already have lying around. This guide will walk you through how to make candle wicks, ensuring your homemade candles burn brightly and safely. It's an engaging way to leap into handmade candle-making, offering a touch of personal flair to your creations.
As we delve into the steps for crafting your candle wicks, from measuring and cutting the twine to the final wax coating, we'll also cover essential safety precautions to keep your candle-making journey hazard-free. Not only will you learn the practical aspects, but we'll also explore troubleshooting tips, cost comparisons, and the little nuances that make DIY candle-making enriching. Stay tuned for insights into material selection, the significance of the wax coating, and why patience truly is key.
Let's get started on this creative adventure, equipping you with everything you need to master the art of making candle wicks.
Materials You Will Need:
- Hot water
- 100% cotton twine (butcher's twine)
- Scissors
- Ruler
- Measuring cup
- Tablespoon measuring spoon
- Borax powder
- Table salt
- Mixing sticks
- Pure or synthetic beeswax
Step by Step Instructions
Learn how to make homemade DIY candle wicks with our easy guide below:
Step 1: Measuring and Cutting the Twine
Begin by measuring the length of the wick you need with a ruler. Cut the cotton twine accordingly. It's efficient to cut multiple wick lengths at once.
Step 2: Preparing the Solution
Measure 1.5 cups (355 milliliters) of water and heat it using a small saucepan or kettle. In a separate container, mix 2 tablespoons of salt and 4 tablespoons of borax powder. Pour the hot water over the borax and salt, stirring until fully dissolved.
Step 3: Soaking the Twine
Submerge the cut twine lengths into the borax and salt solution. Leave them to steep for 24 hours. This treatment helps to ensure a steady burn and minimal smoke when the wick is lit.
Step 4: Rinsing and Drying
After 24 hours, remove the twine from the solution. You may notice some crystal formation, which is normal. Rinse the wicks under clean water to remove residual materials, then set them out to dry for 48 hours. Using a plastic coat hanger or laying them on paper towels are good drying methods to avoid rust stains.
Step 5: Wax Coating
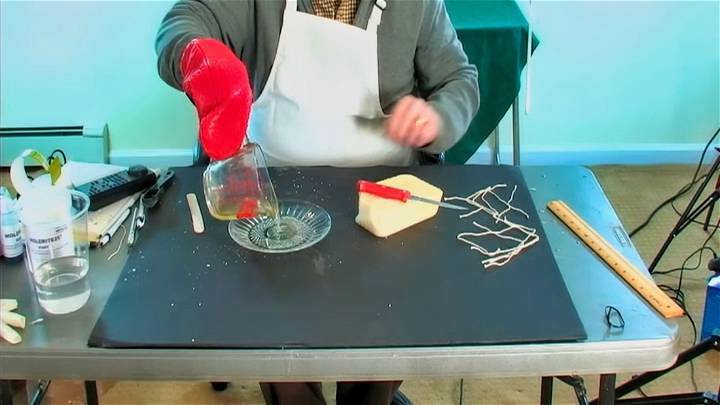
Once dry, prepare a double boiler to melt the beeswax. When the wax is fully melted, dip each twine wick into it, ensuring a complete coat. Allow the wax to cool slightly, then dip a second time for a thorough coating. This wax layer will help the wick stand straight in the candle and contribute to an even burn.
Drying the Wicks
Lay the coated wicks out to dry one final time. Once the wax has hardened, your wicks are ready to be used in candle-making projects.
Video Tutorial
For a step-by-step video tutorial on how to make durable and smokeless candle wicks, watch this helpful video on YouTube: Making Great Candle Wicks.
It pairs well with this written guide, offering a dynamic visual complement to the techniques detailed here, laid out in an approachable format.
By making your own candle wicks, you not only save money but also gain the flexibility to customize them for various candle projects. Enjoy the satisfaction of crafting a candle from wick to wax for a fully homemade experience.
Safety Precautions
When making and using a DIY candle wick, it's crucial to prioritize safety. Here are some key points to keep in mind:
Handling Hot Materials
Wax, a key component in candle-making, needs to be melted for use. It's important to handle hot wax with care to avoid burns. Always use a double boiler to melt wax and never leave it unattended. Use heat-resistant gloves when handling hot materials.
Fire Safety
Candles involve open flames, so it's essential to follow basic fire safety rules. Never leave a burning candle unattended. Keep candles away from flammable materials like curtains, books, and paper. Always burn candles on a heat-resistant surface.
Proper Ventilation
While making candles, ensure your workspace is well-ventilated. Some types of wax can release fumes when melted. If you feel dizzy or nauseous, move to fresh air immediately.
Safe Storage
Store your DIY candle wicks and candles in a cool, dry place away from direct sunlight. This prevents them from melting or deforming.
Safety is paramount when engaging in any DIY project. By following these precautions, you can enjoy the process of making your own candle wicks while ensuring a safe environment.
Troubleshooting Tips
When making DIY candle wicks, you might encounter some challenges. Here are some common issues and their solutions:
Wick Burning Too Fast
If your wick is burning too quickly, it might be too thin. Try using a thicker string or braiding multiple strings together to make a thicker wick.
Wick Not Burning
If your wick isn't burning, it might not be properly coated in wax. Make sure the wick is fully submerged in the wax and given enough time to soak it up.
Candle Flickering or Smoking
If your candle is flickering excessively or producing a lot of smoke, the wick might be too long. Trim your wick to about 1/4 inch before lighting the candle.
Difficulty in Lighting the Wick
If you're having trouble lighting the wick, it might be because the wick is too short or the wax around it has hardened too much. Try digging out a little wax around the wick to expose more of it.
Practice makes perfect. Don't be discouraged if your first few attempts don't turn out as expected. Keep trying, and you'll get the hang of it.
Cost Comparison
When deciding whether to make your own candle wicks or buy them pre-made, it's important to consider the cost. Here's a breakdown:
Cost of DIY Candle Wicks
The cost of making your own candle wicks can vary depending on the materials you use. For example, if you use cotton string and wax, the cost might be relatively low. You'll also need to factor in the time you spend making the wicks.
Cost of Pre-Made Candle Wick
Pre-made candle wicks can be purchased from craft stores or online. The cost can vary depending on the brand, quantity, and quality of the wicks.
Comparing the Costs
When comparing the costs, consider both the monetary cost and the time investment. DIY candle wicks might be cheaper in terms of material costs, but they require time to make. Pre-made wicks are more convenient but might be more expensive.
The best choice depends on your needs and circumstances. DIY is great if you like making your own wicks. Pre-made wicks are better for saving time.
Personal Experiences and Tips
Sharing personal experiences and tips can make your content more relatable and engaging. Here are some insights I've gathered from my own journey of making DIY candle wicks:
Choosing the Right Materials
From my experience, 100% cotton string works best for DIY candle wicks. It burns evenly and is readily available. I've also experimented with other materials like twine and hemp, but cotton has given me the best results.
Importance of Wax Coating
I cannot stress enough the importance of thoroughly coating the string in wax. It makes the wick burn slower and more evenly. I usually dip the string in melted wax a couple of times, letting it cool between each dip.
Patience is Key
One thing I've learned is that patience is key. It can take a few tries to get the hang of making your own wicks, but don't get discouraged. Keep trying, and you'll get better with each attempt.
Experiment and Learn
Don't be afraid to experiment with different materials and techniques. That's how you learn and improve. Remember, the goal is not just to make a candle wick but to enjoy the process as well.
I hope these tips and experiences help you on your candle wick journey. Remember, the most important thing is to have fun and stay safe!

Frequently Asked Questions
In this section, I'll address some common questions that arise when making DIY candle wicks. These answers are based on my knowledge and the latest information available.
What type of string is best for DIY candle wicks?
100% cotton string is often recommended for DIY candle wicks. It's readily available, affordable, and burns well.
How do I coat the string in wax?
To coat the string in wax, you'll need to melt some wax in a double boiler. Once the wax is melted, submerge the string in the wax, ensuring it's fully coated. Then, remove the string and let it cool and harden.
Why is my DIY candle wick not burning properly?
If your DIY candle wick isn't burning properly, it could be due to a few reasons. The wick might be too thin or thick, or it might not be coated properly in wax. Try adjusting these factors to improve the burn.
Can I use other materials for DIY candle wicks?
While cotton is the most common material for DIY candle wicks, you can experiment with other materials. Just ensure that the material you choose is safe to burn.
Making DIY candle wicks is a process of trial and error. Don't be discouraged if things don't go right the first time. Keep experimenting and learning, and you'll get the hang of it.
Conclusion:
In conclusion, mastering the craft of homemade DIY candle wick creation can elevate your candle-making experience, ensuring your candles burn beautifully and efficiently. From selecting the appropriate materials to following the step-by-step instructions, each phase is crucial for achieving the perfect wick.
By adopting these methods, how to make candle wicks becomes not just an activity but an art form, offering a rewarding endeavor for all candle-making enthusiasts. As you embark on this journey, remember to prioritize safety precautions to enjoy the process fully. Whether troubleshooting or comparing costs, the comprehensive guidance provided ensures a smoother, more fulfilling candle-making journey.


