Making a cozy corner at home doesn't have to be a complicated or time-consuming project. With just a few materials and some creativity, you can build a beautiful DIY canopy tent in less than 10 minutes! Whether you're looking to set up a romantic date night, celebrate a special occasion, or simply add a relaxing touch to your living space, a canopy tent is a perfect solution.
In this guide, I'll take you through each step, covering everything you need to know to build your own cozy canopy tent from scratch. We'll look at the materials, different styling ideas, and how you can customize the space to suit your aesthetic and functional needs. The process is easy, fun, and incredibly rewarding.
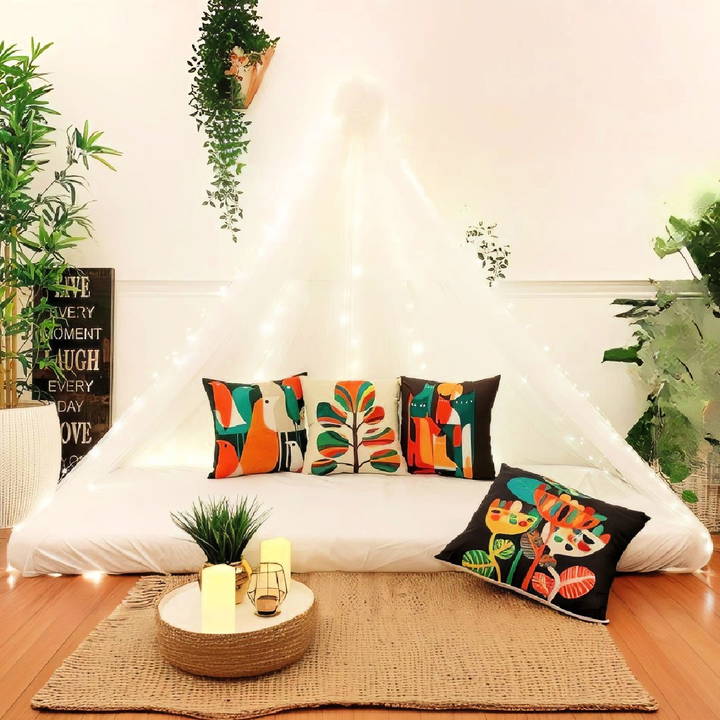
What You'll Need to Build a DIY Canopy Tent
Before diving into the setup, let's gather the basic materials. Fortunately, many of these are items you may already have at home, and others are affordable and easy to find.
Essential Materials:
- Net Curtains – Lightweight, flowy curtains work best for a canopy effect. You'll need at least four panels to make the full tent experience. These can be found at stores like Ikea, or you can repurpose old curtains you may already have.
- Hair Ties or Elastic Bands – You'll need these to secure the tops of the curtains when making the canopy effect.
- String or Yarn – This will be used to hang your curtains. Choose a sturdy string that matches or complements the color of your curtains.
- Command Hooks or Nails – These will hold up the strings that support the canopy. Command hooks are perfect for renters as they won't damage your walls.
- Mattress or Cushions – A twin-size mattress or large cushions will form the seating area. You can also opt for floor pillows if you prefer a more traditional floor seating arrangement.
- Fairy Lights – To add an enchanting, magical touch, use curtain string lights or fairy lights. These can be draped over the canopy for a soft, ambient glow.
- Decorative Pillows – Opt for colorful or printed pillows to contrast with the white or neutral canopy, giving the space more personality.
- Popsicle Stick Shelves – If you like, add some DIY hexagonal popsicle stick shelves for décor. These can hold small planters or other decorative items.
- Jute Mat – A natural jute rug or mat can add texture to the floor seating area, grounding the whole space.
- Tray, Candles, and Plants – For a final touch of ambiance, set up a tray with candles, a small plant, or other decorations to make a calming and serene environment.
Step by Step Instructions
Learn how to make a stunning DIY canopy tent with easy step-by-step instructions and styling tips for a perfect outdoor setup.
Step 1: Set Up the Canopy Structure
Start by preparing your net curtains. Take your four curtain panels and secure each of them at the top using a hair tie or elastic band. This will help hold the fabric together, giving you a nice gathered look when it's hung.
Once you've tied the curtains, thread a string or piece of yarn through the hair ties. This string will serve as the anchor that you hang from the walls or ceiling to make the canopy.
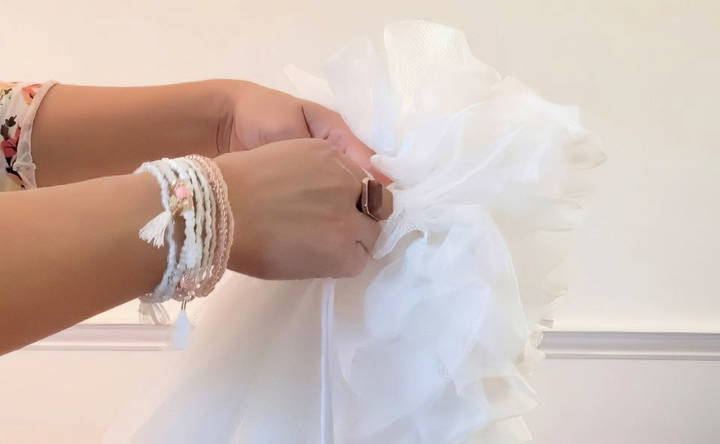
Step 2: Hanging the Canopy
Now it's time to decide where you want to hang your canopy. If you're doing this indoors, you can hang it from a ceiling beam, or curtain rod, or attach it to the wall using command hooks. Choose an area where the ceiling is high enough to allow the fabric to drape freely.
Using your command hooks or nails, securely tie the string to the hooks, letting the curtains fall naturally around the seating area. For a more secure hold, ensure the string is tightly knotted. You can hang the canopy in a semi-circle for an open, inviting look or close the fabric completely for more privacy.
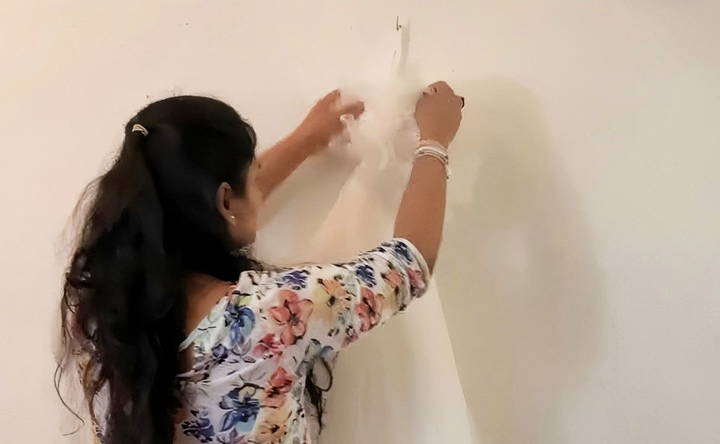
Step 3: Arrange the Seating
For the seating area, place your twin-size mattress, large cushions, or floor pillows under the canopy. Adjust the curtains so they tuck neatly under the mattress or cushions, making a cozy nook where you can relax or host a small gathering.
If you prefer a more traditional tent feel, you can elevate the mattress slightly by placing it on a low platform, but it also works perfectly fine without any additional support.
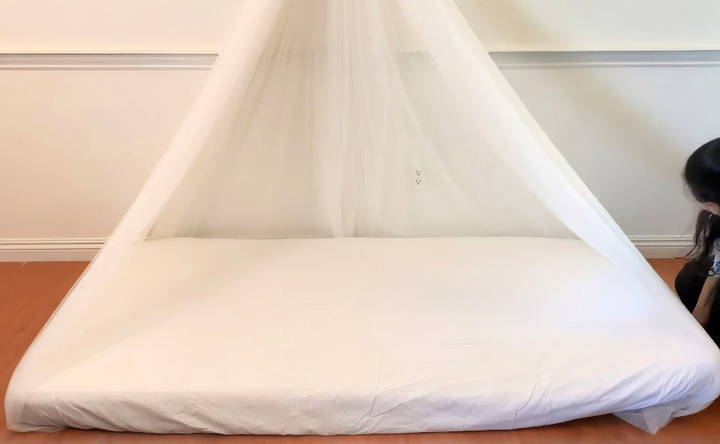
Step 4: Add Ambiance with Lights
Fairy lights are a must for a DIY canopy tent! They provide a soft, warm glow that instantly enhances the atmosphere. You can use string lights designed for curtains or any standard set of fairy lights.
To attach the lights, drape them over the top of the canopy and let them cascade down along the curtains. You can even wrap them around the curtain ties for added sparkle. If you're aiming for a more intimate feel, consider using dimmer lights or candles inside the seating area for a cozy ambiance.
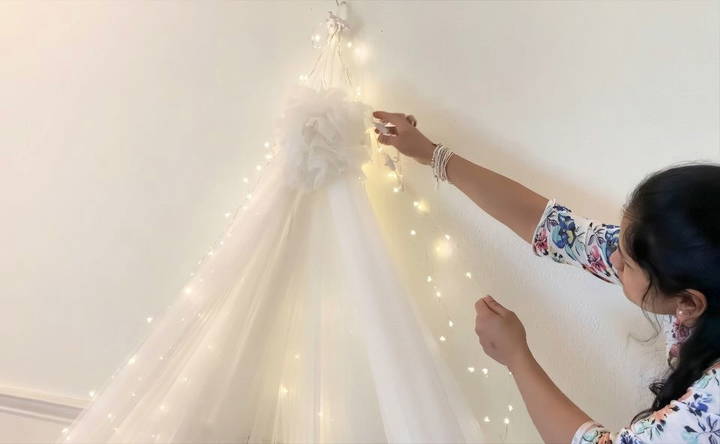
Step 5: Add Colorful Cushions and Décor
Since the net curtains are typically white or neutral, this is the perfect opportunity to play with color. Add in decorative pillows in bold or patterned designs to contrast with the neutral canopy. Bright colors will give the space a lively and inviting feel, while more muted tones can make a calming, serene environment.
For additional décor, add some greenery. Real or faux plants placed around the seating area or on popsicle stick shelves will introduce a sense of nature and tranquility.
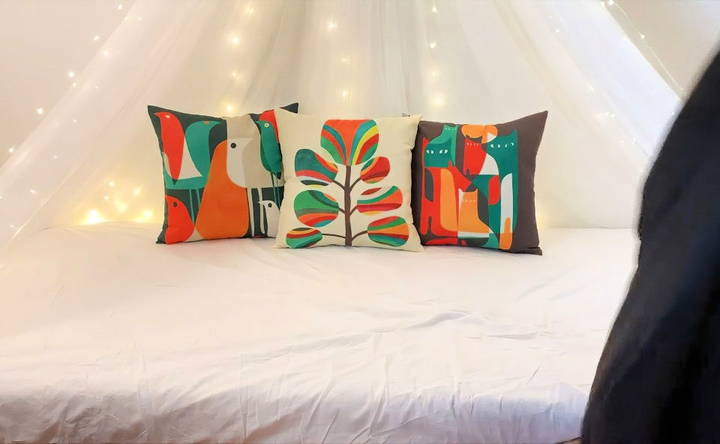
Step 6: Include a Rug and Tray for the Final Touch
A jute mat placed under the seating area or just in front of it adds warmth and texture to the space. Natural materials like jute complement the breezy, open feel of the canopy, giving the setup a cozy, bohemian vibe.
Finish off the look with a tray placed on the mat, which can hold candles, small plants, or even a teapot and cups if you're making a reading or tea nook. The tray will make the area feel intentional and complete.
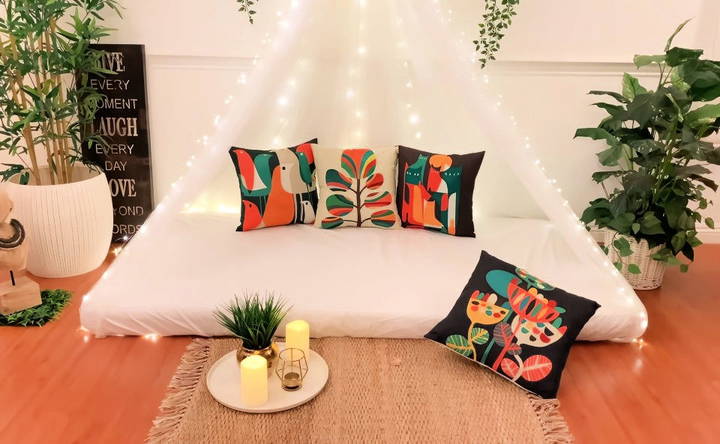
Styling Ideas for Your Canopy Tent
Now that you've set up your DIY canopy tent, let's explore some creative ways to style it for different occasions and spaces.
- Romantic Date Night: Transform your living room or patio into a romantic retreat by setting up the canopy tent for two. Add plenty of soft cushions, drape the curtains for more privacy, and light candles to set the mood. Pair this with soft music and you've got the perfect setting for an intimate evening.
- Birthday or Anniversary Surprise: Decorate the canopy with balloons, flowers, and personalized touches like framed photos or mementos. For an added element of surprise, use battery-operated candles to illuminate the space and place a small gift or note in the tray for a loved one to find.
- Cozy Reading Nook: For book lovers, a canopy tent can be the ultimate reading escape. Fill the space with soft cushions, blankets, and your favorite novels. Install a small bookshelf or magazine holder nearby for easy access to your reading material.
- Kids' Play Area: Kids love tents, and a DIY canopy is the perfect way to make an imaginative play space. Add soft toys, colorful cushions, and perhaps even a small table where they can draw or play games. Use fairy lights and glow-in-the-dark stickers to make the space extra magical.
- Outdoor Zen Corner: Take your canopy outdoors for a peaceful zen corner on the balcony, patio, or even in your backyard. This is a great space for meditation, yoga, or simply enjoying a cup of tea surrounded by nature. Add hanging plants and soft music for the perfect retreat.
Pro Tips for a Flawless Canopy Tent
Here are a few extra tips to make your DIY canopy tent even more spectacular:
- Use Scented Candles: If you're setting up the canopy indoors, try using scented candles or essential oil diffusers to make a calming atmosphere.
- Experiment with Curtain Colors: While white or neutral curtains are classic, you can experiment with other colors like pastel pinks, blues, or even patterns to make a more vibrant or themed look.
- Layer Your Cushions: Mix and match different sizes and textures of pillows and cushions to add more depth and comfort to the seating area.
- Install Adjustable Hooks: If you plan on moving your canopy around or switching locations, use adjustable command hooks so that you can easily set it up again without damaging your walls.
Conclusion
A DIY canopy tent is a fantastic way to add a touch of elegance and comfort to any room or outdoor space. With minimal effort and a few simple materials, you can make a cozy corner that's perfect for relaxation, special occasions, or even as a play area for children. The key to success is in the details – from the fairy lights to the colorful cushions – so don't be afraid to get creative and make it your own.
By following this guide, you'll have your own beautiful, tranquil space in no time. Happy decorating!
FAQs About DIY Canopy Tent
Discover essential FAQs about DIY canopy tent setup and maintenance. Get tips, ideas, and guidance for your own custom canopy project.
Use command hooks or nails to tie the string or yarn securely. Make sure the hooks can hold the weight of the curtains and any additional décor like fairy lights. Test the strength by lightly tugging on the strings before setting up the full canopy.
Yes, you can adjust the number of curtains based on the size of your space. Two curtains can work well for a smaller, more compact canopy setup. Just ensure they are evenly spaced for proper coverage.
Use LED fairy lights as they stay cool and are energy-efficient. Avoid older light bulbs that might heat up and pose a fire risk, especially when used with lightweight, flammable materials like net curtains.
Yes, you can substitute net curtains with any thin, breathable fabric. Lightweight sarees, sheer fabric, or even old scarves can create a similar effect, depending on what you have available.
For a portable setup, use a collapsible tent frame or lightweight curtain rods as support. You can tie the fabric to these structures, making it easy to move the canopy between indoor and outdoor spaces.
Yes, layering additional fabric like thicker curtains over the netting can make a more enclosed or luxurious look. Ensure the added weight is supported by the hooks or nails.
If dust collects on the curtains, you can easily remove them and wash them according to the fabric's care instructions. For delicate net curtains, use a gentle cycle on your washing machine or hand wash them.
Ideally, the curtains should be 8 to 9 feet long, depending on the height of your ceiling. This allows for enough fabric to tuck under the seating area and provide ample draping around the canopy.
Yes, but ensure that the canopy is securely fastened and that all decorations, especially fairy lights, are safely out of reach to avoid potential hazards. Avoid using candles or other open flames near the fabric.
Absolutely! You can easily adapt the design for smaller spaces by using fewer curtains and opting for compact seating like floor pillows or a small mattress. Keep the décor simple to avoid cluttering the area.


