When setting up a canopy for an outdoor vendor booth, wind can be your biggest enemy. Without proper anchoring, your canopy is at risk of tipping over or being blown away, potentially damaging your setup and merchandise. One practical and budget-friendly solution to this problem is making your own DIY canopy weights. Not only will this save you money, but it will also give you peace of mind knowing your booth is securely anchored.
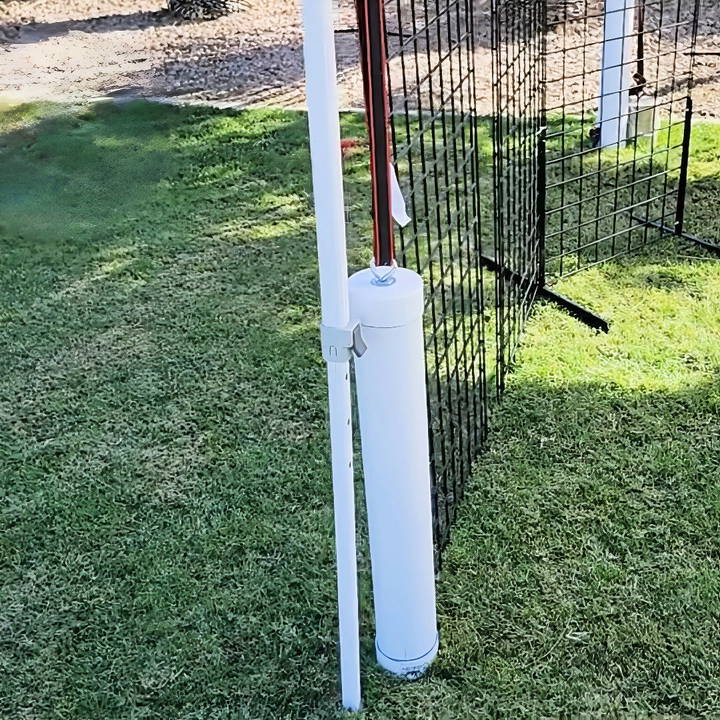
This comprehensive guide will walk you through the steps to make your own easy, effective, and affordable DIY PVC canopy weights. Each weight will be approximately 22 to 24 pounds, which is more than sufficient to keep your canopy stable in windy conditions. Let's dive into the details of this project!
Materials You Will Need
Before starting, gather all the materials required for this project. Most of these can be found at your local hardware store, like Home Depot or Lowe's. Here's a breakdown of what you'll need:
- Drainage Tube (PVC or similar): A lightweight drainage tube is an excellent option, as it is cheaper than regular PVC pipes but still strong enough for the task. You can also opt for PVC pipes if you prefer something more durable and don't mind spending a little extra.
- 3-inch End Caps: You will need one for each end of the drainage tube. These will seal the sand or concrete inside.
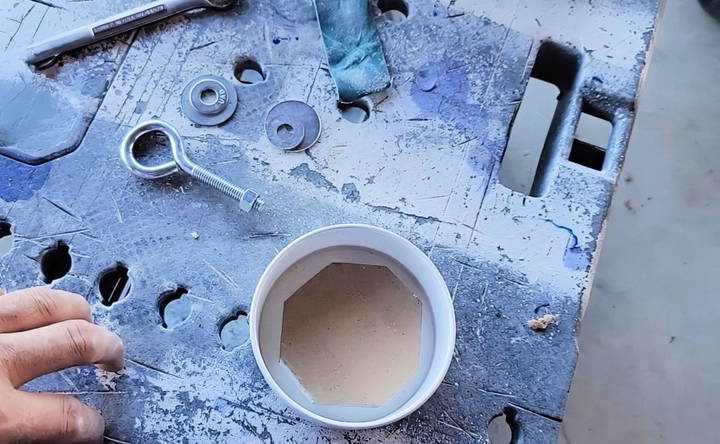
- Washers and Eye Bolts: The eye bolts and washers will serve as the attachment point for hanging or tying the weights to the canopy. Use a combination of small and large washers to make a sturdy connection.
- Plaster Sand or Concrete: Plaster sand is more compact than regular sand, giving the weight more density. Alternatively, you can use concrete for a more solid, heavier option.
- PVC Cement: This will glue the caps securely to the pipe, ensuring that no sand or concrete leaks out.
- Primer: PVC primer will help the glue bond more effectively by cleaning and prepping the surfaces.
- Sandpaper: A medium grit (around 60 or 80 grit) will roughen up the surfaces of the tube and caps to ensure a strong bond.
- Dowel Rod or Similar Tool: This will be used to compact the sand or concrete as you fill the tube.
Optional Tools
- Drill and 3/8-inch Bit: For making the holes for the eye bolts.
- Handle (optional): If you prefer to carry the weights with handles, you'll need materials and tools to attach them.
Step by Step Instructions
Make your own DIY canopy weights with our step-by-step instructions. From preparing the pvc tube to adding handles, get all the tips you need for sturdy DIY weights!
Step 1: Prepare the PVC Drainage Tube
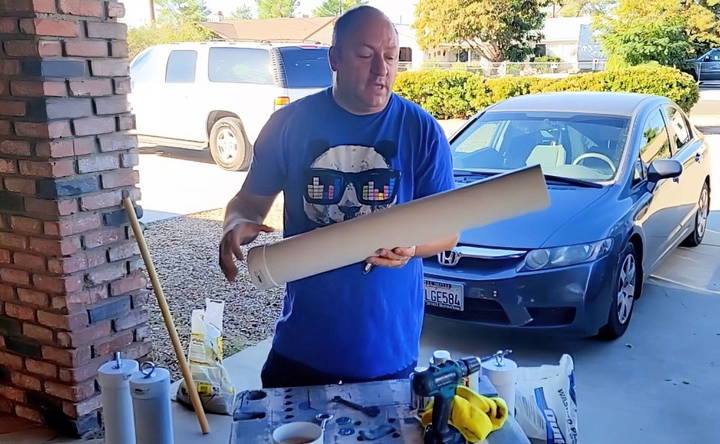
Start by purchasing a 10-foot drainage tube or PVC pipe. You'll want to cut it into smaller sections, about 2.5 feet each. These sections will become the body of your weights.
If you're using regular PVC, it will be heavier, but either material will work fine for this project. The drainage tube option is cheaper and lighter, which makes it easier to transport and handle.
Step 2: Sand the Surface of the Tube and Caps
Using medium-grit sandpaper, gently sand the outside of each tube section and the inside of the 3-inch end caps. The goal here is to roughen the surface slightly to make a better bond when you glue them together later. After sanding, wipe down the surfaces to remove any dust or debris.
Step 3: Attach the Bottom Cap
Apply a generous amount of PVC primer to the inside of the bottom cap and the end of the tube. Next, use PVC cement on the same surfaces. Insert the tube into the cap and give it a slight twist to spread the glue evenly. Hold the cap in place for about 30 seconds to ensure a secure bond.
Step 4: Fill the Tube with Sand or Concrete
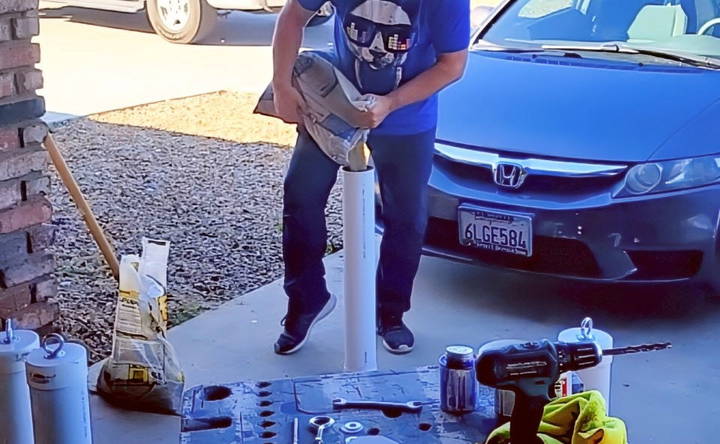
Once the bottom cap is securely attached, you can begin filling the tube with your chosen material.
- Plaster Sand: This option will give you a weight of around 22 pounds per section. It's finer than regular sand and can be compacted more efficiently, allowing you to maximize the weight inside the tube.
- Concrete: If you prefer, you can fill the tube with concrete. This will give you a slightly heavier and more durable weight, approximately 25 pounds per section.
To ensure proper compaction, fill the tube about a quarter of the way and use a dowel rod to press down and compact the material. Repeat this process every few inches until the tube is almost full. Leave about ¾ of an inch of space at the top to allow room for the cap.
Step 5: Attach the Top Cap
After filling the tube with sand or concrete, it's time to attach the top cap. As with the bottom cap, apply PVC primer and cement to the inside of the cap and the outside of the tube. Insert the cap and give it a slight twist to evenly distribute the glue. Hold it in place for 30 seconds to ensure a strong bond.
Step 6: Drill the Hole for the Eye Bolt
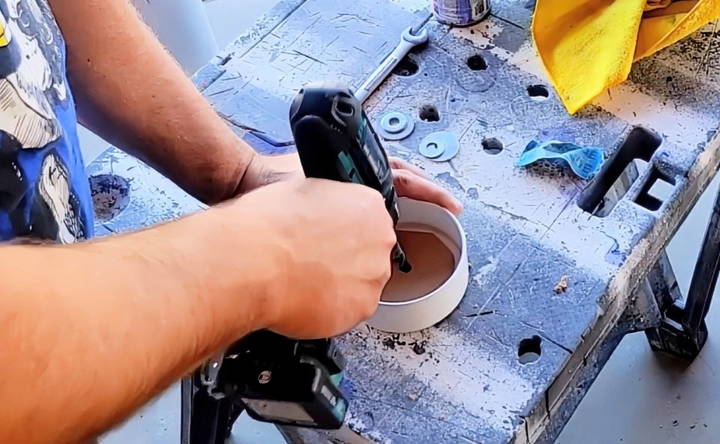
Next, drill a hole in the center of the top cap using a 3/8-inch drill bit. This hole will be used to insert the eye bolt, which will allow you to hang or attach the weights to the canopy.
Step 7: Install the Eye Bolt and Washers
Once you've drilled the hole, insert the eye bolt through the hole, adding washers on both the inside and outside of the cap for added stability. Secure the eye bolt with a nut on the inside. If desired, you can use a lock washer to ensure the bolt stays firmly in place.
Step 8: Let the Glue Cure
Allow the PVC cement to cure for at least 24 hours to ensure a strong bond before using the weights.
Optional Step: Add Handles
If you prefer, you can add handles to the sides of the weights. This will make them easier to carry and transport. To do this, you will need to drill two additional holes on opposite sides of the tube and insert a handle through them. Be sure to reinforce the holes with washers to prevent damage to the PVC.
Tips for Using Your DIY Canopy Weights
Once your weights are complete, they are ready to use! Here are a few tips to ensure you're getting the most out of them:
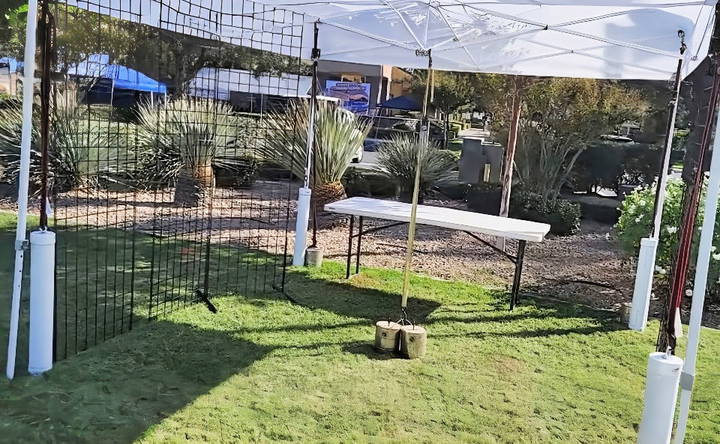
- Positioning: Attach one weight to each leg of your canopy, either hanging from the top or placed at the base. Ensure the weight is close to the ground but not completely resting on it. This setup allows the weight to stabilize the canopy without putting too much pressure on the legs.
- Strapping: You can use bungee cords or straps to secure the weights to the legs of the canopy, preventing them from swinging or moving in the wind.
- Testing: After setting up the weights, give the canopy a little push to ensure it is secure. You should feel resistance, indicating that the weights are doing their job.
- Storage: These weights are durable, but to extend their lifespan, store them in a dry area when not in use. If using sand, avoid getting the weights wet for long periods, as moisture can cause the sand to clump or degrade the PVC over time.
Why DIY Canopy Weights?
Making your own canopy weights offers several advantages:
- Cost-Effective: Store-bought canopy weights can cost anywhere from $40 to $100 or more, depending on the brand and weight. By making your own, you can achieve the same or better results for about $25 per weight.
- Customizable: DIY canopy weights allow you to customize the size and weight to fit your specific needs. Whether you need lighter weights for calmer conditions or heavier ones for windy days, you can easily adjust the amount of sand or concrete you use.
- Durable: By using quality materials like PVC and concrete, your DIY weights will last for years with minimal maintenance.
- Easy to Transport: These homemade weights are compact and easy to carry, making them perfect for vendors who need to set up and break down quickly.
Step-by-Step Video Tutorial
Conclusion
DIY canopy weights are an excellent solution for anyone looking to stabilize their outdoor canopy in a cost-effective and efficient way. With just a few materials and some basic tools, you can make your own weights that will keep your canopy secure, even in windy conditions.
By following this step-by-step guide, you'll have sturdy, reliable, and budget-friendly weights that can handle the challenges of outdoor vending events. So the next time you're preparing for an event, rest assured knowing your canopy won't fly away with the wind!
Try it yourself and see how these simple DIY canopy weights can make a big difference in your outdoor booth setup!
FAQs About DIY Canopy Weights
Discover essential answers about DIY canopy weights, including materials, safety tips, and step-by-step guides to make sturdy, homemade canopy supports.
You'll need a drainage tube or PVC pipe, 3-inch end caps, washers, eye bolts, plaster sand or concrete, PVC cement, primer, sandpaper, and a dowel rod to compact the material. Optional items include handles and lock washers.
Yes, using concrete instead of plaster sand will create heavier weights, around 25 pounds per tube. Concrete is solid and maximizes the space inside the tube, making the weights more durable.
Both methods are valid, but hanging the weights may reduce stress on the canopy legs. Strapping directly to the legs could stress the thinner part of the legs, especially if they’re angled.
When filled with plaster sand, each weight will weigh around 22 to 24 pounds. If filled with concrete, the weight can increase to 25 pounds.
Generally, 20-25 pounds per leg is enough for most canopies. However, some events may require up to 40 or 50 pounds per leg. You can add extra weight or stack two weights using eye hooks if needed.
Yes, but plaster sand is finer and more compactable, offering slightly more weight compared to regular sand. If you want more weight without using concrete, plaster sand is the better option.
You can strap the weights directly to the legs using bungee cords or straps. However, ensure they are tightly secured and not just resting on the ground, as this can destabilize the canopy.
Pre-made canopy weights are available but often cost more than making them yourself. This DIY method typically costs about $25 per weight, offering savings while providing customization.
Yes, these weights are designed to withstand windy conditions. They have been tested in areas with winds of 20-30 mph, and the weights performed well. For extra protection, combine weights with stakes for additional anchoring.
Yes, using stakes in combination with the weights is ideal for maximum stability. Stakes add additional points of contact and reduce the independent movement of the canopy during high winds.
Use eye bolts and washers to make secure attachment points for hanging or tying the weights. Ensure the weights are close to the ground but not resting directly on it for better stability.


