Maintaining your car can be an expensive affair, especially with rising repair costs. But, there are plenty of routine maintenance tasks that you can do yourself, saving both time and money. That said, some jobs are best left to professionals due to safety concerns or the complexity of the repairs. In this comprehensive guide, we'll cover five DIY car maintenance tasks you can handle yourself and discuss why it's important to avoid others.
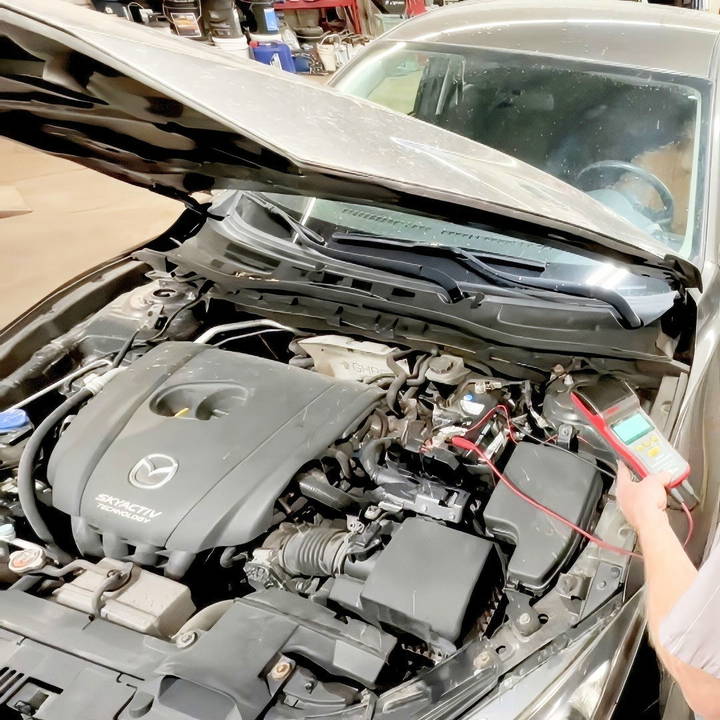
Step by Step Instructions
Discover easy DIY car maintenance with step-by-step guides for filters, spark plugs, headlights, and oil changes, plus when to replace them.
1. Changing the Engine Air Filter
Discover how to change the engine air filter with essential tools and steps. Learn its importance and when to replace it for optimal performance.
Why It's Important:
- The engine air filter prevents dirt, dust, and debris from entering your engine, helping it to run smoothly. A clogged air filter can reduce fuel efficiency, cause poor engine performance, and even lead to engine damage over time.
Tools Needed:
- New air filter
- Basic tools (screwdriver or a wrench)
Steps to Change the Air Filter:
- Locate the air filter housing: Open your car's hood, and you should see the air filter cover. It's usually housed in a rectangular or circular plastic box, often secured by clamps or screws.
- Remove the old air filter: Once you open the housing, take out the dirty air filter. If it looks dusty or clogged, it's time to replace it.
- Install the new filter: Place the new air filter in the housing the same way the old one was positioned. Secure the cover back in place by reattaching the clamps or screws.

When to Replace:
- Typically, air filters should be replaced every 12,000 to 15,000 miles or once a year, but this can vary depending on your driving conditions. If you drive in particularly dusty environments, it's a good idea to check the filter more frequently.
2. Replacing Spark Plugs
Learn the importance of replacing spark plugs, the tools required, step-by-step instructions, and signs indicating it's time to replace them.
Why It's Important:
Spark plugs are critical to your car's ignition system. They create the spark that ignites the air-fuel mixture in your engine's cylinders. Over time, spark plugs wear out, causing issues such as poor fuel efficiency, engine misfires, or trouble starting your car.
Tools Needed:
- Spark plug socket and wrench
- Spark plug gap gauge
- New spark plugs
Steps to Replace Spark Plugs:
- Locate the spark plugs: Depending on your vehicle, spark plugs can be found under the ignition coils. You'll need to remove the coil pack by unscrewing the bolts that hold them in place.
- Remove the old spark plugs: Use the spark plug socket and wrench to carefully unscrew each spark plug.
- Check the gap on new spark plugs: Before installing the new spark plugs, use a gap gauge to ensure the spark plug gap is correct (refer to your car's manual for the recommended gap).
- Install new spark plugs: Insert the new plugs by hand first to avoid cross-threading, then tighten them with a wrench.
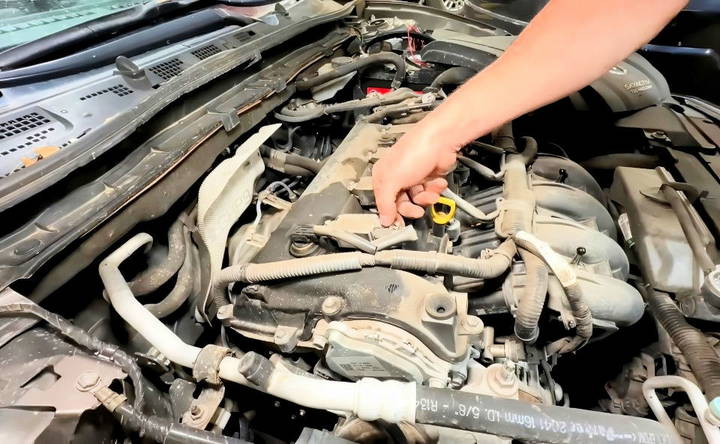
When to Replace:
Typically, spark plugs should be replaced every 30,000 to 100,000 miles, depending on the type of plug and the vehicle's manufacturer recommendation.
3. Changing Headlight Bulbs
Learn why changing headlight bulbs is crucial, discover necessary tools, and follow simple steps to replace them effectively. Find out when to replace.
Why It's Important:
Working headlights are crucial for your safety and visibility on the road, especially at night or in bad weather. Over time, bulbs burn out, reducing visibility and making driving unsafe.
Tools Needed:
- New headlight bulbs (check your vehicle's manual for the correct type)
- Screwdriver (depending on vehicle)
Steps to Replace Headlight Bulbs:
- Access the headlight assembly: Open the hood and locate the back of the headlight assembly. In many cars, you'll just need to twist the bulb connector to remove it.
- Remove the old bulb: Pull the old bulb from the socket, being careful not to touch the glass of the new bulb with your fingers (oil from your skin can shorten its lifespan).
- Install the new bulb: Insert the new bulb into the socket and twist it back into place.
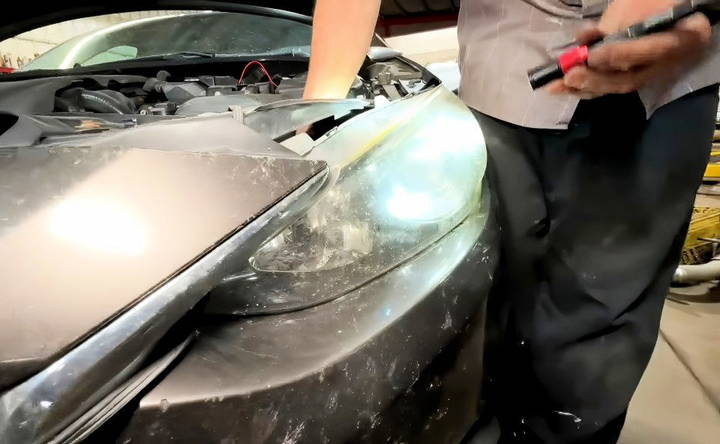
When to Replace:
Replace headlight bulbs as soon as they start dimming or burn out entirely. Always check both headlights and replace bulbs in pairs to ensure consistent brightness.
4. Performing an Oil Change
Learn how to perform an oil change efficiently. Discover its importance, required tools, and step-by-step guide. Know when it's time for a change.
Why It's Important:
Oil lubricates the engine's internal parts, preventing excessive wear and tear. Over time, oil breaks down and becomes contaminated, making it less effective. Regular oil changes extend the life of your engine and keep your car running smoothly.
Tools Needed:
- New oil (check your car's manual for the correct type and amount)
- New oil filter
- Oil filter wrench
- Drain pan
- Funnel
- Wrench set
Steps to Change the Oil:
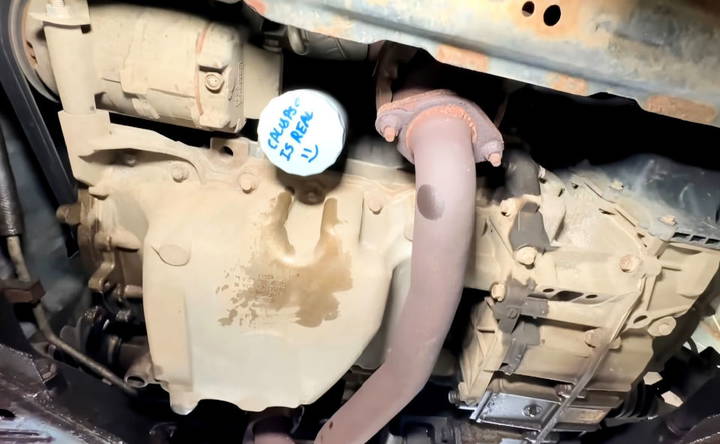
- Drain the old oil: First, jack up the car (if necessary) and place a drain pan under the oil pan. Remove the drain plug and let the old oil flow out completely.
- Replace the oil filter: Use an oil filter wrench to unscrew the old filter and replace it with a new one. Before installing the new filter, lubricate the rubber gasket with a bit of new oil.
- Add new oil: After replacing the drain plug, pour in the new oil using a funnel. Start the engine and let it run for a minute, then turn it off and check the oil level with the dipstick. Top off as needed.
When to Change Oil:
Depending on the type of oil used (conventional, synthetic blend, or full synthetic), oil changes should be done every 3,000 to 7,500 miles.
5. Replacing the Cabin Air Filter
Learn how to replace the cabin air filter efficiently. Discover why it's important, tools needed, steps, and when to replace it for fresh air.
Why It's Important:
The cabin air filter helps ensure the air inside your car is clean by filtering out dust, pollen, and other contaminants. A dirty cabin filter can reduce airflow from your climate control system and cause bad odors.
Tools Needed:
- New cabin air filter
- Screwdriver (if necessary)
Steps to Replace the Cabin Air Filter:
- Locate the cabin filter: It's usually found behind the glove box or under the dashboard.
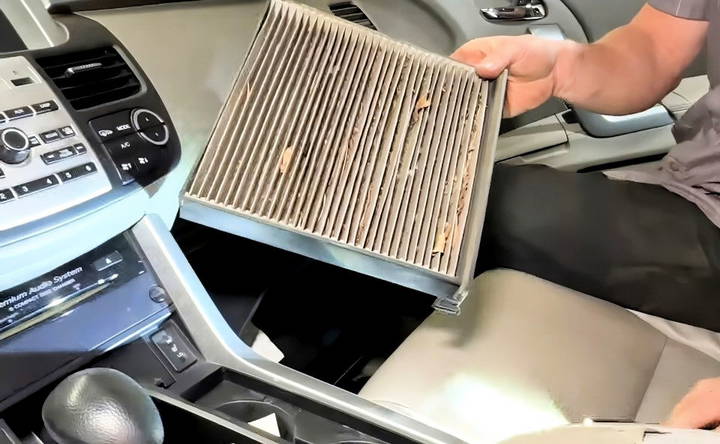
- Remove the old filter: Open the glove box and detach the clips or screws holding it in place to access the filter. Slide out the old, dirty filter.
- Install the new filter: Slide the new filter into the slot and reassemble the glove box.
When to Replace:
The cabin air filter should be replaced every 15,000 to 30,000 miles, but this varies depending on your driving conditions. If you notice reduced airflow from the vents or bad smells inside the car, it may be time for a replacement.
Tasks Best Left to Professionals
While these basic maintenance tasks are great DIY projects, there are some repairs that should be left to the professionals due to their complexity or safety risks.
- Brake System Repairs: Brakes are a critical safety component of your vehicle, and any error during repair can have serious consequences. Whether it's replacing brake pads or working on the brake fluid system, improper repairs can lead to brake failure. For this reason, it's best to take your car to a mechanic for any brake-related issues.
- Steering and Suspension Work: Steering and suspension systems are essential for your car's handling and safety. These systems are complex, and improper repairs can compromise the safety and stability of your vehicle. If you notice any issues with your steering or if your car doesn't feel stable on the road, it's wise to have a professional diagnose and fix the problem.
- Electrical System Repairs: Modern vehicles rely heavily on complex electrical systems, from infotainment systems to engine management. Attempting DIY electrical work can lead to short circuits, fires, or even void your vehicle's warranty. If you experience any electrical issues, it's best to consult a professional mechanic.
Conclusion
DIY car maintenance is a fantastic way to save money and keep your vehicle in top condition. Tasks such as changing the air filter, replacing spark plugs, and performing oil changes are well within reach for most car owners with basic tools and a bit of know-how. However, for more complex repairs, such as brake work or electrical issues, it's always best to rely on the expertise of a professional mechanic.
By understanding which tasks you can handle yourself and which should be left to the pros, you can take better care of your car and keep it running smoothly for years to come.
FAQs About DIY Car Maintenance
Discover essential FAQs about DIY car maintenance. Learn expert tips, tools, and techniques to keep your vehicle in top condition.
If your car's air filter looks clogged or dirty, it's a good indication it needs replacing. Ideally, replace the air filter every 12,000 to 15,000 miles, or sooner if you drive in dusty conditions. A clean air filter helps improve fuel efficiency and engine performance.
Yes, a coolant drain and fill is a relatively simple task that can extend the life of several expensive components. Just be sure to follow your vehicle's specific coolant recommendations and properly dispose of the old coolant.
Replace your cabin air filter every 15,000 to 30,000 miles, or about every six months if you drive in heavily polluted or dusty areas. Reduced airflow or musty odors are signs it's time for a change.
Basic tools include a wrench set, screwdrivers, a torque wrench, and specialized tools like a spark plug socket. Investing in these tools can save you significant money on labor for simple jobs like oil changes and spark plug replacements.
While changing brake pads is doable for those mechanically inclined, it’s a safety-critical repair. You must ensure the correct installation to avoid brake failure. If you're unsure, consult a professional or research extensively before attempting it yourself.
Overtightening can cause serious issues like breaking bolts or damaging components. Use a torque wrench to apply the correct amount of pressure when tightening bolts. Refer to your car's manual for the recommended torque specifications.
YouTube videos can be a great resource, especially if they are specific to your car's make and model. However, always cross-check information with your car’s service manual to ensure accuracy, particularly for safety-related tasks.
One frequent mistake is draining the wrong fluid, such as transmission fluid instead of engine oil. To avoid this, carefully locate the oil pan and ensure you're draining the correct fluid. Always double-check the oil level after refilling to prevent under or overfilling.


