If you're tired of accumulating small trash in your car, a DIY car trash can might be just the solution you need. Making your own car trash bag is not only a simple sewing project but also a functional way to keep your car tidy. This project is beginner-friendly, meaning even those with limited sewing experience can easily accomplish it.
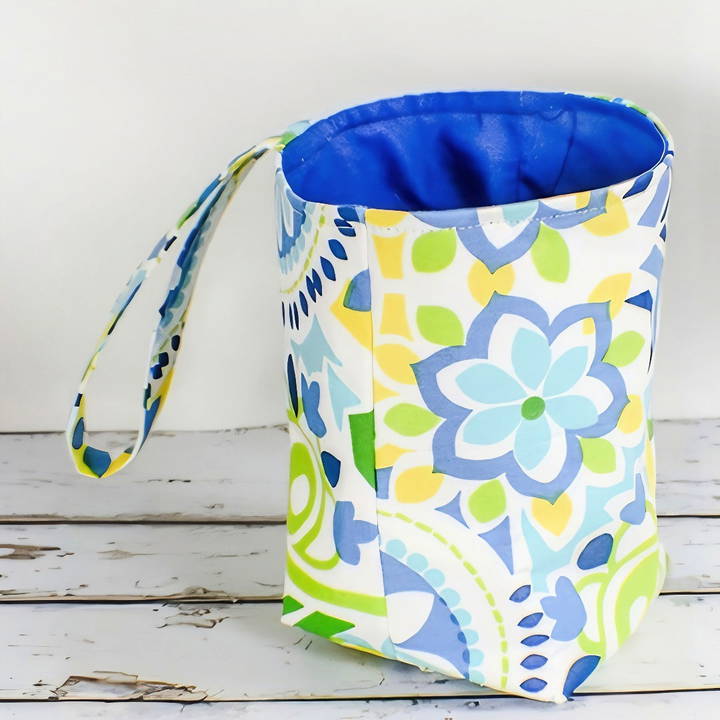
In this DIY guide, you'll learn how to make your own car trash bag with minimal materials. Whether you're using fabric scraps or buying new material, this practical project will help you make a handy car accessory in no time. Plus, you can easily customize it to match your car's interior or express your personal style.
Materials Needed
To sew your car trash bag, you'll need the following materials:
- Two pieces of outer fabric (10” x 10” each)
- Two pieces of lining fabric (10” x 10” each)
- Two pieces of interfacing (10” x 10” each)
- Strap fabric (3” x 15”)
- Thread (choose a color that matches your fabric)
- Sewing machine and basic sewing supplies (pins, scissors, iron, etc.)
Note: Interfacing is optional but highly recommended if you want your car trash bag to have structure and last longer. In this guide, we use Pellon Craft Fuse 808 for added sturdiness but feel free to use any interfacing of your choice or omit it if you prefer a softer bag.
Step by Step Instructions
Learn how to make a DIY car trash can with our step-by-step guide. Easy instructions from preparing materials to finishing touches are included.
Step 1: Preparing Your Materials
The first step is to cut your fabric and interfacing it into 10" x 10" squares. You'll need two pieces of outer fabric, two pieces of lining fabric, and two pieces of interfacing. Additionally, cut your strap fabric into a 3” x 15” rectangle.
- Tip: If you're using scraps or remnants, this is a great opportunity to put them to use! You can even mix and match different fabrics for a more personalized look.
Step 2: Attach the Interfacing
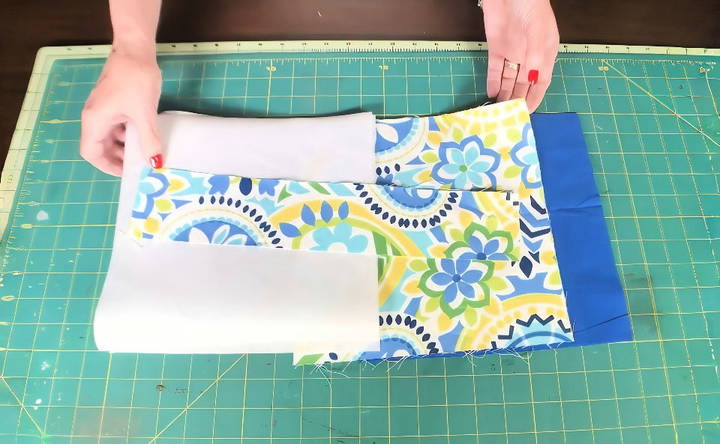
Attaching interfacing adds strength and durability to your trash bag, especially if you expect it to endure daily wear and tear.
- Place the shiny side of the interfacing (this side has glue) against the wrong side of your outer fabric.
- Align the edges perfectly and press with a hot iron for about 10 seconds, moving across the surface to ensure the glue adheres. Be careful not to move the fabric while pressing to avoid wrinkles.
- Repeat this process for both outer fabric pieces.
- Note: If you've never used interfacing before, don't worry—it's easy! The key is to ensure that the glue side adheres properly by applying enough heat and pressure.
Step 3: Sewing the Outer Bag
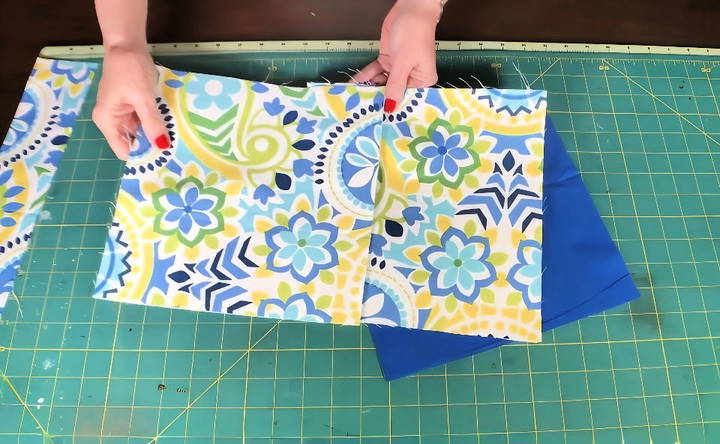
Now that your outer fabric has interfacing attached, it's time to sew the pieces together.
- Place the two outer fabric pieces right sides together (the right side is the “pretty” side of the fabric).
- Sew along three edges (the two sides and the bottom), leaving the top edge open.
- Use a 1/2-inch seam allowance for this step.
- After sewing, clip off any excess threads and set the outer bag aside.
You'll now have a little pouch that will form the outer shell of your car trash bag.
Step 4: Sewing the Lining
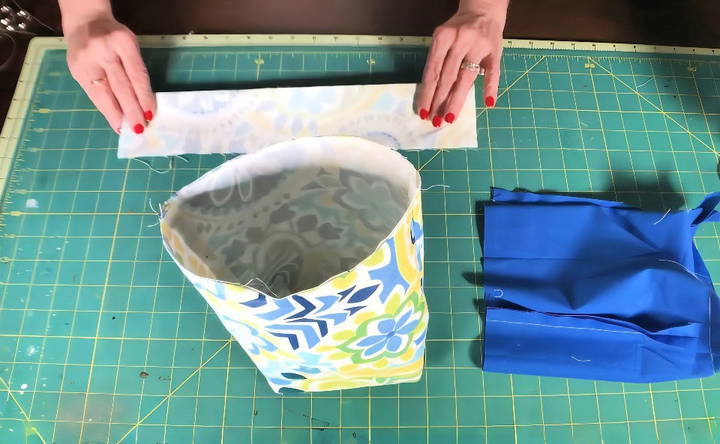
The process for sewing the lining is similar to the outer bag, with one key difference: you'll need to leave an opening at the bottom.
- Sew along the two sides and partially along the bottom, but leave a 2-3 inch gap at the bottom of the lining. This opening will allow you to turn the bag right side out later.
- Again, use a 1/2-inch seam allowance for the seams.
This will make another pouch, which will serve as the interior lining of your bag.
Step 5: Boxing the Corners
Boxing the corners gives your bag structure, allowing it to stand up on its own.
- Open up the seams of your outer fabric and match the side seam with the bottom seam to form a triangular point.
- Pin this point in place and sew across the seam, about 2 inches from the point. This will make a boxed corner.
- Repeat this process on the other side of the bag.
Do the same for the lining fabric. Remember, the boxed corners should be the same size for both the outer fabric and the lining.
Step 6: Making the Strap
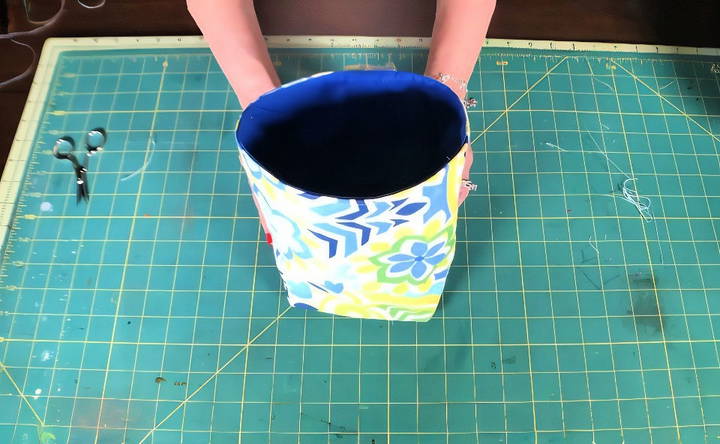
While the main part of your bag is now assembled, you'll need a strap to hang it from the shifter knob or another convenient spot in your car.
- Take your strap fabric and fold the raw edges toward the center lengthwise.
- Press the folds with an iron.
- Fold the strap in half lengthwise again, enclosing the raw edges.
- Topstitch along both sides of the strap to keep it securely folded.
This strap will allow you to hang your trash bag in the car easily.
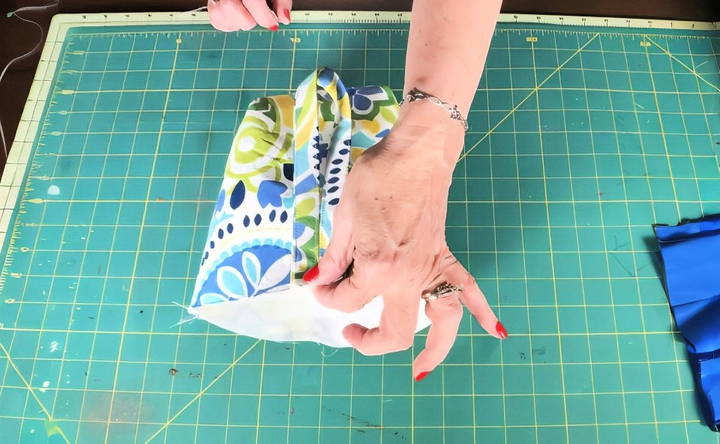
Step 7: Assembling the Bag
Now it's time to put the bag together.
- Turn the outer bag right side out and keep the lining inside out.
- Pin the strap to the top edge of the outer bag, about halfway across the opening.
- Next, insert the outer bag into the lining bag, ensuring that the right sides of the fabric are facing each other. The two bags should fit together snugly, with the strap sandwiched in between the layers.
- Align the side seams and pin all around the top edge.
Step 8: Sewing the Outer and Lining Together
With everything pinned in place, it's time to sew the outer and lining layers together.
- Sew around the entire top edge of the bag, including over the strap. Be sure to sew back and forth over the strap for extra durability.
- Once sewn, reach through the opening in the lining and turn the bag right side out by pulling the outer fabric through the hole.
Step 9: Closing the Lining
After turning the bag right side out, the final step is to close the opening in the lining.
- You can close the opening by hand with a ladder stitch, which gives a clean, nearly invisible finish. Alternatively, you can machine-sew it closed since this part will be hidden inside the bag.
- Once the hole is closed, tuck the lining into the outer bag.
Step 10: Finishing Touches
To give the bag a professional finish, press the top edge and topstitch around the top of the bag. This will help keep the lining in place and prevent it from shifting during use.
Finally, your DIY car trash bag is complete! The strap allows you to hang it from your car's shifter knob, making it a convenient spot to toss small bits of trash during your daily commute.
Additional Tips and Ideas
- Fabric choice: Choose a fabric that is durable and easy to clean. You can even use waterproof fabric for the lining to make cleaning up easier.
- Decorations: Feel free to personalize your trash bag by adding decorative elements, such as patches, embroidery, or fabric paint.
- Size adjustments: If you'd like a larger or smaller bag, adjust the fabric measurements accordingly. For example, you can make a deeper bag by cutting the fabric squares to 12” x 12” instead of 10” x 10”.
- Using Velcro: For a different hanging method, consider adding Velcro to the strap, allowing you to easily attach and detach the bag.
Conclusion
Making a DIY car trash bag is a practical and rewarding project that adds convenience and organization to your car. With just a few pieces of fabric and basic sewing skills, you can make a stylish and functional trash can that helps keep your car tidy. Best of all, this project is quick to make and customizable to your needs.
Give this project a try and enjoy the benefits of a clutter-free car! Happy sewing!
FAQs About DIY Car Trash Can
Discover answers to common questions about DIY car trash can solutions, materials, and usage for an organized, eco-friendly driving experience.
You will need two 10” x 10” squares for the outer fabric, two 10” x 10” squares for the lining, and two 10” x 10” squares for the interfacing. The strap fabric should measure 3” x 15”.
Interfacing is optional but recommended for added structure and durability. If you prefer a softer bag, you can skip it. Pellon Craft Fuse 808 is suggested for sturdiness.
To box the corners, match the side and bottom seams, form a point, and sew 2 inches from the tip of the point. This step helps the bag maintain its shape.
Yes, using waterproof fabric like PUL or applying iron-on vinyl to the lining can make it easier to clean. Some people also use a shower curtain liner for water resistance.
If hanging the bag from the back of a car seat, you'll need a longer strap. Measure the headrest's circumference with string to determine the appropriate length.
To reduce bulk, you can trim the excess fabric from the boxed corners before turning the bag right side out. Some people prefer leaving the corners intact for better structure.
Yes, you can adjust the size by cutting the fabric to larger dimensions, such as 12” x 12” or 16” x 16”. Keep the strap proportional or adjust its length depending on where you plan to hang it.
Yes, most interfacing, including Pellon, is machine washable. However, always check the specific interfacing instructions for best care. Ensure it's securely fused to prevent peeling.


