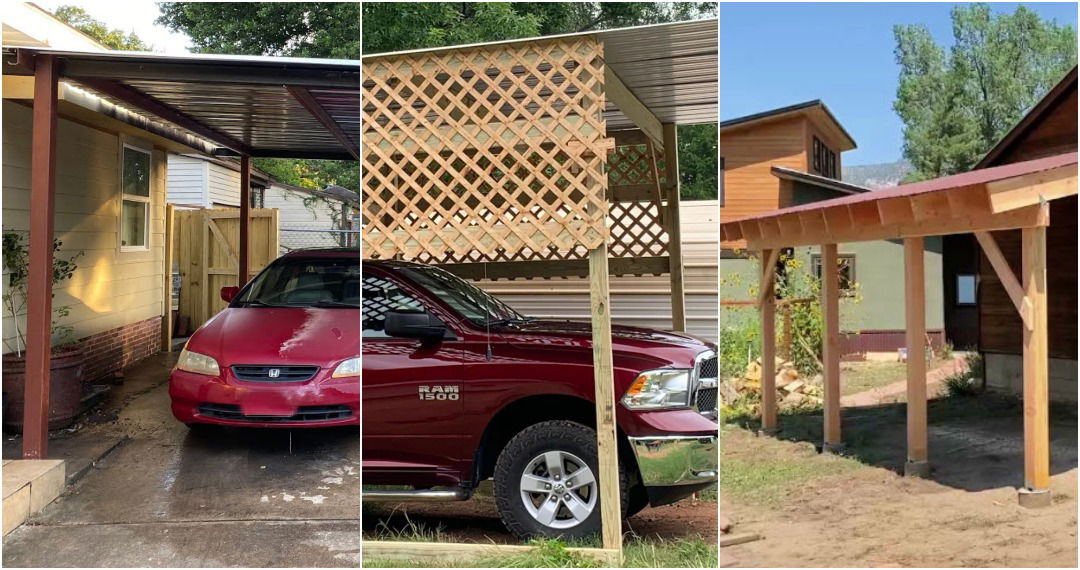
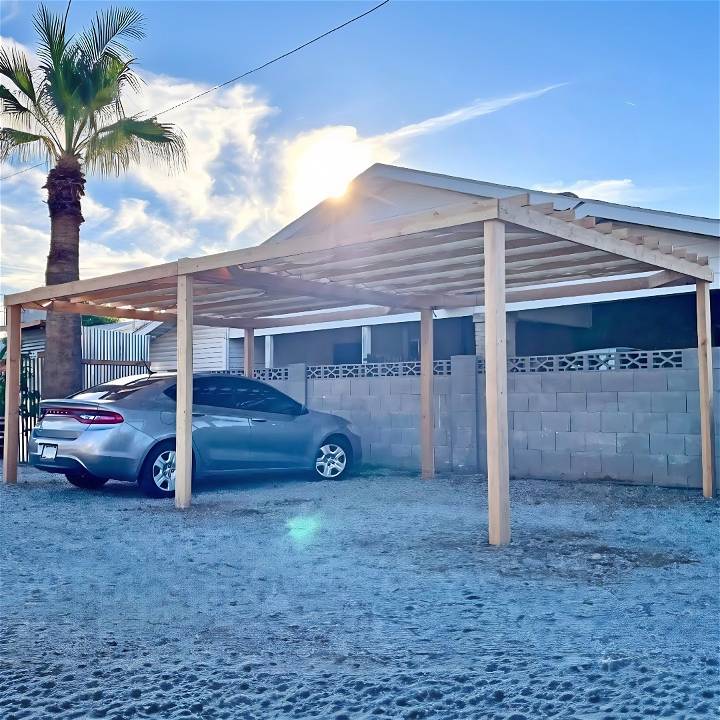
Last summer, I embarked on a DIY project I'd been plotting for months: constructing a double-wide carport at my rental property in Arizona. With scorching summers, I knew a shaded area for vehicles would be invaluable. My journey from demolition to the final product was filled with challenges, triumphs, and invaluable learning experiences. Here's a step-by-step guide to how I built a robust carport for under $600, complete with tips and tricks to help any DIY enthusiast tackle a similar project.
Getting Started: Materials and Preparation
Materials Needed:
- Lumber (Six 4x4 posts and several 2x6 beams for the structure, plus 2x4s for the roofing framework)
- Concrete (To secure posts in the ground)
- Paint (To treat the base of posts against moisture)
- Wood clamps, screws, and lag bolts (For assembling the structure)
- Sunshade fabric (To provide the necessary shade)
Why Each Material is Important:
- Lumber and Beams: Serve as the skeleton of the carport, providing the necessary support and structure.
- Concrete: Ensures the posts are fixed and stable in the ground, crucial for durability.
- Paint: Protecting the part of the posts buried in the ground from rot is essential for longevity.
- Hardware: Keeps the structure tightly assembled, ensuring safety and stability.
- Sunshade fabric: The whole purpose of the carport is to provide shelter and shade from the sun.
Step by Step Instructions
Learn how to build your own carport with our step-by-step instructions. From planning the foundation to adding final touches, we've got you covered.
Step 1: Planning and Laying the Foundation
The initial phase involved clearing the old carport space and deciding on the new carport's dimensions. I opted for a spacious double-wide layout, suitable for two cars. Proper measurement at this stage was crucial to ensure a balanced structure.
Digging Post Holes: The hard Arizona ground made digging a challenge. Patience and perseverance (and a bit of rain) helped us dig six holes for the posts. Each hole was deep enough to set the posts securely with concrete.
Step 2: Setting the Posts
After treating the bottom of the posts with paint for moisture protection, we set them into the holes. Achieving a perfectly straight alignment required precision, so we took our time, used a level, and braced the posts temporarily with wood scraps. Once satisfied, we filled the holes with concrete and let it set.
Step 3: Constructing the Framework
With all posts securely in place and aligned, we moved on to the framework. This involved attaching horizontal beams atop the posts to build the carport's roof structure. Safety was paramount, so I used wood clamps to hold the beams as I worked mostly solo. This step was about ensuring the structure was not just built but built to last, with every beam and cross member securely fastened.
Step 4: Adding the Cross Beams
Spacing the cross beams correctly was essential for both the integrity of the structure and the aesthetics. These beams would support the sunshade and needed to be evenly distributed. I marked equal distances on the supporting beams and used clamps and a drill to attach each cross beam with precision.
Step 5: Final Touches
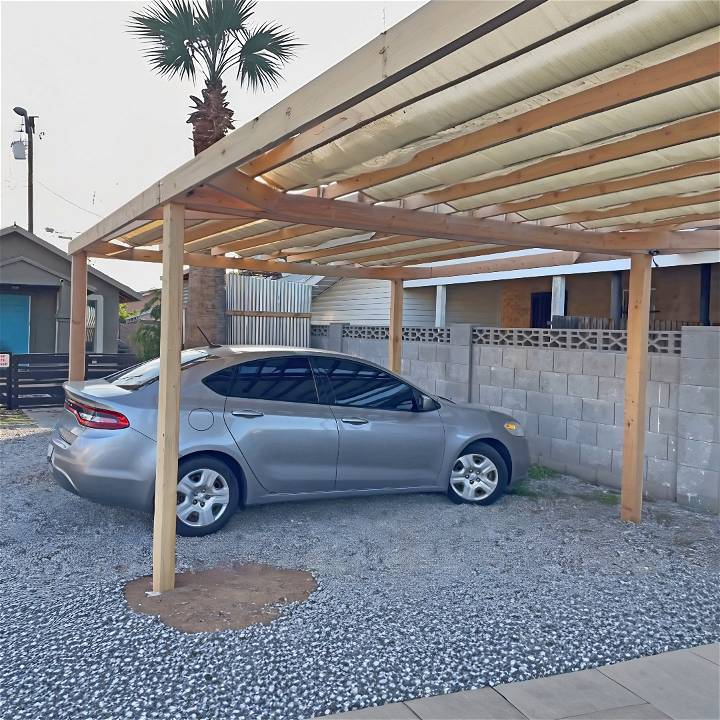
After ensuring all beams and posts were securely connected, it was time for corner braces. These not only added extra stability but also a pleasing geometric symmetry to the carport. Finally, installing the sunshade fabric was the last step. Chosen for its durability and effectiveness, it was cut to size and attached over the framework, transforming the structure into a fully functional carport.
Putting It All Together
The end result was a sturdy, aesthetically pleasing carport that didn't just meet my expectations – it surpassed them. Beyond providing much-needed shade, it stood as a testament to what careful planning, hard work, and a bit of DIY spirit can achieve.
Tips and Takeaways
- Patience is Key: Especially when digging post holes in hard soil and ensuring everything is level and aligned.
- Safety First: Always use clamps and proper equipment to hold beams in place when working alone.
- Double-Check Measurements: A single mismeasurement can throw off the whole project.
- Don't Skimp on Materials: Quality materials make for a durable and long-lasting carport.
- Have Fun: Enjoy the process, as the satisfaction of building something with your own hands is unparalleled.
Building this carport was not just about building a shade structure; it was about challenging myself, learning new skills, and ultimately providing something of real value for my tenants. Whether you're a seasoned DIYer or a determined beginner, remember that with the right approach, you can tackle big projects and achieve great results.
Customization Ideas for Your DIY Carport
Building a carport that meets your needs and reflects your personal style is not only practical but can also be a fun and rewarding project. Here are some ideas to help you customize your carport:
Personalize with Side Panels
Side panels can provide additional protection from the elements and enhance privacy. Consider these options:
- Wooden slats: For a natural look that blends with your garden.
- Decorative metal: To add a modern touch and allow light to filter through.
- Polycarbonate sheets: They're durable and let in plenty of light while blocking UV rays.
Storage Solutions
Maximize the functionality of your carport with storage options:
- Built-in shelves: Ideal for gardening tools or automotive supplies.
- Hooks and racks: Hang bicycles or garden hoses neatly.
- Cabinets: Lockable cabinets are perfect for storing valuable tools.
Solar Panels
Installing solar panels on your carport's roof can provide several benefits:
- Energy efficiency: Reduce your electricity bills by harnessing solar power.
- Sustainability: Contribute to a greener environment by using renewable energy.
- Government incentives: Check for local subsidies or tax breaks for installing solar panels.
Integrated Lighting
Lighting is essential for safety and convenience. Here are some ideas:
- LED strips: Install along the edges for a modern look and energy efficiency.
- Motion sensor lights: For security and to save energy.
- Solar-powered lights: An eco-friendly option that doesn't require wiring.
Design Features
Make your carport stand out with these design features:
- Color scheme: Choose colors that complement your home's exterior.
- Trim and moldings: Add architectural details for a finished look.
- Paving: Select a paving material that matches your home's walkways or driveway.
By using these customization ideas, you can make a carport that is both functional and stylish. Remember to match the design with your home and think about each addition's practicality. Enjoy building!
Maintenance and Upkeep for Your DIY Carport
Regular maintenance is key to ensuring your carport remains safe and functional for years to come. Here's how you can keep your carport in top condition:
Routine Inspections
Check regularly for any signs of wear and tear. Look for:
- Loose fittings: Tighten any bolts or screws that may have loosened over time.
- Roof condition: Clear away debris and check for any damage that may lead to leaks.
- Support structure: Ensure posts and beams are secure and not weakened by weather or insects.
Weather Protection
Protect your carport from the elements to prolong its life:
- Sealant: Apply a waterproof sealant to wood surfaces to prevent rot and water damage.
- Rust prevention: For metal carports, use rust-resistant paint to touch up any scratches or exposed areas.
- Drainage: Ensure that the ground around your carport slopes away to prevent water pooling.
Cleaning Tips
Keep your carport clean to avoid buildup that could cause damage:
- Sweeping: Regularly sweep the floor to remove leaves, dirt, and debris.
- Washing: Use a mild detergent and water to clean the roof and side panels.
- Clear gutters: If your carport has gutters, keep them clear to prevent overflow and water damage.
Seasonal Care
Adjust your maintenance routine with the changing seasons:
- Winter: Remove snow from the roof to prevent overloading the structure.
- Spring: Check for any damage caused by winter storms.
- Summer: Look for sun damage and fading, and reapply protective coatings if necessary.
- Fall: Clear away fallen leaves and prepare for winter weather.
By following maintenance tips, you'll keep your carport in good condition, lasting longer and looking better.
FAQs About DIY Carports
Discover all you need to know about DIY Carports with our comprehensive FAQs. Get expert tips and advice for building your own carport today!
What is a DIY Carport?
A DIY carport is a structure you can build yourself to shelter your vehicles. It's usually open on two or more sides and can be attached to your home or freestanding.
Do I Need a Permit to Build a Carport?
In many areas, yes. It's important to check with your local building authority. Permits ensure your structure is safe and meets local codes.
What Materials Can I Use for My Carport?
Common materials include wood, metal, and polycarbonate. Your choice depends on your budget, the look you want, and how long you want it to last.
How Do I Choose the Right Size for My Carport?
Consider the number of vehicles and their size. A standard single carport is about 12 feet wide, but you'll need more space for additional vehicles or storage.
Can I Add Storage to My Carport?
Absolutely! You can add shelves, cabinets, or hooks to keep tools and equipment organized and protected from the weather.
Conclusion:
In conclusion, building a DIY carport can be a cost-effective and practical solution for protecting your vehicle. With the right materials and a little elbow grease, you can build a functional and stylish carport that suits your needs.


