Cats are fascinating creatures with behaviors that often intrigue and delight their human companions. One such behavior is their natural tendency to climb. Let's explore why cats are drawn to heights and how this affects their well-being.
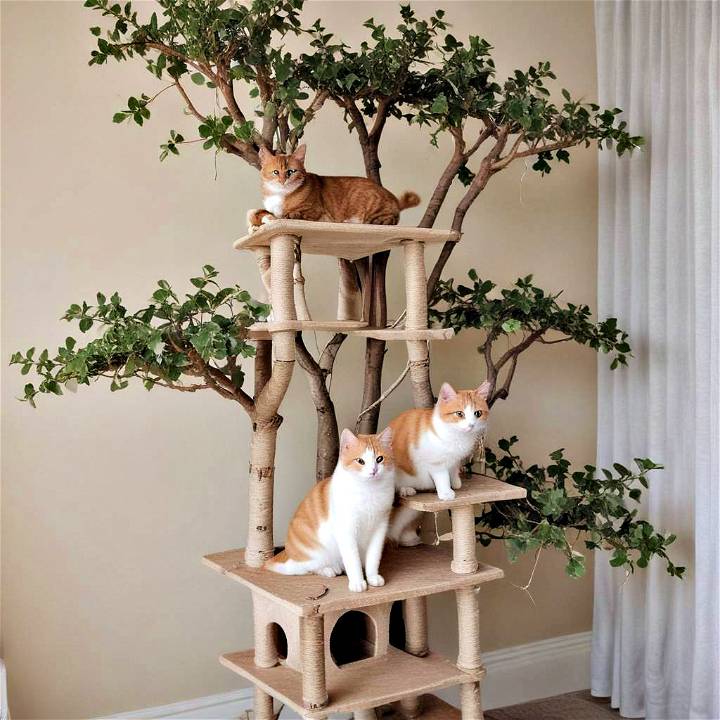
Why Do Cats Climb?
- Instinctual Behavior: Climbing is an instinct for cats. In the wild, their ancestors climbed to hunt and to keep safe from predators. Today's domestic cats still carry these instincts. They climb to survey their territory and to feel secure in their environment.
- Physical Exercise: Climbing is great exercise. It helps cats stay agile and strong. When they climb, they use their muscles, improve their balance, and enhance their coordination.
- Mental Stimulation: Climbing keeps a cat's mind active. It challenges them to assess distances and navigate obstacles, which is good for their mental health.
- Safety and Security: High places offer safety. From up high, cats can watch for danger and escape if needed. It gives them a sense of control over their surroundings.
- Social Dynamics: In multi-cat homes, climbing can help establish social order. Cats may compete for the highest spot as a way of showing their status.
The Benefits of Cat Trees
- Personal Space: Cat trees provide a space of their own. Cats value their privacy, and a cat tree can be a safe haven for rest and relaxation.
- Scratching Post: Cat trees often serve as scratching posts. Scratching is a natural behavior for cats, helping them to mark their territory and care for their claws.
- Furniture Protection: A cat tree can save your furniture. It gives cats a designated place to climb and scratch, keeping them away from your couch and curtains.
- Confidence Booster: For shy cats, a cat tree can be a confidence builder. It provides a secure place to observe their world and interact on their own terms.
By understanding these aspects of your cat's behavior, you can build a more enriching and comfortable environment for your feline friend.
How to Make a Cat Tree - Step by Step Guide
Making a cozy space for my cats was a top priority. Designing a cat tree with a litter box and recycling bin was a fun challenge. I used real wood branches for a natural look. Let me show you how I made it.
Materials Needed and Their Purpose
- Wood Planks and Branches: The core structure was built from sturdy wood planks, ensuring it could support the weight and activity of my cats. Branches were selected for the 'tree' part to provide an authentic climbing experience.
- Rope: To mimic the rough texture of a tree and give my cats something to claw at, I wrapped several branches in rope.
- Litter Box: Choosing a new, modern litter box was crucial for easy cleaning and to ensure it fit seamlessly within the wooden enclosure.
- Recycling Bin Inserts: Reusing the inserts from an old bin helped in crafting a dedicated space for recyclable materials, making it both eco-friendly and convenient.
- Hinges and a Lock: Rustic-looking hinges added a charming touch to the doors, while a lock ensured the litter box door stayed closed when necessary.
- Screws and Tools: Various screws were needed to assemble all parts securely. A drill, jigsaw, and screwdriver were essential tools for this project.
Building the Base Frame
Recycling Bin and Litter Box Enclosure
- Sketching and Cutting the Wood: The first step involved measuring and cutting the wood to build a frame that would house both the litter box and recycling bin. Accuracy here was key to ensuring everything would fit perfectly.
- Assembling the Frame: I assembled the frame indoors to make adjustments as needed, ensuring it snugly fit our designated space.
Adding the Planks
After the frame was in place, I began attaching the exterior planks. Pre-drilling holes before screwing them in helped prevent the wood from splitting. I used weather-resistant wood, considering the cat tree's proximity to the recycling bin and litter box.
Making the Tree
- Selecting the Branches: My fianc* é, a forest ranger, sourced several beautiful wood branches. We picked ones with natural curves to resemble a real tree.
- Attaching the Branches: Securing the branches to the base required long screws for stability. It was a two-person job, with one holding the branches in place and the other screwing.
- Adding the Cat Platforms: To build levels for my cats to rest and observe from, I attached additional branches horizontally, ensuring they were well-supported and sturdy.
The Finishing Touches
- Rope Wrapping: I wrapped the branches in rope to give my cats ample scratching materials. This required patience and tight knots to ensure durability.
- Installation of the Litter Box Door: For easy cleaning, the litter box door was designed to open towards the front. Cutting a cat entrance and installing a locking mechanism ensured it was both accessible for my cats and secure.
- Decor and Final Assembly: The last step involved sanding down any rough edges to ensure safety and adding decorative elements like plants to make the cat tree an attractive part of our living space.
The cat tree is a great addition. It hides the litter box and recycling bin while providing stimulation for my cats. Watching them play on it is rewarding.
Making this cat tree took time and effort. Hopefully my journey motivates and guides you in making your own cat oasis. Patience and creativity are key.
Troubleshooting Common Issues with DIY Cat Trees
Building a DIY cat tree can be a rewarding project, but sometimes you might encounter a few hiccups along the way. Here's a guide to help you troubleshoot some common issues, ensuring your feline friend enjoys a safe and sturdy place to play and relax.
Stability Concerns
- The Base: The foundation of your cat tree must be solid. If your cat tree wobbles, consider enlarging the base or adding weight to it for better stability.
- Securing to the Wall: For extra safety, especially for tall cat trees, secure them to the wall with brackets or anchors.
Material Wear and Tear
- Sisal Rope Unraveling: If the sisal rope on scratching posts starts to come loose, re-wrap it tightly and secure the ends with non-toxic glue.
- Fabric Tearing: Replace any torn fabric promptly to prevent your cat from ingesting loose threads or making larger tears.
Design Flaws
- Inadequate Platform Size: Ensure platforms are large enough for your cat to sit and lie down comfortably. This is particularly important for larger cats.
- Insufficient Scratching Areas: Cats need ample space to scratch. If your cat tree lacks this, add more scratching posts or panels.
Assembly Difficulties
- Complex Instructions: If assembly instructions are confusing, look for video tutorials or ask for help from someone with more DIY experience.
- Missing Pieces: Double-check you have all the necessary parts before starting. If something is missing, you may need to improvise or purchase replacements.
By addressing these common issues, you can ensure your DIY cat tree is a beloved and lasting fixture in your cat's life. Remember, the key is to build a safe, comfortable, and engaging environment for your kitty to enjoy.
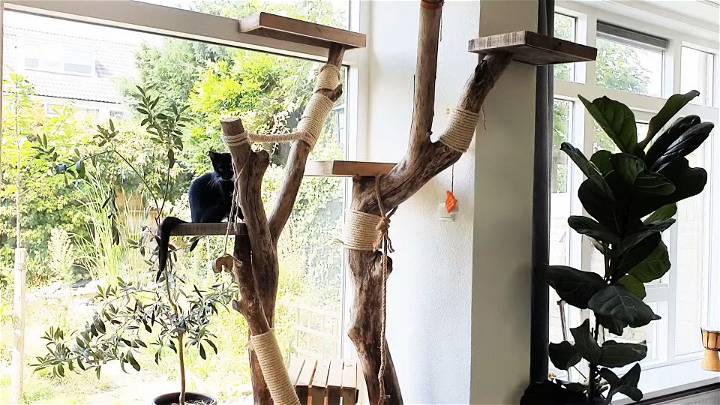
DIY Cat Tree Guide: Answering Your Top Questions
Building a DIY cat tree is a fantastic way to provide a fun and safe space for your feline friend. To help you get started, here are answers to some frequently asked questions that cover the essentials of building your own cat tree.
What materials do I need for a DIY cat tree?
You'll need sturdy materials like wood or PVC pipes for the frame, platforms, and posts. Sisal rope for wrapping posts, comfortable fabric for lounging areas, and non-toxic glue or screws for assembly are also essential.
How can I ensure the cat tree is stable?
A wide, heavy base is crucial for stability. You can also secure the cat tree to a wall with brackets to prevent tipping, especially if you have active cats or multiple felines.
What tools are required to build a cat tree?
Basic tools like a saw, drill, screwdriver, and staple gun will be needed. If you're wrapping posts with sisal rope, scissors or a sharp knife will also come in handy.
Can I customize my cat tree?
Absolutely! You can tailor the size, shape, and features of your cat tree to fit your space and your cat's preferences. Add extra platforms, hideaways, or toys to make it unique.
How do I choose the right location for the cat tree?
Place the cat tree in a safe, quiet corner where your cat likes to spend time. Ensure it's away from busy areas to reduce stress and away from fragile items to prevent accidents.
What's the best way to encourage my cat to use the cat tree?
Introduce your cat to the tree gradually. Use treats, catnip, or their favorite toys to make the tree an appealing place to explore and relax.
How can I maintain and clean the cat tree?
Vacuum the cat tree regularly to remove fur and dust. If it has removable fabric, wash it according to the material's instructions. Check and tighten any loose parts periodically for safety.
Conclusion:
Wrapping up, building your own DIY cat tree can be a fun and rewarding project for any cat owner. By following the steps outlined in this guide, you can provide your feline friend with a personalized and comfortable space to play and relax.


