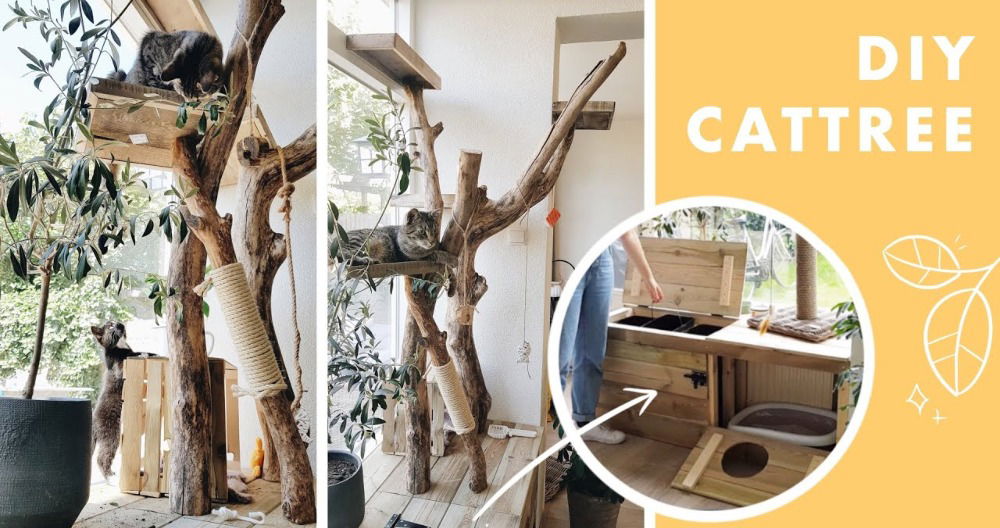
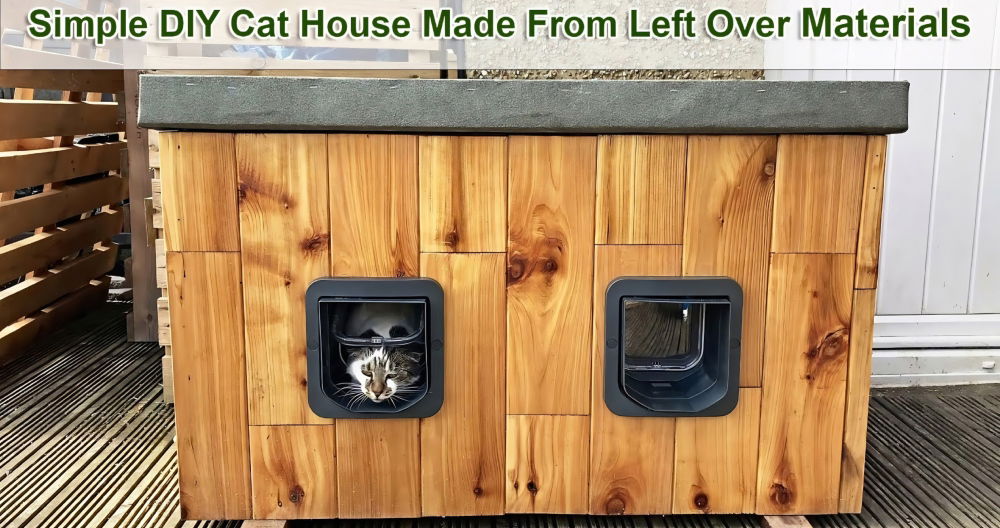
Last year, my cat Mittens seemed bored and restless. I wanted to make her happy, so I decided to build a DIY cat wall playground. I bought some simple materials from a local hardware store. A few wooden planks, brackets, and screws were all I needed. After some planning, I started building. It was surprisingly easy, and seeing her excitement was worth all the effort.
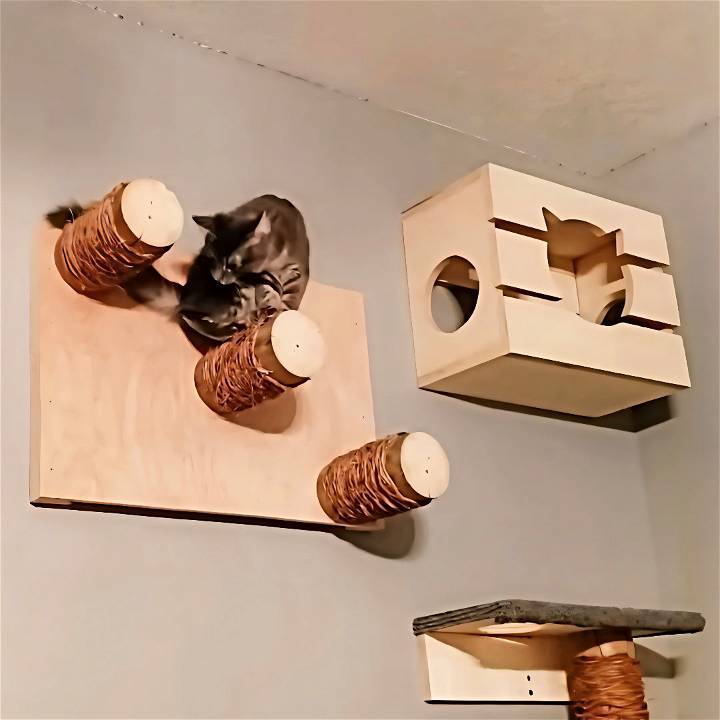
Building this DIY cat wall climbing system not only kept Mittens entertained but also provided her with much-needed exercise. I added different levels and even a cozy resting nook. Watching her explore her new playground was so rewarding. If you're thinking about doing something similar, go for it!
This guide will help you get started on making something amazing for your cat, just like it did for me.
Materials and Why They Are Needed
- Scrap lumber: Essential for the structure. Using scrap not only saves money but also makes this project more sustainable.
- Carpet remnants: Provides grip for your cat to climb easily. This is crucial for their climbing comfort and safety.
- Staple gun and staples: To affix the carpet onto the wood securely. It ensures the carpet doesn't peel off when your cat is climbing.
- Saw and table saw: For cutting the lumber and making the cleat system. Precise cuts are vital for a sturdy build.
- Screws and drill: To assemble the pieces and mount the structure. Ensures the playground is safely secured.
- 45-degree angle cutting tool: For the cleat system. This allows the playground to be mounted securely and provides flexibility in placement.
Step by Step Instructions
Make a fun, engaging DIY cat wall playground with our step-by-step guide. Transform your space into a feline paradise easily!
Step 1: Planning and Cutting
The first step is conceptualizing your cat playground. Envision what you want it to look like and how it would fit into your indoor space. Once you have a rough idea, begin by sorting through your scrap lumber to find suitable pieces. Measure and cut these pieces according to your design. Remember, patience and precision at this stage set the foundation for a fantastic playground.
Step 2: Assembling the Structure
After cutting the lumber to the right sizes, begin assembling the structure. This can be a simple process of screwing the pieces together, but it's crucial to ensure everything is sturdy and aligned. Think about incorporating diverse elements such as platforms, ramps, and towers to keep your cat entertained.
Step 3: Implementing the Cleat System
A clever way to mount the structure without making it too permanent is by using a cleat system. This involves cutting the lumber at a 45-degree angle to build two pieces that interlock and hold the structure firmly against the wall. It's an ingenious solution that allows for flexibility, enabling you to move the playground should the need arise.
Step 4: Adding Carpet for Comfort and Grip
The most important adjustment I made was wrapping parts of the structure with carpet remnants. Initially, Bucky struggled to climb the playground because it lacked grip. Stapling the carpet around the platforms and ramps provided him with the necessary traction, making his playtime more enjoyable and safer. Plus, it adds a warm, cozy touch to the setup.
Step 5: Enjoy Watching Your Cat Explore
The final step, and by far the most rewarding, was watching Bucky explore his new playground. This confirmed that all the effort put into this project was worth it. His happiness and safety were my priority, and achieving that was incredibly fulfilling.
Customization Ideas for Your DIY Cat Wall Playground
Building a DIY cat wall playground is not just about building a fun space for your feline friend; it's also about adding a personal touch that reflects both your style and your cat's personality. Here are some unique and practical ideas to customize your cat playground:
- Choose a Theme: Just like a child's playroom, your cat's playground can have a theme. Whether it's a jungle adventure with artificial vines and greenery or a sleek, modern design with geometric shapes, pick a theme that you love and that you think will appeal to your cat.
- Color Coordination: Cats may not see colors as we do, but that doesn't mean aesthetics aren't important. Choose colors that complement your home's decor. Soft pastels or neutral tones can blend seamlessly, while bright colors can make the playground a focal point.
- Adjustable Shelves: Cats love to climb and explore different levels. Incorporate adjustable shelves or platforms that you can move around to keep the playground fresh and challenging for your cat.
- Personalized Touches: Add elements that are unique to your cat. This could be a shelf lined with their favorite blanket, a scratch post wrapped in rope from an old sailing trip, or a platform at just the right height for them to peer out the window.
- Interactive Toys: Attach toys to the playground that will stimulate your cat's hunting instincts. Think feather wands, hanging balls, or even a small tablet holder for cat-friendly apps.
- Safety First: Ensure all materials are non-toxic and securely attached to the wall. Test the playground's stability regularly, especially if you have a particularly adventurous cat.
- Multi-Cat Considerations: If you have more than one cat, build multiple pathways so they can play without getting in each other's way. Include separate rest areas where each cat can have its own space.
Make your DIY project enjoyable and functional for both you and your pet. Customize it to build a playground your cat will adore and that complements your home.
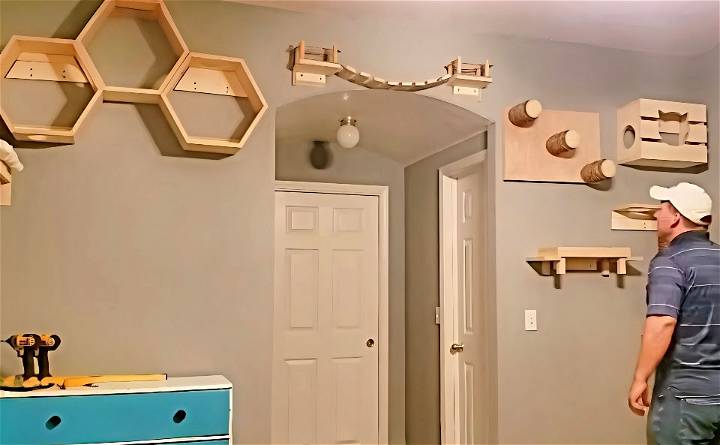
Space Optimization for Your DIY Cat Wall Playground
Maximizing space is crucial, especially if you're living in a smaller home or apartment. Here's how you can optimize space when making your DIY cat wall playground:
- Vertical is Vital: Cats love to climb, so think vertical. Use your wall's height to build a playground that allows your cat to jump, climb, and perch high up. This approach takes advantage of unused vertical space and keeps the floor clear.
- Foldable Features: Consider adding elements that can be folded back when not in use. For example, a fold-down shelf can provide a temporary platform for your cat and can be tucked away when you need more space.
- Corner Constructions: Corners are often underutilized spaces. Fit triangular platforms or hammocks in these areas to build cozy nooks for your cat without taking up too much room.
- Wall-Mounted Essentials: Attach scratch posts, toys, and even feeding stations to the wall. This keeps essential items off the floor and integrates them into the playground.
- Floating Shelves: Use floating shelves of various lengths and heights to build a dynamic area for your cat to explore. Ensure they're sturdy and well-secured to the wall.
- Multi-Functional Furniture: If you have furniture against the wall, turn the top into a part of the playground. Secure a soft mat or a small bed to build a resting spot.
- Streamlined Design: Keep the design sleek and avoid bulky structures. Use materials like rope, light wood, or clear acrylic for a less cluttered look.
- Measure Twice, Install Once: Plan your layout carefully. Measure your space and consider your cat's size and agility to ensure the playground is accessible and enjoyable.
Follow these tips to build a space-saving, stimulating cat wall playground. Aim for a fun, safe area that fits your home. Keep it simple, secure, and smart!
Safety Precautions for Your DIY Cat Wall Playground
When making a DIY cat wall playground, safety is paramount. Here's how you can ensure your playground is a secure haven for your cat:
- Sturdy Installations: Make sure all components are securely attached to the wall. Use appropriate anchors and brackets for your wall type, and regularly check for any loose parts.
- Smooth Edges: Check for sharp edges or corners on all materials. Sand down any rough areas to prevent scratches or injuries to your cat.
- Non-Toxic Materials: Use only non-toxic materials and finishes. Cats often chew or lick their surroundings, so it's crucial to avoid anything that could be harmful if ingested.
- Appropriate Weight Limits: Consider the weight of your cat and ensure that shelves and platforms can support them comfortably. This is especially important for larger breeds.
- Escape Routes: Design the playground with escape routes in mind. Cats should be able to get down quickly and safely if they feel threatened or scared.
- Avoid Small Parts: Small, detachable parts can be a choking hazard. Ensure that all elements are too large to be swallowed and securely attached.
- Test for Stability: Before letting your cat use the playground, test the stability of each piece. Apply gentle pressure to ensure everything stays in place.
- Regular Inspections: Periodically inspect the playground for signs of wear and tear. Look for loose threads, splintering wood, or worn-out scratch pads.
- Safe Play Zone: Keep the area around the playground free of clutter. This ensures your cat won't hurt themselves if they jump or fall off.
- Emergency Plan: Have a plan in case your cat gets stuck or injured. Keep your vet's number handy and know how to remove your cat from the playground if necessary safely.
Follow these safety tips to ensure a fun, secure environment for your cat's new playground, giving you peace of mind.
FAQs About DIY Cat Wall Playground
Discover everything you need to know in our faqs about DIY cat wall playgrounds. Get tips, safety info, and design ideas for your feline's perfect play space!
1. How can I ensure the cat wall playground is safe?
Safety is paramount when making a cat wall playground. Make sure to attach all elements securely to the wall, preferably into studs or solid backing. Use non-toxic materials and finishes, and avoid small parts that could be choking hazards. Regularly inspect the playground for loose parts or wear and tear.
Yes, you can create a cat wall playground in a rented space. Consider using damage-free hanging solutions like adhesive hooks or Velcro strips for lightweight elements. Alternatively, you can attach the playground to a large piece of plywood to make it portable and avoid drilling holes in the walls.
To maintain your cat’s interest, incorporate various textures and levels to explore. Include scratching posts, perches, and hideaways. You can also periodically rearrange the elements to build new challenges and refresh the playground’s appeal.
When designing your cat wall playground, consider your cat’s behavior and preferences. Stagger shelves at different heights to encourage climbing. Use carpet tiles for added grip and comfort. Personalize the playground with paint or stains to match your home decor, and ensure there’s enough space for your cat to jump and lounge comfortably.
Selecting the right spot for your cat wall playground is crucial for your cat's enjoyment and safety. Look for a quiet corner or an area along a wall with minimal foot traffic to avoid disturbances. Ensure the location is away from fragile items and has enough vertical and horizontal space for your cat to climb and jump safely. Consider placing it near a window if possible, as cats love to watch the outdoors from a high vantage point. Remember to check the wall's integrity and whether you can drill into studs for a secure installation.
Conclusion:
Building a DIY cat wall playground was a fulfilling experience, and it made Mittens so much happier. If you want to give your cat a fun and engaging space, these tips will guide you. It's easy and very rewarding.


