Transforming a space with ceiling drapery can bring a dramatic effect to any event. Whether it's a wedding, a banquet, or another celebration, draping builds a beautiful, elegant atmosphere. When you know how to hang ceiling drapery yourself, you can turn a bland venue into something breathtaking—all while staying on budget. Here's how I DIY ceiling drapes and how you can do it too, following these simple steps.
Step by Step Instructions
Learn how to install DIY ceiling drapes with step-by-step instructions. From understanding your ceiling type to selecting fabric and adjusting the lighting.
Assessing the Venue
Learn how to assess a venue effectively. Step-by-step guide: understand the ceiling type and measure the space accurately.
Step 1: Understand the Ceiling Type
The first thing I do before even picking up the fabric is assess the ceiling. Knowing whether you have a drop ceiling or a finished ceiling will determine how you mount your draping.
For instance, drop ceilings (the kind with panels) are much easier to work with. You can attach your fabric to the grid using hooks, clamps, or zip ties. Finished ceilings are more challenging because they may require drilling into beams or using a more intricate support system.
- Pro Tip: If you're working with a chandelier or light fixtures, make sure they are properly mounted and designed to hold additional weight. You don't want any accidents during the event.
Step 2: Measure the Space
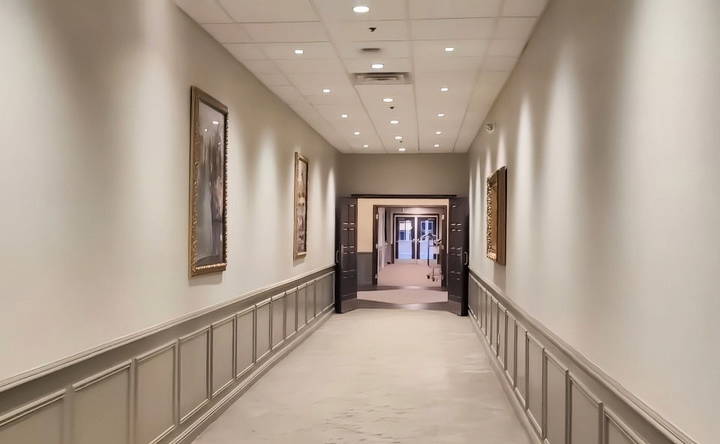
Before anything goes up, I always measure the space. In venues with drop ceilings, you can easily count the ceiling tiles to gauge dimensions. For example, tiles are often 2 feet each, so counting them gives you a quick estimate of the room size.
For my event, I had a space that was about 50 feet long, so I knew I would need two 25-foot drapes for each half of the room, which equaled four pieces of fabric. When you understand your dimensions, the entire process becomes a lot smoother.
Choosing the Right Fabric and Lighting
Learn to choose the right fabric and lighting for your drapery. Our guide offers personal insights and step-by-step tips to enhance your home decor!
Step 3: Select the Right Fabric
Not all fabrics work for ceiling draping. I used a lightweight fabric to keep things easy. My go-to choices include silk or chiffon because they are light but still look rich.
Personal Insight:
When choosing fabric, consider the colors of your event. For example, at my event, I matched the fabric with the color scheme of the wedding, which made everything look cohesive. Lighter colors often work best as they reflect light beautifully.
Step 4: Add Lighting to Enhance the Drapery
Lighting makes all the difference. By adding uplights or string lights, the drapery becomes even more stunning. The lights help emphasize the folds and curves of the fabric, making a warm and inviting ambiance.
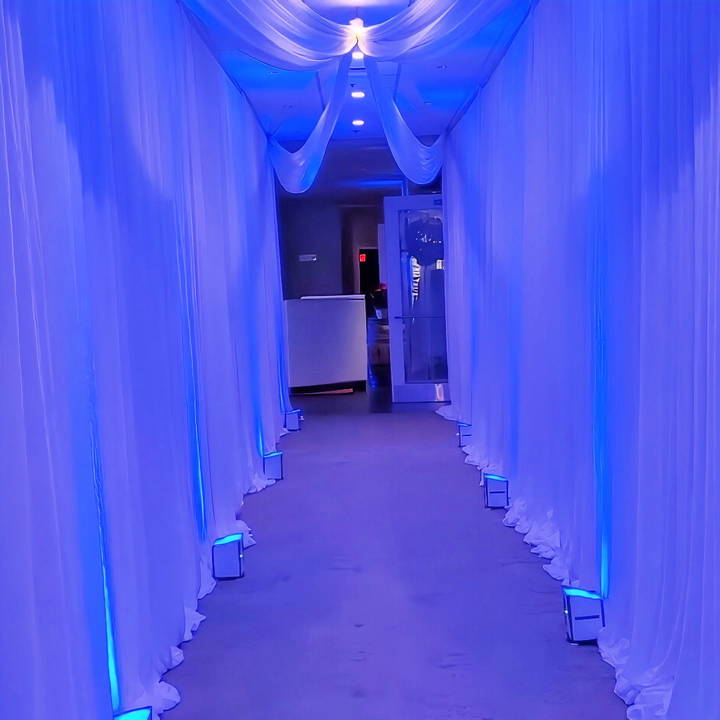
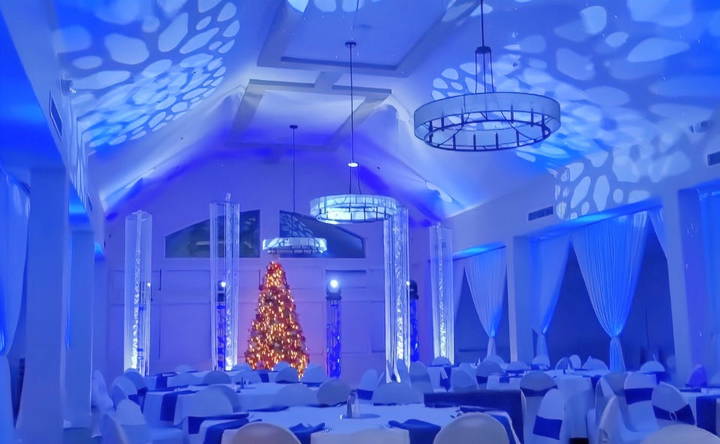
At one of my events, I combined blue lighting with white drapes for a winter-themed party. The color combination made the room look magical.
Installing the Drapery
Learn to install drapery with our step-by-step guide. From preparing fabric to mounting it on the ceiling, make it easy and efficient.
Step 5: Prepare Your Fabric
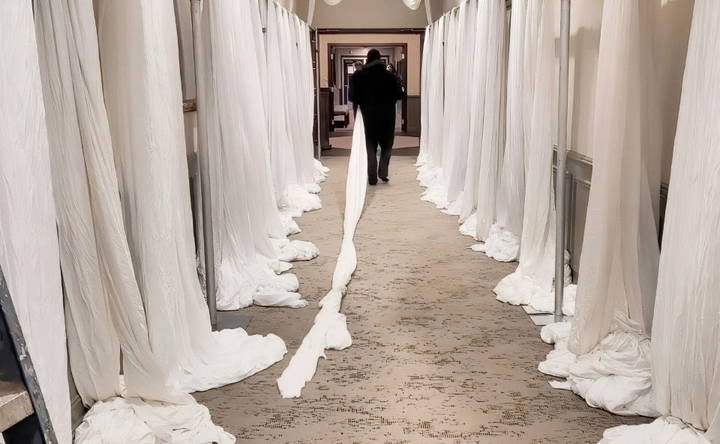
Before putting anything on the ceiling, it's important to get your fabric ready. I start by pleating the fabric into an accordion shape. This helps give the drapes that full, luxurious look when they're hung.
To do this:
- Grab the fabric at the bottom.
- Pleat it by folding it back and forth in your hands like an accordion.
- Once pleated, secure the fabric with zip ties to ensure it holds its shape.
For my setup, I pleated four pieces of fabric in this way, making two sections to drape across the ceiling in an "X" shape.
Step 6: Secure the Fabric
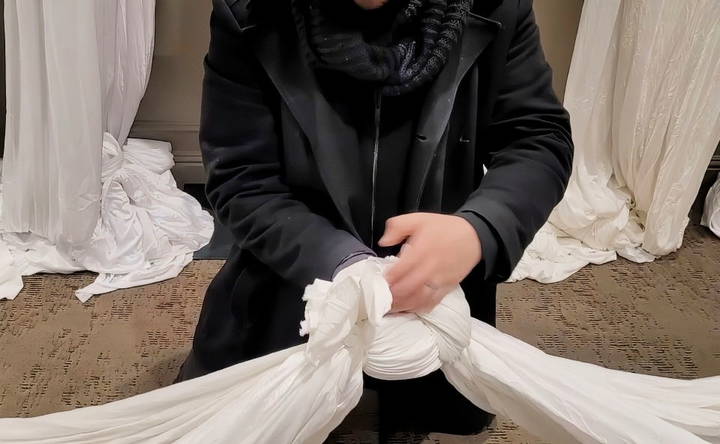
Next, I secured the pleated fabric. To keep everything safe and secure, I used double zip ties. These are perfect for ensuring the fabric stays up throughout the entire event. One zip tie serves as the main anchor, while the second acts as a fail-safe.
If you have any excess fabric or zip ties hanging out, just fold them back into the fabric to keep everything clean and polished.
Alternative Methods:
- C-clamps: If you're working with a grid ceiling, C-clamps can be attached directly to the grid. They're reliable and easy to use.
- Carabiners: When dealing with heavier fabric, I sometimes use carabiners. Just make sure they're rated for the load of the fabric.
Step 7: Mount the Fabric to the Ceiling
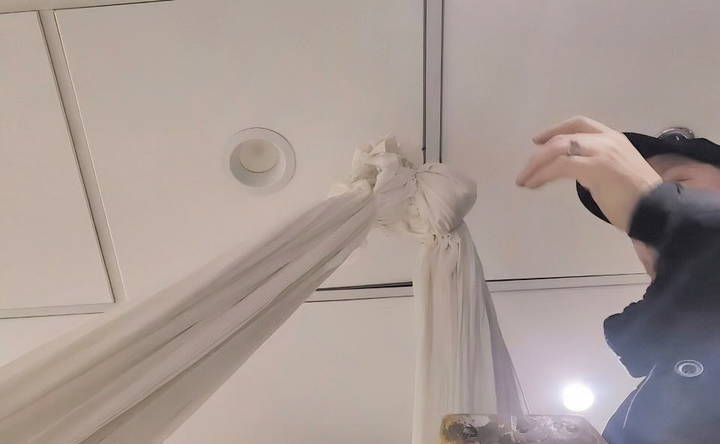
Once your fabric is secured, it's time to hang it. If you're working with a drop ceiling, you can easily attach the fabric to the grid. I recommend using a T-hook or zip ties for extra security.
For this event, I started from the center of the ceiling, making an "X" with the draping. By attaching the fabric in the middle and pulling the ends toward the corners, I ensured that the drapes buildd a focal point in the room.
- Pro Tip: Always have a spotter when you're hanging fabric from the ceiling. Your spotter can guide you, making sure everything looks symmetrical and at the right height.
Final Touches: Making the Event Look
Complete your event setup with side drapes, perfect lighting, and a final inspection. Learn how to build the event look in 'final touches.'
Step 8: Add Side Drapes and Accents
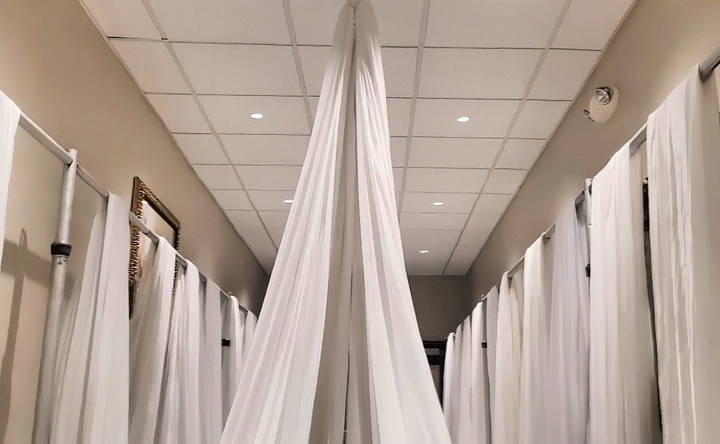
After the ceiling drapes are up, don't forget the walls! For this event, I added complementary side drapes to the walls, matching the ceiling fabric. It gave the whole space a more unified and polished look.
To add side drapes:
- Attach them to a base plate on the floor.
- Pull them tight to keep them from moving around.
- Swag them slightly for that elegant curve.
Step 9: Adjust the Lighting
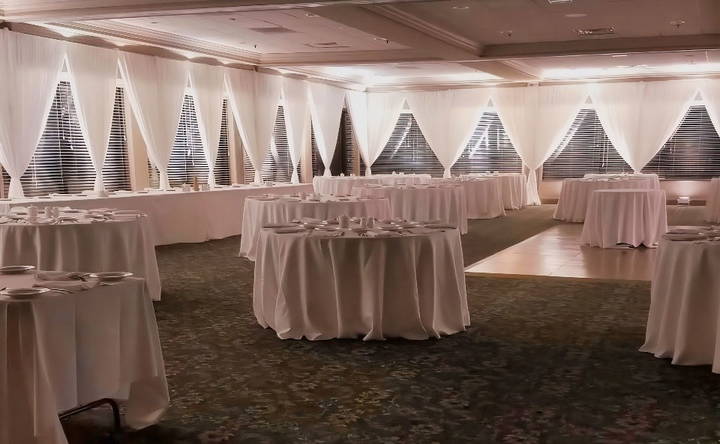
Finally, I adjusted the lighting to work perfectly with the fabric. Using uplights helped emphasize the colors and textures of the draping. Blue lighting for a winter-themed event or warm white lighting for a wedding can completely change the vibe of a room.
Step 10: Inspect the Finished Look
Before wrapping up, I always step back and inspect the room from various angles. This ensures everything looks symmetrical and balanced.
If you're planning an outdoor event or need more draping ideas, you can always adapt this process. For example, for outdoor ceremonies, I sometimes use base plates with poles to build arches, attaching fabric in a similar way as indoor events.
Customization Ideas for DIY Ceiling Drapes
Customizing your DIY ceiling drapes can transform any space, making it unique and special. Here are some creative ideas to help you personalize your ceiling drapes for various occasions:
1. Choosing the Right Fabric
- Events: For weddings or formal events, use luxurious fabrics like silk or satin. For casual gatherings, cotton or linen works well.
- Colors: Match the fabric color to your event theme—soft pastels for weddings, vibrant colors for parties, or neutral tones for home decor.
2. Adding Lights
- Fairy Lights: String fairy lights along the drapes for a magical effect. They are perfect for evening events and add a warm glow.
- LED Strips: Use LED strips for a modern look. They can be color-coordinated with your theme and are energy-efficient.
3. Incorporating Flowers
- Fresh Flowers: Attach fresh flowers to the drapes for a natural and elegant touch. Ideal for weddings and garden parties.
- Artificial Flowers: Artificial flowers are used for long-lasting decoration. They are available in various colors and styles.
4. Using Decorative Elements
- Ribbons and Bows: Add ribbons or bows to the drapes for a playful and festive look. Choose colors that complement your theme.
- Beads and Crystals: Hang beads or crystals from the drapes for a sparkling effect. They catch the light beautifully and add a touch of glamour.
5. Making Patterns
- Tie-Dye: Make tie-dye patterns on the fabric for a bohemian vibe. This is great for casual and outdoor events.
- Stenciling: Use stencils to paint patterns or designs on the drapes. This allows for endless customization options.
6. Layering Fabrics
- Multiple Layers: Layer different fabrics for a rich and textured look. Combine sheer fabrics with solid ones for depth and interest.
- Contrasting Colors: Use contrasting colors in the layers to make the drapes stand out. This can build a striking visual effect.
7. Personalized Messages
- Banners: Hang banners with personalized messages or names. This is perfect for birthdays, weddings, or special announcements.
- Printed Fabric: Use fabric with printed messages or designs that are meaningful to the event or the people involved.
8. Seasonal Themes
- Holiday Decor: Customize your drapes with holiday-themed decorations. For example, use red and green for Christmas or orange and black for Halloween.
- Seasonal Colors: Change the drapes according to the season. Light and airy fabrics are for summer, and warm and cozy fabrics are for winter.
Customizing your DIY ceiling drapes makes them unique and adds a personal touch that guests will love.
Common Mistakes and How to Avoid Them
When making DIY ceiling drapes, it's easy to make mistakes that can affect the final look and functionality. Here are some common pitfalls and tips on how to avoid them:
1. Incorrect Measurements
- Mistake: Not measuring the space accurately can lead to drapes that are too short or too long.
- Solution: Measure the length and width of the area where you plan to hang the drapes. Double-check your measurements before cutting the fabric.
2. Choosing the Wrong Fabric
- Mistake: Using fabric that is too heavy or too light can cause issues with hanging and durability.
- Solution: Select a fabric that suits your needs. Lightweight fabrics like chiffon or organza are great for a delicate look, while heavier fabrics like velvet or canvas provide more structure.
3. Improper Installation
- Mistake: Not securing the drapes properly can result in them falling or looking uneven.
- Solution: Use sturdy hooks or rods designed to hold the weight of your drapes. Ensure they are securely attached to the ceiling or walls.
4. Ignoring Safety Precautions
- Mistake: Overlooking safety can lead to accidents, especially if the drapes are near lights or other heat sources.
- Solution: Keep drapes away from open flames and hot lights. Use fire-resistant fabrics if possible.
5. Poor Fabric Maintenance
- Mistake: Not maintaining the drapes can cause them to look dirty or worn out quickly.
- Solution: Follow the care instructions for your fabric. Regularly clean and inspect the drapes for any damage.
6. Lack of Planning
- Mistake: Starting the project without a clear plan can lead to confusion and mistakes.
- Solution: Plan your design and layout before you begin. Sketch out your ideas and gather all necessary materials in advance.
7. Overcomplicating the Design
- Mistake: Adding too many elements can make the drapes look cluttered and overwhelming.
- Solution: Keep the design simple and elegant. Focus on a few key elements that enhance the overall look.
8. Inconsistent Theme
- Mistake: Mixing too many styles or colors can build a disjointed appearance.
- Solution: Stick to a cohesive theme that matches the rest of your decor. Choose colors and patterns that complement each other.
9. Neglecting the Ceiling Height
- Mistake: Not considering the ceiling height can result in drapes that don't hang properly.
- Solution: Measure the height of your ceiling and adjust the length of the drapes accordingly. Ensure they hang at the desired height without touching the floor or being too short.
10. Forgetting About Lighting
- Mistake: Not accounting for the lighting in the room can affect the appearance of the drapes.
- Solution: Consider how natural and artificial light will interact with the fabric. Choose colors and materials that look good in the lighting conditions of your space.
Planning and avoiding common mistakes will lead to beautiful and functional ceiling drapes, enhancing your space. Careful execution ensures success.
FAQs About DIY Ceiling Drapes
Discover everything you need to know about DIY ceiling drapes with our comprehensive FAQs. Learn tips, materials, and installation steps.
Ceiling drapes are fabric panels hung from the ceiling to create a decorative effect. They are often used for weddings, parties, and events to add elegance and ambiance.
Measure the length and width of the area you want to cover. Add extra length for draping and pleating. Typically, you will need about 1.5 to 2 times the length of the area for a full look.
Yes, ceiling drapes can be used in various venues, including homes, banquet halls, and outdoor tents. Ensure the ceiling can support the weight of the fabric and any additional decorations.
You can add uplighting, chandeliers, or fairy lights to enhance the look. Using different fabric colors and textures can also build a more dynamic and visually appealing effect.
Yes, you can reuse the fabric if it is in good condition. Carefully remove the fabric after the event, clean it if necessary, and store it properly to avoid wrinkles and damage.
DIY Drapery: A Game Changer for Events
Using DIY ceiling drapery can turn an ordinary room into something extraordinary without the cost of hiring a professional. By following these steps, you'll be able to transform your venue with ease. Whether you're hosting a wedding, a holiday party, or any other special event, ceiling drapery adds that extra touch of elegance that everyone will remember.
Remember, it's all about planning ahead, choosing the right materials, and taking your time during setup. With some practice and patience, you'll be able to build a beautiful event space that will wow your guests.


