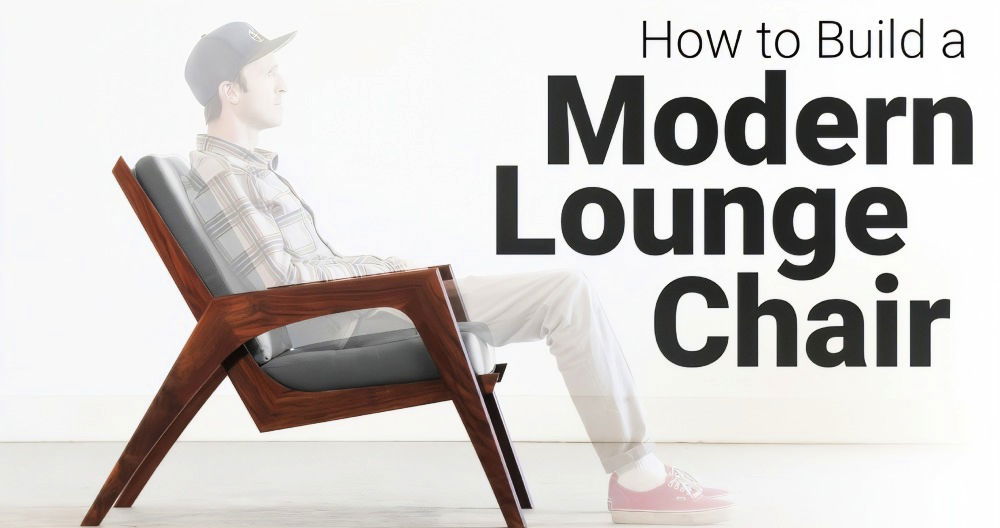
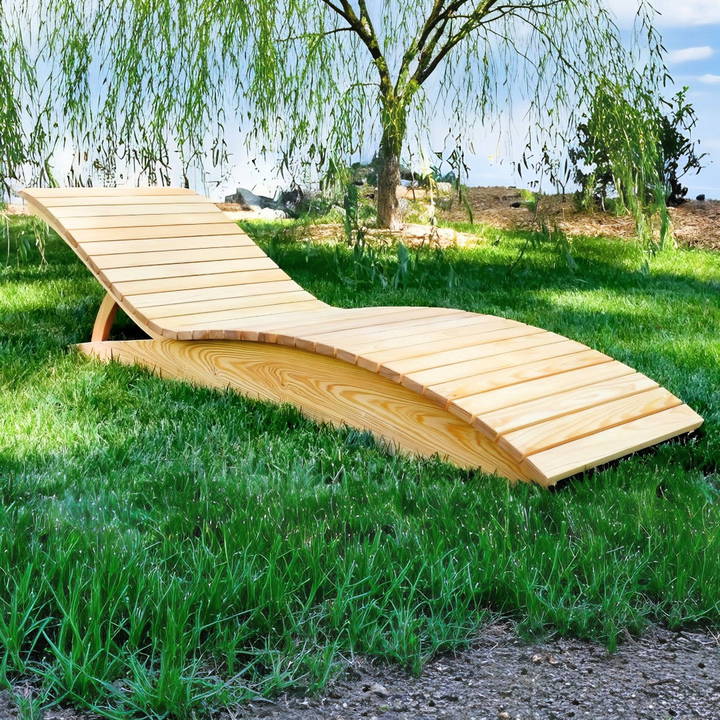
There's something incredibly rewarding about building your own outdoor furniture. Not only do you get a unique, custom piece, but it's also an opportunity to learn new skills and enjoy the satisfaction of hands-on craftsmanship. In this guide, I'm going to walk you through the process of building a modern DIY chaise lounge, a project I recently completed using cypress wood for its durability and resistance to the elements. I'll share tips and lessons I learned along the way, making this both an accessible and rewarding project for anyone looking to build their own outdoor relaxation space.
Why Cypress Wood?
Choosing the right wood for outdoor furniture is essential. I opted for four-quarter cypress because it's naturally rot-resistant, making it a perfect candidate for outdoor use. Cypress also offers a nice balance of being sturdy and easy to work with. Over time, I've learned that selecting the right materials from the start can make or break a project. Plus, when working with outdoor furniture, you need wood that can stand up to the elements. Cypress fit the bill perfectly for this build.
Step by Step Instructions
Learn how to make a DIY chaise lounge with our step-by-step guide, from template preparation to final assembly for perfect outdoor relaxation.
Step 1: Template Preparation and Cutting the Wood
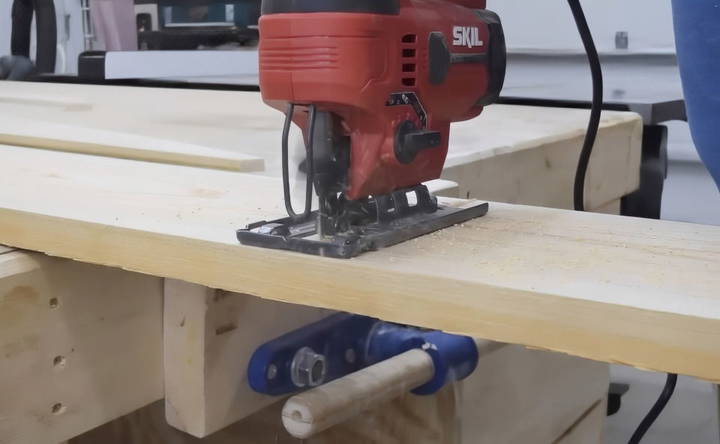
I started by using full-scale templates to shape the different components of the chaise lounge. If you don't have these, don't worry; you can easily make your own templates by drawing the desired shapes on paper or cardboard. Tracing the templates onto the cypress wood was the next step, and I used both a bandsaw and a jigsaw to cut the pieces to rough shape. If you only have a jigsaw, it's entirely possible to cut all the pieces that way—just be sure to cut close to the line for more precise shaping later.
- Pro Tip: The closer you cut to the line, the less sanding and finishing you'll need to do later. I found that leaving more than a quarter-inch of extra material made for unnecessary extra work.
Step 2: Shaping with the Router
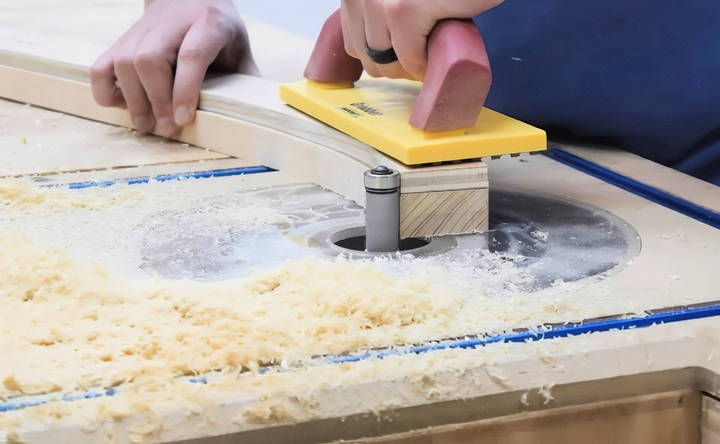
Once the rough cuts were made, I moved on to the shaping process. I used double-sided tape to attach the templates to the rough-cut pieces. Then, at the router table, I used a flush-trim bit to bring the wood to its final shape. For those unfamiliar with routing, a flush-trim bit is designed to follow the template's edge and give you a perfectly shaped piece of wood. If you don't have access to a router table, a fixed base or plunge router will also do the trick.
When working with the end grain, I paid extra attention to avoid tear-out—a common issue when routing. I didn't experience any, but it's worth noting that tear-out can occur, so take your time.
- Safety Note: Always be mindful of your hand placement when using a router. The repetitive nature of routing can sometimes make you complacent, but maintaining control and awareness is key to avoiding accidents.
Step 3: Preparing the Slats
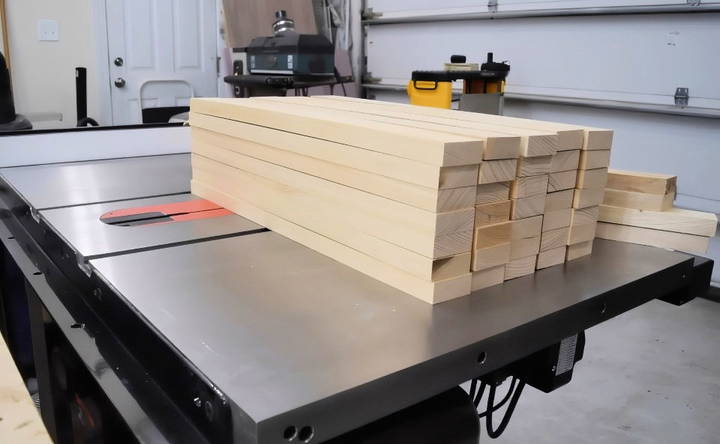
With the main structure shaped, I moved on to cutting the slats for the chaise. This required a jointer to get a clean edge on the boards before trimming them down on the table saw. If you don't have a jointer, don't worry—you can accomplish a similar result using a table saw or a router table with a jointing setup.
Once the slats were cut to width, I trimmed them to their final length using a miter gauge with a stop. This technique ensures each cut is accurate and consistent. Afterward, I swapped out my table saw blade for a ripping blade to cut the boards to their final width.
- Tip: Using a feather board attachment helped me get consistent results when ripping the boards. If you've never used one before, it's a handy tool that keeps your wood snug against the fence, preventing unwanted shifts during the cut.
Step 4: Sealing the Bottom for Protection
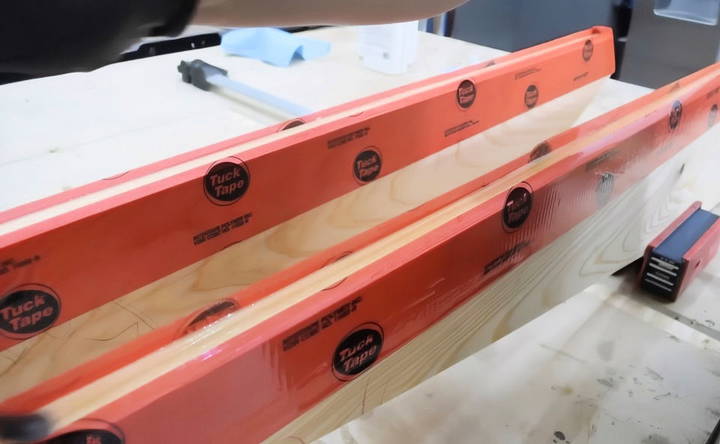
Outdoor furniture faces constant exposure to moisture, especially from the ground. To protect the chaise lounge, I applied a two-part epoxy to the bottom edges of the boards. This builds a barrier that prevents water from being absorbed into the wood, extending the longevity of the piece.
Step 5: Rounding the Edges
I wanted the chaise to have a sleek, polished look, so I used an eighth-inch round-over bit on the router table to round all the edges of the slats. If you have a favorite edge-profile bit, now is the time to use it to add your own personal touch. Taking care of these details can elevate the look of your project from basic to professional.
Step 6: Assembly
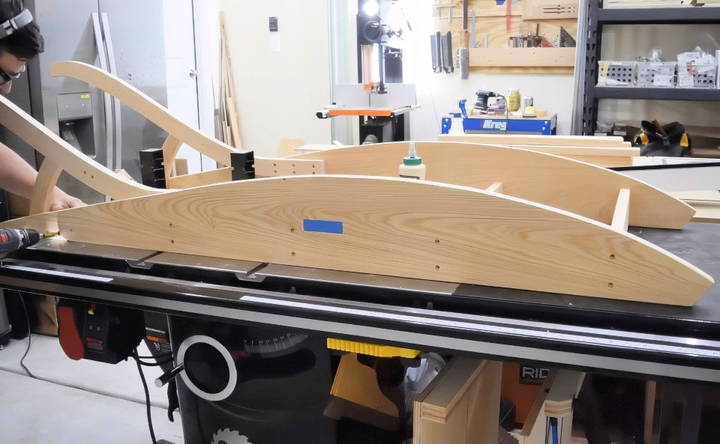
With the pieces prepped, it was time to assemble. I started by marking and pre-drilling the screw holes for the stretchers. To hold everything in place, I used Titebond 3 wood glue, which is designed for outdoor use. After applying the glue, I pre-drilled and drove in screws to attach the backrest.
At this point, I also cut the backrest support to length and attached it to the base. If you don't have access to the fancy tools I used, like the domino joiner, you can substitute dowels or traditional mortise and tenon joinery for similar results.
Step 7: Final Touches and Sanding
With the structure assembled, I moved on to the finishing touches. I used a combination of a rasp and sandpaper to round over any remaining exposed edges. Then, I marked and drilled screw holes for the stretchers that run along the backrest.
To prevent moisture from affecting the lower stretchers, I elevated them off the ground by about a quarter-inch using plywood offcuts. This small detail helps prevent moisture from being absorbed into the wood from the ground, a trick I've picked up after years of working on outdoor furniture.
Step 8: Concealing Screw Holes
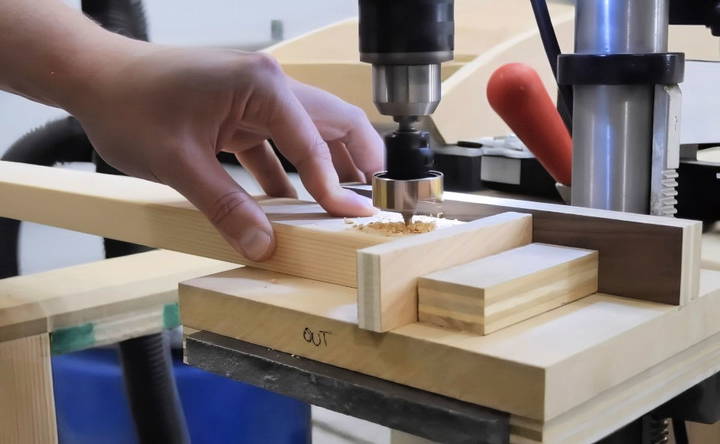
One design feature I'm particularly proud of is the way I concealed the screw holes with wooden plugs. Using a plug-cutting bit on the drill press, I cut plugs from the same cypress wood and glued them into place. After trimming and sanding them flush, the plugs seamlessly blend into the piece, giving it a clean and polished look. While this step isn't necessary, it's an extra touch that enhances the design and durability of the piece.
Step 9: Finishing with Oil
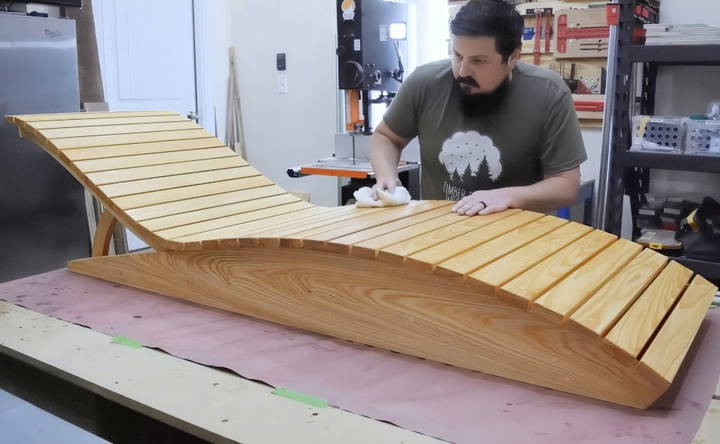
For the finish, I chose a penetrating oil. It's a fantastic option for outdoor furniture since it seeps into the wood and provides lasting protection against the elements. However, with penetrating oil, you'll need to refinish the piece every year or two to keep it looking its best. In my experience, this type of maintenance is well worth the effort for outdoor furniture that's exposed to harsh conditions.
Step 10: Final Assembly and Outdoors Placement
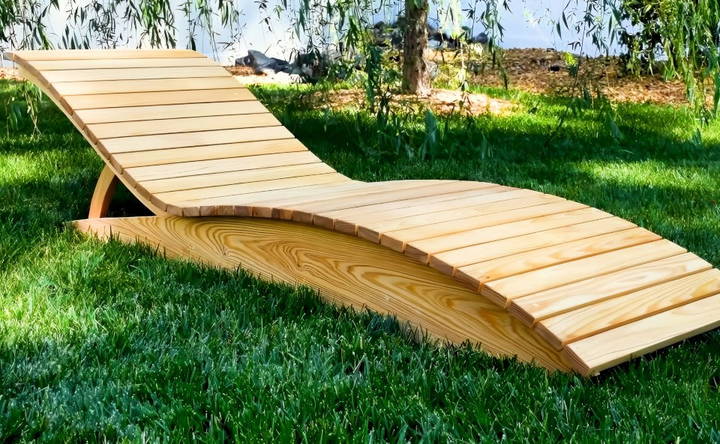
Once the oil was dry, I moved the chaise lounge outdoors. The modern design is both functional and elegant, fitting seamlessly into any backyard or patio setting. The combination of rounded edges and flush wooden plugs gives the entire piece a professional, finished appearance.
Lessons Learned
One thing I always like to reflect on after completing a project is what I could have done differently or better. For this chaise lounge, I learned the importance of double-checking measurements before cutting—especially when working with angles and curves. Rushing through those steps can lead to mistakes that are difficult to fix later on.
Additionally, ensuring the wood is properly sealed against moisture is crucial for outdoor furniture. Skipping steps like applying epoxy to the bottom edges can lead to wood rot down the line, so I always recommend taking the time to protect the wood before assembly.
Customization Tips
Customizing your DIY chaise lounge can make it uniquely yours and perfectly suited to your space and style. Here are some easy-to-follow tips to help you add personal touches and enhance the comfort and appearance of your chaise lounge.
Painting and Staining
Choosing the Right Finish: Select a paint or stain that complements your outdoor decor. For a modern look, go with bold, solid colors. For a rustic feel, choose natural wood stains.
Application Tips:
- Preparation: Sand the wood surface to ensure it's smooth and ready for painting or staining.
- Priming: Apply a primer if you're using paint. This helps the paint adhere better and last longer.
- Painting/Staining: Use a brush or roller to apply the paint or stain evenly. Follow the wood grain for a natural look.
- Sealing: Once dry, apply a clear sealant to protect the finish from weather elements.
Adding Cushions and Upholstery
Selecting Cushions: Choose cushions that are weather-resistant and easy to clean. Look for materials like outdoor fabric that can withstand sun and rain.
Attaching Cushions:
- Velcro Strips: Use Velcro strips to attach cushions securely to the chaise lounge. This makes them easy to remove for cleaning.
- Ties: Sew ties onto the cushions and attach them to the frame for a more traditional look.
DIY Upholstery: If you're feeling crafty, you can upholster the cushions yourself. Choose a durable fabric, cut it to size, and use a staple gun to attach it to the cushion foam.
Personal Touches
Built-in Storage: Add a storage compartment under the seat for storing outdoor essentials like blankets or magazines. Use hinges to build a lift-up seat for easy access.
Cup Holders: Install cup holders on the armrests for added convenience. You can buy pre-made cup holders or build your own using PVC pipes.
Decorative Elements:
- Stencils and Decals: Use stencils or decals to add patterns or designs to the wood. This can give your chaise lounge a unique and artistic touch.
- Throw Pillows: Add colorful throw pillows for extra comfort and style. Choose patterns and colors that match your outdoor decor.
Final Touches
- Weatherproofing: Ensure your chaise lounge is weatherproof by applying a waterproof sealant. This will protect the wood from moisture and extend its lifespan.
- Regular Maintenance: Keep your chaise lounge looking great by cleaning it regularly. Wipe down the wood and cushions with a damp cloth and mild soap. Check for any loose screws or parts and tighten them as needed.
By following these customization tips, you can build a chaise lounge that is not only comfortable and functional but also a reflection of your personal style.
Troubleshooting Common Issues
Building a DIY chaise lounge can be a rewarding project, but sometimes, things don't go as planned. Here are some common issues you might encounter and how to fix them.
Loose Joints
Problem: Over time, the joints of your chaise lounge may become loose, causing instability.
Solution:
- Tighten Screws and Bolts: Regularly check and tighten all screws and bolts. Use a wrench or screwdriver to ensure they are secure.
- Add Wood Glue: For extra stability, apply wood glue to the joints before tightening the screws. This will help keep the joints firm.
Broken Legs
Problem: The legs of your chaise lounge can break or crack, especially if the wood is not strong enough.
Solution:
- Replace the Leg: Remove the broken leg and replace it with a new one. Make sure to use sturdy wood like oak or maple.
- Reinforce with Metal Brackets: Attach metal brackets to the legs for added support. This will help distribute the weight more evenly.
Torn Fabric or Cushions
Problem: The fabric or cushions on your chaise lounge can tear or wear out over time.
Solution:
- Patch the Fabric: Use a fabric patch kit to repair small tears. Follow the instructions on the kit for best results.
- Replace the Cushions: If the cushions are too worn out, consider replacing them with new, weather-resistant ones. Look for cushions made from durable outdoor fabric.
Uneven Surface
Problem: Your chaise lounge may wobble if it is placed on an uneven surface.
Solution:
- Level the Ground: Ensure the ground where you place the chaise lounge is level. Use a spirit level to check and adjust as needed.
- Adjust the Legs: If the ground cannot be leveled, adjust the length of the legs. You can add small pieces of wood or rubber pads to the shorter legs to balance the chaise lounge.
Splintering Wood
Problem: The wood on your chaise lounge can splinter, making it uncomfortable and unsafe.
Solution:
- Sand the Wood: Regularly sand the wood to smooth out any rough edges. Use fine-grit sandpaper for the best results.
- Apply a Sealant: After sanding, apply a wood sealant to protect the wood from moisture and further splintering.
Rusty Hardware
Problem: Metal screws and bolts can rust, especially if your chaise lounge is kept outdoors.
Solution:
- Replace with Stainless Steel: Use stainless steel screws and bolts, which are more resistant to rust.
- Apply Rust Inhibitor: Spray a rust inhibitor on the metal parts to prevent rust from forming.
Fading Paint or Stain
Problem: The paint or stain on your chaise lounge can fade due to exposure to sunlight and weather.
Solution:
- Reapply Paint or Stain: Sand the surface lightly and reapply a fresh coat of paint or stain. Choose a product that is designed for outdoor use to ensure it lasts longer.
- Use a UV-Protective Finish: Apply a UV-protective finish over the paint or stain to help prevent fading.
Fixing these issues will keep your DIY chaise lounge comfy and nice for years. Regular upkeep and quick repairs will maintain its appeal.
FAQs About DIY Chaise Lounge
Discover answers to common questions about DIY chaise lounges, including materials, tools, and step-by-step instructions for your perfect project.
A chaise lounge is a long chair designed for reclining and relaxing. It typically has an extended seat that allows you to stretch out your legs comfortably.
Building your own chaise lounge can save money, allow for customization, and provide a sense of accomplishment. You can choose materials, colors, and designs that match your style and needs.
The time required can vary based on your experience and the complexity of the design. Generally, it can take anywhere from a few hours to a couple of days to complete.
Absolutely! One of the benefits of DIY projects is the ability to customize. You can adjust the size, shape, and color to fit your preferences and space.
Use outdoor-grade wood and seal it with a waterproof sealant. Choose outdoor fabrics for cushions that are resistant to moisture and UV rays.
Conclusion
Building this DIY chaise lounge was an enjoyable and rewarding experience. It's a project that combines both aesthetic appeal and functional durability, making it a great addition to any outdoor space. Whether you're a seasoned woodworker or just getting started, I hope this guide has given you the insight and inspiration to tackle this project on your own.


