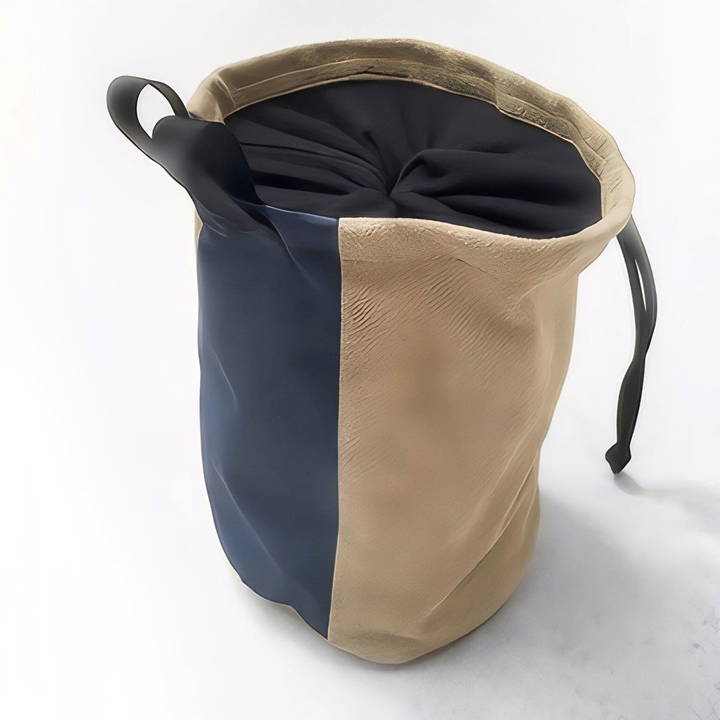
Making your own DIY chalk bag is a great project for rock climbers and fitness enthusiasts seeking a functional and personalized touch. Follow along as we outline each step to make a durable, stylish chalk bag, covering essential materials, tools, and instructions for building the main body and adding a drawstring closure.
Whether you're a seasoned sewer or a beginner looking for a fun project, this tutorial will help you make a chalk bag to enhance your climbing experience.
Materials You'll Need
For a high-quality, durable chalk bag, gather the following materials:
- Exterior Fabric (Nylon Blend): A durable, lightweight material, like nylon, is ideal for the outside of the bag. This fabric can withstand wear and tear, making it suitable for activities where the bag might be tossed or dragged around.
- Interior Fabric (Felt): Soft felt is a great choice for the bag's interior. It retains chalk effectively while providing a comfortable feel when you reach inside.
- High-Visibility Fabric (Optional): Adding a pop of color with high-visibility fabric, like neon or reflective material, can improve the bag's look and make it easier to spot in low-light conditions.
- Cotton or Nylon Drawstring: For the closure mechanism, a sturdy drawstring keeps your chalk secure and prevents spills.
- Metal Cord Stopper: This small piece keeps the drawstring in place after pulling it tight, ensuring the bag remains closed during climbs.
- Zipper (Optional): Adding a small zipper can make a secure pocket for items like earphones or keys.
- Additional Accessories (Optional): You may want webbing straps for attaching the bag to a belt or adding loops for carrying brushes or other accessories.
Tools You'll Need
- Sewing Machine: A basic sewing machine with standard stitching options will work well.
- Fabric Scissors: High-quality scissors make cutting fabric easier and more precise.
- Ruler or Measuring Tape: For accurate measurements, a clear ruler or measuring tape is essential.
- Seam Ripper: This tool is handy for making small openings and correcting any mistakes.
- Iron: Pressing seams will improve the bag's final appearance and make sewing easier.
- Tweezers (Optional): For tasks like threading the drawstring through small openings, tweezers can be very helpful.
Step by Step Instructions
Discover how to make a DIY chalk bag with easy, step-by-step instructions. Personalize your bag with optional features and enjoy climbing!
Step 1: Design and Plan Your Chalk Bag
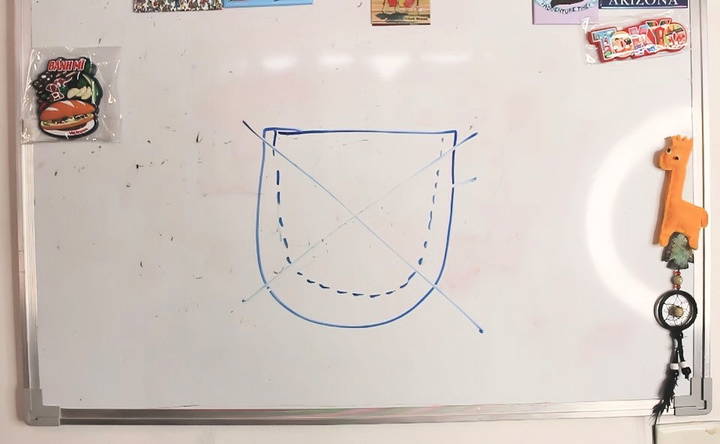
Before diving into the construction process, sketch out your bag's design. Visualize the shape, size, and any additional features, like pockets or loops, you want to include. This step helps you stay organized and ensures that you have a clear plan for each part of the bag.
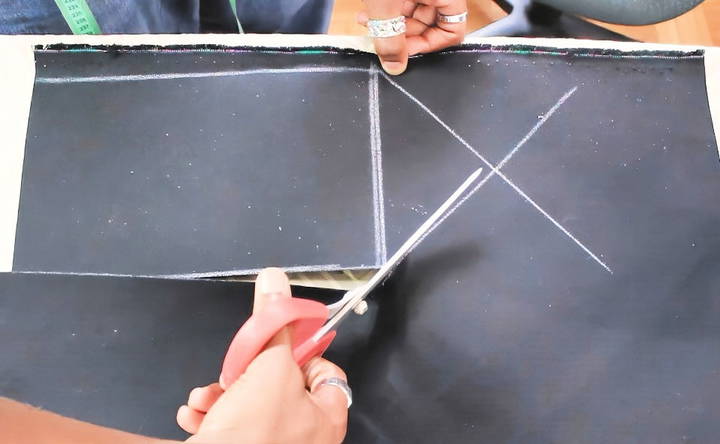
Step 2: Cut Out the Fabric Pieces
Using your design as a guide, cut out the fabric pieces as follows:
- Exterior Panels: Cut four panels from the nylon fabric in a trapezoidal shape. This shape will make a round opening at the top and a more stable square base.
- Interior Panels: Cut four identical trapezoidal panels from the felt fabric.
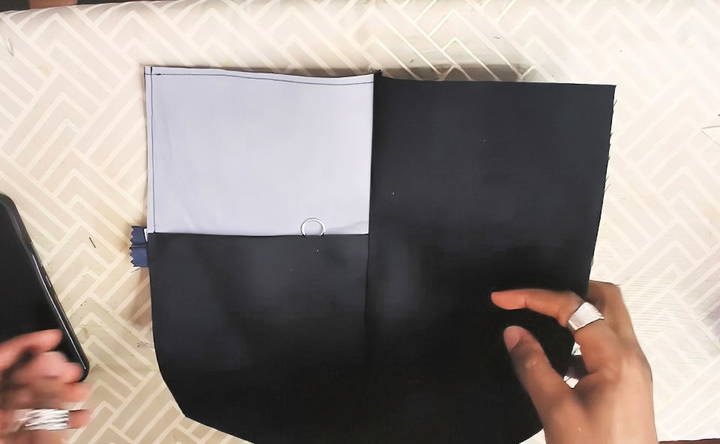
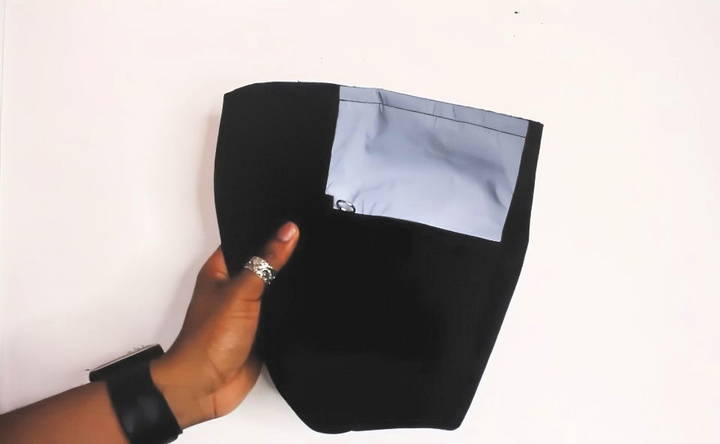
- Pocket (Optional): If you want a zippered pocket, cut a smaller rectangle from the high-visibility fabric and a zipper-sized opening in one of the exterior panels.
Tip: To ensure accuracy, use a ruler or measuring tape and cut carefully.
Step 3: Assemble the Pocket (Optional)
If you're adding a pocket, this step will guide you through the process:
- Position the Zipper: Lay the zipper on one of the exterior panels and stitch it in place, leaving space at the bottom for folding.
- Attach the Pocket Fabric: Sew the pocket fabric onto the panel around the zipper. The pocket can hold small items, making it a functional addition to your chalk bag.
Step 4: Sew the Exterior Panels Together
Now, it's time to construct the outer shell:
- Pair the Panels: Take two nylon panels and place them right sides together. Stitch along one of the longer edges, making a seam. Repeat with the remaining two panels.
- Combine the Pairs: Attach the two panel pairs by sewing along their long edges. This will form a complete loop with the trapezoidal panels, making a circular opening at the top.
- Press the Seams: Use an iron to press the seams flat. This step is optional but will make the bag easier to handle in later steps.
Step 5: Assemble the Interior Lining
The interior lining follows the same process as the exterior:
- Sew the Felt Panels Together: Stitch the felt panels in pairs, just as you did with the nylon exterior. Ensure the seams are strong, as they'll need to hold up to repeated use.
- Combine the Pairs: Stitch the two felt pairs together to complete the inner lining.
Tip: Check the fit of the felt lining inside the nylon shell at this stage. This will help you catch any sizing issues before final assembly.
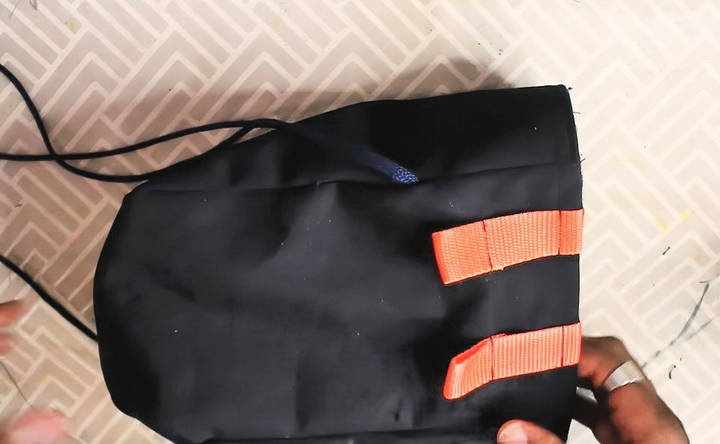
Step 6: Add Loops for Attachments (Optional)
If you want the option to attach your chalk bag to a belt or add accessories, add loops to the exterior fabric:
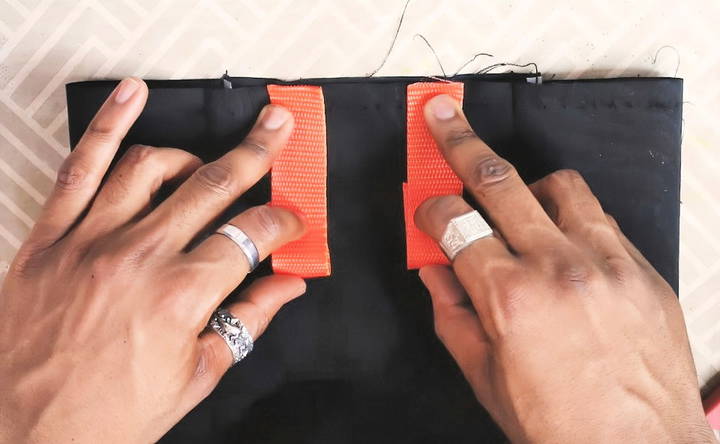
- Cut the Webbing Strips: Cut two pieces of high-visibility fabric or webbing for the loops.
- Position and Sew: Sew these strips to the exterior fabric, ensuring they're securely attached. This feature allows you to clip the bag onto a belt or harness.
Step 7: Insert the Interior Lining
With both the interior and exterior shells assembled, it's time to put them together:
- Align the Shells: Place the felt lining inside the nylon shell with right sides facing each other.
- Stitch Around the Opening: Sew around the entire opening of the bag, leaving a small gap for turning the bag inside out later.
Step 8: Install the Drawstring Closure
Now, it's time to add the drawstring closure, which keeps your chalk secure.
- Make a Hole for the Drawstring: Use a seam ripper to make a small hole in the nylon shell near the top edge. This hole will be the exit point for the drawstring.
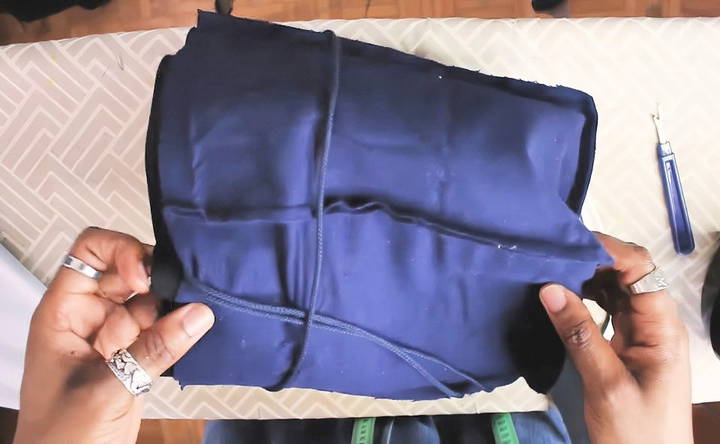
- Thread the Drawstring: Wrap the drawstring around the top of the bag and feed it through the hole. You can use tweezers to help with this step.
- Add Fabric Loops: Make small fabric loops around the drawstring to keep it in place. Sew these loops along the top edge to secure the drawstring.
Step 9: Finish the Seams and Turn the Bag Inside Out
With the main components in place, complete the bag by closing any remaining seams:
- Sew the Opening: Using the gap you left earlier, turn the bag right side out. Stitch the gap closed by hand or with a top stitch for a clean finish.
- Top Stitch the Edge: Sew around the top of the bag, about half an inch from the edge, to keep the lining in place and make a finished look.
Step 10: Add the Drawstring Stopper
The final step is installing the metal stopper, which will keep the drawstring securely closed:
- Thread the Stopper: Feed both ends of the drawstring through the stopper, using tweezers if needed.
- Tie the Ends: Knot the drawstring ends to prevent them from slipping through the stopper.
Optional Additions and Personalizations
A DIY chalk bag is highly customizable. Consider adding the following optional features:
- Reflective Tape: Reflective tape can improve visibility in low light and give your bag a unique look.
- Elastic Brush Holder: Attach a small elastic loop to hold a brush for cleaning climbing holds.
- Personalized Embroidery or Patches: Customize your bag with embroidery or patches for a personal touch.
Pros and Cons of DIY Chalk Bags
Explore the pros and cons of DIY chalk bags. Discover benefits like cost-effectiveness and customization vs. potential durability and quality issues.
Pros:
- Cost-Effective: Making your own chalk bag can be cheaper than purchasing one, especially if you already have fabric scraps.
- Customizable: You have complete control over the design, from fabric choice to additional features.
- Sustainable: DIY projects reduce waste by using available materials and allowing you to repair the bag as needed.
Cons:
- Time-Consuming: Sewing a chalk bag requires some time and patience, especially if you're new to sewing.
- Learning Curve: If you're not familiar with sewing techniques, there may be a learning curve, particularly with attaching the drawstring.
Care and Maintenance Tips
To ensure your chalk bag lasts:
- Regularly Clean the Bag: Empty out any excess chalk and hand wash the bag as needed. Avoid machine washing to preserve the fabric and structure.
- Check Seams and Drawstring: Periodically inspect the seams and drawstring for wear and tear. Reinforce any weakened areas to extend the bag's lifespan.
- Store Properly: When not in use, store your chalk bag in a dry area away from moisture.
Conclusion
Making a DIY chalk bag is a fantastic way to combine creativity and functionality. By making your own, you can ensure it meets your needs and style preferences. With a few materials and some basic sewing skills, you can craft a chalk bag that's not only practical but also a reflection of your personality. So gather your materials, follow this guide, and enjoy the process of making a chalk bag that's truly yours!
FAQs About DIY Chalk Bag
Discover answers to common questions about DIY chalk bags, including materials, steps, and tips for making your own chalk bag.
Yes, several materials can work. For example, duck canvas, often used in outdoor cushions, is durable and suitable. Other creative options include reusing rice bags or other thick fabric sources. Test for durability and comfort, as your bag will endure regular use.
The bag size can vary based on preference. A standard size holds enough chalk but remains portable, roughly 6-8 inches in height and 4-5 inches in diameter. Adjust dimensions if you prefer a smaller or larger bag.
Yes! Adding a zippered pocket is a popular choice for storing items like earphones or a small brush. Simply attach a zipper to a fabric piece and sew it to one of the bag panels before assembly for convenience.
You can draft a simple trapezoidal shape for each panel, as mentioned. Alternatively, search for printable chalk bag patterns online, or create one by copying the shape and size of an existing bag you like.
Use a smaller stitch length on your sewing machine to create tighter seams. Additionally, sew over high-stress areas, such as where the zipper meets fabric or around the drawstring hole, to prevent tearing with heavy use.
Use a seam ripper to make a small hole near the top of the exterior fabric. Then, use tweezers or a safety pin to guide the string through the casing maked around the bag's top. For extra security, add fabric loops to hold the string in place.
There are many options! Consider using bright or reflective fabrics, adding embroidery, or sewing on patches. A personalized chalk bag adds unique flair and makes it easy to spot at the gym.
Empty out excess chalk after each use, and hand-wash the bag with mild soap as needed. Avoid machine washing to preserve the fabric and construction. Inspect the seams regularly to catch any wear before it worsens.


