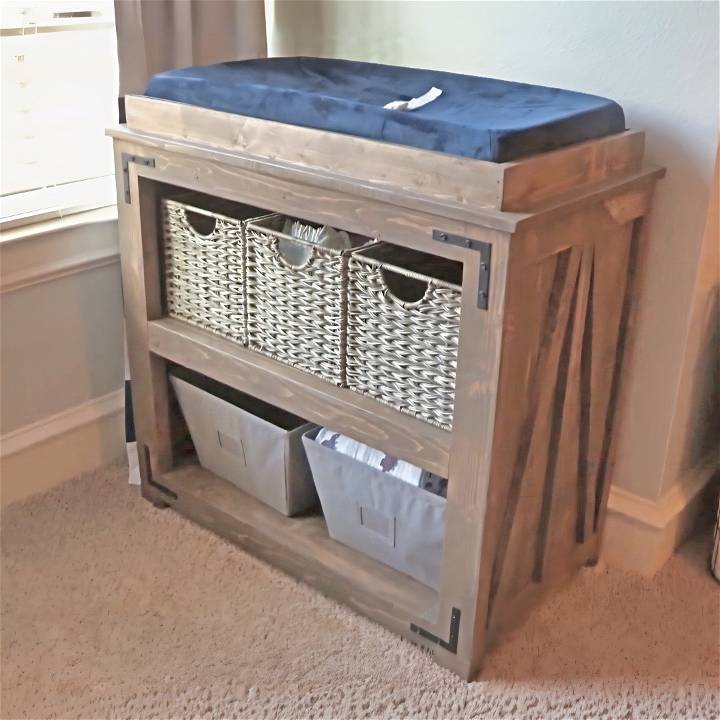
When my sister announced she was expecting, it inspired me to embark on a journey of building something special for her little one. A DIY changing table with storage seemed like the perfect blend of practical and heartfelt. Here's how I brought this idea to life, transforming a simple concept into a functional piece of furniture.
Preparing the Materials
To start, I gathered all my materials and tools, ensuring everything was on hand. Here's what I needed:
- Wood (various sizes for the frame, legs, and shelves)
- Wood glue
- Pocket hole screws (two and a half inch and one and a quarter inch)
- Brad nails
- Stain and paint
- Decorative metal corners (for added flair!)
Each material had its purpose. Wood serves as the base and structure, while wood glue and screws hold everything securely. The stain and paint make it visually appealing, and the decorative corners add a chic touch.
Building the Frame
Step 1: Constructing the Sides
I started by constructing the frame for the side of the changing table. This involved attaching the bottom runner 1.5 inches up from the bottom to build feet. This was crucial for stability. The top runners were flush to the top of the legs, with a 12-inch gap between the top and the middle runner.
Step 2: Adding the Side Runners and Legs
Next, side runners were attached to form the structure of the table's sides. This was where the changing table started to take shape. I laughed as I remembered the weirdest places I had changed a diaper, adding a personal touch to the process.
Placing the Shelves and Long Runners
After constructing the sides, it was time to add the shelves. I drilled three-quarter inch pocket holes around the boards for the shelves and attached them using wood glue and pocket hole screws. This process was repeated to attach the long runners to the other side of the changing table.
The Final Touches
Miter and Bevel Cuts for Angles
I then planned some cool angles, added some strategic cuts for flair, and ensured everything fit before I finally glued and nailed them down. This step made my changing table not just functional but also stylish.
Attaching the Top and Building the Frame
Flipping the whole structure upside down, I attached the top through all those pocket holes into the top. Then, it was time to build the frame that would hold the changing pad. Using one by three boards and miter cuts at 45-degree angles for the corners, the frame came together nicely.
Finishing Touches: Stain, Paint, and Decorative Corners
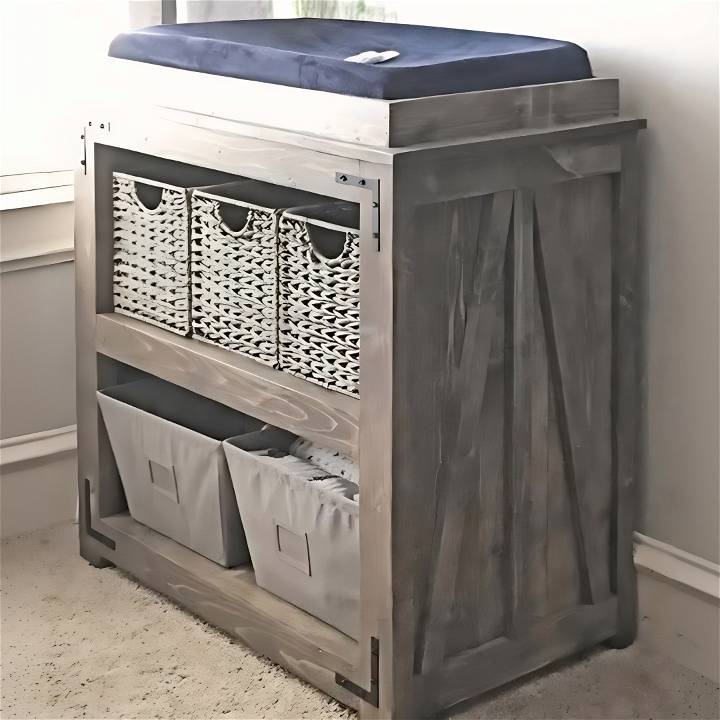
The last step was staining the wood and adding the decorative metal corners for that extra shine. It was the punctuation mark on my project, the final flourish that turned a bunch of wooden pieces into a beautiful, functional changing table.
Why This Project Mattered
This wasn't just about building furniture; it was about crafting memories and providing my sister with something special for her baby. Each step in the process, from the initial cuts to the final stains, was imbued with love and anticipation for the new arrival.
Tips and Tricks for Fellow DIYers
- Read and Reread Your Plans: Ensure you understand each step before drilling any holes.
- Measure Twice, Cut Once: A well-known adage that remains invaluable.
- Don't Skimp on the Glue: Ensure each connection is strong.
- Customize: Don't be afraid to add your personal touch, like the decorative corners.
- Safety First: Always wear the appropriate safety gear.
Constructing this DIY changing table was a meaningful experience for me. I hope it motivates others to start their own DIY projects and find joy in creating something new.
Customization Ideas for Your DIY Changing Table
Building a changing table that is both functional and unique can be a rewarding DIY project. Here's how you can add personal touches to your changing table:
Choose a Theme
Start by selecting a theme that matches your nursery. Whether it's a color scheme, a storybook character, or a natural motif, let this theme guide your customization choices.
Paint and Finishes
Paint your changing table to fit the theme. Use non-toxic, baby-safe paints to ensure safety. Consider chalk paint for a matte finish or a glossy sealant for easy cleaning.
Add Decorative Touches
Incorporate decals or stencils for artistic flair. You can also add trim or molding for a more finished look.
Functional Customizations
- Adjustable Shelves: Install shelves that can be moved to accommodate different storage needs.
- Hooks and Holders: Add hooks for hanging diaper bags or holders for wipes and lotions.
- Safety Rail: Ensure there's a safety rail on all sides, and consider padding it for extra protection.
Convertible Design
Plan for the future by making the changing table convertible. It could turn into a bookshelf, a desk, or a toy storage unit as your child grows.
Personalization
Add a personal touch with your baby's name or initials. This can be done with wooden letters or vinyl stickers.
By focusing on these customization ideas, you'll build a changing table that's not only practical but also a cherished piece of your nursery's decor.
Troubleshooting Common Issues
Building a DIY changing table can come with its set of challenges. Here's a guide to help you overcome common issues that might arise:
Stabilizing the Structure
If your changing table wobbles, check that:
- All legs are even. Use a level to verify.
- Joints are tight. Reinforce any loose connections with additional screws or brackets.
Aligning Components
Misalignment can occur when:
- Holes are not drilled straight. Use a drill guide to maintain alignment.
- Pieces are not cut uniformly. Measure twice and cut once to ensure accuracy.
Surface Finishing
For a smooth finish:
- Sand thoroughly before painting or staining.
- Apply multiple thin coats of finish rather than one thick coat.
Drawer Slides
If drawers aren't sliding smoothly:
- Check for obstructions in the tracks.
- Ensure slides are installed level and parallel to each other.
Safety Features
To ensure the changing table is safe:
- Verify that safety straps are secure.
- Ensure the changing pad is anchored properly to prevent slipping.
By anticipating these issues and knowing how to address them, you'll be better prepared to build a safe and sturdy changing table.
FAQs About DIY Changing Tables
Discover the answers to all your DIY changing table questions in this comprehensive FAQ guide. Learn how to build and customize your own changing table today!
What materials do I need to build a DIY changing table?
To build a DIY changing table, you'll need wood (like pine or plywood), screws, brackets, sandpaper, paint or stain, and tools such as a saw, drill, screwdriver, and measuring tape. Choose materials that are sturdy and safe for baby use.
How can I ensure the changing table is safe?
To ensure safety, make sure the table is stable and doesn't wobble, the corners are rounded or cushioned, and there's a safety strap or rail to keep the baby from rolling off. Regularly check for any loose screws or sharp edges.
Can I customize my changing table to match my nursery?
Absolutely! You can paint the changing table to match your nursery's color scheme, add decorative elements like stickers or decals, and even build in additional storage to match your needs. Just make sure all materials used are non-toxic and safe for babies.
What is the ideal height for a changing table?
The ideal height for a changing table is usually around 36 inches (91 cm). This height allows you to comfortably change diapers without bending over too much, reducing back strain. Adjust the height to suit your comfort.
How can I add more storage to my changing table?
You can add more storage by incorporating shelves, drawers, or baskets underneath the changing surface. Use dividers or containers to organize smaller items like diapers, wipes, and clothes for easy access.
Conclusion:
In conclusion, designing a DIY changing table can be a rewarding and practical project for any parent. By following these steps and utilizing your creativity, you can build a unique and functional piece for your nursery.


