Making a DIY charm necklace is an exciting way to express your personality. I remember the first time I made one. I gathered all my favorite trinkets: an old locket from my grandmother, a tiny key from a toy box, and a few colorful beads. The process was simple yet fulfilling. Anyone can do it, with just a few essential supplies and a little bit of creativity.
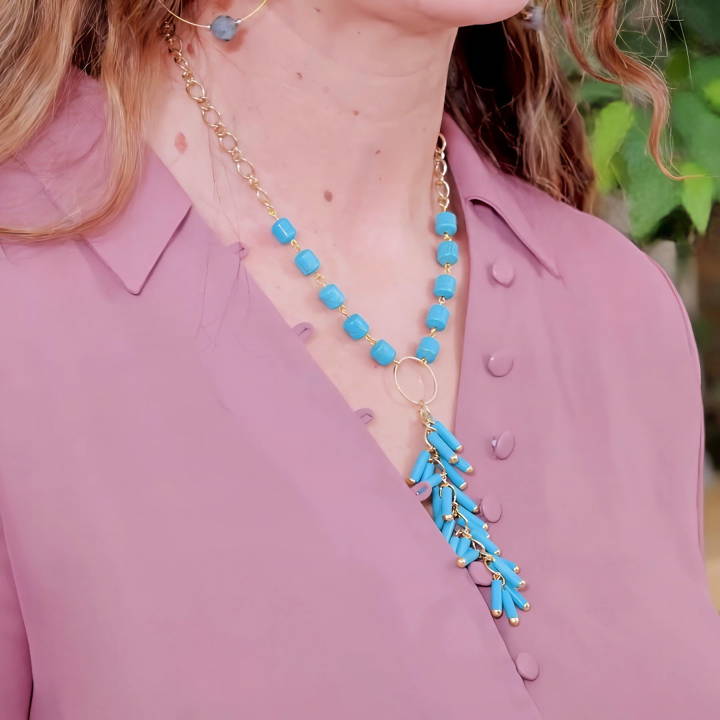
I started with a basic chain, some jump rings, and pliers. After deciding on the order of my charms, I attached each one carefully. The result was unique and meaningful. As I wore my new necklace, the charms jingled softly, reminding me of different parts of my life. Making a DIY charm necklace is fun, creative, and something special to wear proudly.
I believe making your own charm necklace can be just as enriching. These steps will help you make a necklace that's truly yours. Give it a try, and let your creativity shine.
Materials Needed
Before we dive into the making process, let's talk about the materials you'll need. This preparation step is crucial because having everything on hand makes the process smoother and more enjoyable. Here's what you're going to need:
- Flat Nose Plier and Chain Nose Plier: These tools are essential for opening and closing the links of your chain securely, without damaging them.
- Flush Cutter: To cut the chain to your desired length accurately.
- One Step Looper: This magical tool helps make perfect loops every time, which is essential for attaching your beads to the chain.
- Eye Pins and Head Pins: These pins will hold your beads in place and allow you to connect them to the necklace.
- Quick Link or Large Chain Link: This acts as the centerpiece where all your bead dangles will gather.
- Chain: Serves as the foundation of your necklace, essential for its structure.
- Tube Beads and Other Beads: These are the main stars of your necklace. Choose beads that you love the look of, and that complement each other well.
- Additional: Ruler (for measuring the chain), barrel beads (for a variation in bead texture), jump rings, and a clasp (if your chain doesn't include one).
Step by Step Instructions
Learn step-by-step how to make a charm necklace, from making and connecting bead components to crafting cha cha dangles and assembling the necklace.
Making the Bead Components
Learn how to make rosary-style bead components and connect bead components effortlessly with our step-by-step guide.
1. Rosary Style Bead Components
First, take your eye pins and the beads for the neck part of the necklace. Thread an eye pin through a bead and use the one-step looper to make a loop at the end. This technique is known as making a rosary-style component. Do this for all ten beads that will line the neck part of your necklace.
2. Connecting the Bead Components
Using your flat nose or chain nose plier, open the loop of one bead component slightly and hook another component to it. Close the loop securely. This step is easier using a bent chain nose plier, as it allows for better maneuverability. Connect five components for one side of the necklace, and replicate for the other side.
Crafting the Cha Cha Dangles
Learn how to make the perfect cha-cha dangles and attach them to a chain with our step-by-step guide. Ideal for jewelry-making enthusiasts!
1. Making the Dangles
Now, for the playful part of the necklace - the dangles. Slide your chosen beads onto head pins, then use the one-step looper to make a loop at the end, effectively making a dangle. Repeat this process for all 27 (or however many you prefer) dangles.
2. Attaching the Dangles to the Chain
Cut a chain length of approximately 2.5 inches for the bottom portion of your necklace. Attach the dangles to the chain by opening the loop slightly and hooking it to a chain link. Start by attaching a single dangle to the bottom link, then attach two dangles to the next link, continuing in this pattern until all dangles are securely attached.
Assembling the Necklace
Learn how to expertly assemble a necklace with our guide: connecting the components and adding the finishing touches for a perfect piece!
1. Connecting the Components
Take your large chain link or quick link and open one of its links slightly. Attach it to the chain you've prepared with the dangles. Then, connect the beaded components you made earlier to the same large link, effectively gathering all elements of your necklace.
2. Finishing Touches
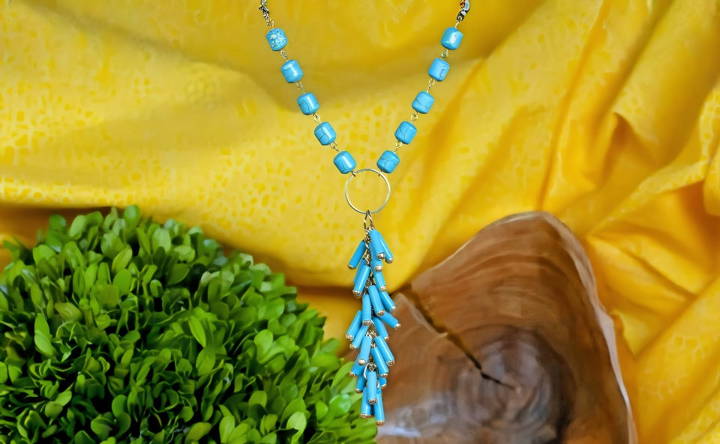
Finally, measure and cut two 10-inch lengths of chain (or your preferred length) for the back part of the necklace. If your chain does not have a clasp, attach one now using jump rings. Connect each chain to the ends of your beaded components, and voila, your Cha Cha Charm Necklace is complete!
Personalization Ideas
Making a charm necklace is a beautiful way to express your personality and hold close to the memories and moments that define you. Here are some personalization ideas to make your charm necklace truly unique:
- Initials and Names: Add charms with your initials or those of loved ones to make a personal touch. You can also include whole names or just a single letter for simplicity.
- Significant Dates: Commemorate special dates, such as birthdays or anniversaries, with number charms. This is a subtle way to keep important milestones close to your heart.
- Birthstones: Incorporate charms with birthstones for each month you want to celebrate. Each stone has its own meaning and adds a pop of color to your necklace.
- Hobby Symbols: Reflect your passions and hobbies through charms. Whether it's a musical note for music lovers, a paint palette for artists, or a book for avid readers, these charms tell your story.
- Travel Memories: If you love to travel, add charms that represent different places you've visited. This could be an Eiffel Tower for Paris or a palm tree for tropical destinations.
- Nature Elements: For those who love the outdoors, consider charms that represent nature, like leaves, flowers, or animals that have a special significance to you.
- Inspirational Quotes: Some charms come with engraved quotes or words. Choose sayings that inspire you and provide comfort or motivation.
- Mixing Metals: Don't be afraid to mix different metals for a modern twist. Combine silver, gold, and rose gold charms for a diverse and eye-catching look.
- Lockets: Include a locket charm where you can place a tiny photo or a written message. It's a classic and sentimental addition to any charm necklace.
- Cultural Symbols: Embrace your heritage with charms that reflect your cultural background. This could be a traditional symbol, flag, or landmark that holds personal meaning.
A charm necklace's beauty is in telling your story. Each charm is a life chapter, making your necklace a trove of personal tales and memories.
Troubleshooting Common Issues
When making charm necklaces, you might encounter a few hiccups along the way. Here's how to troubleshoot some common issues:
- Loose Charms: If charms are falling off, check the jump rings. If they're open, use pliers to gently close them.
- Tangled Chains: Lay the necklace flat and use two pins to carefully untangle knots. Patience is key!
- Discoloration: Metals can tarnish over time. Use a proper jewelry cleaner for the type of metal you have to restore its shine.
- Broken Clasp: A broken clasp can be replaced. Take it to a jeweler or use a jewelry repair kit if you're feeling handy.
Maintenance and Care
To keep your charm necklace looking its best, follow these care tips:
- Regular Cleaning: Gently wipe your necklace with a soft, dry cloth after wearing it to remove oils and dirt.
- Proper Storage: Store your necklace in a dry place, away from direct sunlight. Use a jewelry box with a soft lining.
- Avoid Chemicals: Remove your necklace before swimming or using cleaning products to prevent damage.
- Professional Check-Up: Once a year, have a jeweler check your necklace for any wear and tear.
FAQs About How to Make a Charm Necklace
Discover answers to frequently asked questions about making a charm necklace. Learn tips and techniques for making personalized jewelry easily at home.
Attaching charms to your necklace chain is a simple process:
Use pliers to twist open a jump ring.
Slide the charm onto the jump ring.
Hook the jump ring through a link in the necklace chain.
Use pliers to twist the jump ring closed, ensuring it is securely fastened.
Absolutely! Mixing different types of charms can add personality and uniqueness to your necklace. Consider combining initial charms, colorful beads, or various shapes and symbols to make a piece that truly represents you.
Inspiration for your charm necklace can come from many sources. You might look at fashion blogs, jewelry making tutorials on platforms like YouTube, or social media sites where crafters share their creations. Remember, the goal is to make something that resonates with you personally.
To keep your charm necklace looking its best:
Store it in a dry place when not in use.
Avoid exposing it to harsh chemicals like chlorine or cleaning agents.
Clean it gently with a soft cloth to remove any tarnish or buildup.
Selecting the right chain for your charm necklace is important for both style and comfort. Here are some tips:
Material: Chains can be made from a variety of materials, including gold, silver, and stainless steel. Choose a material that matches your skin tone and is less likely to cause an allergic reaction.
Length: The length of the chain will determine where the necklace sits on your chest. Common lengths are 16 inches (choker), 18 inches (at collarbone), and 24 inches (below the chest).
Strength: Make sure the chain is sturdy enough to hold all your charms without breaking.
Clasp: A lobster clasp is easy to use and provides a secure closure, ensuring your necklace stays in place.
Conclusion
In conclusion, learning how to make a diy charm necklace that's all you can be a rewarding project. It's a creative way to express your style and make personalized accessories. Use unique materials and your favorite charms to craft a necklace that truly reflects your taste. Now equipped with the steps and tips shared, you can start making your own DIY charm necklace today.


