Building something with your own hands can be very satisfying. One project that stood out for me was making a DIY chess board. I always found chess fascinating, and building a board from scratch made it even more special. The process isn't hard, and the materials are easy to find. You'll need wood, paint, and some basic tools.
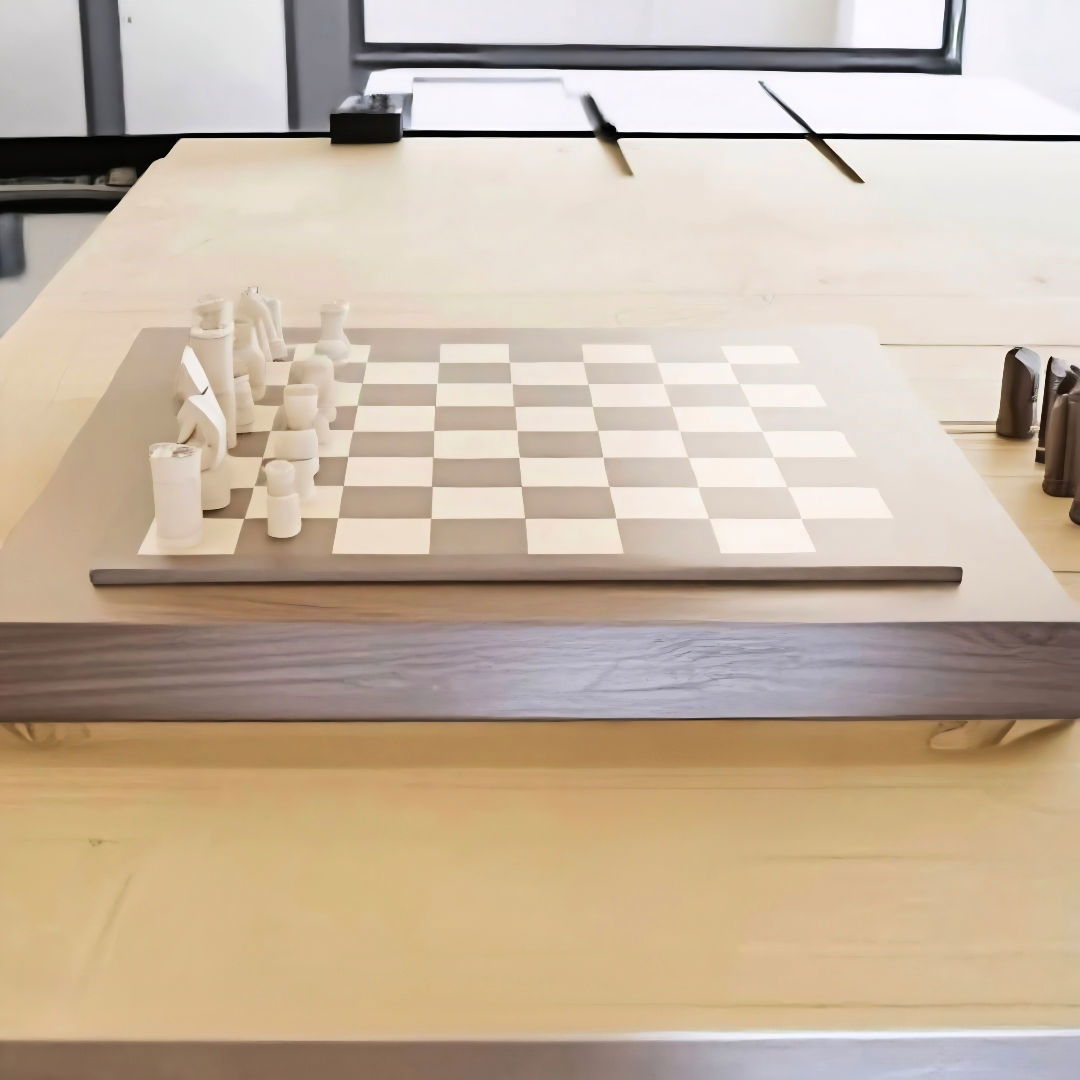
Starting can seem daunting but taking it step by step makes it manageable. Measure and cut the wood into squares, then arrange them in the classic black and white pattern. Glue them onto a larger board, and you've got your basic chessboard. Painting each square requires patience, but it's worth it. When you see the final product, you'll be proud of your work.
Materials Needed:
- Walnut and Maple Wood: For the chess board squares. Walnut and maple contrast beautifully, making the chessboard visually appealing.
- Mahogany Wood: For detailing between squares. This adds a subtle, refined touch to the board.
- MDF: As a base for the chessboard. MDF provides stability, preventing warping and ensuring the board stays flat over time.
- Thin Strips of Wood: For making the chess pieces. You'll shape these into your knights, rooks, bishops, etc.
- Veneer Glue: To attach the chessboard to the MDF. This ensures a durable bond.
- Sandpaper: Sandpaper is used to smooth the board and pieces. Smooth surfaces are essential for a quality finish.
Step by Step Instructions
Learn how to make your own chess board with our easy, step-by-step DIY chess board instructions. Perfect for hobbyists and chess lovers!
Starting with the Chess Board:
Learn how to build a stunning chessboard. From cutting strips to gluing and adding mahogany details, assemble your board on mdf for a flawless finish.
Cutting the Strips:
First, cut two-inch-wide strips of walnut and maple wood. The alternating colors of these woods build the checker pattern classic to chess boards. Accuracy in cutting these strips is crucial for the aesthetics of your board.
Adding Detail with Mahogany:
Before assembling the walnut and maple strips, cut thin strips of mahogany for an extra layer of detail between the squares. This step isn't necessary, but it elevates the board's look, giving it an artisan feel.
Gluing the Strips:
Glue the walnut, maple, and mahogany strips together, alternating between walnut and maple, with a strip of mahogany in between. Ensure everything is perfectly aligned. Once dry, cut this assembly into two-inch strips again, and glue these strips together, offsetting them to build the chessboard pattern. Add mahogany strips between these as well.
Attaching to MDF:
Once the glue has dried and you've sanded the board smooth, attach your thin chessboard veneer to a piece of MDF using veneer glue. This step is vital to prevent the board from warping.
Crafting the Box and Compartments:
Learn how to craft a custom box with compartments, prepare walnuts, make precise rabbets and miters, and add intricate details for a professional finish.
Preparing the Walnut:
Mill some chunks of walnut for the sides of the box which will hold the board and pieces. Thickness is key here; it determines the compartment's height underneath the board.
Rabbets and Miters:
Cut rabbets into the top and bottom of the box pieces for the board to sit in and for attaching a bottom panel. Then, cut miters for assembling the box, ensuring everything fits snugly around the chessboard.
Adding Details:
Glue thin strips of mahogany onto the upper rabbets for a decorative detail, trim them flush, and then sand as needed. Beveling the box edges can also add a sleek, refined touch.
Making the Chess Pieces:
Learn how to make chess pieces with easy design tips, including crafting the knight, rook, and bishop, plus sanding and finishing techniques.
Simplify the Design:
I opted for geometric shapes that can easily be cut from the thin strips of wood. This approach makes it easy to build uniform, recognizable pieces.
The Horse, the Castle, and the Pointy One:
- The Knight (Horse): Shape the wood into a simple horse head silhouette.
- The Rook (Castle): A straightforward rectangular shape with notches to resemble a castle.
- The Bishop (Pointy One): A taller, slender piece with a diagonal cut at the top.
Sanding and Finishing:
Once all pieces are cut, spend a good amount of time sanding them smooth. This not only improves the look but also the tactile experience when playing.
Final Assembly:
With all components made, the last step is assembly. Ensure the chess board is securely fixed to the box and that each piece fits well within the compartments. This is a good time to apply any finish or sealant to protect the wood and bring out its natural beauty.
Design Customization Ideas
Building a DIY chess board is not just about crafting a playing surface; it's an opportunity to express your creativity and make a piece that's uniquely yours. Here are some design customization ideas to inspire you:
- Choose Your Wood Wisely: Different woods can give your chess board a distinct look and feel. For a classic look, consider walnut or maple. If you're adventurous, try mixing woods like mahogany and ash for contrast.
- Burn Baby Burn: Wood burning, or pyrography, allows you to add intricate designs or personal messages to your board. It's a way to add a personal touch that's both beautiful and permanent.
- Color It Up: Don't shy away from color. Use stains or paints to add vibrant hues or subtle shades to your board. You can even paint the squares in a checkerboard pattern or use a color gradient for a modern twist.
- Tile It Out: For a truly unique board, use tiles instead of wood for the playing surface. Ceramic, glass, or stone tiles can build a mosaic effect that's both eye-catching and durable.
- Add a Border: Frame your chess board with a border of a contrasting color or material. This not only adds to the aesthetic but also helps protect the edges of your board.
- Personalize Your Pieces: Customize your chess pieces to match your board. Paint them, carve them, or even 3D print them in shapes that reflect your personality or interests.
- Engrave Your Legacy: Engraving your name, a special date or a quote on the side or back of the board can make it a memorable heirloom to pass down through generations.
- Functional Art: Consider adding a drawer or storage compartment for your chess pieces. It's practical and adds another element of design to your board.
The key to a great DIY project is making it your own. So, let your imagination run wild and build a chess board that reflects your style and passion for the game.
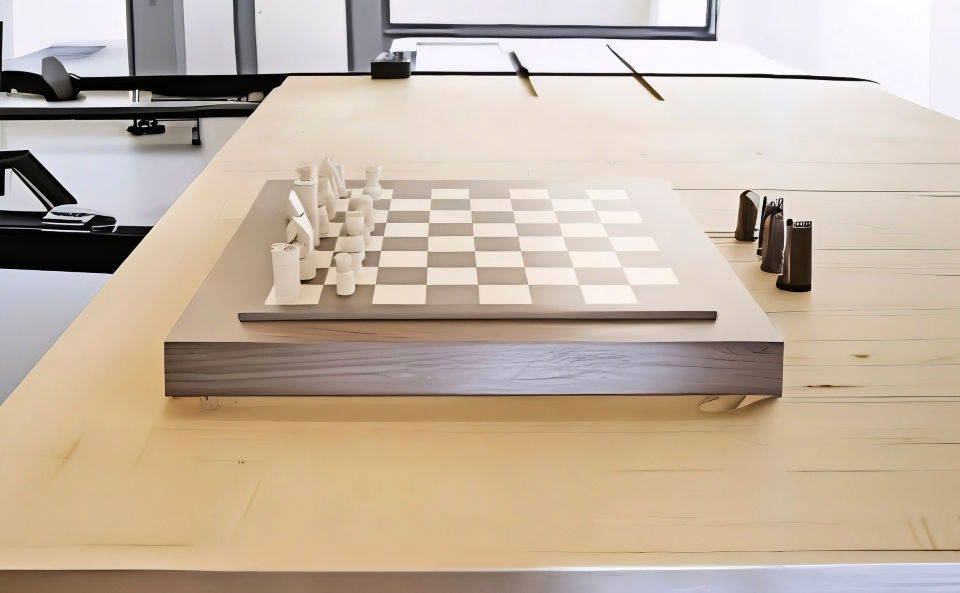
Skill Level Assessment
When embarking on the journey of making a DIY chess board, it's important to assess your skill level to ensure a successful and enjoyable project. Here's how you can gauge your readiness and choose a project that matches your abilities:
Beginner:
If you're new to woodworking or crafting, look for projects labeled as ‘beginner-friendly' or ‘for beginners.' These will typically require minimal tools and simple techniques. For a beginner's chess board, consider using pre-cut wood and a straightforward design.
Intermediate:
If you have some experience with tools and have completed a few projects, you might be ready for intermediate-level work. This could involve more precise cuts, inlays, or the use of power tools. An intermediate project might include making a chessboard with a unique pattern or multiple wood types.
Advanced:
For those with extensive experience and a well-equipped workshop, an advanced project could be the right challenge. This might involve intricate marquetry, carving, or incorporating materials like metal or glass into your design.
Tips for All Levels:
- Always read through the entire set of instructions before starting.
- Gather all your materials and tools in advance.
- Don't rush. Take your time to measure twice and cut once.
- If you're unsure about a technique, watch tutorial videos or ask for advice from more experienced crafters.
The goal is to enjoy the process as much as the final product. Choose a project that aligns with your skills, and don't be afraid to learn something new along the way.
FAQs About DIY Chess Board
Discover everything you need to know about making a DIY chess board—from materials to assembly tips—with FAQs, perfect for enthusiasts and beginners.
Start by ripping the boards to 1-1/2 inches on a table saw. You can also use pre-cut 1x2 boards, but ensure their edges are perfectly square. Then, use a miter saw to rough cut the boards to a length of 16 inches, which gives you some leeway when gluing and cutting them into strips later.
Once the glue has dried, sand or plane the chessboard to smooth out any unevenness. Measure the chessboard and cut the plywood to size for the base. Attach the plywood to the back of the chessboard with glue and nails. Finally, apply a clear coat to protect the wood and give it a polished look.
Yes, you can make your own chess pieces to match your board. You'll need additional wood for the pieces, and you may choose to stain half of them for the darker color. Use a lathe or carving tools to shape the pieces, or if you prefer a simpler method, different sized drill bits can build distinguishable pieces for each role.
To ensure your chess board squares align correctly, measure and mark the board carefully before cutting. Use a square tool to check the angles and make sure they are 90 degrees. When gluing the strips together, use bar clamps and check the alignment with a ruler or measuring tape. It's important to let the glue dry completely before unclamping.
There are many ways to customize your chess board. Consider using inlays for a decorative touch or engraving the edges with a personal message or design. You can also experiment with different types of finishes, such as stain, wax, or paint, to add color or sheen to your board. For a truly unique chess board, try adding a drawer for piece storage or magnetic strips to keep the pieces in place.
Conclusion:
This project is a fantastic way to spend an afternoon. Making your own DIY chess board not only provides a useful game piece but also offers a sense of achievement. I'm sharing this with you because I believe it's a rewarding experience. Give it a try; you'll gain new skills and a unique chessboard.


