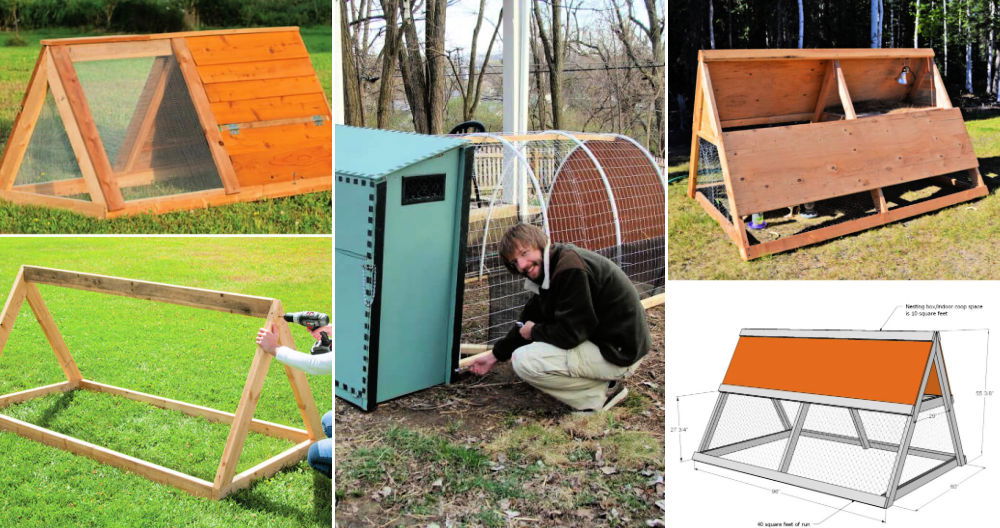
Making a homemade DIY chicken brooder isn't just about gathering materials; it's about providing the best start for your chicks. By crafting your own brooder box, you're tailoring their early environment to fit their needs perfectly. This introduction to chicken brooding will guide you through the essential steps, helping you understand why brooding is important and the pivotal role it plays in a chicken's life cycle. With practical advice, this guide is designed to make the process accessible and straightforward.
As you move forward, you'll learn about choosing the right brooder, which involves considering various types and understanding the materials and tools required. This section is crucial for anyone ready to take the next step in ensuring their chicks thrive from the outset. By the end of this introduction, you'll be well-equipped to start building your DIY chicken brooder, with detailed steps and tips to lead you through from planning to final touches.
Let's get started on this rewarding endeavor that sets the foundation for healthy, happy chickens.
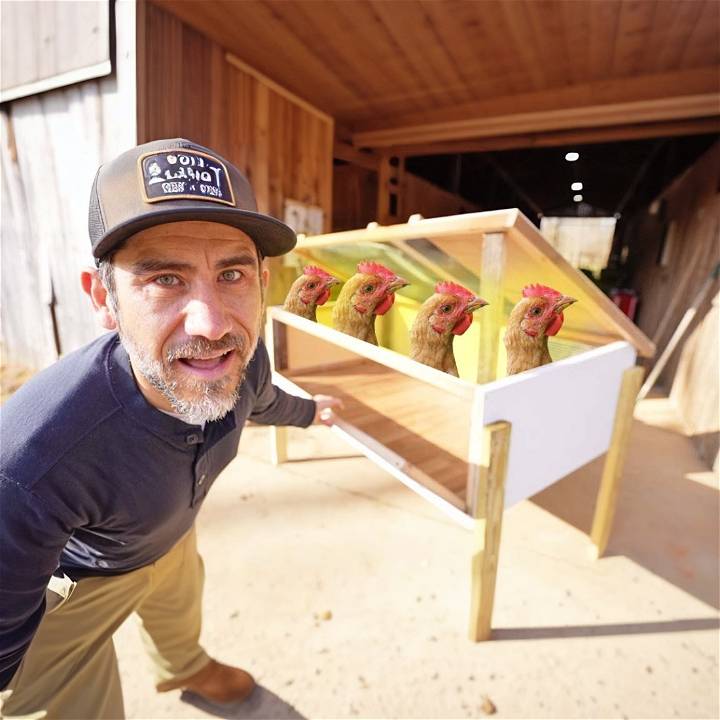
Introduction to Chicken Brooding
Chicken brooding is a crucial phase in the life cycle of a chicken. It's the period immediately after hatching when the chicks need additional heat and care until they are capable of maintaining their own body temperature.
Why is Brooding Important?
Brooding is essential for the survival and health of newly hatched chicks. During the first few weeks of their lives, chicks are unable to regulate their body temperature effectively. They depend on the heat provided by the mother hen or an artificial heat source in a chicken brooder. Without this heat, chicks can become chilled, which can lead to illness or even death.
The Role of Brooding in a Chicken's Life Cycle
Brooding sets the foundation for a chicken's life. It's during this period that chicks develop their first feathers and start to exhibit social behaviors, such as pecking and scratching. Proper brooding ensures that chicks grow into healthy, productive adult chickens.
Remember, brooding is not just about providing heat. It also involves ensuring the chicks have access to clean water, nutritious food, and a safe, clean environment. It's a commitment that requires time, resources, and knowledge. But with the right preparation and care, brooding can be a rewarding experience that sets your chicks up for a healthy start in life.
I hope this clarifies chicken brooding. Next, we'll discuss choosing, setting up, and maintaining a brooder, as well as other important aspects of brooding. Stay tuned! 🐣
Choosing the Right Brooder
Choosing the right brooder is a critical step in the brooding process. The brooder serves as a temporary home for your chicks, providing them with the warmth and security they need to thrive.
Types of Brooders
There are several types of brooders available, each with its own advantages and disadvantages. Here are a few common types:
- Cardboard Box Brooder: This is the simplest and most cost-effective type of brooder. It's easy to set up and ideal for small-scale poultry keepers. However, it's not very durable and can be difficult to clean.
- Plastic Bin Chicken Brooder: Plastic bins are more durable than cardboard boxes and are also easy to clean. They're a bit more expensive but can be used repeatedly.
- Commercial Brooder: These are specially designed for brooding chicks and come with built-in heating elements and feeders. They're the most expensive option but offer the best environment for your chicks.
Factors to Consider When Choosing a Brooder
When choosing a brooder, consider the following factors:
- Size: The brooder should be spacious enough to accommodate all your chicks without crowding. As a rule of thumb, each chick should have at least 2 square feet of space.
- Heat Source: The chicken brooder should have a reliable heat source to maintain the right temperature. Heat lamps are commonly used, but make sure they're securely fastened to prevent accidents.
- Ventilation: Good ventilation is crucial to prevent the buildup of ammonia from the chicks' droppings. However, make sure drafts are minimized as they can chill the chicks.
- Ease of Cleaning: The brooder should be easy to clean to maintain a healthy environment for the chicks.
The right brooder for you depends on your specific circumstances, including the number of chicks you're brooding, your budget, and the space you have available. Take the time to consider your options and choose the brooder that best meets your needs. 🐣
Materials Needed
- Scrap wood (1x1s and plywood)
- Mesh wire (half-inch scraps preferred)
- Narrow crown stapler (or hammer and staples as an alternative)
- Angle grinder with cutoff wheel
- Circular saw
- Paint
- Screws and pilot hole drill
- Draw latch for door locking
- Large, shallow water trough
- Vinyl sheet for easy cleaning
- Heat lamp
Tools & Equipment
- Safety goggles
- Gloves
- Measuring tape
- Sawhorses (optional)
Steps to Build Your DIY Brooder
Learn how to build your own DIY chicken brooder in a few simple steps below:
1. Planning Your Space
Calculate the needed space based on the number of chicks, adhering to at least half a square foot per chick for comfort.
2. Prepping the Wood
Using scrap wood, measure and cut 1x1s for the frame and plywood for the siding. Prioritize reusing materials to keep costs low and the project eco-friendly.
3. Constructing the Frame
Assemble the 1x1 wood scraps into a rectangular frame. Secure corners with screws, ensuring stability.
4. Adding the Mesh
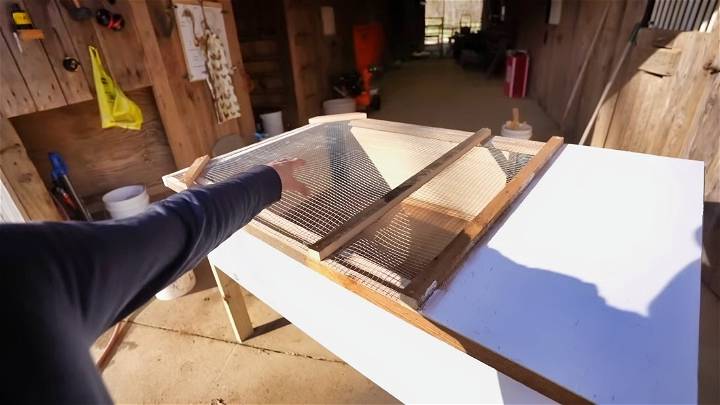
Cut the mesh wire to fit one side of the frame, making a ventilation window. Use a narrow crown stapler to fasten the mesh securely to the wood. This tool is especially handy for a one-person job, making the process smoother and quicker.
5. Saw Work
With the circular saw, make any needed adjustments to the wood pieces, ensuring they fit perfectly into your DIY chicken brooder design. Remember, a circular saw is a versatile tool capable of handling various cuts, making it indispensable for this project.
6. Painting
Before further assembly, paint all wooden parts for weatherproofing and easier cleaning. Allow the paint to dry completely.
7. Assembling Walls and Floor
Attach the plywood walls to the frame using screws. For the bottom, ensure the use of a sturdy piece of plywood to support the chicks and bedding material.
8. Preparing the Door
Install a small door using hinges for easy access. A draw latch will keep the door securely closed, protecting your chicks from predators.
9. Final Touches
- Incorporate a large, yet shallow, water trough suitable for the size of your chicks. This allows easy access without the risk of drowning.
- Lay a vinyl sheet over the bottom for effacing cleaning. Secure its edges but leave it removable for thorough washouts.
- Install a heat lamp above the brooder, ensuring it's positioned to provide consistent warmth without overheating any area.
Video Tutorial
For a step-by-step video tutorial, check out sow the land's DIY chicken brooder guide.
It pairs well with this written guide, bringing the construction process to life, making it easier to follow along and visualize each step as you go.
Building a DIY chicken brooder saves money and gives satisfaction. With patience and tools, you can make a safe space for chicks to thrive. Customize as needed.
Maintaining the Chicken Brooder
Maintaining the brooder is a crucial aspect of brooding that ensures your chicks grow in a clean and healthy environment. Here's a detailed guide on how to do it effectively.
Regular Cleaning
Regular cleaning is essential to prevent the buildup of waste and bacteria. Depending on the number of chicks and the size of the brooder, you may need to clean it daily or every few days.
- Remove and replace the bedding: Bedding can quickly become soiled with chick droppings. Regularly remove the old bedding and replace it with fresh, clean bedding.
- Clean the feeders and waterers: Chicks can often spill food and water, leading to a buildup of waste. Clean the feeders and waterers regularly to prevent this.
Monitoring Temperature
The temperature within the brooder should be monitored and adjusted as needed. The temperature should start at around 95°F (35°C) during the first week and decrease by about 5°F (3°C) each week until it reaches room temperature.
- Use a reliable thermometer: A reliable thermometer is essential for accurately monitoring the temperature within the brooder.
- Adjust the heat source: If the temperature is too high or too low, adjust the heat source accordingly. Remember, overheating can be just as dangerous as chilling.
Observing Chick Behavior
Chick behavior can often indicate if the conditions within the brooder are optimal.
- Huddling under the heat source: If the chicks are huddling under the heat source, they may be cold, and the temperature should be increased.
- Avoiding the heat source: If the chicks are avoiding the heat source and staying on the edges of the brooder, they may be too hot, and the temperature should be decreased.
Maintaining the brooder is not a one-time task but a continuous process that requires regular attention and care. With these tips, you can ensure your brooder remains a safe and healthy environment for your chicks. 🐣
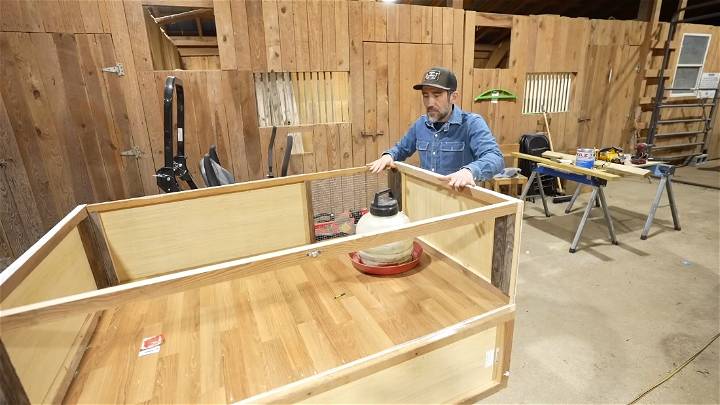
Feeding and Watering
Feeding and watering are two of the most critical aspects of brooding. Providing your chicks with the right nutrition and clean water is essential for their growth and development.
What to Feed Your Chicks
Newly hatched chicks should be fed a starter feed that's specifically formulated for them. This feed contains the right balance of nutrients that chicks need for their rapid growth.
- Starter Feed: This is a high-protein feed designed for chicks from hatching until they are about 6 weeks old. It typically contains about 20-24% protein.
- Grower Feed: After 6 weeks, you can transition your chicks to a grower feed, which has slightly less protein (about 15-18%).
Remember to provide feed in a shallow dish or a chick feeder to prevent wastage and ensure easy access for the chicks.
Watering Your Chicks
Chicks need constant access to clean water. However, because they are so small, they can easily drown in a deep water dish. Here's how to water your chicks safely:
- Use a Chick Waterer: This is a shallow dish with a narrow lip that prevents chicks from getting into the water and drowning.
- Keep the Water Clean: Chicks can dirty their water very quickly, so it's important to change the water daily.
Tips for Feeding and Watering
Here are some additional tips to keep in mind:
- Avoid Overcrowding: Make sure there's enough space for all your chicks to eat and drink without crowding each other.
- Monitor Your Chicks: Keep an eye on your chicks to make sure they are all eating and drinking. If a chick is not eating or drinking, it may be sick.
Feeding and watering your chicks properly will ensure they grow into healthy, productive chickens. Remember, a good start is half the battle won! 🐣
Troubleshooting Common Problems
Raising chicks in a brooder is a rewarding experience, but it can also present some challenges. Here's a guide to troubleshooting common problems you might encounter.
Overheating or Chilling
One of the most common issues is maintaining the right temperature in the brooder. Overheating and chilling can both be harmful to chicks.
- Signs of Overheating: If chicks are panting, have their wings spread, and are staying away from the heat source, they might be too hot.
- Signs of Chilling: If chicks are huddled together under the heat source and are peeping loudly, they might be too cold.
Solution: Regularly check the temperature in the brooder and adjust the heat source as needed. Remember, the temperature should decrease by about 5°F each week.
Dehydration
Chicks can become dehydrated if they don't have constant access to clean water.
- Signs of Dehydration: Lethargy, sunken eyes, and dry, stickybeaks are signs of dehydration.
Solution: Always ensure that fresh, clean water is available. If a chick becomes dehydrated, you can give it an electrolyte solution to help it recover.
Pasting Up
Pasting up is a condition where droppings stick to the chick's vent, preventing it from defecating.
- Signs of Pasting Up: A chick with pasting up will have droppings stuck to its vent area.
Solution: If you notice a chick with this issue, gently clean the area with a warm, wet cloth. Be careful not to pull on the droppings as this can injure the chick.
The key to troubleshooting is observation. Regularly check on your chicks and take note of any changes in their behavior or appearance. With prompt action, most issues can be resolved quickly and easily. 🐣
FAQs About DIY Chicken Brooder
Learn all about DIY chicken brooders with our comprehensive FAQs guide. Get tips and tricks for making a safe and comfortable environment for your chicks.
Q1: How long do chicks need to stay in the brooder?
A1: Chicks typically stay in the brooder until they are fully feathered, which is usually around 5-6 weeks of age.
Q2: What temperature should the brooder be?
A2: The brooder should start at around 95°F (35°C) for the first week and decrease by about 5°F each week until it reaches room temperature.
Q3: What should I feed my chicks?
A3: Chicks should be fed a starter feed that's specifically formulated for them. This feed contains the right balance of nutrients that chicks need for their rapid growth.
Q4: How often should I clean the chicken brooder?
A4: The frequency of cleaning depends on the number of chicks and the size of the brooder. However, it's generally a good idea to clean the brooder daily or every few days.
Q5: How can I tell if my chicks are too hot or too cold?
A5: Chicks will give you signs if they are uncomfortable. If they are too cold, they will huddle under the heat source. If they are too hot, they will move away from the heat source and may pant or spread their wings.
Q6: When does a broody hen start laying again?
A6: A broody hen that hatches and raises chicks will stop laying for a week or so before the chicken keeper reacts and supplies her with hatching eggs. Then, she'll sit for the 21 days it takes to incubate chicken eggs. And she'll raise her chicks for anywhere from three or four weeks to the full six or eight weeks at which most mother hens send their chicks forth. It may take a week or so after mama and chicks part ways for her hormones to trigger a resumption of egg laying.
Q7: Are broody hens aggressive?
A7: Broody hens are much more assertive and even aggressive than their regular selves. If you reach into a broody's nest while she's sitting, she is liable to puff up her feathers, shriek, and even peck your hand hard.
Q8: What is brooding in poultry production?
A8: Brooding is defined as the management of chicks from one day old to about 8 weeks of age, and it involves the provision of heat and other necessary care during chicks' early growing period.
Q9: What are the types of brooding?
A9: There are two types of brooding: natural and artificial. Natural brooding is used on farms where only a few chickens are raised each year. Depending on her size, a hen will brood 15-20 chickens. The broody hen will provide all the warmth required by the chicks. Artificial brooding is the handling of newly born chicks without the aid of hens. It is accomplished by means of a temperature-controlled DIY chicken brooder.
Q10: What are common health issues during chicken brooding?
A10: Some common health issues during chicken brooding include overheating, chilling, dehydration, and pasting up (a condition where droppings stick to the chick's vent, preventing it from defecating).
Remember, every chick and every brooding experience can be unique. If you have a question that's not covered here, don't hesitate to seek advice from experienced poultry keepers or professional resources. Happy brooding! 🐣
Conclusion:
In conclusion, building a homemade DIY chicken brooder is not only a cost-effective solution for raising healthy chicks but also an immensely satisfying project. With a clear understanding of the importance of brooding and the necessary steps involved in making your chicken brooder box, you're well-equipped to provide a warm, safe environment for your young poultry.
Keep in mind the significance of choosing the right materials, maintaining the ideal temperature, and regular cleaning to ensure your chicks thrive. Armed with this guide and a bit of effort, your journey into poultry raising will be off to a fantastic start. Happy brooding!


