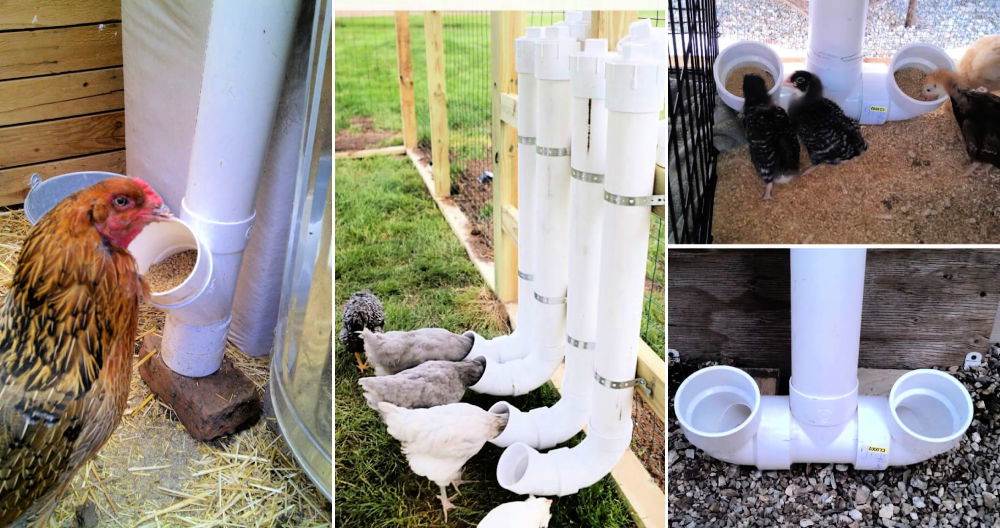
As a homesteader with a keen interest in poultry, managing feed wastage effectively has been a challenge I've encountered over time. Expensive commercial feeders and my handcrafted ones seemed inadequate in curbing this issue. Inspired by a Provident Prepper video, I embarked on a journey to make an inexpensive, waste-reducing chicken feeder. Here's how I did it, step by step.
Understanding the Need for a New Feeder
My decision to make a new feeder was driven by the observation of excessive feed waste with my existing setup. The chickens kicked out too much feed, leading to unnecessary losses, especially with the rising feed prices. This situation called for a cost-effective and efficient solution.
Materials Used
- 10-foot PVC pipe (3-inch diameter)
- Why? It serves as the main body for the feeder, offering durability and ease of cleaning.
- 90-degree PVC elbow and 45-degree PVC elbow
- Why? These parts direct the feed towards the chickens, making access easier and reducing waste.
- PVC cap
- Why? To keep the feed dry and prevent contamination from the external environment.
- Couplings and Small Scrap Pieces of PVC
- Why? For connecting different parts of the feeder without glue, allowing for easy assembly and disassembly.
- Mounting Brackets or Plumber's Tape
- Why? To securely anchor the feeders on the wall, keeping them in place.
- Saw (if PVC isn't pre-cut) and Drill
- Why? For cutting the PVC pipe into desired lengths and making holes for mounting.
Step by Step Guide DIY Chicken Feeder
Learn how to make a DIY chicken feeder with this step-by-step guide. Cut, assemble, attach, mount, and fill for happy hens!
Step 1: Cutting and Assembling
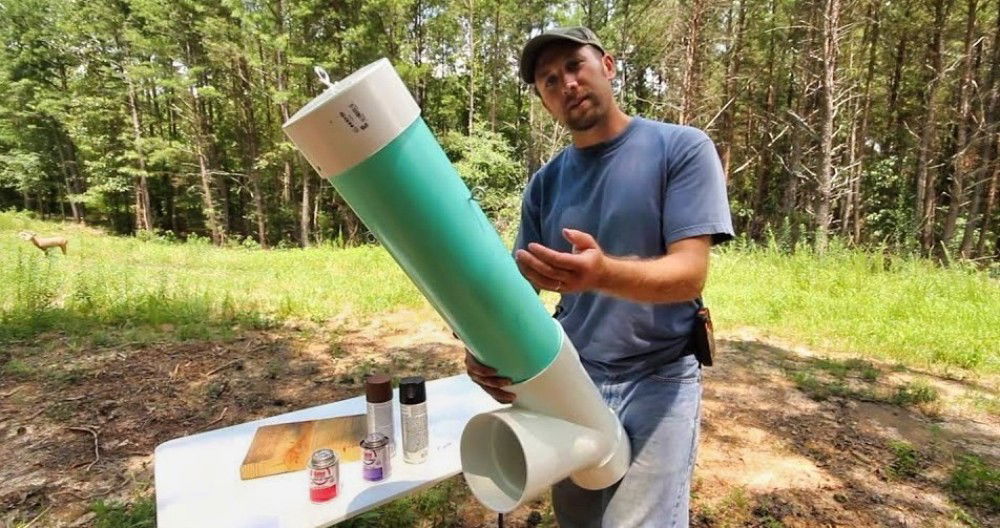
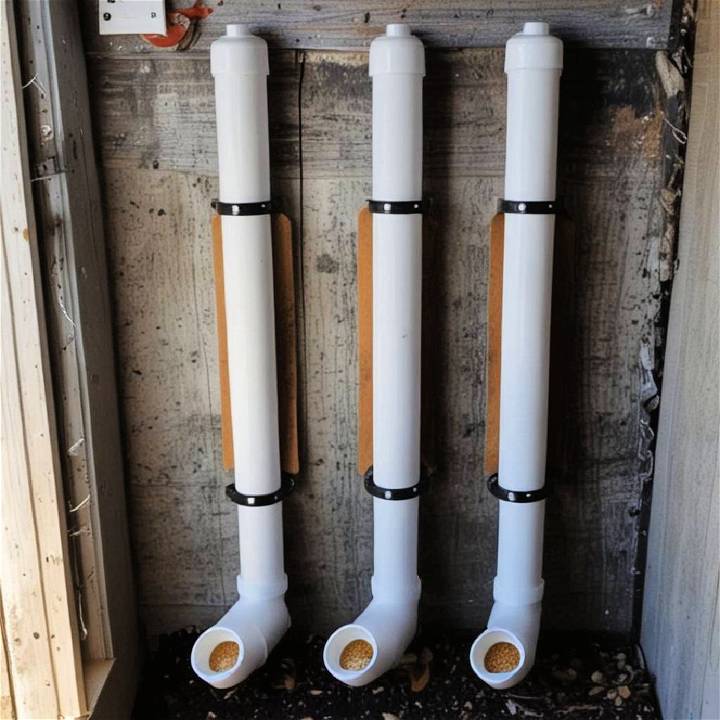
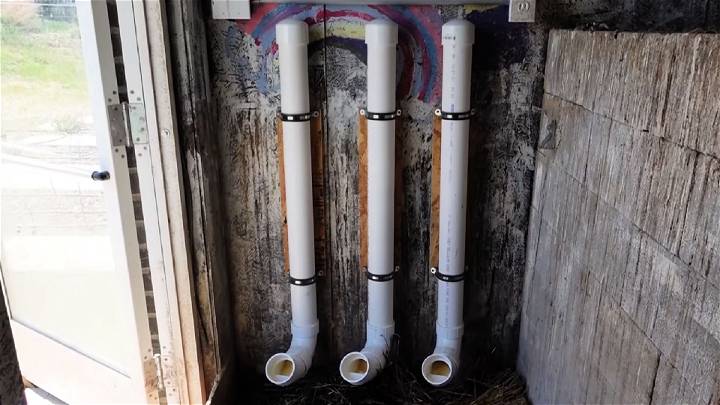
I began by dividing the 10-foot PVC pipe into three equal sections, each around 3.3 feet long, ensuring there was no waste. The 90-degree elbow was attached to one end of each pipe section, acting as the bottom where the feed would be accessible to the chickens. The 45-degree elbow was used atop the pipe, serving as the feeder's entry point.
Step 2: Attaching the Cap
A PVC cap was placed on the other end of the 45-degree elbow to keep the feed dry and clean. It was crucial for maintaining feed quality, especially during adverse weather conditions.
Step 3: Mounting the Feeders
I used mounting brackets to secure each assembled feeder against the coop's interior wall. This step required making sure the feeders were at an appropriate height for my chickens to eat comfortably without straining or jumping.
Step 4: Filling the Feeders
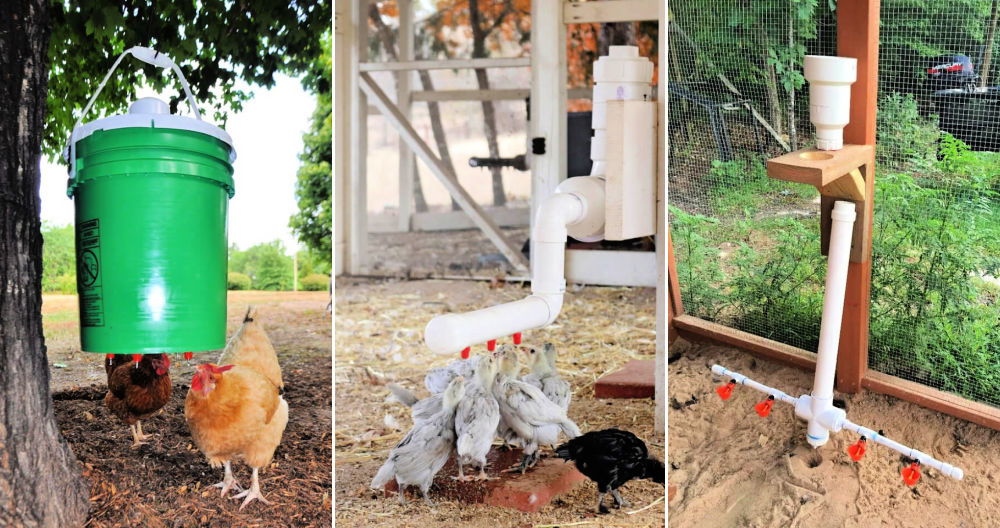
Initially, I used a flexible cup to pour feed into each feeder. However, I planned to switch to a funnel for easier refilling. This small change promised to make refilling a breeze, even in cramped coop spaces.
Observations and Adjustments
After installation, I noticed immediate improvements. Feed waste reduced significantly as the feeders dispensed smaller amounts, minimizing spillage. The chickens adapted quickly to the new feeders, and the coop floor stayed cleaner, further confirming the efficiency of this setup.
The ease of maintenance and cleaning was also a notable benefit. The PVC material made it simple to wash and dry the feeders, ensuring hygiene was maintained within the coop.
Comprehensive Guide to Chicken Nutrition
When it comes to raising healthy chickens, understanding their nutritional needs is key. A well-designed DIY chicken feeder can help ensure that your flock gets a balanced diet, which is crucial for their growth, egg production, and overall health.
Essential Nutrients for Chickens
Chickens require a variety of nutrients to thrive:
- Proteins: Essential for growth, repair, and egg production. Sources include soybean meal, fish meal, and meat scraps.
- Carbohydrates: Provide energy. Grains like corn and wheat are common sources.
- Fats: Also for energy and to absorb vitamins. Found in grains and oilseeds.
- Vitamins: Necessary for various body functions. Leafy greens and commercial vitamin supplements can be included in their diet.
- Minerals: Important for bone structure and eggshell quality. Calcium and phosphorus are particularly vital, and can be supplied through crushed oyster shells and bone meal.
Feeding Tips with Your DIY Feeder
- Consistency: Feed your chickens at the same times each day to maintain a routine.
- Cleanliness: Keep the feeder clean to prevent mold and diseases.
- Accessibility: Ensure all chickens can access the feeder without crowding.
- Protection: Design the feeder to protect the feed from weather and pests.
Monitoring and Adjusting Diets: Pay attention to your chickens' behavior and egg production as indicators of their nutritional status. If you notice a decline in health or egg quality, it may be time to reassess your diet. Adjusting the amount and type of feed can help address any deficiencies.
Customization Tips for Different Flock Sizes
Designing a DIY chicken feeder that suits the size of your flock is essential for ensuring all your chickens get their fair share of food without overcrowding or waste. Here's how you can customize your feeder for different flock sizes:
Small Flocks: Simplicity and Efficiency
- For flocks of 5-10 chickens, a simple PVC pipe feeder or a small trough feeder works well.
- Ensure there's enough space for all chickens to eat at once, typically 2-3 inches of feeder space per bird.
Medium Flocks: Scalability and Accessibility
- Flocks of 10-20 chickens require a larger feeder or multiple small feeders to prevent competition.
- Consider a larger trough or a multi-level PVC feeder to provide more access points.
Large Flocks: Capacity and Distribution
- For flocks over 20 chickens, you'll need a feeder with a high capacity to hold enough food for all.
- Large barrel feeders or multiple trough feeders spaced out can prevent overcrowding.
Adjustable Designs for Growing Flocks
- Make feeders with removable sections or adjustable lengths to accommodate a growing flock.
- This flexibility allows you to add more space as your flock increases in size.
Ensuring Equal Access
- Place feeders in open areas where all chickens can approach from any side.
- Avoid corners or tight spaces where dominant birds might block access to more submissive ones.
Minimizing Food Waste
- Use grill or grid patterns over the feed to prevent chickens from scratching out and wasting food.
- Adjust the height of the feeder so that it's at the same level as the chickens' backs to reduce spillage.
FAQs About DIY Chicken Feeders
Explore FAQs about DIY chicken feeders - discover tips, tricks, and essential information for making your own affordable and effective chicken feeders.
Q: What materials do I need to build a DIY chicken feeder?
A: To build a DIY chicken feeder, you'll typically need some basic materials such as PVC pipes or buckets, a saw for cutting, screws or glue for assembly, and possibly a drill. You can also repurpose materials like old containers or wood. The key is to use materials that are safe for chickens and can withstand the outdoor environment.
Q: How can I make sure my feeder is the right size for my flock?
A: The size of your feeder should be based on the number of chickens you have. Each chicken needs about 2-3 inches of space at the feeding trough to eat comfortably. For a small flock, a simple PVC pipe feeder may suffice, while larger flocks might require a bigger trough or multiple feeders.
Q: Can I adjust the feeder to prevent feed waste?
A: Yes, you can design your feeder to minimize waste. For instance, using a grid or grill over the feed can prevent chickens from scattering it. Also, setting the feeder at the right height—level with the chickens' backs—will help reduce spillage as they eat.
Q: How do I keep pests away from my chicken feeder?
A: Keeping your feeder off the ground is one effective way to deter pests. You can hang the feeder or use a stand to elevate it. Additionally, ensure that the feeder has a secure lid and is only dispensing enough feed for the chickens to eat at one time.
Q: Is it necessary to clean my DIY feeder, and how often?
A: Yes, regular cleaning of your chicken feeder is important to prevent mold and disease. How often you clean will depend on the type of feeder and how quickly it gets dirty, but a general rule is to clean it whenever you refill it with feed. Use mild soap and water for cleaning, and make sure the feeder is dry before adding new feed.
Concluding Thoughts
Building these inexpensive chicken feeders has been a rewarding journey. It significantly reduced feed waste, saved me money in the long run, and provided more hygienic feeding conditions for my chickens. For fellow poultry enthusiasts facing similar challenges, this DIY project might just be the solution you need. Remember, the key aspects are planning, precise execution, and regular monitoring for any needed adjustments.


