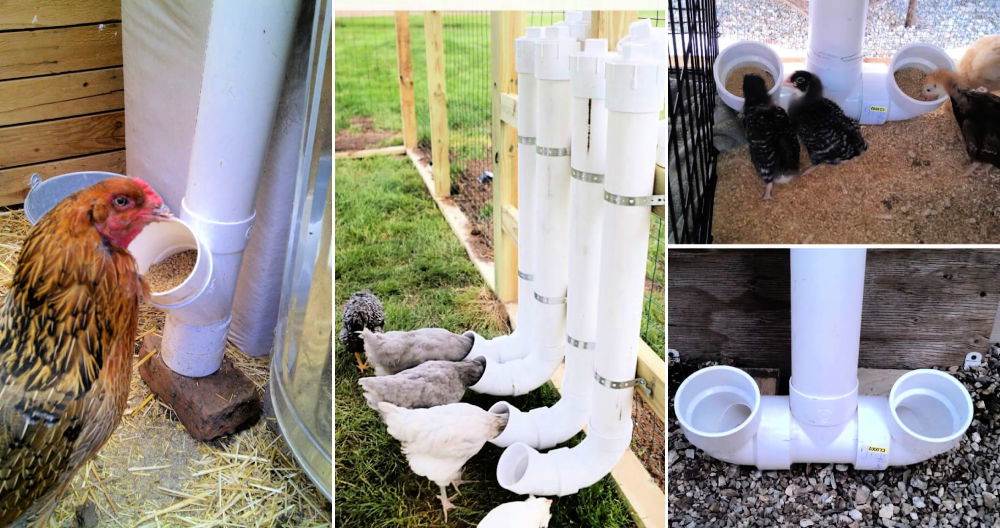
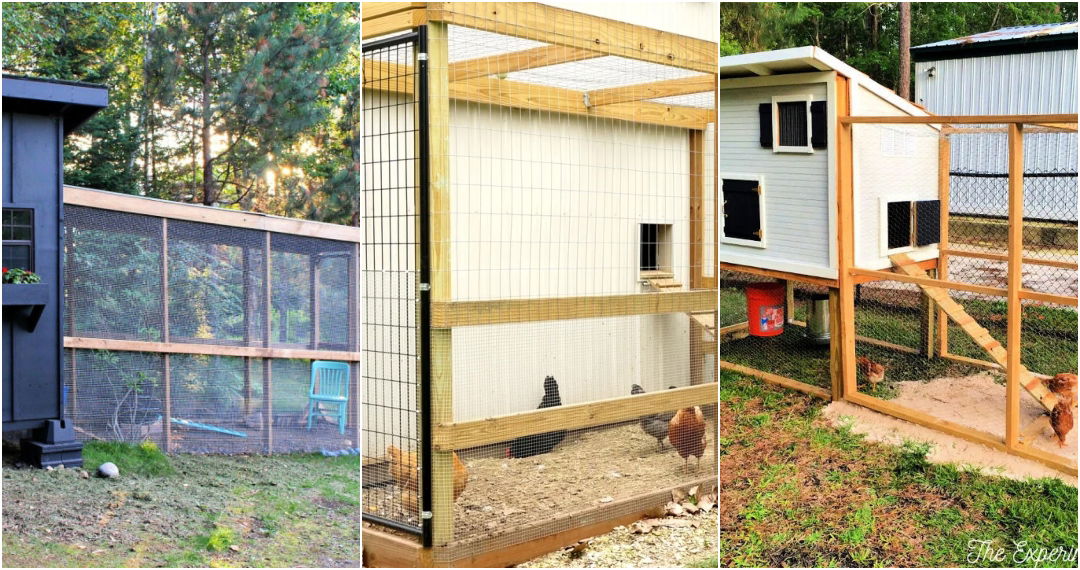
Looking for DIY chicken waterer ideas? You're in the right place. Making a PVC chicken waterer is not only an affordable way to ensure your chickens have constant access to fresh water, it's also a fun project with practical benefits. With this guide, you'll be equipped to build a waterer that's easy to fill, clean, and perfect for your feathered friends. Our step-by-step instructions make it simple for anyone to make a reliable water source that keeps your chickens hydrated.
We've compiled 20 innovative DIY chicken waterer ideas to suit different needs and setups. From straightforward models that anyone can make to slightly more complex versions that offer additional benefits like cleaner water, there's something here for every poultry keeper. As we delve into why DIY chicken waterers are a smart choice, we'll also cover essential materials and straightforward cleaning tips. Prepare to enhance your chickens' living environment by reading on, and discover the perfect DIY waterer to suit your coop and your birds' needs.
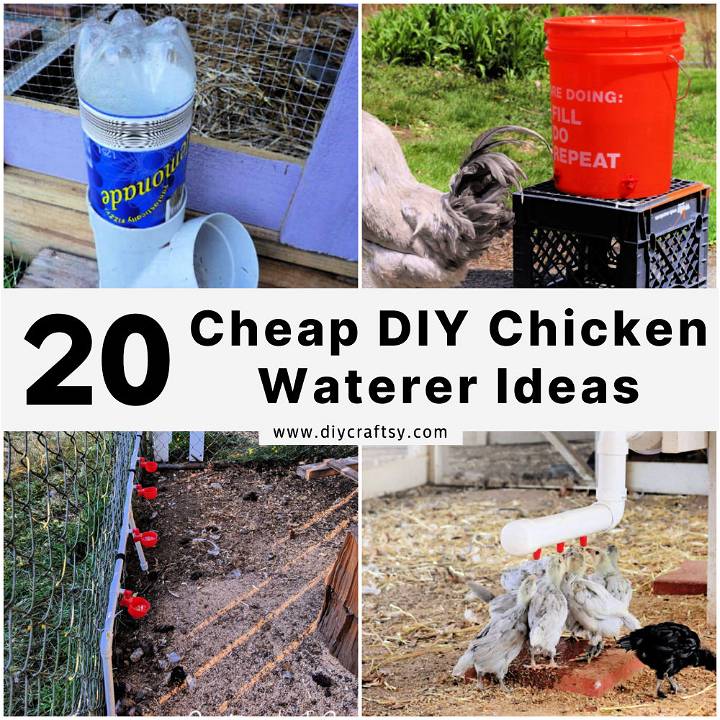
Why DIY Chicken Waterers?
Making your own chicken waterer comes with a host of benefits that both you and your feathered friends will appreciate. Here's why embarking on this DIY journey can be a game-changer:
- Cost-Effective: Building your own waterer often costs a fraction of what you'd spend on commercial options. You can use materials you might already have lying around, saving you money in the long run.
- Customizable: Every flock and coop is unique. DIY ideas allow you to tailor the waterer's size, capacity, and design to perfectly suit your chickens' needs and your space constraints.
- Healthier Chickens: Homemade waterers can be designed to reduce spillage and keep the water clean. This decreases the risk of diseases spreading through dirty water, leading to healthier, happier chickens.
- Sustainability: By using repurposed materials like PVC pipes or old buckets, you're making an environmentally friendly choice. Plus, making a system that reduces water waste is good for the planet.
- Convenience: Automatic or gravity-fed systems mean less daily maintenance for you. Once set up, these DIY waterers ensure your chickens always have access to fresh water without constant refilling.
- Fun and Fulfilling: There's a sense of accomplishment that comes from building something with your own hands, especially when it contributes to the welfare of your animals.
DIY chicken waterers are a practical, cost-effective, and enjoyable way to ensure your chickens stay hydrated and healthy. Plus, they offer a satisfying project that benefits both the environment and your backyard flock.
Easy DIY Chicken Waterer That Stays Clean!
Keeping your chickens hydrated while maintaining a clean water supply can often be a challenging part of backyard poultry care. Instead of battling with dirty water troughs or unreliable water dispensers, consider making your own DIY chicken waterer. It's simple, affordable, and ensures your chickens always have access to clean water. Below is a step-by-step guide to help you craft this indispensable tool for your feathered friends.
Materials Needed:
- 5-gallon bucket with a lid
- Poultry drinking cups (as many as required)
- Drill with a 3/8 drill bit
- Pliers or sandpaper (for smoothing drilled holes)
- Wrench or appropriate tool for tightening the nuts on your poultry cups
Instructions:
Preparing the Bucket
- Measure and Mark: Begin by measuring approximately three inches from the bottom of your 5-gallon bucket. This will be where you drill the holes for the poultry drinking cups. Ensure that the marks are evenly spaced around the bucket to allow each chicken access without overcrowding.
- Drill Holes: Using a 3/8 drill bit, drill holes at each marked spot on the bucket. The number of holes will depend on how many poultry drinking cups you plan to install.
- Clean Up Edges: After drilling, remove any excess plastic bits from the edges of the holes using pliers or gently sand them off. This step ensures a smooth surface that won't interfere with the sealing of the poultry cups.
Installing Drinking Cups
- Insert Poultry Cups: Carefully push the poultry cups through the holes from the outside of the bucket. It might require a bit of force as the fit needs to be snug.
- Secure Cups: Fetch the nuts that came with your poultry drinking cups and screw them onto the threaded part of the cups from the inside of the bucket. Use a wrench or the appropriate tool to tighten them, ensuring they are secure and leak-proof.
Finalizing Setup
- Fill With Water: Once all the cups are securely attached, fill the bucket with clean water, ensuring not to exceed the level of the lowest drinking cup.
- Seal With Lid: Place the lid securely on the bucket to prevent contamination and reduce water evaporation.
- Position the Waterer: Finally, place your new chicken waterer in your coop or run. Make sure it is on a stable surface to keep the water levels even in the cups.
Training Your Chickens
- Remove Old Water Sources: To encourage your chickens to use the new waterer, remove any other water sources from their enclosure.
- Show Them How: You might need to tap the valves of the poultry cups to show your chickens where the water comes out.
- Monitor: Keep an eye on your flock to ensure they are using the new waterer and adjust if necessary.
Video Tutorial
For a step-by-step video tutorial on making this easy DIY chicken waterer, watch this helpful YouTube video.
It pairs well with this written guide, enriching your understanding with visual cues to ensure a swift and successful DIY project.
This DIY chicken waterer not only simplifies your poultry care routine but also ensures your chickens have constant access to clean water, enhancing their health and wellbeing. Happy building!
FAQs On DIY Chicken Waterer
Making a DIY chicken waterer can be a fun and rewarding project. Below, you'll find answers to some of the most commonly asked questions to help you get started and maintain the perfect hydration system for your flock.
What materials do I need to build a DIY chicken waterer?
- 5-gallon bucket with lid: To act as the water reservoir.
- Poultry drinking cups or nipples: These will serve as the points where your chickens can drink from.
- Drill and drill bits: For making holes in the bucket to install the drinking cups or nipples.
- Pliers or sandpaper: To smooth any sharp edges around the holes.
- Wrench or appropriate tool: For securing the nuts on the poultry drinking cups.
How do I clean my DIY chicken waterer?
- Empty the waterer: Discard any remaining water.
- Disassemble if necessary: Remove any parts like drinking cups or nipples.
- Scrub with soapy water: Use a brush to clean the inside of the bucket and any parts thoroughly.
- Rinse well: Ensure all soap residue is removed.
- Sanitize: Use a mild bleach solution (1 part bleach to 10 parts water) to sanitize, then rinse thoroughly again.
- Dry and reassemble: Allow the parts to dry completely before putting everything back together.
Can I leave my DIY chicken waterer outside?
Yes, you can, but keep these points in mind:
- Place it in a shaded area: To keep the water cool and reduce algae growth.
- Elevate it: To prevent dirt and debris from getting into the water.
- Consider weather conditions: If freezing temperatures are expected, ensure your waterer has a heating mechanism or bring it inside to prevent the water from freezing.
How often should I refill the waterer?
Refill frequency depends on:
- The number of chickens: More chickens will drink more water.
- Weather conditions: Chickens drink more in hot weather.
- Size of your waterer: A larger waterer requires less frequent refills.
As a general rule, check the water level daily and refill as needed to ensure your chickens always have access to fresh water.
How do I train my chickens to use the new waterer?
- Remove other water sources: Make sure the new waterer is the only water source available.
- Show them how it works: Gently tap the valves or nipples to show water coming out.
- Be patient: It may take some time, but chickens are curious and will eventually figure it out.
Is it necessary to have a lid on my DIY chicken waterer?
Yes, a lid is crucial for several reasons:
- Prevents contamination: Keeps dirt, debris, and other contaminants out.
- Reduces evaporation: Helps maintain the water level, especially on hot days.
- Safety: Prevents chickens from potentially drowning or sitting in the water.
Can I use something other than a 5-gallon bucket?
Absolutely! Feel free to get creative with materials you have on hand, such as:
- Old water jugs: Good for smaller flocks.
- Large food-grade containers: Ideal for larger flocks.
- PVC pipes: Excellent for making a gravity-fed system.
20 DIY Chicken Waterer Ideas
Discover 20 innovative DIY ideas for PVC chicken waterers to keep your flock hydrated and happy. Upgrade your coop with these easy projects today!
1. DIY Chicken Waterer from 5-gallon Buckets
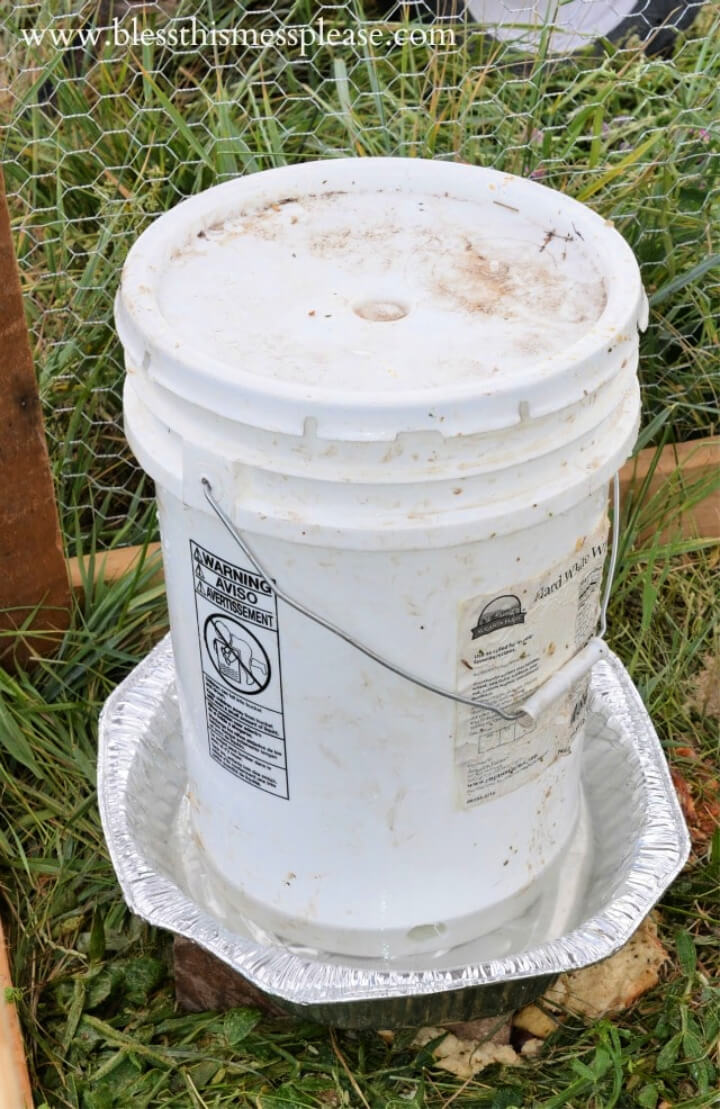
Transform your backyard chicken care with a simple and affordable DIY project! Learn how to make a durable chicken feeder and waterer using 5-gallon buckets. This cost-effective solution ensures your chickens have constant access to clean, fresh water and feed, crucial for their health and egg production. Embrace self-sufficiency and improve your poultry care with easy instructions from BlessThisMessPlease. Perfect for all chicken keepers wanting a practical and inexpensive way to support their flock.
2. Making a PVC Chicken Waterer
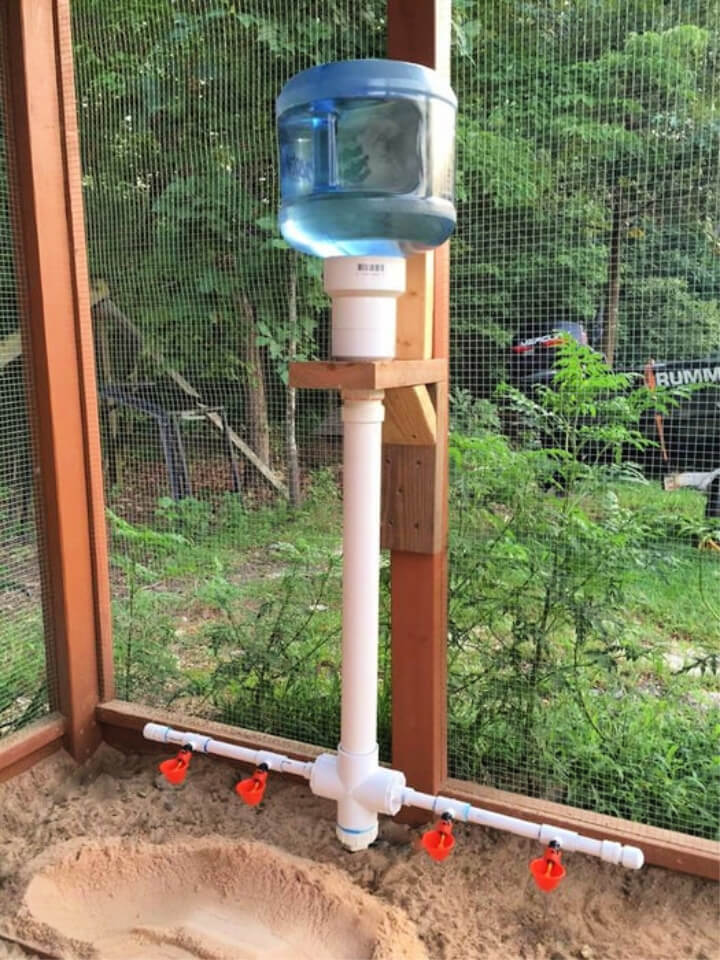
Discover a simple and efficient way to keep your chickens hydrated with the PVC Chicken Waterer DIY project. Ideal for poultry enthusiasts, this guide at Instructables provides a step-by-step process to make a durable and easy-to-use waterer. Save time and reduce water waste, ensuring your birds always have access to clean water. Perfect for any backyard setup, this project is both cost-effective and a great weekend activity.
3. How to Make Glass Chicken & Poultry Waterer
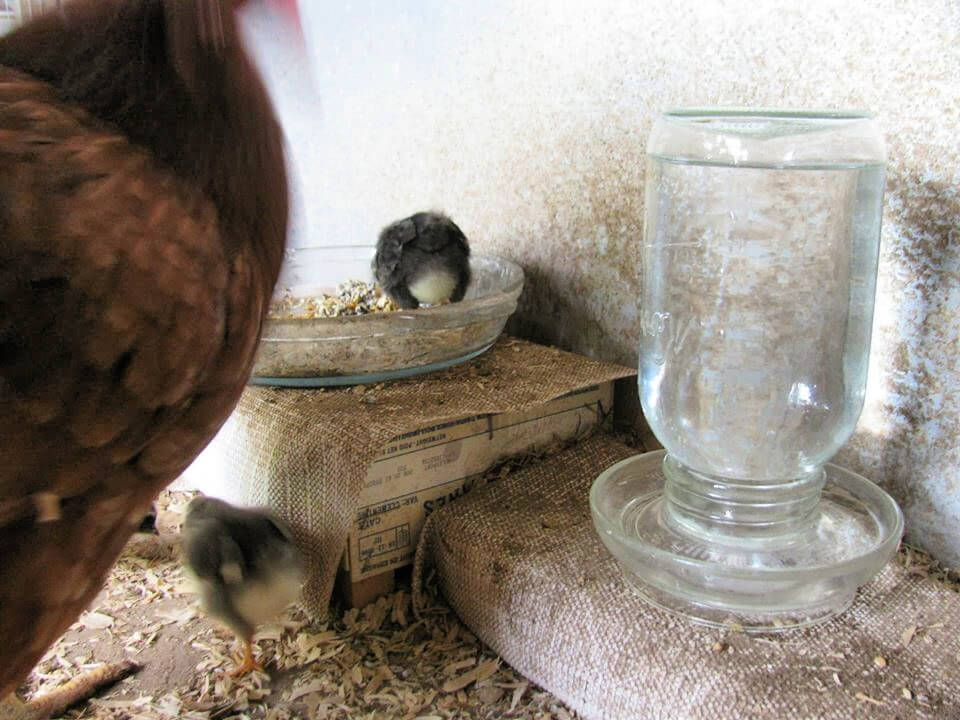
Discover a healthier, safer way to keep your poultry hydrated with a DIY Glass Chicken & Poultry Waterer. Sue from the Natural Chicken Keeping blog shares an innovative solution avoiding plastic, perfect for all climates. Ideal for year-round use, this glass waterer prevents contamination and frostbite risks.
It offers a simple refill and cleaning process, ensuring a tiny, safe drinking opening for your chickens. Sue's step-by-step guide on making this eco-friendly waterer makes it accessible for anyone looking to provide a healthy environment for their poultry.
4. Build an Automatic Chicken Waterer
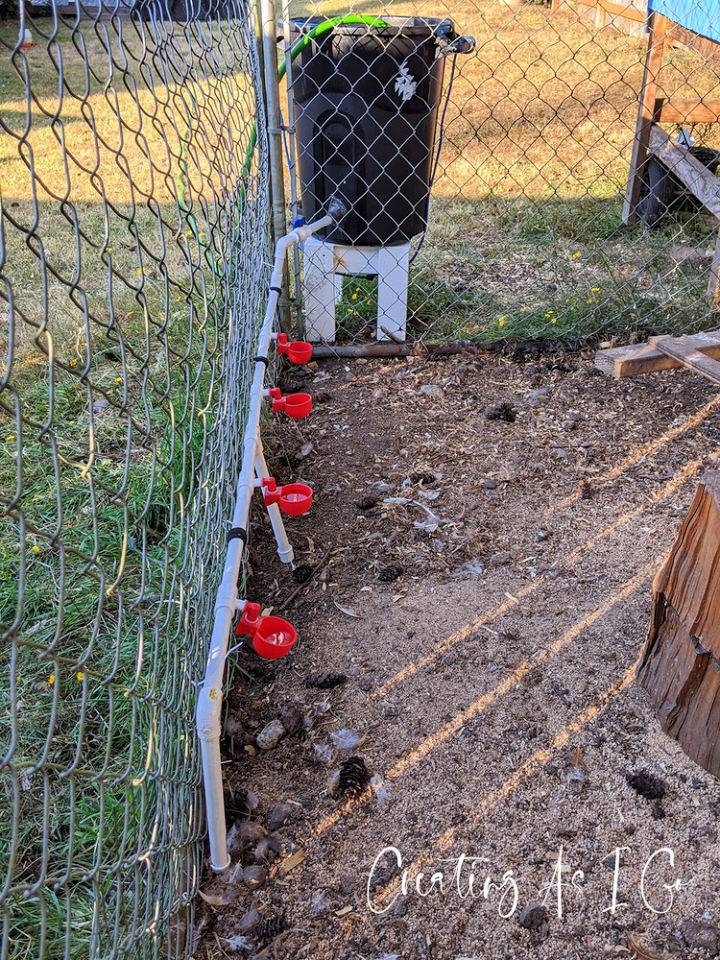
Elevate your backyard chicken care with an automatic waterer! Say goodbye to daily water dish refills. Discover the step-by-step guide to making a DIY automatic chicken waterer that keeps your feathered friends hydrated with minimal fuss. From selecting the right type of water cups to constructing a reliable system with PVC pipes, this guide simplifies the process, ensuring your chickens always have access to clean water. Ideal for busy pet owners, it's a game-changer for your poultry care routine.
5. Make Your Own Chicken Waterer
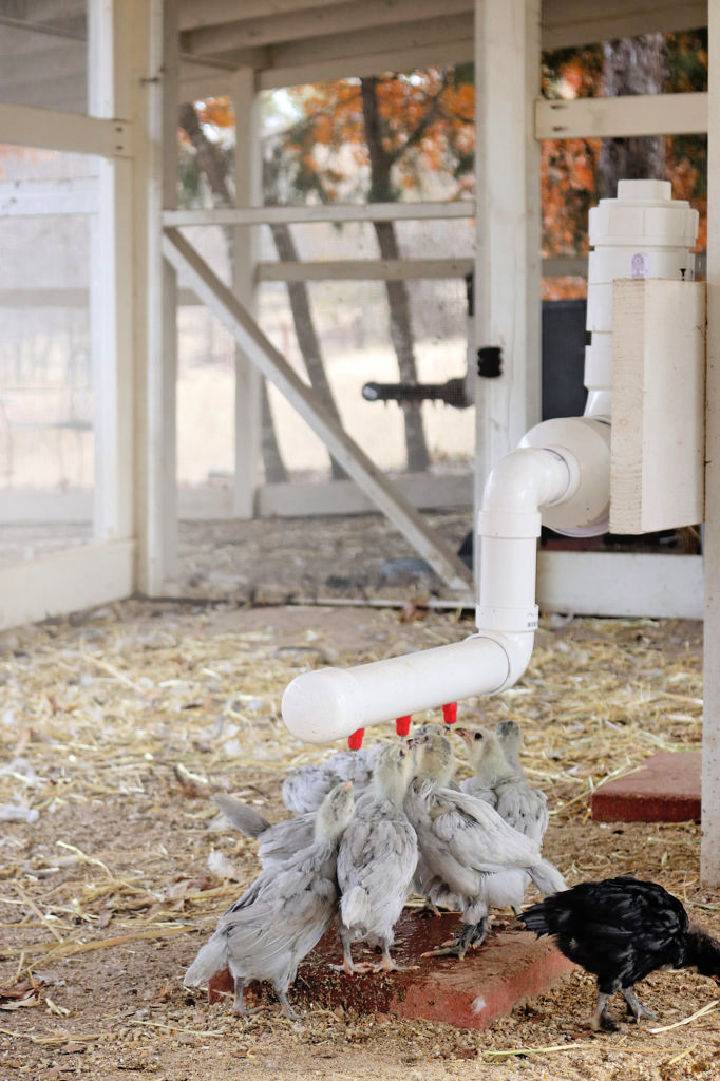
Discover the ultimate DIY Chicken Waterer guide at TLB Acres. Perfect for chicken owners seeking efficient ways to keep their feathered friends hydrated, this tutorial walks you through making a user-friendly watering system. With simple tools and supplies, anyone can build a system that caters to both adult chickens and chicks.
This guide ensures your flock gets clean water with minimal maintenance, enhancing farm efficiency. Ideal for various flock sizes, follow these easy steps to construct a chicken nipple watering system that keeps your birds happy and healthy.
6. How to Make a Chicken Waterer
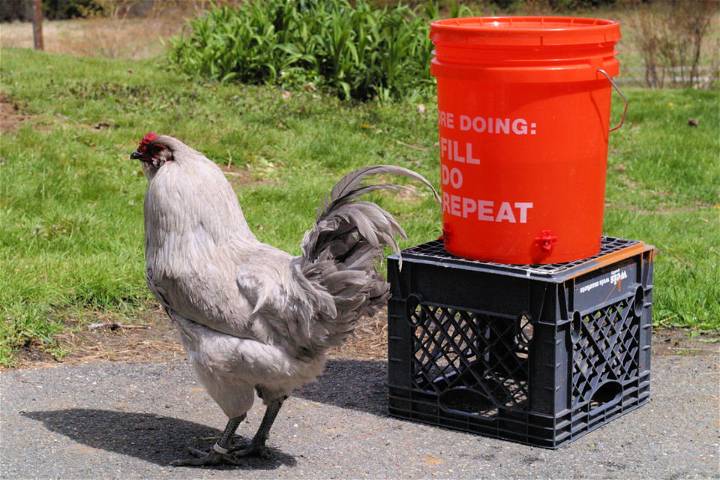
Elevate your backyard chicken care with our DIY Chicken Waterer guide at The Silver Fox Farm. It's a simple and cost-effective solution to keep your feathered friends hydrated with clean water. All you need are a few basic tools, a bucket, and poultry nipples. Follow our easy 5-step tutorial to make a reliable water source for your flock. It's not only about saving money but ensuring your chickens have access to clean water daily. Ideal for chicken enthusiasts committed to their flock's well-being.
7. Easy and Cost-Effective DIY Chicken Waterer
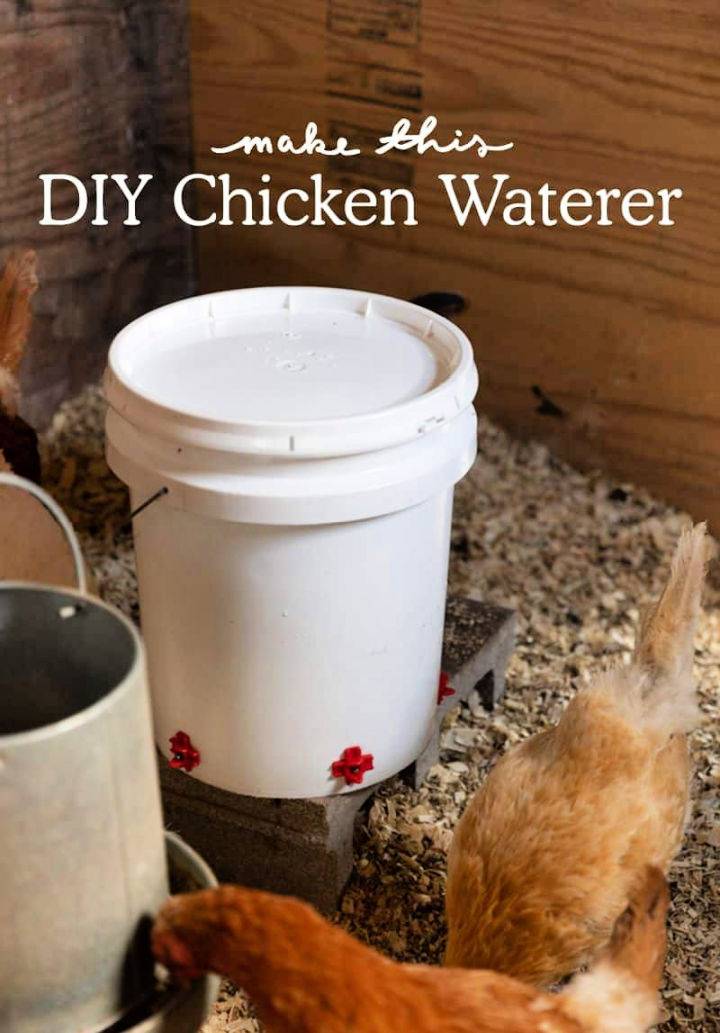
Discover the joy of building your own DIY Chicken Waterer with an easy and budget-friendly guide from Fresh Exchange. In about 40 minutes, using a 5-gallon bucket and a few simple supplies, you can ensure your feathered friends always have access to fresh water.
This guide walks you through the steps, from preparing the bucket to installing chicken water nipples, making the task simple and efficient. Ideal for keeping your chickens hydrated and healthy. Dive into the DIY project that not only satisfies your chickens but also brings ease and affordability to chicken care.
8. Handmade Heated Chicken Waterer
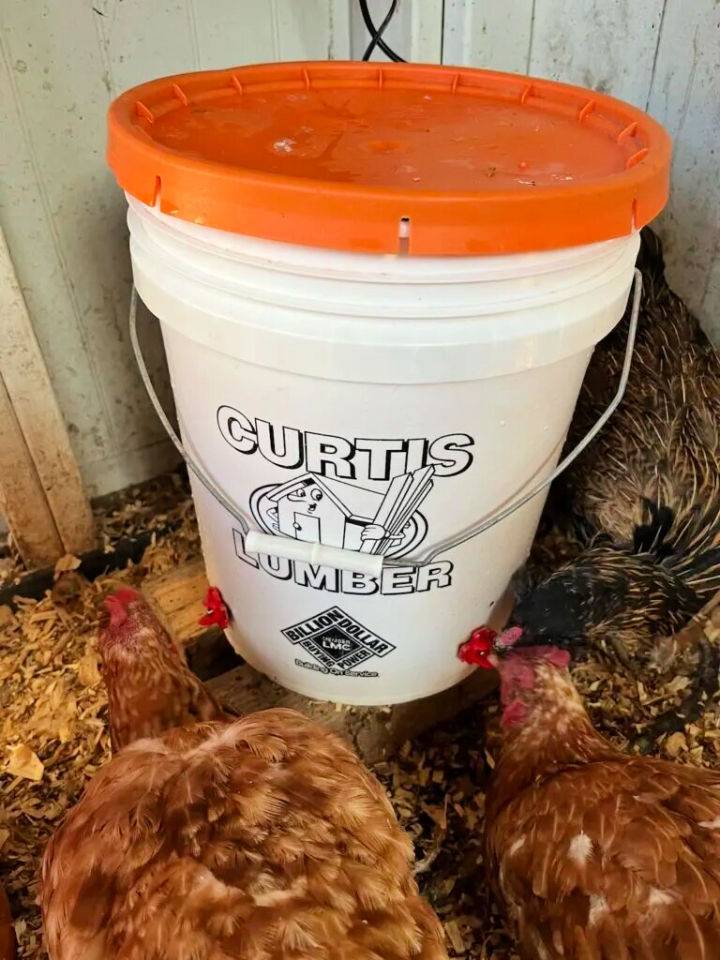
Facing the challenge of keeping chicken water from freezing in the harsh winters of Upstate NY, we discovered an effective, low-maintenance DIY heated chicken waterer. Using basic materials like an aquarium heater, bubbler, Thermo Cube, and a 5-gallon bucket, this solution keeps water moving and warm enough to prevent freezing.
The key is the correct placement of horizontal chicken nipples and ensuring the heater and bubbler remain submerged. This system may become the ultimate way to provide consistent, unfrozen water to your flock throughout winter. For a step-by-step guide, visit Tree Farm Design Co.
9. How to Make PVC True Auto Waterer
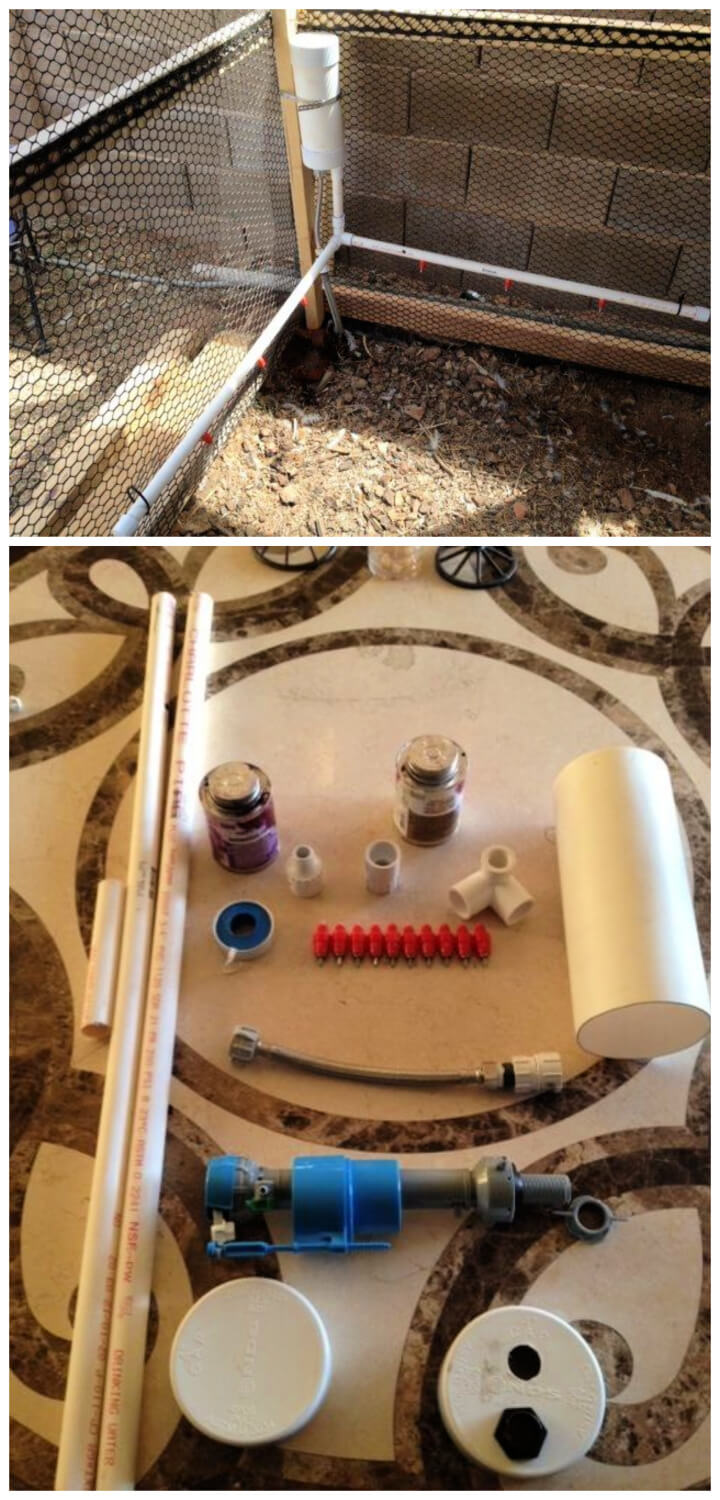
Discover a game-changing approach to keeping your chickens hydrated with My PVC "True Auto" Waterer. This innovative DIY solution transforms the tedious task of daily water refilling and cleaning into a thing of the past. By leveraging common materials like PVC pipes, a toilet fill valve, and nipple drinkers, this system ensures a constant supply of fresh water for your feathered friends.
Perfect for busy poultry enthusiasts, this auto waterer is easy to assemble, cost-effective, and adaptable to your flock's size. For a step-by-step guide on crafting this efficient waterer, visit Backyard Chickens. Simplify your poultry care routine with this clever DIY project.
10. Chicken Waterer from Beverage Cooler
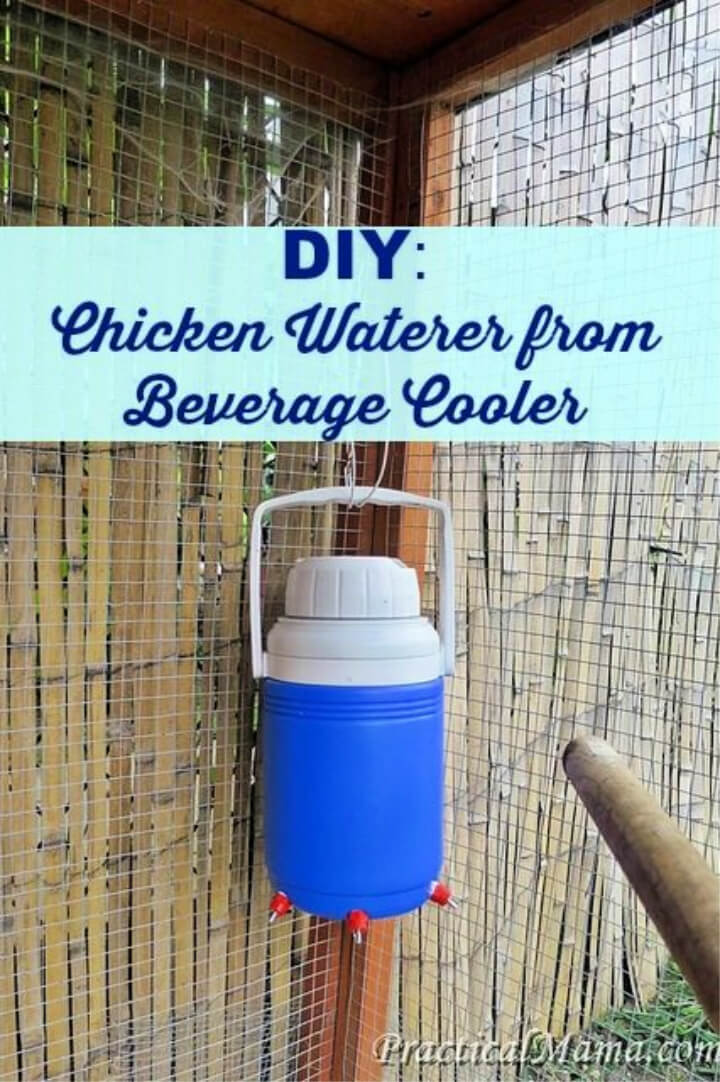
Looking to ensure your backyard chickens have fresh water without the worry of spreading illness? A DIY chicken waterer from a beverage cooler might be the perfect solution. Easy to assemble and ideal for small flocks, it keeps water cool in summer yet is simple to swap out when winter's chill sets in. Learn how to make this practical addition to your coop with a guide full of tips and straightforward instructions at Practical Mama. Perfect for keeping your hens hydrated with minimal fuss.
11. DIY Fang Dangled Automatic Waterer
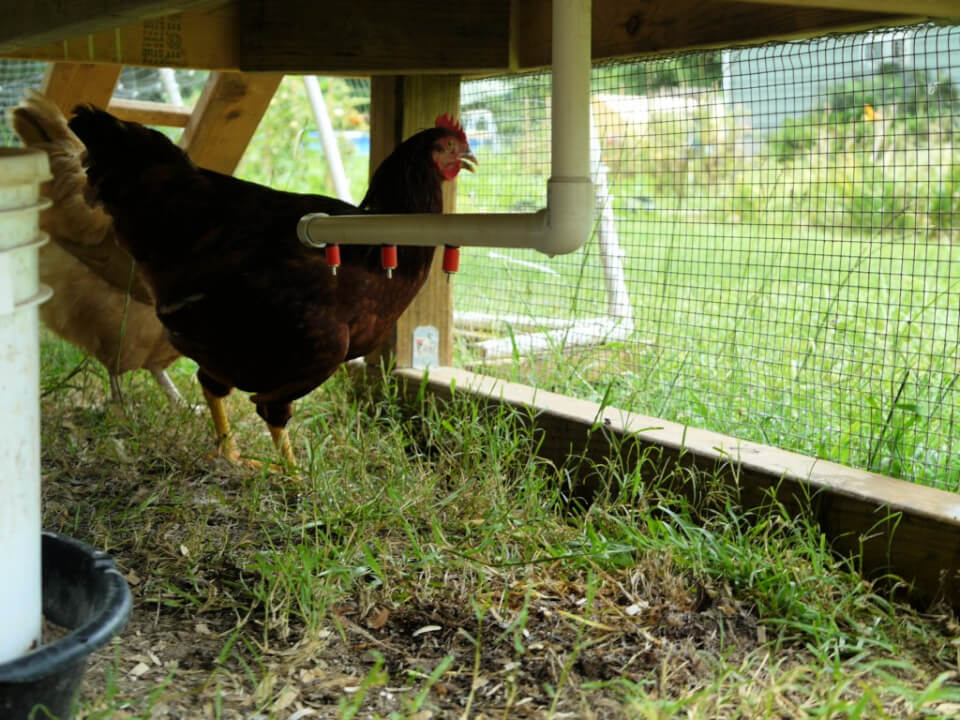
Transform your poultry care routine with a simple, efficient DIY solution - the Fang Dangled Automatic Chicken Waterer. Ideal for keeping your flock hydrated without the hassle, this innovative system can be assembled with minimal cost and effort, ensuring fresh water supply round the clock. Learn how to construct this waterer with everyday materials by visiting BackyardChickens.com. An engaging project for any chicken keeper, it promises a cleaner, happier, and healthier environment for your birds. Let's get building!
Pallet Chicken Coop Plans: Discover affordable pallet chicken coop plans to build on a low budget. Get started on your DIY project and make a cozy home for your feathered friends.
12. Chicken Nipple Waterer using a Plastic Bucket
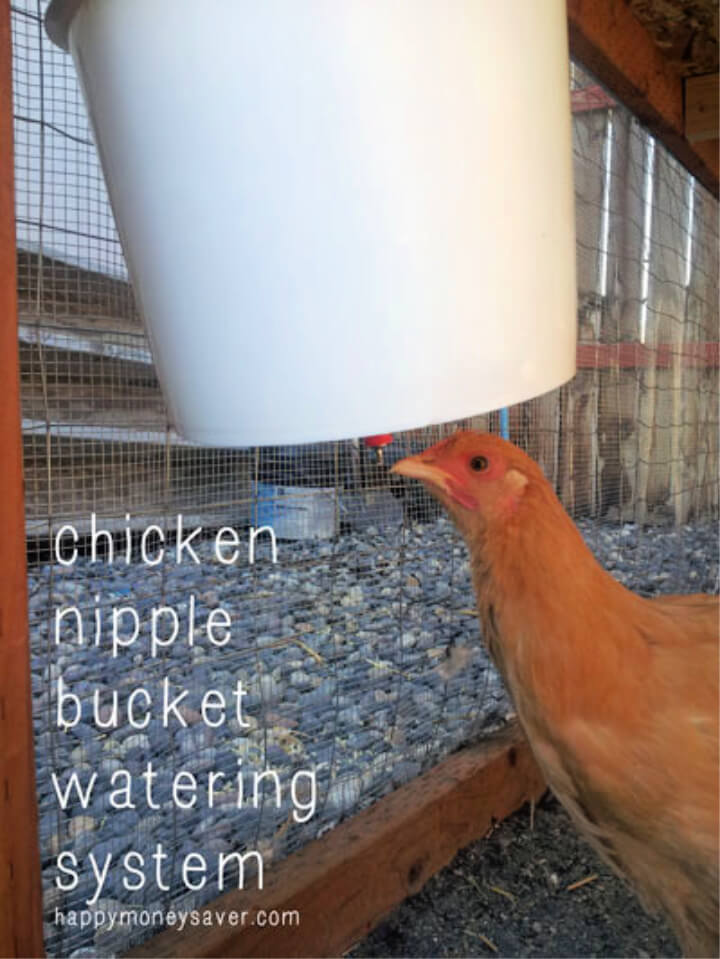
Discover a hassle-free way to keep your chickens hydrated with a DIY Chicken Nipple Waterer. This ingenious solution uses a simple plastic bucket and nipple system to ensure clean water for your flock without the constant need for refills. Perfect for busy chicken keepers, this setup prevents dirt and bacteria from contaminating the water, offering peace of mind and more free time. Learn to make your own with an easy-to-follow guide at Happy Money Saver. Ideal for flocks of up to 20 chickens, start building a healthier, simpler watering system today.
13. Inexpensive DIY PVC Chicken Waterer
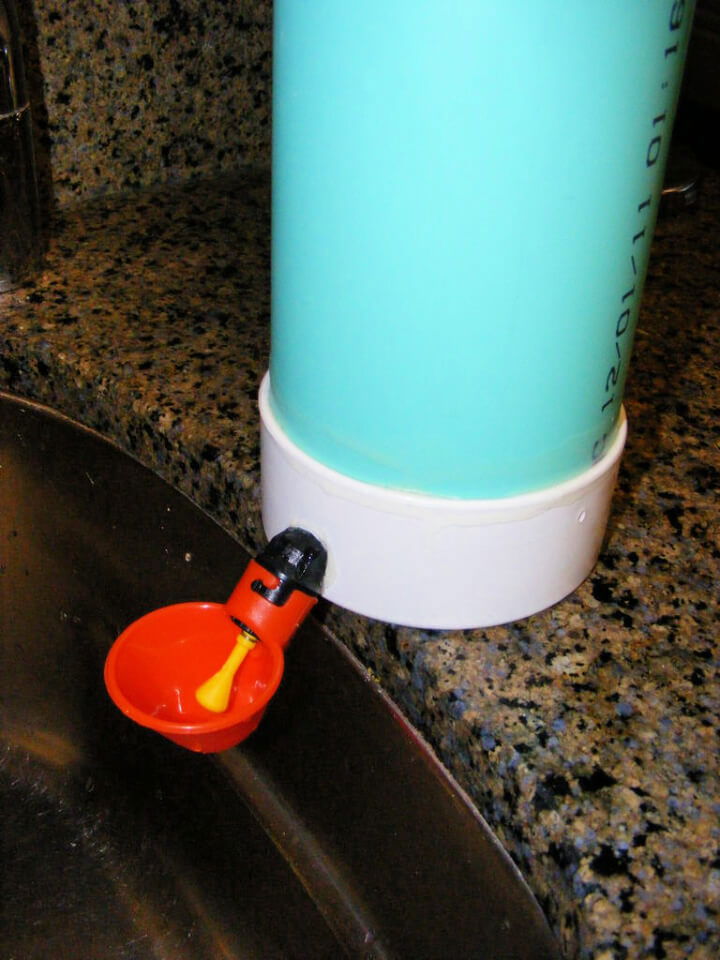
Discover a simple, efficient solution for keeping your chickens hydrated with a DIY PVC Chicken Waterer. This easy-to-follow guide on Instructables offers step-by-step instructions to make a reliable water supply for your poultry. Perfect for busy farmers or homesteaders, this system ensures your chickens always have access to clean water. Dive into this resource now to enhance your poultry care practices efficiently.
14. Make a 5-Gallon Chicken Waterer
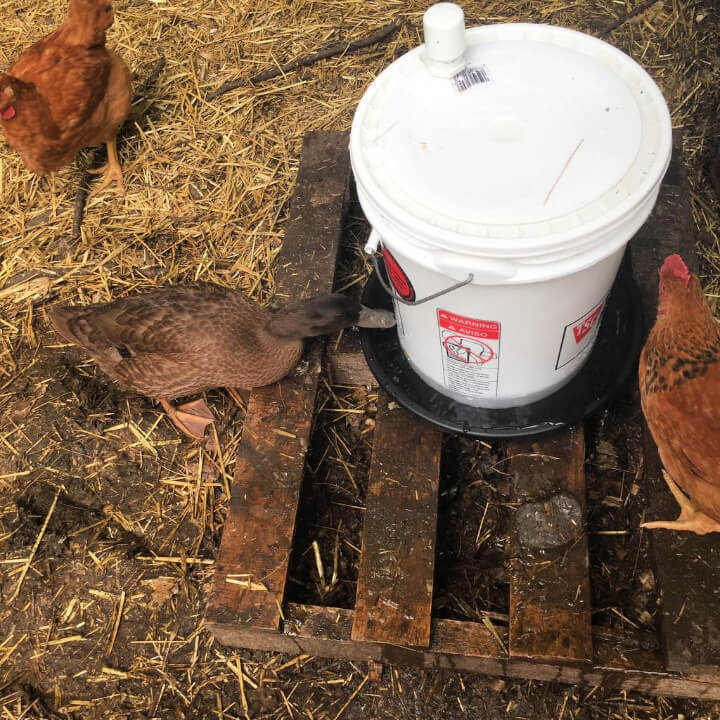
Elevate your backyard farming with a DIY 5-Gallon Chicken Waterer project that ensures your feathery friends stay hydrated with clean water. This easy-to-follow guide at Instructables teaches you to craft a reliable water supply for your chickens, enhancing their welfare and simplifying your chores. Perfect for poultry enthusiasts of all skill levels, this cost-effective and efficient solution is a game-changer for home farming. Dive into this instructive and engaging guide today to make a better environment for your chickens.
15. Make Your Own Chicken Waterer

Keep your chickens healthy and hydrated with a simple DIY project from Longbourn Farm. Crafting your own chicken feeder and waterer can be an economical and durable solution compared to store-bought options.
Whether you're interested in a more affordable, long-lasting solution or just love DIY projects, this tutorial guides you through making a reliable waterer using just a few supplies like a 5-gallon bucket, drill, and feed pan. Plus, it's a quick setup that promises ease and functionality for your feathered friends.
16. PVC Soda Bottle Chicken Waterer
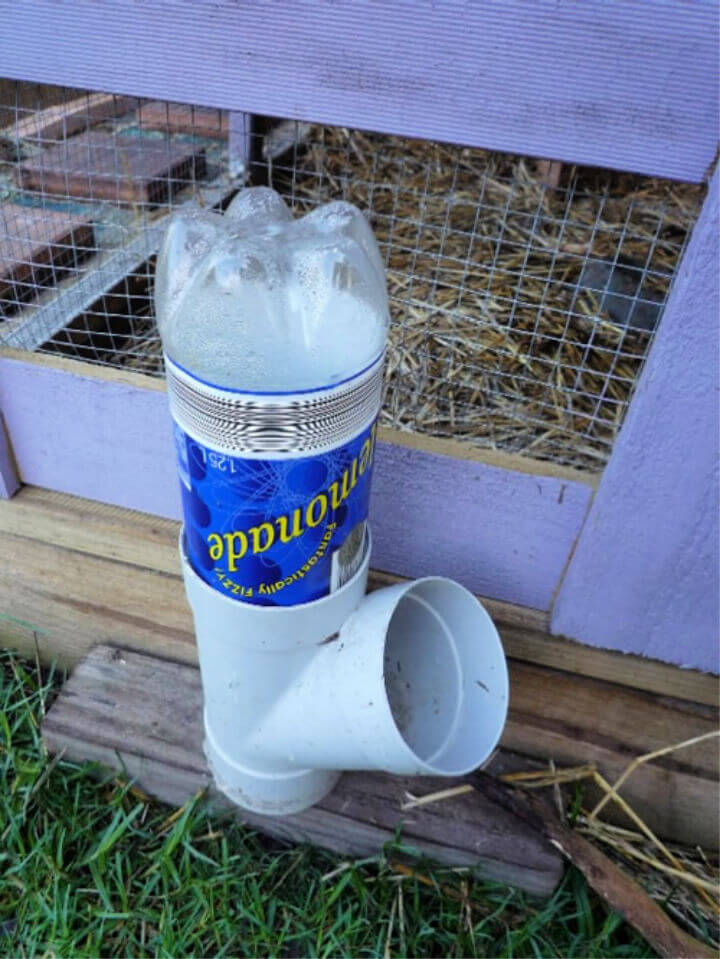
Looking for an efficient and cost-effective way to keep your chickens hydrated? Try this DIY PVC soda bottle chicken waterer. Simple to assemble, it only requires a PVC Y fitting, cap, a soda bottle, a nail, and a hammer. Fill the bottle, place it upside down in the Y fitting, and let gravity do the rest. Ideal for busy chicken keepers, this DIY solution minimizes refills and ensures your poultry always has access to fresh water. For detailed instructions, visit Homestead Lifestyle.
17. Handmade Chicken Water Station Idea
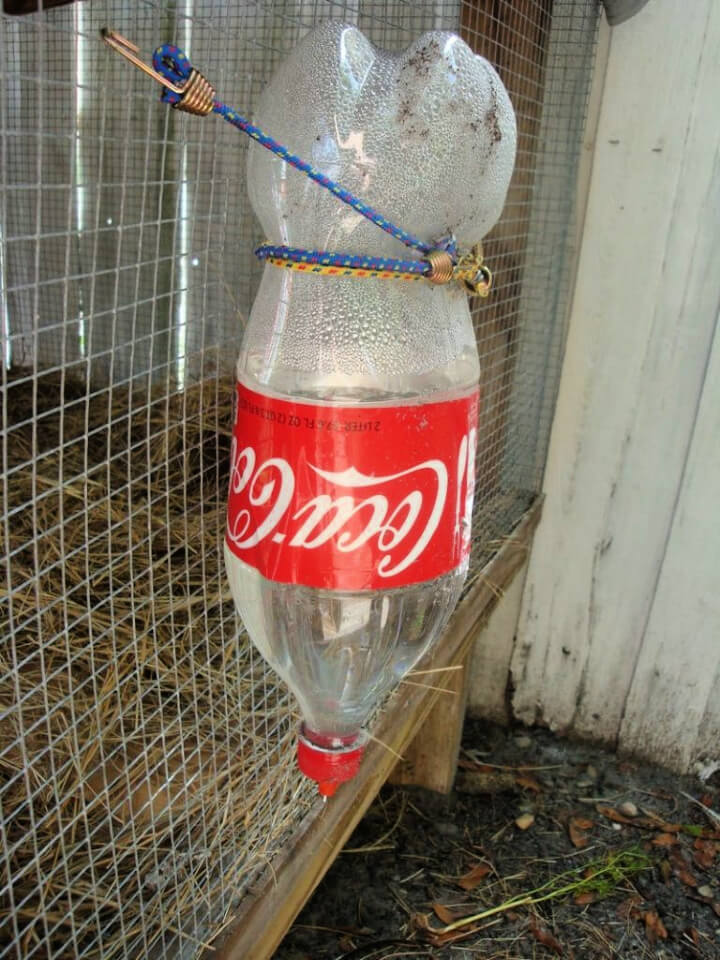
Discover a clever and cost-effective solution for a problem many backyard chicken keepers face: messy and dirty water supplies. This innovative backyard chicken waterer tutorial, found on Georgia's Cookie Jar, introduces an easy DIY project using common household items.
With just a chicken nipple, an empty 2-liter soda bottle, and a few tools, you'll make a clean, efficient watering system. Ideal for small flocks, this guide ensures your chickens always have access to fresh water without the usual hassle. Keep your coop tidy and your feathered friends happy with this simple yet brilliant setup.
18. DIY PVC Pipe Chicken Waterer
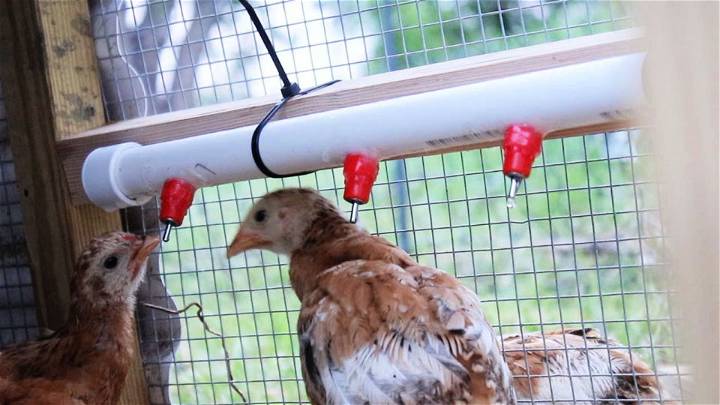
Embarking on a poultry care project? Discover how to construct a DIY PVC pipe chicken waterer with ease. Jason from Sow the Land provides a step-by-step guide on making an efficient watering system using simple materials like PVC pipes, a bucket, and nipple waterers. Perfect for keeping your chickens hydrated, this homemade solution is cost-effective and easy to install. For a detailed tutorial, visit Sow the Land. Simplify your chicken care routine with this practical, DIY waterer.
19. Easy DIY Chicken Waterer
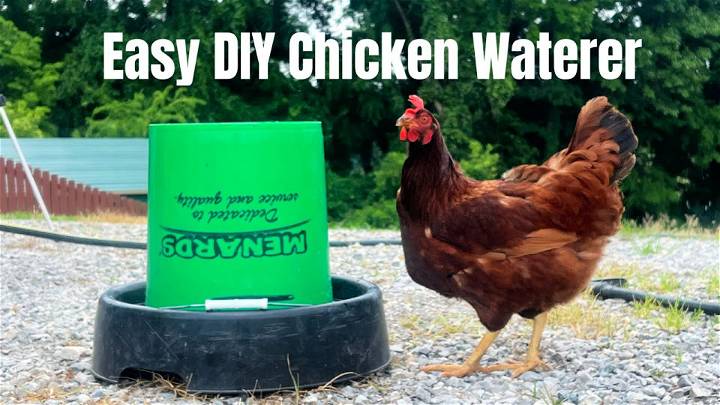
Discover a straightforward, affordable solution for keeping your chickens hydrated with this Easy DIY Chicken Waterer tutorial. Say goodbye to the hassle of frequent refills and cleaning. This guide employs a simple three-part system, including a five-gallon bucket.
Learn to make a reliable water source that's low on maintenance and high on efficiency. Perfect for those hot days when your chickens need more water. For a detailed walkthrough, visit The BriarPatch. Ideal for any flock size, ensure your chickens stay hydrated effortlessly.
20. Automatic Chicken Watering System Gravity Fed from A Rain Barrel
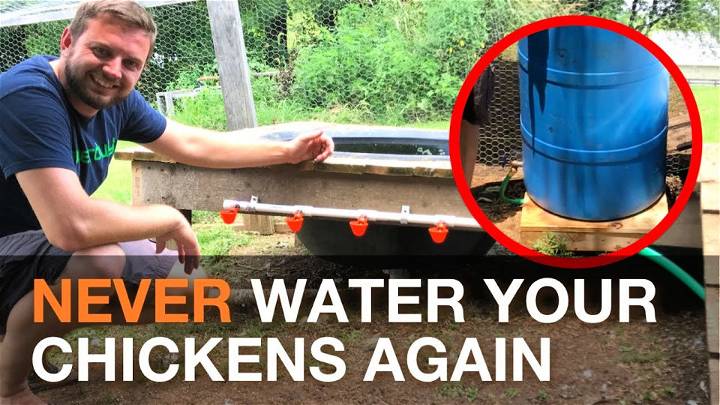
Unlock the secrets to a sustainable and efficient poultry care system with our innovative automatic chicken watering solution. Powered entirely by gravity and fed from a rain barrel, this system is not only eco-friendly but also ensures your chickens have constant access to fresh water.
Simple to set up and requiring minimal maintenance, it's an ideal choice for both backyard poultry enthusiasts and small-scale farmers. Learn how to make your own by watching our detailed tutorial. This DIY project could be the game-changer in your poultry care routine!
Conclusion:
In conclusion, crafting a DIY chicken waterer, especially one made from PVC, offers an affordable and efficient solution to keep your poultry hydrated. From ensuring cleanliness to straightforward instructions for assembling, this guide equips you with everything you need to make a practical water station for your flock.
By customizing your project using the 20 DIY chicken waterer ideas, you can guarantee that your chickens have consistent access to fresh water, significantly impacting their health and happiness. Remember, a well-hydrated chicken is a happy chicken. So, take this opportunity to enhance your poultry care routine with a homemade waterer that suits your needs and those of your feathered friends.


